
Results 1 to 6 of 6
 12Likes
Thread: W&B Rattler in streaked horn
 LinkBack URL
 About LinkBacks
-
05-26-2016, 11:25 PM #1Senior Member


- Join Date
- Mar 2014
- Posts
- 333
Thanked: 65 W&B Rattler in streaked horn
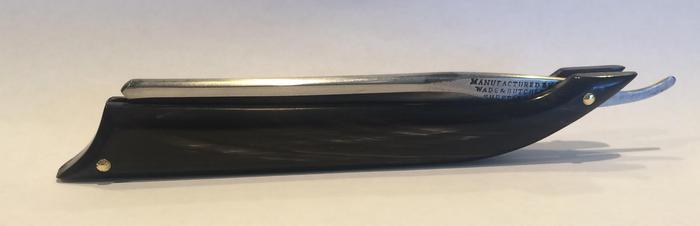
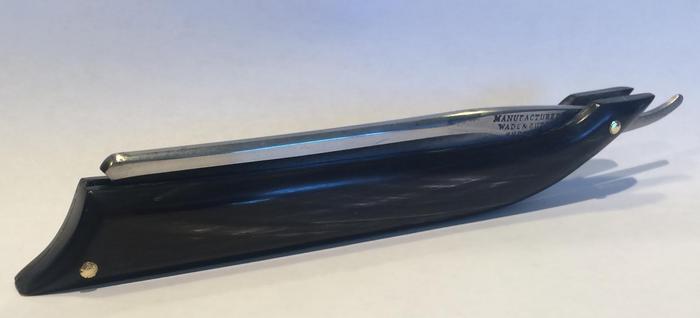
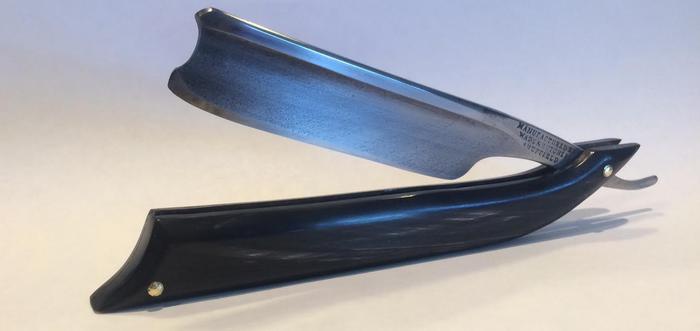
Fun project, made me think a bit on the placement of the pins. It came with a satin finish on the blade and I didn't want to remove it so I simply polished it up a bit. Did something a little different with the scales but wanted to follow the lines of the spine. For some reason I am splitting the heads on my pins. If anyone knows why please let me in on the secret. It's making me mental.
Last edited by onimaru55; 06-01-2016 at 01:02 PM. Reason: edit at op request
"The production of to many usefull things results in too many useless people."
Karl Marx
-
05-28-2016, 04:37 PM #2Senior Member


- Join Date
- Apr 2011
- Location
- California
- Posts
- 1,596
Thanked: 865
Nice looking scales Tim. My guess is that the pin heads are splitting because you are not cutting them close enough to the collar?
Suticat likes this.Lupus Cohors - Appellant Mors !
-
05-28-2016, 04:59 PM #3the deepest roots

- Join Date
- Feb 2011
- Location
- Seattle
- Posts
- 1,221
Thanked: 169
exactly right, I used to do the same thing. Originally Posted by Wolfpack34

-
05-28-2016, 09:56 PM #4Senior Member


- Join Date
- Jun 2013
- Location
- Gladstone QLD AUSTRALIA
- Posts
- 3,245
Thanked: 804
Nice work on the scales mate
When I started, I would cut a 1/16" pin measure the stock piece with vernier callipers, peen 1 end to the size head I wanted then measure again, this told me how much extra pin above the washers I needed to match the first mushrooming for the washer set up I was using,
I would also measure the length at the pin hole on the str8 when clamped together and cut my pin to length prior to final assembly.
This gave me a visual guide it was a bit of a long way of doing it but once you get used to it, you can eye it up better when building without the measuring.
For the way I peen Usually it is about 1/2 a pin diameter for the smallest washers
Up to a max of 1 diameter for the eyelet type washer set ups
Just my observations
Hope this help someoneSaved,
to shave another day.
-
05-29-2016, 12:38 AM #5The Great & Powerful Oz


- Join Date
- May 2008
- Location
- Bodalla, NSW
- Posts
- 15,638
Thanked: 3751
Looks like your pin question is answered.
Just a FYI. The grind style is called a "Rattler".The white gleam of swords, not the black ink of books, clears doubts and uncertainties and bleak outlooks.
-
05-29-2016, 03:52 AM #6Senior Member
- Join Date
- Mar 2014
- Posts
- 333
Thanked: 65
I took it apart and re-pinned it. It looks a thousand times better. Originally Posted by Wolfpack34
Wolfpack34 likes this."The production of to many usefull things results in too many useless people."
Karl Marx


 Reply With Quote