
Results 1 to 10 of 19
 38Likes
Thread: The Mokume Gane Straight
 LinkBack URL
 About LinkBacks
-
01-15-2017, 10:12 PM #1Member


- Join Date
- Oct 2014
- Location
- Sacramento, CA
- Posts
- 71
Thanked: 42 The Mokume Gane Straight
Good Day All!
Thought it would be fun to show you a little something that I am proud of. (Note: this razor is sold, and this post is not intended as a advertisement for such. It's just me, doing a little showing off, and giving some info on how I created this piece.)
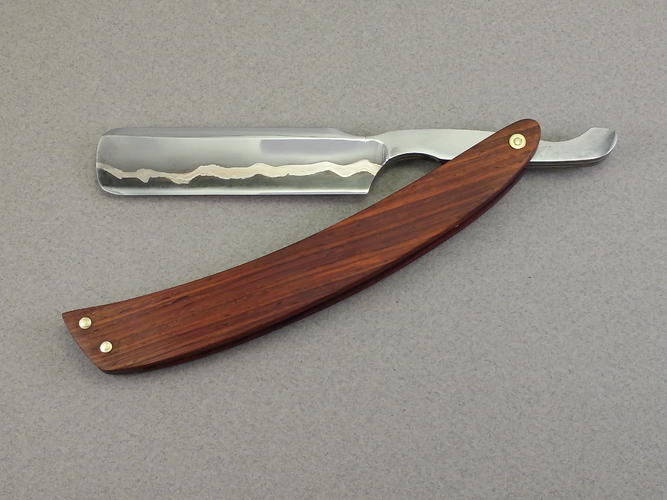
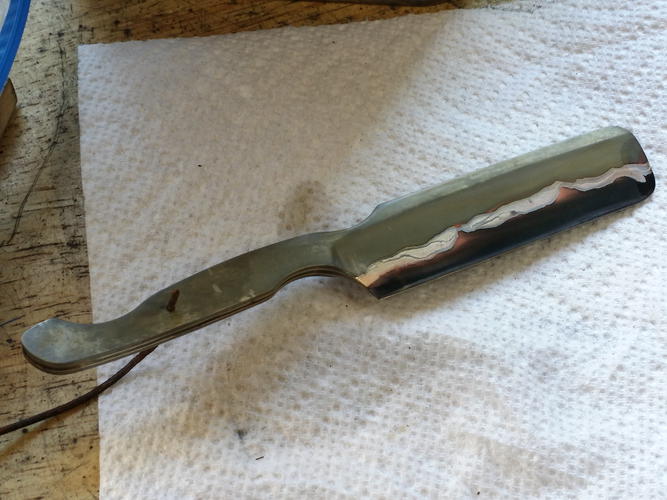
This razor was crafted using a process called Mokume Gane for welding different metals together. What you see here is a high carbon core, that is the edge of the blade, with a jacket of nickel, copper and mild steel. It makes for a unique and beautiful razor, me thinks. I was shooting for what would seem like a river flowing through the hollow of the blade. A homage to my home town, sometimes called The River City.
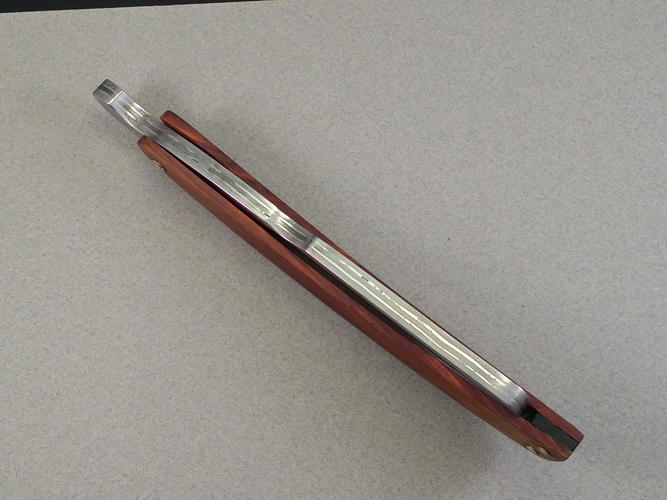
First, the gratuitous completed piece shots!

But, how does one make such a thing? Let's check out that process!
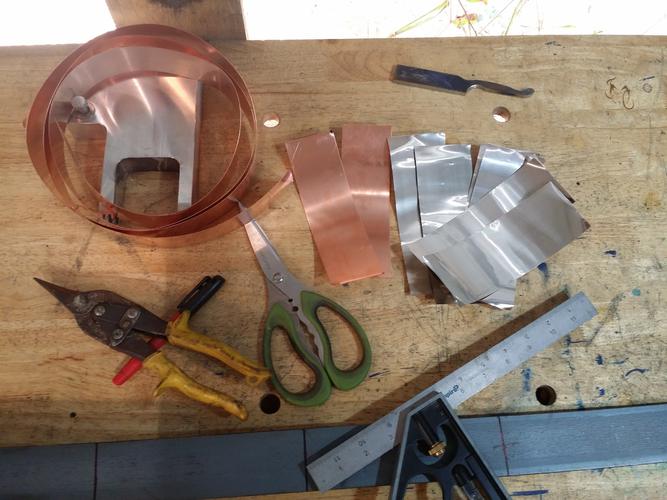
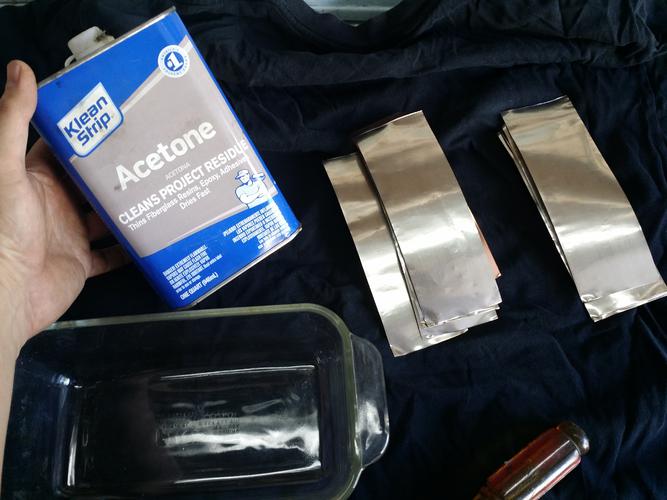
First, we gather all the raw ingredients. Copper, Nickel, Mild Steel, and High Carbon Steel
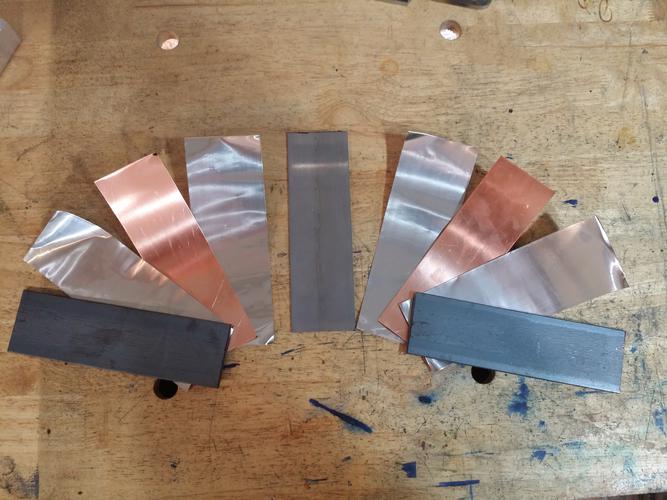
Then, we see how the layers will be stacked. This way, the high carbon layer will become the cutting edge of the razor, and not any of the other types of metals. (Making for a crap razor!)
For this type of forging there is no flux used. In order to get the metals to fuse together they must be clean-clean-clean! No oxide, mill scale or even oils from my fingers can be present. I grind off all scale adn give each piece of the layers a bath an acetone.
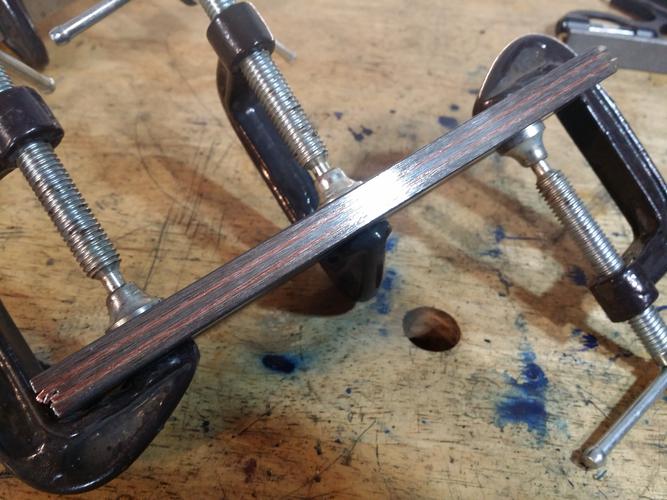
Now, I stack them together, clamp them as tightly as possible without deforming any layer, and put a quick tac weld to make a billet. Next stop, the forge!
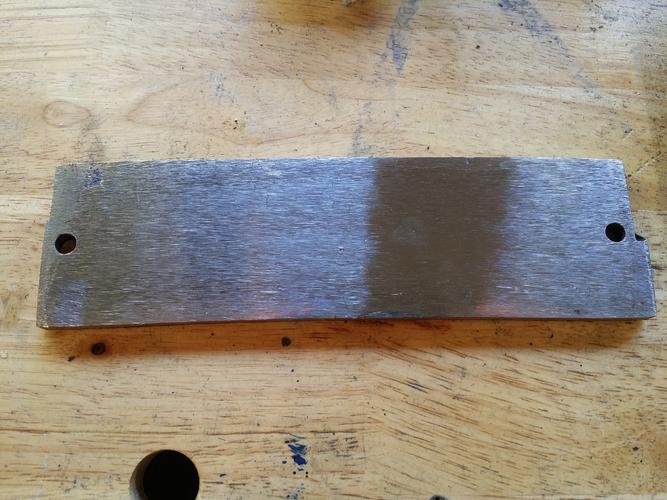
After forging, this is the end result. A single bar of fused metals.
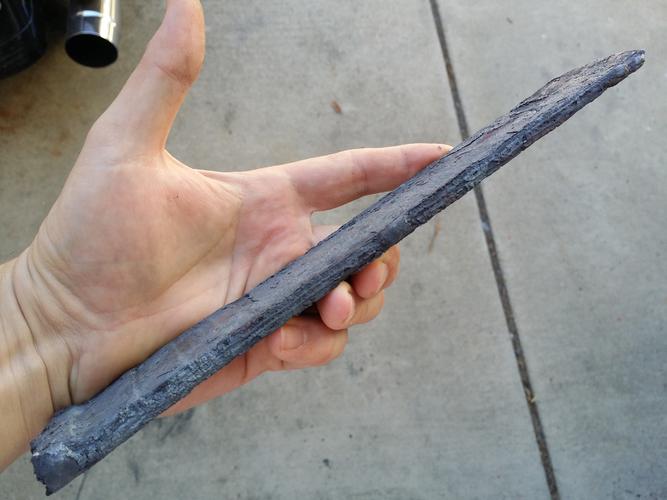
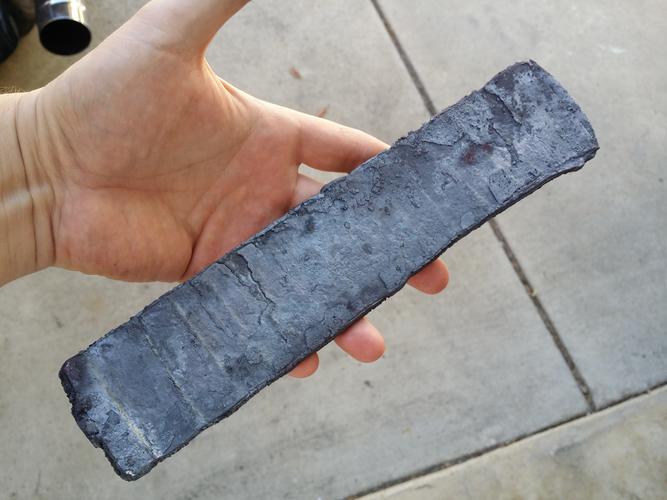
Next, grinding off all to forge scale and flatten the billet.
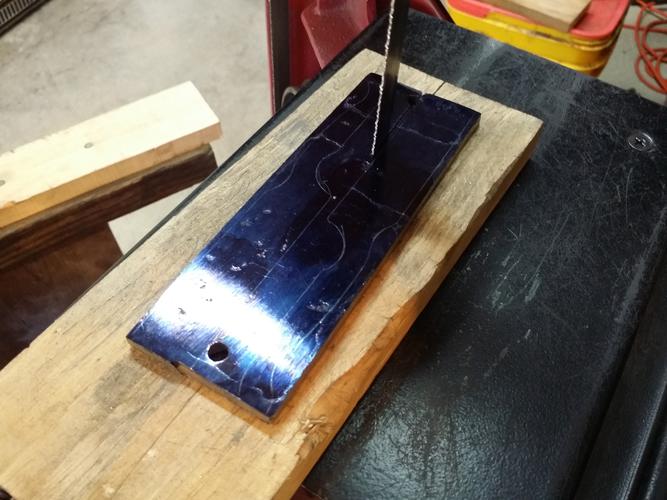
Next step is the band saw for cutting the blanks. I was able to get two blanks from this billet.
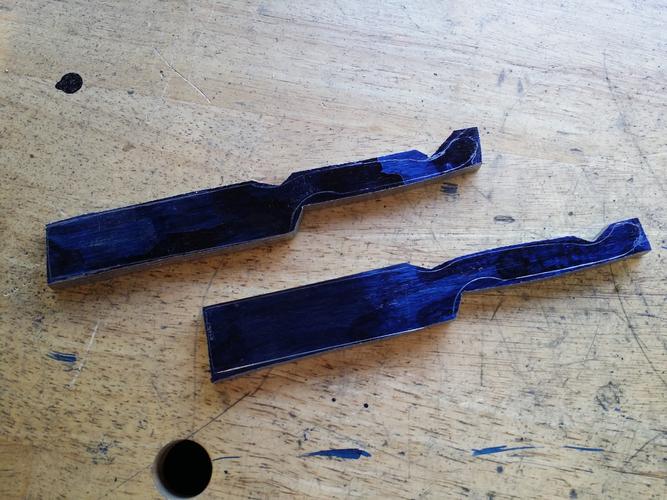
Here, during the rough grind stage you can already begin to see how the layering is taking to the razor.
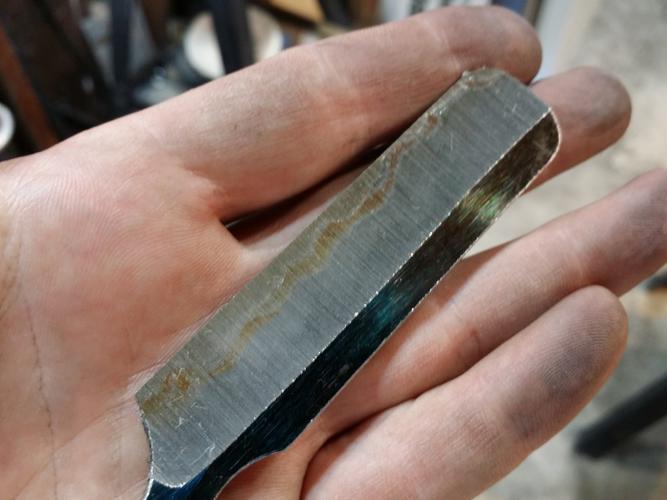
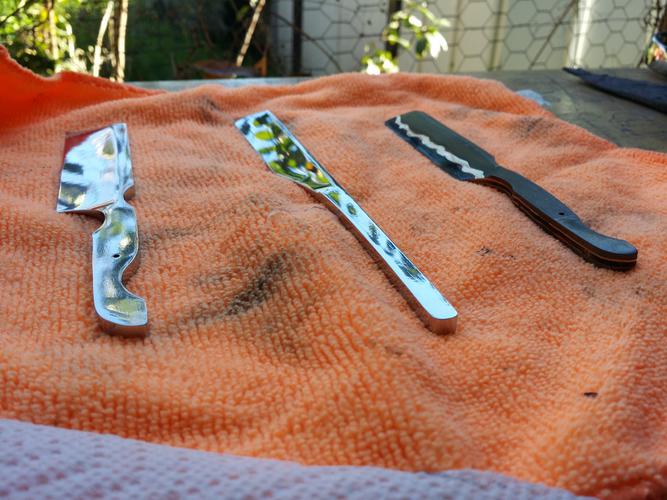
Alright, the grinding is done! Now I want to draw out some contrast in the different metals. So, a quick dip on some ferric acid does the trick.
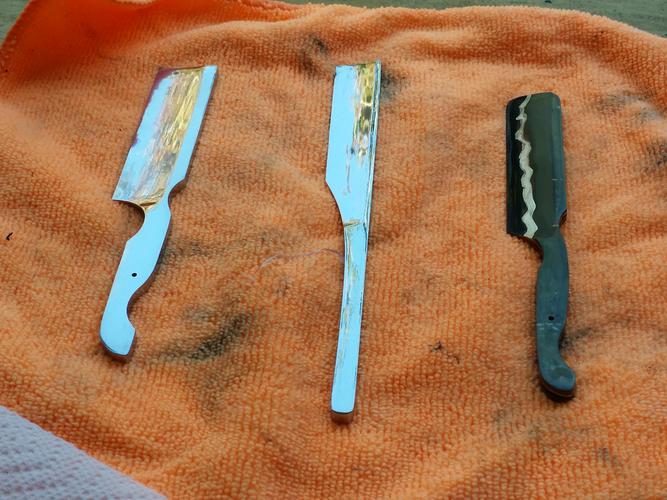
I wanted it a bit darker, so I passed it through the acid quickly a couple more times and finally got the coloring I wanted. Here, compared to other mirror polished pieces.
(Oops! Looks like I can only load 15 images per post. I'll follow up the last images on a reply in this thread.)
-
The Following 5 Users Say Thank You to JohnGlueck For This Useful Post:
Dieseld (01-15-2017), lz6 (01-15-2017), markbignosekelly (01-16-2017), MikeB52 (01-15-2017), Phrank (01-15-2017)
-
01-15-2017, 10:15 PM #2Member
- Join Date
- Oct 2014
- Location
- Sacramento, CA
- Posts
- 71
Thanked: 42
Okay! Last couple images!
Here after a few more times though the acid:
And, final step of polishing out the pins.
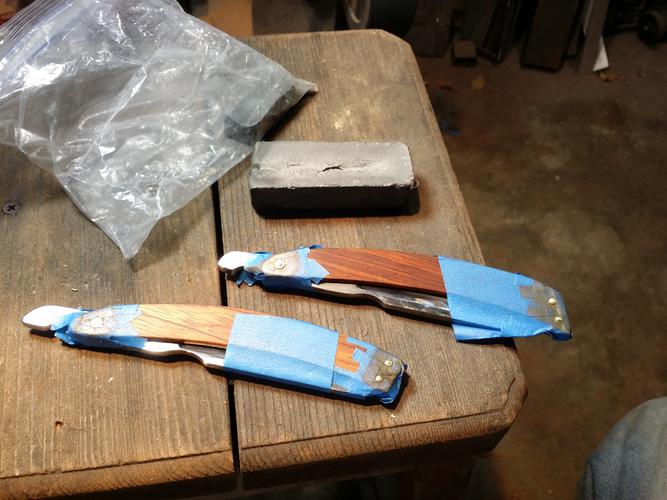
Alrighty! That's my bit of fun. Hope you all enjoyed following along!
-
-
01-15-2017, 10:40 PM #3Senior Member


- Join Date
- Feb 2013
- Location
- Haida Gwaii, British Columbia, Canada
- Posts
- 14,443
Thanked: 4828
That is quite the process. I have many thoughts. it does make for a nice effect on the face of the blade.
It's not what you know, it's who you take fishing!
-
The Following User Says Thank You to RezDog For This Useful Post:
JohnGlueck (01-15-2017)
-
01-15-2017, 11:17 PM #4Str8Faced Gent.


- Join Date
- Aug 2013
- Location
- Orangeville, Ontario
- Posts
- 8,456
- Blog Entries
- 1
Thanked: 4207
Thanks for sharing John. So your layers, are they shim stock pieces that you sandwiched between the high carbon and the mild carbon thicker plates?
Very nice effect on the finished steel."Depression is just anger,, without the enthusiasm."
Steven Wright
https://mobro.co/michaelbolton65?mc=5
-
The Following User Says Thank You to MikeB52 For This Useful Post:
JohnGlueck (01-16-2017)
-
01-15-2017, 11:35 PM #5Giveaway Guy


- Join Date
- Nov 2016
- Location
- Reading MI
- Posts
- 4,784
Thanked: 1586
Great looking razor and thanks for the background to its creation
Look sharp and smell nice for the ladies.~~~Benz
Imperfection is beauty, madness is genius and it's better to be absolutely ridiculous than absolutely boring ― Marilyn Monroe
-
The Following User Says Thank You to Dieseld For This Useful Post:
JohnGlueck (01-16-2017)
-
01-16-2017, 12:24 AM #6Member
- Join Date
- Oct 2014
- Location
- Sacramento, CA
- Posts
- 71
Thanked: 42
Correct! I found that shim stock gives me the best bang for the buck. It allows me to forge quickly, and keep oxide from getting created, which would ruin any kind of weld. I like how thin I can find that material as well, allowing for more layers, and minimizing forge time thinning out all those layers to a proper thickness to make a razor. Originally Posted by MikeB52

-
The Following User Says Thank You to JohnGlueck For This Useful Post:
MikeB52 (01-16-2017)
-
01-16-2017, 02:00 AM #7Senior Member


- Join Date
- Apr 2014
- Location
- Portland, Oregon
- Posts
- 3,350
Thanked: 664
Great looking blade, only I think it looks more like snow on the Sierras rather than a river. Nice effect.
Richard
-
The Following User Says Thank You to evnpar For This Useful Post:
JohnGlueck (01-16-2017)
-
01-16-2017, 02:49 AM #8Senior Member
- Join Date
- Dec 2016
- Location
- Bassfield MS
- Posts
- 105
Thanked: 23
That came out great! First time I've seen a san mai done like that. Bet it took some careful forge work to avoid liquifying the copper! Hmmm, got me to thinking, wonder if brass shim stock alone would work, would have to look the melting points up, but should be fairly close to critical temp for the high carbon steel. Possibly able to forge braze the high carbon center in, would have to be careful during heating to critical to avoid the soft brass from popping loose, but might be doable. In any event, very well done, and very interesting look, that's something you don't see every day for sure, thanks for sharing.
-
The Following User Says Thank You to will52100 For This Useful Post:
JohnGlueck (01-16-2017)
-
01-16-2017, 03:16 AM #9Senior Member

- Join Date
- Oct 2010
- Location
- 50 miles west of randydance
- Posts
- 9,674
Thanked: 1354
They sure look pretty but have some reservations about galvanic corrosion in a shaving environment.
will52100 likes this.
-
The Following User Says Thank You to 32t For This Useful Post:
JohnGlueck (01-16-2017)
-
01-16-2017, 04:02 AM #10~ Life is but a Dream ~

- Join Date
- Dec 2014
- Location
- Oakham, Ma.
- Posts
- 3,843
Thanked: 1218
Very interesting to see the entire process.
It's a beautiful blade in a beautiful razor.
Thanks for sharing.
Pete <:-}"Life is short, Break the Rules. Forgive quickly, Kiss Slowly,
Love truly, Laugh uncontrollably, And never regret ANYTHING
That makes you smile." - Mark Twain
-
The Following User Says Thank You to petercp4e For This Useful Post:
JohnGlueck (01-16-2017)


 Reply With Quote