
Results 1 to 10 of 10
 24Likes
Thread: Merkur Restoration
 LinkBack URL
 About LinkBacks
-
07-23-2017, 07:09 PM #1www.edge-dynamics.com


- Join Date
- Feb 2013
- Location
- London
- Posts
- 3,066
Thanked: 512 Merkur Restoration
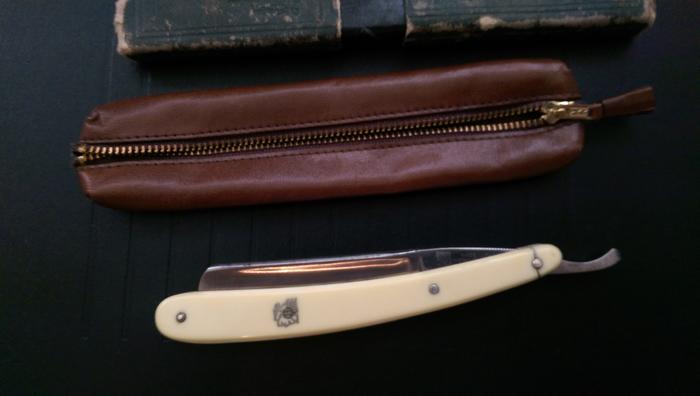
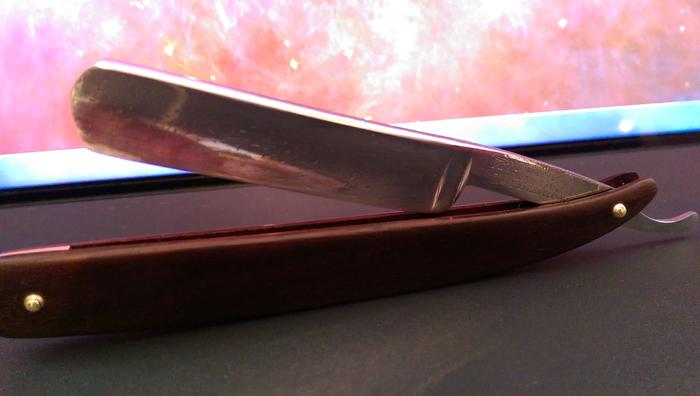
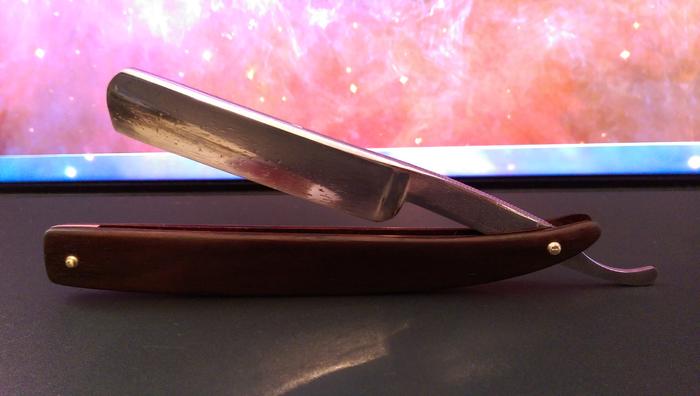
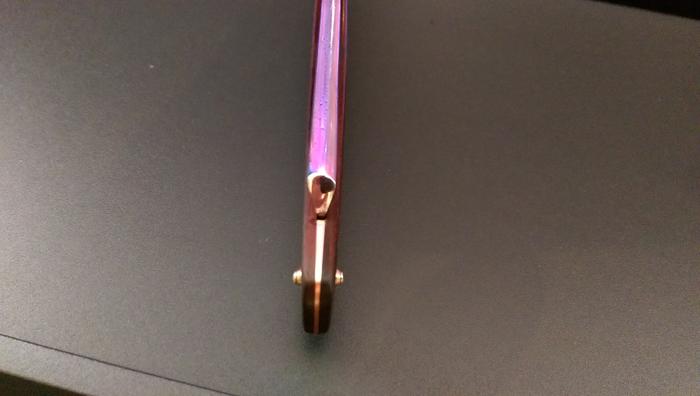
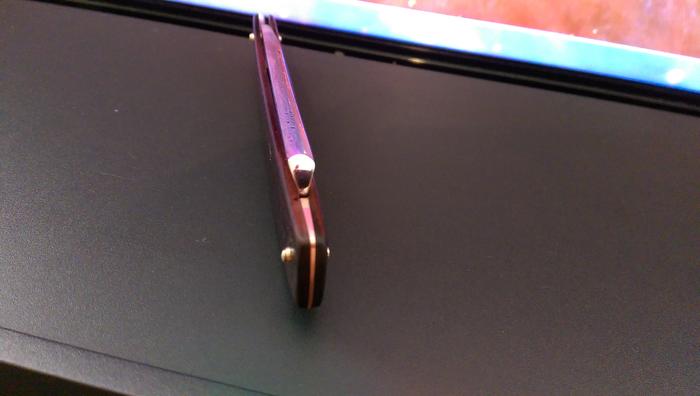
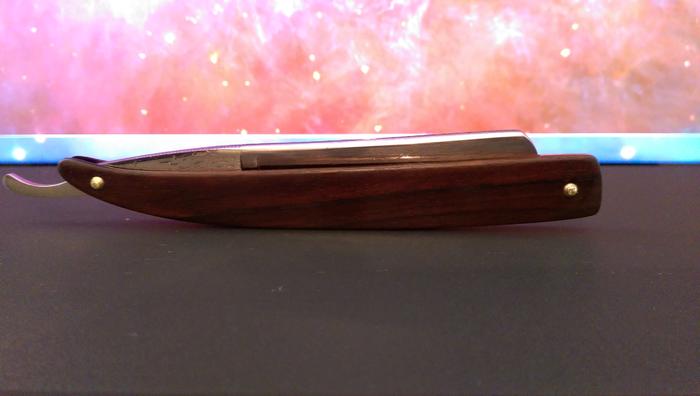
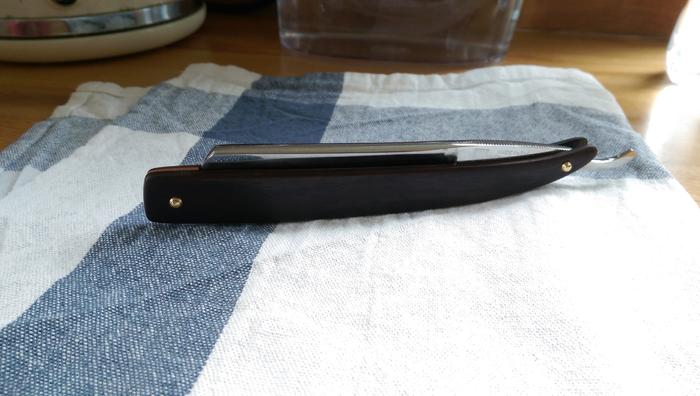
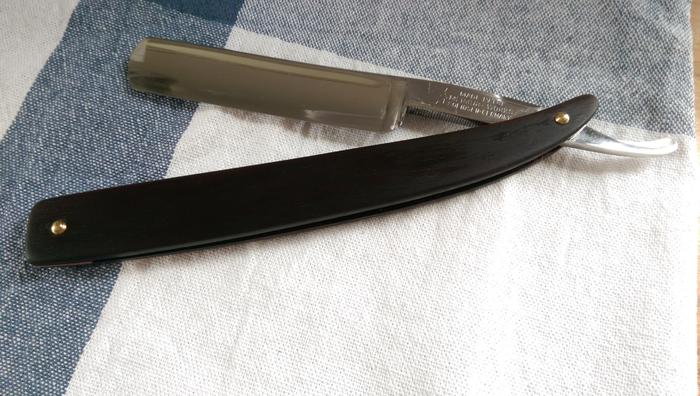
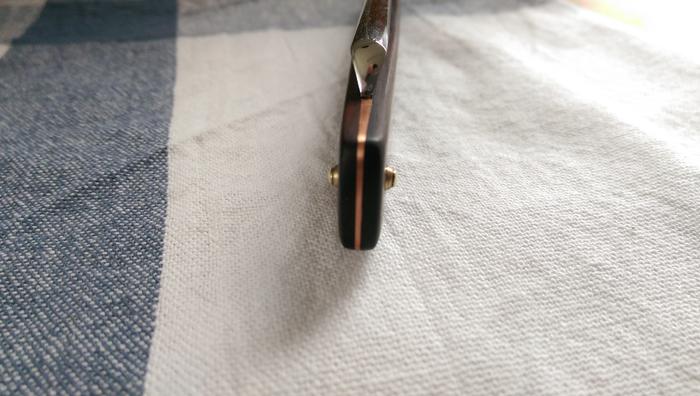
A friend asked me to restore his late fathers Merkur vintage razor.
The original scales were cracked so they had to go. Shame about the Merkur sign because I really like that symbol .
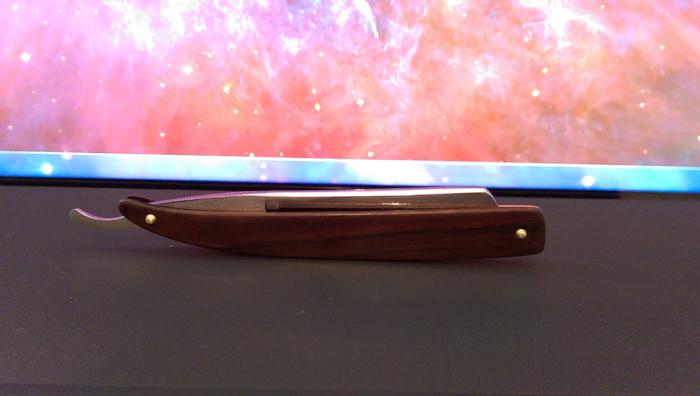
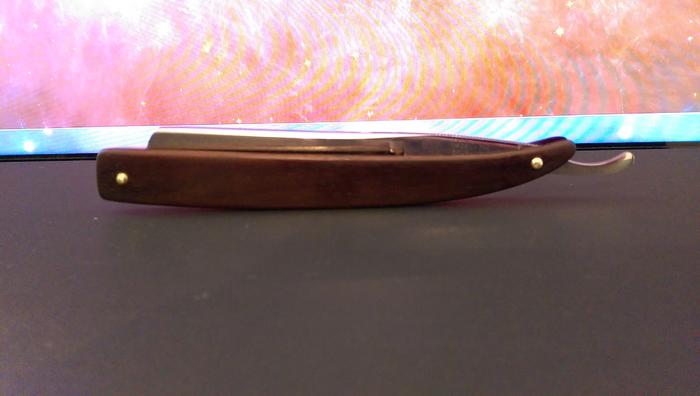
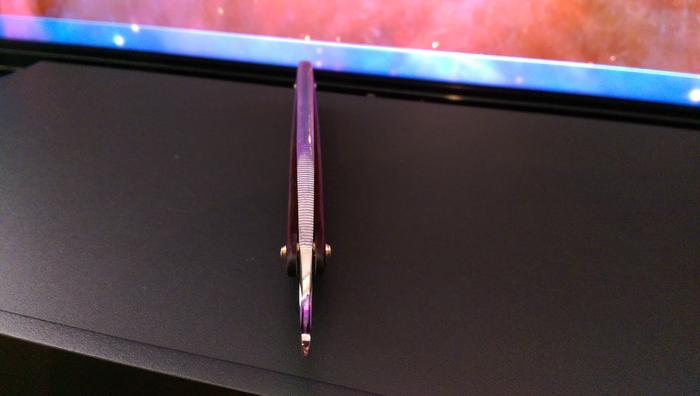
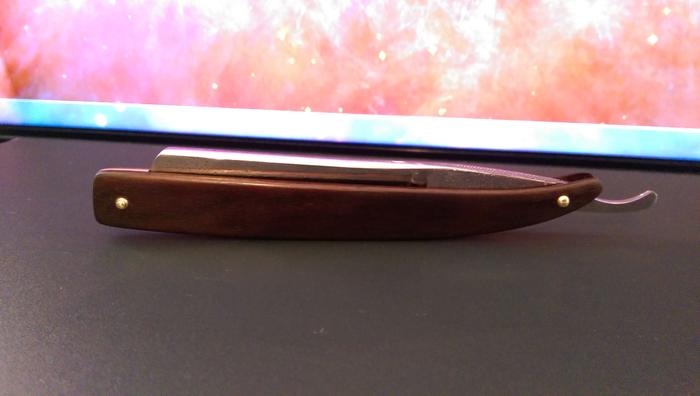
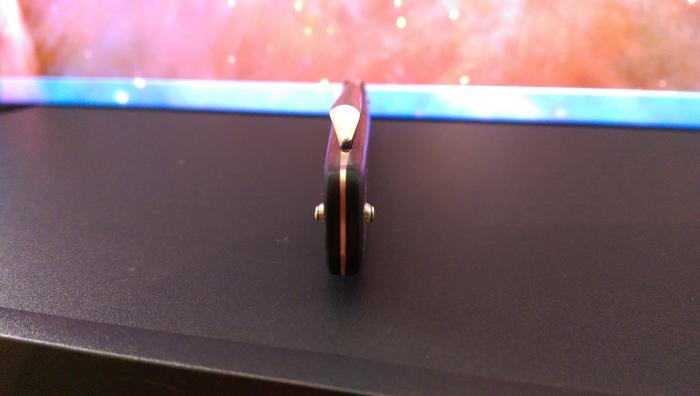
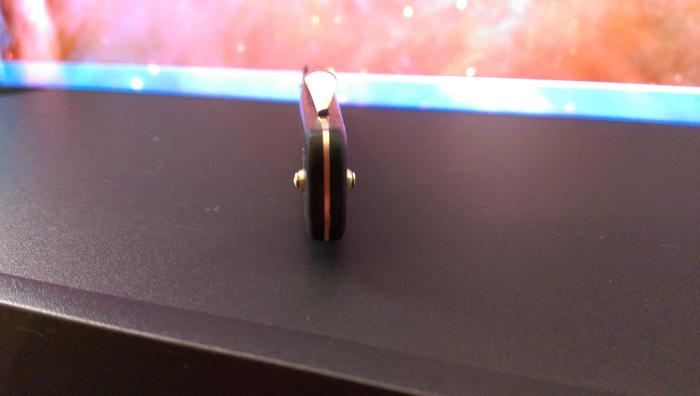
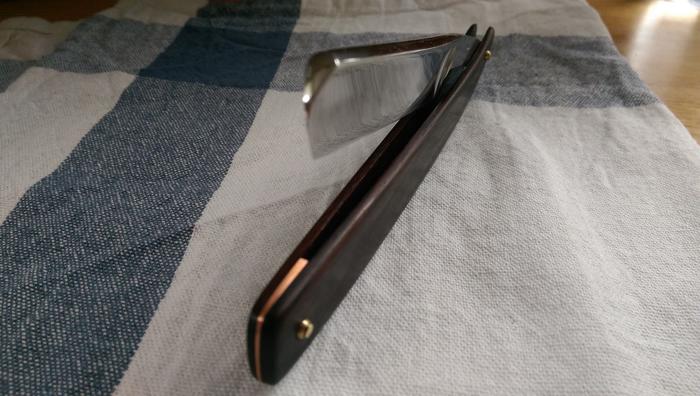
I had free reign over this job so I designed my own scales to follow the contour of the spine. I used a type of Ebony which is dark brown with black streaks. Thinned by hand to about 3mm ish, I'm guessing
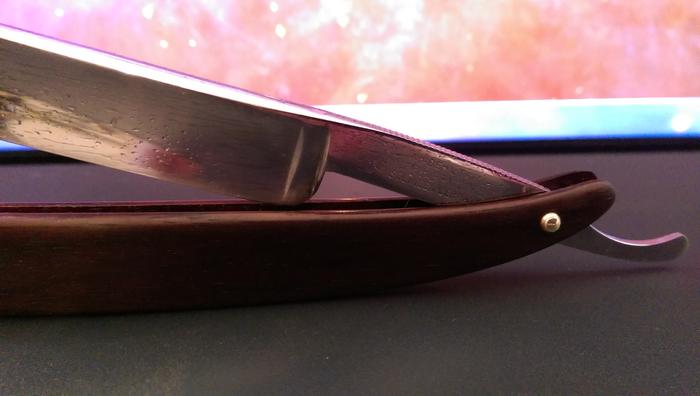
Being a hollow grind I thought I could get away with a copper wedge . The wedge had to be specific, allowing the spine and scales to sit parallel and I used brass pins,collars and internal washers.
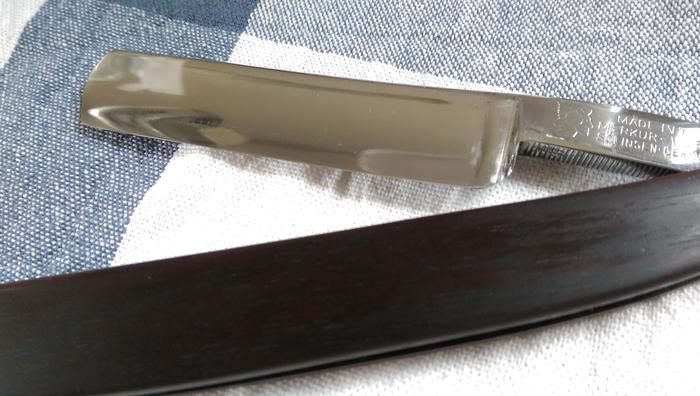
The blade had deep pitting and scars on the spine, so I did the spine starting with 240 grit paper. The rest of the blade I started at 400 grit. Finishing the whole this with 3000 grit and then polish.
I had to leave a few pits because the blade was too thin to even get near them..
I have yet to hone it up , I'm still waiting for the oil to fully dry on the scales/ 2 coats of true oil and I will finish it with beeswax.
Lovely blade and I cant wait to test shave it.
Surprising to me is how cheap these blades go for . I think I want one , one day ..
Cheers guys. (sorry the pictures are so dark)


Last edited by JOB15; 07-23-2017 at 07:12 PM.
-
07-23-2017, 08:41 PM #2Senior Member


- Join Date
- May 2010
- Location
- Upstate South Carolina
- Posts
- 3,308
Thanked: 987
Nice job-Beautiful wood on the scales, brass hardware, and I love that copper wedge (been wanting to try that myself, maybe with some bulls-eye copper collars). I admire your bravery in sanding into deep pitting on that hollow ground. I've heard great things about Tru-Oil; I need to try it sometime.
Last edited by ScoutHikerDad; 07-23-2017 at 08:44 PM.
JOB15 likes this.
-
07-23-2017, 08:58 PM #3Senior Member


- Join Date
- Jan 2016
- Location
- Prescott Arizona USA
- Posts
- 825
Thanked: 369
Nice job, the scales are proportioned nicely.
ScoutHikerDad and JOB15 like this.Freddie
-
07-23-2017, 09:05 PM #4www.edge-dynamics.com
- Join Date
- Feb 2013
- Location
- London
- Posts
- 3,066
Thanked: 512
The deep sanding was on the spine so it was no problem. Originally Posted by ScoutHikerDad

Personally I think the wedge is really important so I always try to make them special or out of the ordinary.
I have lots of different oils but True oil may well be the best ..
-
07-23-2017, 09:10 PM #5Senior Member

- Join Date
- Jun 2016
- Location
- NH
- Posts
- 1,924
Thanked: 1363
Nice job, the grain looks great in those scales with the contrast running lengthwise. Good choice of wedge, steps it up a notch in classiness.
"Go easy"
-
07-24-2017, 11:35 AM #6Giveaway Guy

- Join Date
- Nov 2016
- Location
- Reading MI
- Posts
- 4,784
Thanked: 1586
That is one great restoration. It all came together very well and is one classy looking razor
Look sharp and smell nice for the ladies.~~~Benz
Imperfection is beauty, madness is genius and it's better to be absolutely ridiculous than absolutely boring ― Marilyn Monroe
-
07-24-2017, 12:00 PM #7Senior Member

- Join Date
- Aug 2016
- Posts
- 688
Thanked: 123
Nice job, I'm sure he will be very happy with the results.
JOB15 likes this.Fact: Opinions are not the same as facts... Well, that's my opinion anyway
-
07-24-2017, 12:21 PM #8www.edge-dynamics.com
- Join Date
- Feb 2013
- Location
- London
- Posts
- 3,066
Thanked: 512
Cheers, I'll post a daylight picture once I put a killer edge on it..
-
07-24-2017, 01:50 PM #9Senior Member

- Join Date
- Oct 2015
- Location
- Knoxville,IA
- Posts
- 2,368
Thanked: 762
Great work sir, I too have been thinking about using copper. After seeing it I like the look a lot. It could really make the right material pop.
lz6 likes this.Nothing is fool proof, to a sufficiently talented fool...
-
07-29-2017, 03:52 PM #10www.edge-dynamics.com
- Join Date
- Feb 2013
- Location
- London
- Posts
- 3,066
Thanked: 512
Today I put an edge on this blade and had a shave ..
I started with the Shapton Glass 500 . I think the DMT would have been too much.
No circles , just slight X's with no pressure and gave it a bevel.
Then i killed it and went to the Naniwa 1k. Same thing light strokes and set the bevel.
I then went 5k,10k Chosera, minimal strokes and onto the 16k Shapton Glass with 8 strokes.
Then I finished with the Escher 100 strokes with water only.
The shave was amazing. Smooth and sharp, everything you would want from an edge.
I took a few daylight pictures.
For the last week the blade has sat in my view and I really got to appreciate the shape of the scales .
Onto my next project : W&B 9/8ths
Cheers
Last edited by JOB15; 07-29-2017 at 03:54 PM.


 Reply With Quote