
Results 11 to 20 of 21
 69Likes
 LinkBack URL
 About LinkBacks
-
10-12-2017, 12:16 PM #11Senior Member


- Join Date
- Oct 2011
- Location
- Standish, Maine
- Posts
- 816
Thanked: 952
Tin/bismuth alloy. Modern day plumber's solder? How did you shape the wedge? Did you melt the solder and cast it? I wonder if it would cast in a round ball mold. I just use a hammer to flatten a lead round ball into a wedge shape and usually have a wedge .025 on the thin wedge to .080 on the thick end for a near wedge blade. I find it really easy to control how thick I want the finished wedge.
The wedge I reduce in size until it is about .010 proud and assembled with micro fasteners. I also do not finish the lead wedge until after I have the razor pinned. I then file and sand the wedge flush with the scales. Finally kiss the edges on a buffer to re-polish the scales but stay off the wedge. The result is no rolled over appearance of the scales or wedge where the wedge and scales meet. A clean sharp parting line between the pieces.
-
The Following User Says Thank You to karlej For This Useful Post:
Voidmonster (10-12-2017)
-
10-12-2017, 02:35 PM #12Captain ARAD.


- Join Date
- May 2011
- Location
- Pacifica, CA
- Posts
- 2,474
Thanked: 2226
You are correct! Which means I don’t have any before pictures. I was at least able to figure out when I bought it by searching all my ebay receipts. November 25, 2015. Originally Posted by Grazor
 Grazor likes this.-Zak Jarvis. Writer. Artist. Bon vivant.
-
10-12-2017, 02:38 PM #13Captain ARAD.
- Join Date
- May 2011
- Location
- Pacifica, CA
- Posts
- 2,474
Thanked: 2226
Ummmm. I can neither confirm nor deny that I have an enormous pile of razors to restore. Originally Posted by ovidiucotiga
 -Zak Jarvis. Writer. Artist. Bon vivant.
-
10-12-2017, 02:52 PM #14Captain ARAD.
- Join Date
- May 2011
- Location
- Pacifica, CA
- Posts
- 2,474
Thanked: 2226
I bought a 5 pound block of this stuff a long time ago for the purpose of making razor wedges. Originally Posted by karlej
Hammering wouldnt work so well on it because the bismuth makes it brittle. It’d crack.
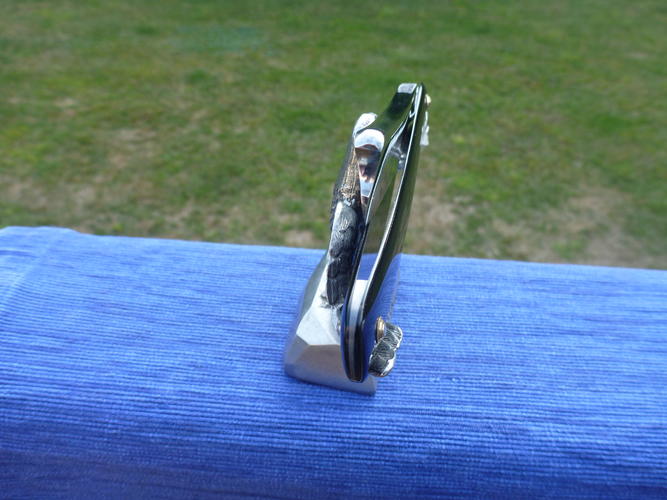
I made this one a while back by melting a little bit into a slightly tilted metal pan. That gave it a natural taper, but it was way too thick. So I used double-sided tape, stuck it to the end of a flat bar of aluminum and thinned it on the belt sander. It took two goes at that, as the first tapered too much and left a gap at the point. I also employ the old Sheffield trick of using a file to scratch up the inside of the scales where the wedge will go so it doesn’t spin when everything’s pinned up.
For final fit, I get it down to about 0.2mm proud and then use sandpaper on a hard surface until I just touch the scales, then I polish with micromesh, and finish with buffer using a floppy cloth wheel with just a tiny bit of Mother’s polish on it.-Zak Jarvis. Writer. Artist. Bon vivant.
-
-
10-12-2017, 03:12 PM #15Senior Member

- Join Date
- Jun 2016
- Location
- NH
- Posts
- 1,924
Thanked: 1363
Nice work, I like to result a lot! I have a "wedgie" type FBU that needs tending to, but it was over-honed some on the toe end so it looks a little weird. I'll have to see if it also has an apostrophe, it might. Yours is nice and nice!
Voidmonster likes this."Go easy"
-
The Following User Says Thank You to xiaotuzi For This Useful Post:
Voidmonster (10-12-2017)
-
10-12-2017, 04:28 PM #16Str8Faced Gent.


- Join Date
- Aug 2013
- Location
- Orangeville, Ontario
- Posts
- 8,449
- Blog Entries
- 1
Thanked: 4206
You bought that on my 50th birthday Zak! Originally Posted by Voidmonster
Very nice work on the restoration. Looks new.
 Voidmonster likes this."Depression is just anger,, without the enthusiasm."
Steven Wright
https://mobro.co/michaelbolton65?mc=5
-
The Following User Says Thank You to MikeB52 For This Useful Post:
Voidmonster (10-12-2017)
-
10-12-2017, 04:53 PM #17Senior Member

- Join Date
- Jan 2013
- Location
- Communist State of California
- Posts
- 1,461
Thanked: 463
Great work. When you say sanding drum, are you talking about a sleeveless drum on a drill? That has been my go to method for awhile now. I’ve not touched greaseless since I got my sleeveless method dialed in. Looks like you’re getting a great finish.
I’m in a be east bay and I’m wearing a respirator for the smoke too. Lungs were burning at work yesterday so I figured I’d better do something.Voidmonster likes this.B.J.
-
The Following User Says Thank You to BeJay For This Useful Post:
Voidmonster (10-12-2017)
-
10-12-2017, 05:12 PM #18Captain ARAD.
- Join Date
- May 2011
- Location
- Pacifica, CA
- Posts
- 2,474
Thanked: 2226
I’m using something like this Originally Posted by BeJay
I got the biggest one Woodcraft had, and also one of the cheap variety packs from Harbor Freight. I use all of them, but the one from Woodcraft is decidedly better.
My drill press is a radial model, so I just rotate it 45 degrees and stick the drum on for sanding.
I’ve never used the greasless compounds, but I do use fancy polishing sticks from Rio Grande on very hard fabric wheels. After a lot of experimentation I came to the conclusion that the ‘red’ compound is all I need.
The sanding drum also provided lots of room for experimentation. I have a complete progression of micromesh metal specialty in 8x10 sheets that I cut for the drums, but it doesn’t actually work significantly better than regular old sandpaper.
For regrinding I cut down 80 an 120 grit 3x20 sanding belts.
I inch steadily toward a dedicated knife grinding rig with multiple wheel sizes.-Zak Jarvis. Writer. Artist. Bon vivant.
-
-
10-12-2017, 06:20 PM #19Senior Member
- Join Date
- Jan 2013
- Location
- Communist State of California
- Posts
- 1,461
Thanked: 463
I also have a few from Lee Valley and the HF kit. I’ve got a 1” drum that’s fantastic for full hollow grinds. The trade off is that the paper doesn’t last very long on the smaller drum. My 2.5” (LV) seems to hit the sweet spot on larger blades. I find the larger drums can have a negative affect on the edge if I’m not careful.
Voidmonster likes this.B.J.
-
The Following User Says Thank You to BeJay For This Useful Post:
Voidmonster (10-12-2017)
-
10-12-2017, 06:31 PM #20Captain ARAD.
- Join Date
- May 2011
- Location
- Pacifica, CA
- Posts
- 2,474
Thanked: 2226
Yup. I've flattened a couple rounded points by being hamfisted on the drum. More likely than not, I'll end up building some sort of a jig so I can precisely control angle (ideally one that could be repurposed on any grinder I use). On the flip side, if I'm being careful around the edge, the razors come out of the sanding process much quicker to get a bevel on because they're almost there already. They are, honestly, kitchen knife sharp at the end of the process. Originally Posted by BeJay
I'd probably also be closer to actually building a purpose-built polishing wheel using a coated leather surface on a wood wheel if it weren't for the fact that the tight-sewn buffing wheel I'm using has become almost as firm a surface as that'd be.-Zak Jarvis. Writer. Artist. Bon vivant.


 Reply With Quote
 )
)