
Results 1 to 10 of 11
 33Likes
 LinkBack URL
 About LinkBacks
Threaded View
-
11-29-2020, 06:10 AM #1Senior Member


- Join Date
- Aug 2020
- Location
- Roseville, CA (30 minutes north of Sacramento)
- Posts
- 246
Thanked: 7 Custom Scales For a Wade & Butcher (Heavy Pix and Explanation)
O-Tay folks. Just wanted to share my very first scales design and install with y'all.
I'm nothing special, so no pride here if I am mistaken in some method or steps taken.
Just me, my psycho-babble, and a bunch of pictures to share with y'all.
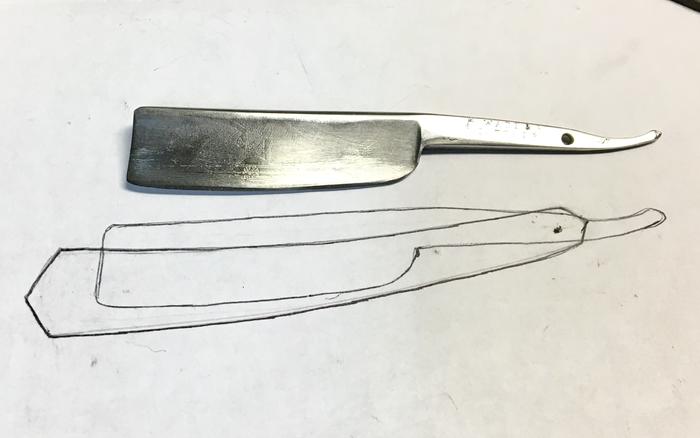
So I had an old 1837ish Wade & Butcher that I acquired and restored.
I believe I paid something like $25 or $30 for it.
The scales were cracked, pieces had broken off the scales, and the steel was super rough.
Perfect for a vintage razor restore!
So the blade was cleaned, but left a bit rough, as it had a super faint etching on one side. And if I polished the other parts of the razor, the etched-side would look different than the rest. So I left it in a way that it all matched. (Gives it character as well).
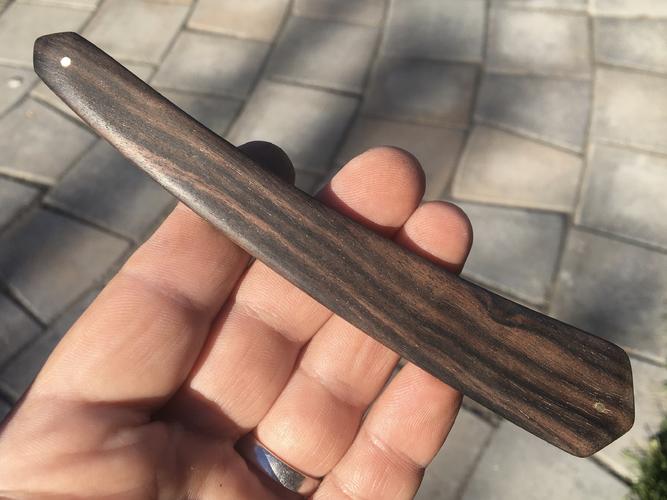
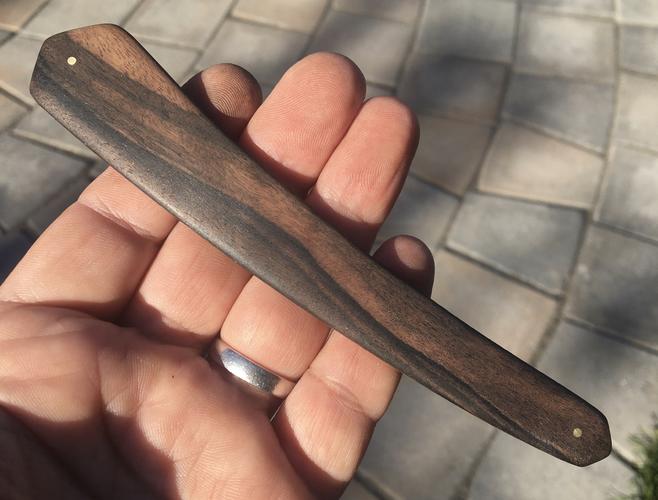
The next part were the scales. I wanted a darker "old wood" look.
I do not like bright bling-bling colors...ever...on anything...period!
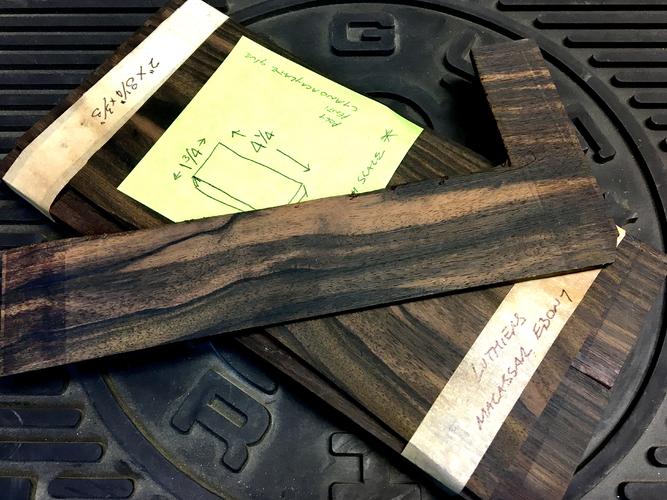
So I grabbed some 1/8" inch thick "Luthiers Macassar Ebony" that I had been saving for a knife handle.
It was a good choice, as I knew it would get a little deeper and darker after I treated it with linseed oil.
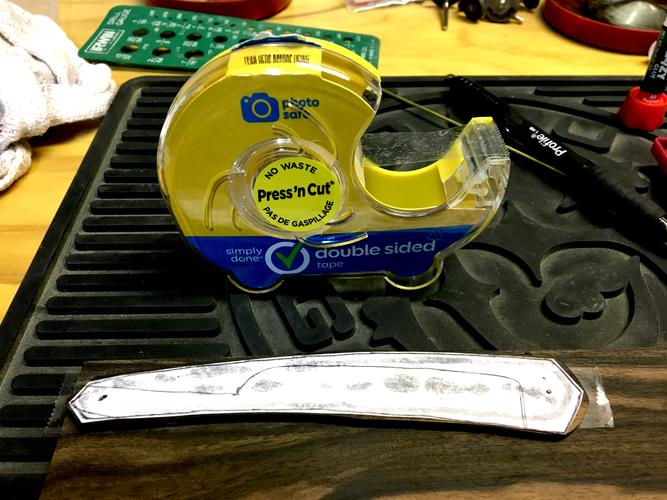
Below you can see how I traced the blade and designed the scales like I wanted them.
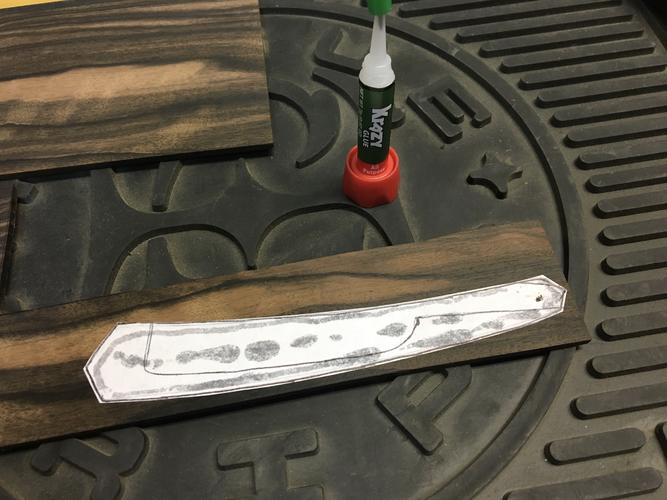
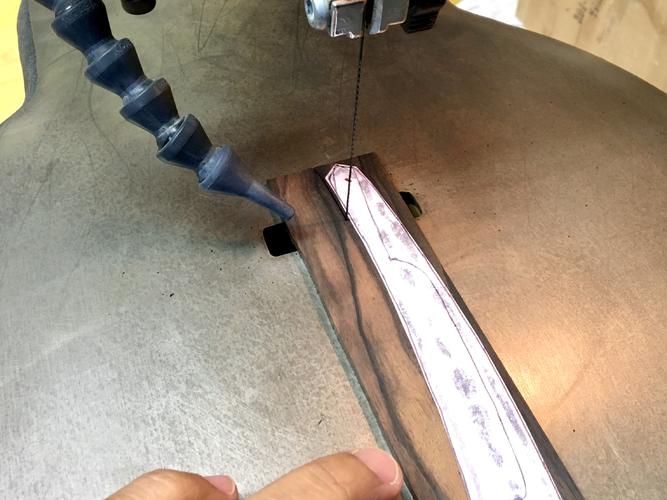
The next pictures show the wood I used, how I cut-out the pattern I drew and Crazy Glued it to the wood, and then how I cut it out on the scroll saw.
By the way, a good note. Always attach the design securely with Crazy Glue or some other type of thin-layered adhesive. If the pattern is loose, it will "shift/come off/peel up on the sides" when you are cutting it, sanding it, or just handling it. The pattern sands off easily afterwards.
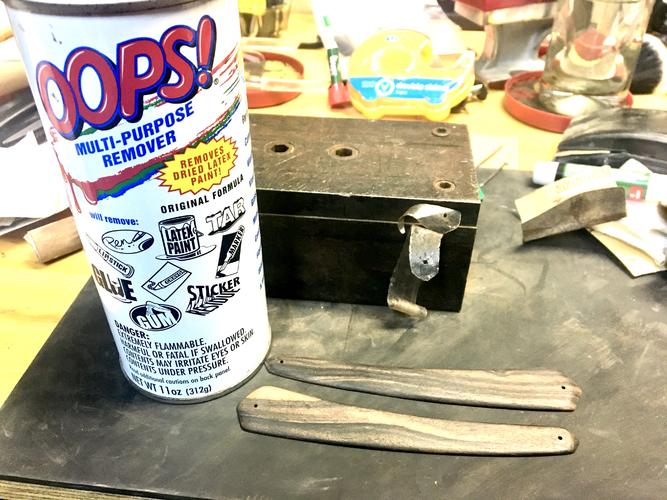
After it is rough cut, I laid it on the other half of the wood, and attached it using double-sided tape. (Which I will never do again. More on this in a minute).
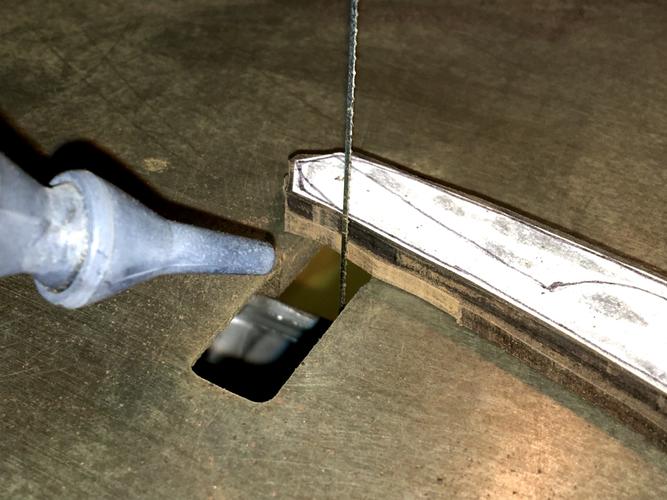
After the two pieces of wood were securely fastened together, I did one more thing. I placed the pieces on my drill press, drilled two 1/16" inch holes, and placed a brass pin in each hole. This will hold the two pieces securely. (Which is why I did not need the double-sided tape). The brass pins are not even an issue when sanding the scales, as they sand down super easily with any powered sander. (If you are going to HAND SAND the scales, then this may pose an issue for you, so stick to double-sided tape or some other means).
After they are attached, I went to my scroll saw and cut them out. And then I went to my small 1x30 Rikon belt sander and sanded it down. Notice how the brass pins were not an issue, and sanded down without a problem. At this point the pattern was also sanded away, as it was not needed any longer.
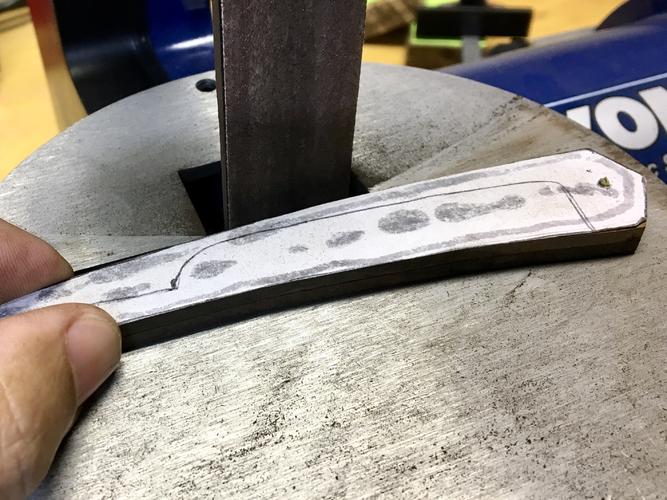

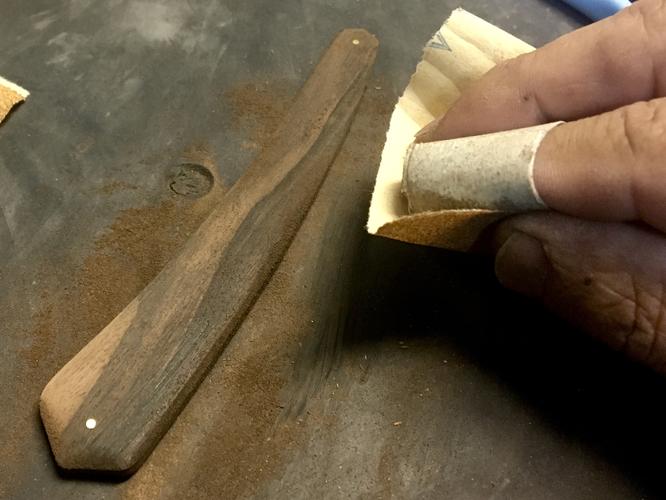
I got the shape right to where I wanted it on the belt sander, then proceeded to hand sand it to its final shape and finish. I started hand sanding it with 120 grit, then 200 grit, then I finished with 400 grit...which was kinda overkill. Once again, notice how the brass pins were never an issue.
After the sanding was done, it was time to separate the two pieces. The pins were super easy to remove. Light tapping with a finishing nail popped them out easily. No issues whatsoevah. But this is where I HATED using the double-sided tape. (Which I will never use again). After I peeled-off the lining (which you can see attached to my metal peening block), it left a nasty reside, which I needed an adhesive remover to remove. Blagh! Nothing overly hard. But I hated the smell, rubbing a solvent on the wood, and then having to discard the nasty-smelling solvent wad with the adhesive residue.
continued on next page...Last edited by RaymondMillbrae; 11-29-2020 at 08:00 AM.
-
The Following User Says Thank You to RaymondMillbrae For This Useful Post:
JBHoren (11-29-2020)


 Reply With Quote