
Results 1 to 10 of 11
 33Likes
 LinkBack URL
 About LinkBacks
Hybrid View
-
11-29-2020, 07:58 AM #1Senior Member


- Join Date
- May 2011
- Location
- Merthyr Tydfil South Wales UK.
- Posts
- 5,601
Thanked: 1413
Nice little pictorial, well done.
BobH and RaymondMillbrae like this.Wherever youre going never take an idiot with you, you can always find one when you get there.
-
11-29-2020, 09:20 AM #2Senior Member


- Join Date
- Mar 2015
- Location
- Akron, Ohio
- Posts
- 11,975
Thanked: 4304
Very nice.
Instead of double sided tape, I like to use a piece of paper, with 3-4 drops of Elmer's glue on the inside of each scale.
Clamp the paper between the scales to dry. Once dried, u can drill, sand, and shape, with no restrictions.
To separate the scales, just slide a SE razor blade between the scales. Any glue residue can be removed with a damp rag.
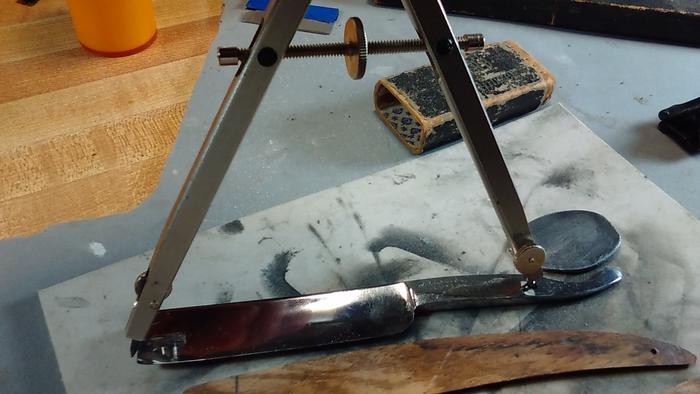
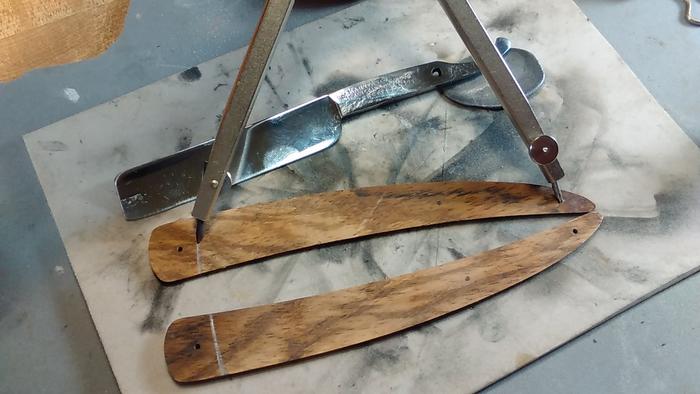
Also....a drafting compass, is the bee's knees, for wedge placement.
 Mike
Mike
-
-
11-29-2020, 09:53 AM #3Skeptical Member


- Join Date
- Nov 2016
- Location
- Colorado Springs
- Posts
- 10,486
Thanked: 2186
Nice work and some fine looking wood. A do a couple steps differently but the outcome is what matters.
It's just Sharpening, right?
Jerry...
-
11-29-2020, 12:33 PM #4Senior Member

- Join Date
- Jun 2013
- Location
- Pompano Beach, FL
- Posts
- 4,018
Thanked: 631
Great job. You sure this is your first try?
Love the wood.BobH and RaymondMillbrae like this.
-
11-29-2020, 06:00 PM #5Senior Member

- Join Date
- Aug 2020
- Location
- Roseville, CA (30 minutes north of Sacramento)
- Posts
- 246
Thanked: 7
Thanks, everyone.
I also considered the glue and paper method. And it is a better method than the double-sided tape.
I was told a razor easily cleaned-up the Elmer's glue after separation.
But lazy me didn't want to wait for the glue to dry, so I went the double-sided tape way. (Which I regretted.
I'll only use pins next time. It was a super good way to connect the scales together tightly while sanding and working on them.
The drafting compass was also a great idea! (I have a few laying around in my office somewhere).
Onto my next project.
-
04-28-2021, 06:13 PM #6Veteran

- Join Date
- Jun 2014
- Location
- Florida
- Posts
- 82
Thanked: 5
Nice looking. Would like to point out that you used a spacer not a wedge. With a wedge, the scales bow keeping the scales off the razor. With no bow, the scales could rub the blade.
OldTraf
Mind the toe, and the heel, 'twill follow.
-
04-29-2021, 03:09 PM #7Senior Member
- Join Date
- Apr 2012
- Location
- Diamond Bar, CA
- Posts
- 6,553
Thanked: 3215
Nice work, especially for your first re-scale.
Yes, a wedge will keep tension on the pivot and provide clearance at the tang.
Also drill your pin holes while the scales are flat, to ensure that they are perpendicular to the inside face, so you do not have issues centering the blade. It is almost impossible to drill both holes square on a non-flat surface.
If you do not glue the wedge, you will have a bit of wiggle room to adjust the wedge and center a blade, especially with wood, as wood will move with moisture variation. A properly pinned wedge will remain tight and can be trimmed tight to the scales with a file and sanding.
Here is a good video on drilling perpendicular holes on a non-flat scale.
The jig is shown in use at about 8:05 in the video.
()
-
05-01-2021, 04:47 PM #8Senior Member

- Join Date
- Dec 2018
- Location
- Gainesville, FL
- Posts
- 5,980
Thanked: 608
For shaping scales I use low temperature hot glue. It holds tight with a micro-thin layer and peels free easily with the scrape of a fingernail. Once loose it will normally peel off in one clean layer. It also will not adhere beyond the surface to any scale material I have used, probably any that would be suitable for scales. Just another option. Originally Posted by RaymondMillbrae
 Iron by iron is sharpened, And a man sharpens the face of his friend. PR 27:17


 Reply With Quote