Results 1 to 10 of 14
-
01-04-2010, 07:23 AM #1
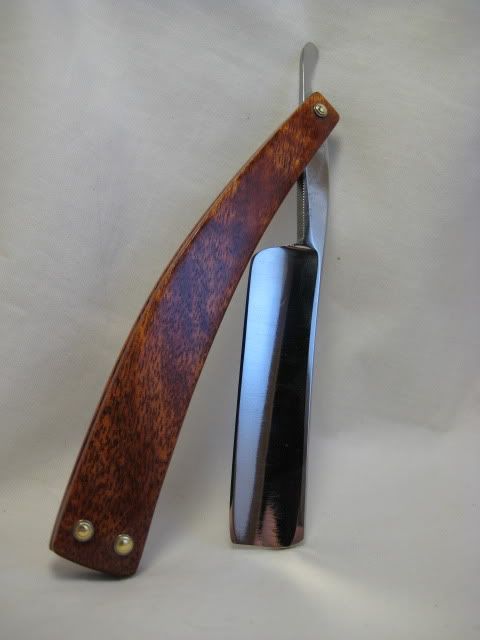
 Restore: "Hortense Razor Co: Barber's Razor" in Bloodwood
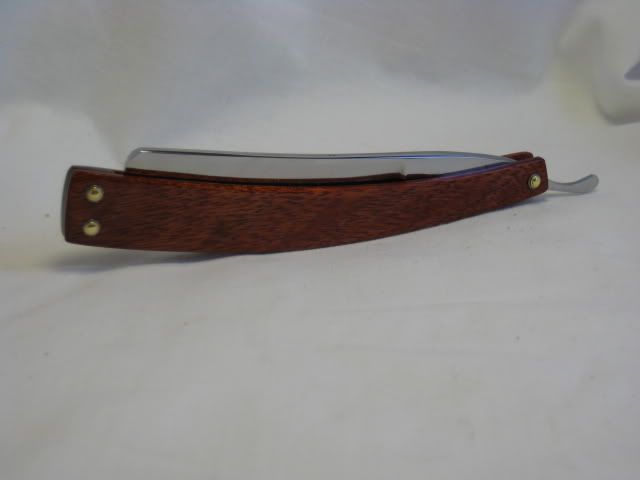
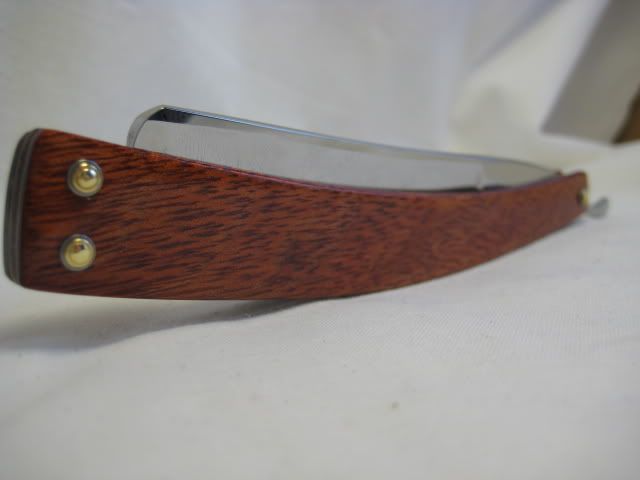
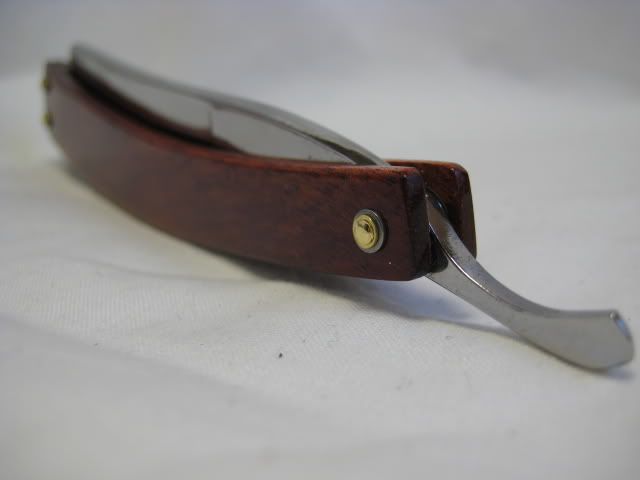
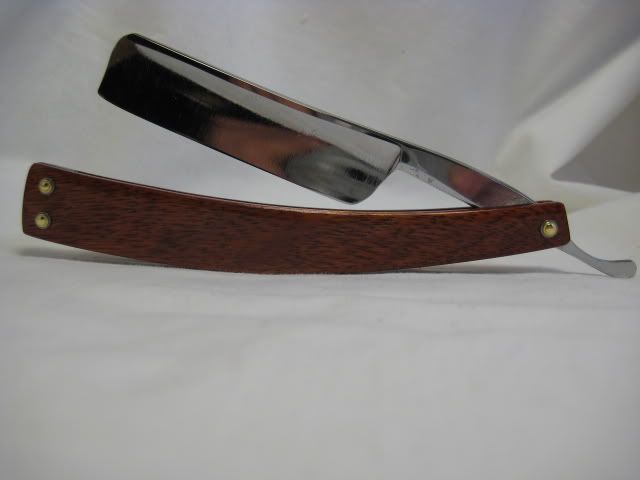
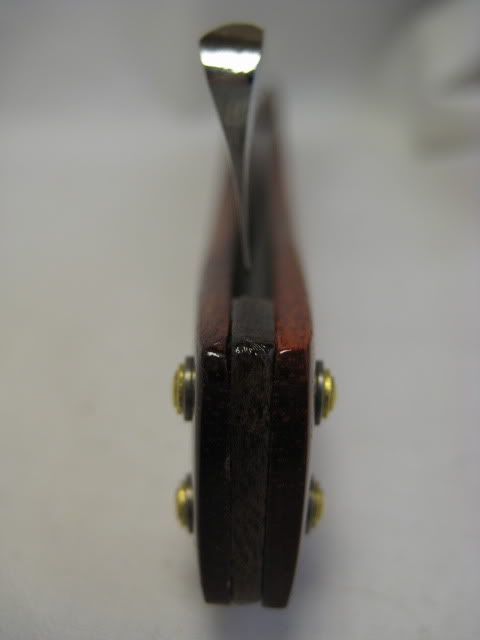
This razor looked like a simple job, but the devil is in the details. A little sanding and tumbling and the blade looked ready to go, but as you can see in the wedge photo the blade is ground...uniquely. It isn't warped or uneven, but if we call the tang 'right', then although the blade is ground on the same rotational axis it is in fact rotated about 2 or 3 degrees... it took some extra work to put this one in her clothes!
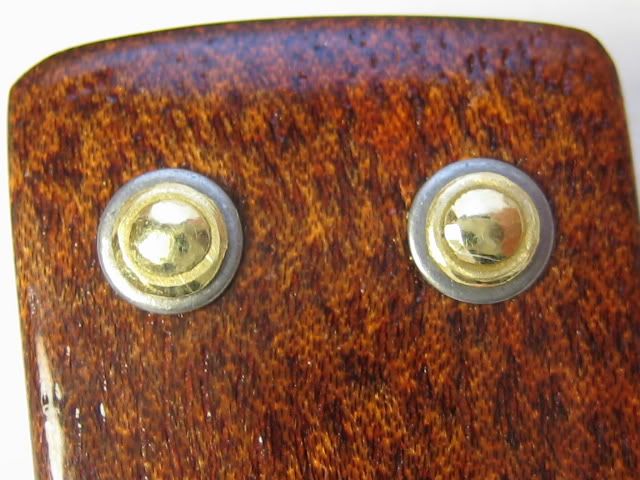
But it was worth it. Extra thin bloodwood, in a squared patter with the ends filed down to a nice taper, hand rubbed to 2000 grit and then given 3 topcoats of a hardening oil and varnish blend. Stacked stainless and brass washers.
Hope you like it, Will!
-
01-04-2010, 09:29 AM #2

She is slightly askew eh. This is where flexible scale materials are a blessing.
Well done The white gleam of swords, not the black ink of books, clears doubts and uncertainties and bleak outlooks.
-
The Following User Says Thank You to onimaru55 For This Useful Post:
BKratchmer (01-05-2010)
-
01-04-2010, 01:07 PM #3At this point in time...


- Join Date
- Jun 2007
- Location
- North Idaho Redoubt
- Posts
- 27,037
- Blog Entries
- 1
Thanked: 13249
Nicely done!!!
And of course naturally the one with the slight tweak to the blade you chose a double pin wedge which allows for no "adjustment"... Yeah I bet the was some fun, getting her to sit right... Restoring is fun, restoring is fun, restoring is fun, just keep repeating that
Good Job through...Wow that Pin shot is fantastic...
Hint: (when faced with a slightly hinky blade that needs just a small push to get right, redrill your holes at 5/64 this gives just a tiny bit of adjustment to the scales)
ps: Ben this won't work well with double pin wedges
-
The Following User Says Thank You to gssixgun For This Useful Post:
BKratchmer (01-05-2010)
-
01-04-2010, 01:30 PM #4
-
The Following User Says Thank You to Undream For This Useful Post:
BKratchmer (01-05-2010)
-
01-04-2010, 05:56 PM #5

Well done Benjamin, I am very pleased with the final product. I can see you put a ton of effort in this razor to meet your standards and I thank you for that. The scales are absolutely stunning.
Thank you
Will
-
01-05-2010, 11:21 PM #6

Glen + Brad:
Thanks for the tip! I was really flummoxed about how to fix the problem (I wound up adding a couple extra bearings to the pivot) and have some 'give' in the pins would definitely make it more adjustable. Would another option be using a more pronounced wedge to bow the scales more?
Either way, I'll need to pay more attention to the razor when I'm making the scales....I was really ticked at myself for somehow missing the problem when I did my test-fit.
Will:
I'm glad you like it! I think you'll really be pleased to see it in person- the bloodwood just glows. Shimmers as you move it.
-
01-06-2010, 11:55 PM #7

Yeah, you could try a more pronounced wedge, or, you could make a wedge that is flat on one side (perpendicular to the drill hole) and all of the taper actually occurs on the other side. This will force most of the bow to occur on one side and could counteract a mis-ground/off center blade. If you do this It isn't very noticable on an end product. There are complications that arise when you do this though.
Other options -- regrind the tang on one side to correct the issue (a lot of work..), or, if you're not too worried if you destroy the razor, even attempt to bend the tang / razor to true. I recommend a vice for that if it came to it, and I probably wouldn't attempt anything so insane on a full hollow blade
I assume this is what it looked like when you held up the blade and looked down the tang?
Last edited by Undream; 01-07-2010 at 12:03 AM.
-
01-07-2010, 12:10 AM #8I used Nakayamas for my house


- Join Date
- Aug 2009
- Location
- Des Moines
- Posts
- 8,664
- Blog Entries
- 1
Thanked: 2591
-
01-07-2010, 12:29 AM #9
-
01-07-2010, 12:57 AM #10At this point in time...


- Join Date
- Jun 2007
- Location
- North Idaho Redoubt
- Posts
- 27,037
- Blog Entries
- 1
Thanked: 13249 For anyone reading along
In the Workshop sticky there is a thread about tweaking the Scales...
and there is the one about tweaking the tang using three rods/nails in a vice... I just used the vice technique last night on a hollow grind but be freaking careful go slow and steady.... The trick is in the thickness of the tang most hollow grinds have a thinner tang then the old wedges so they tweak easier... Nothing works every time though, and Spazola/Charlie did a great diagram about tweaking the scales AFTER they are built...
My suggestion is to physically do what Brad just drew, BEFORE you start the scales for a razor... I have a straight edge that I check each razor with now after I had so much extra work on those Chinese DA's....


 LinkBack URL
 About LinkBacks


 Reply With Quote
