Results 1 to 10 of 10
Thread: Custom Spike point: Part II
-
01-05-2010, 05:15 AM #1
Custom Spike point: Part II
Hi guys, I wanted to update you on my custom razor projects (here is the previous thread if you are joining now -- custom part 1). Today I heat treated my blades and it worked!!! I heat treated my three blades in the coal forge I built this week out of a brake drum from a big truck.
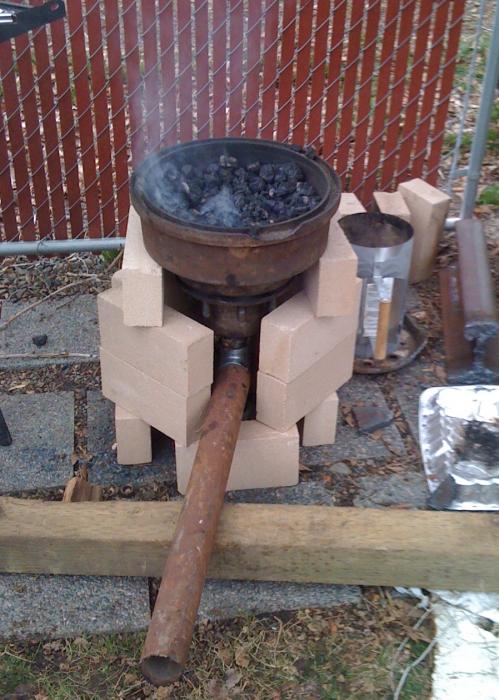
Here is a pic of my forge... nothing fancy, I used a shop vac for my blower and it worked very well. (here the fire is actually out, I was so excited while heating the razors that I forgot to get out my camera).
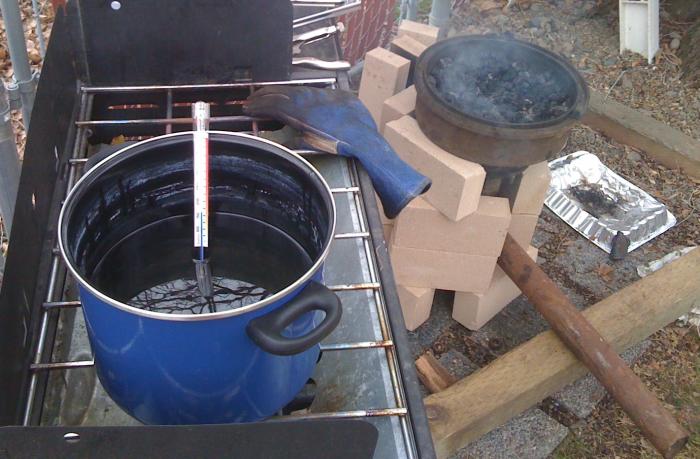
After heating up the steel to critical temp (checking both via steel color and magnetic tests) I immediately quenched the razors in peanut oil heated to about 150 F. Here is a pic of my crude set up.
After letting the blades cool to the touch in the oil, I tested the hardness with a fresh file. The file just slid right off of the steel with nary a scratch! WoooHooo! Now, I may have gotten lucky today with my heat treats, but it worked three times in a row, so I am pretty happy.
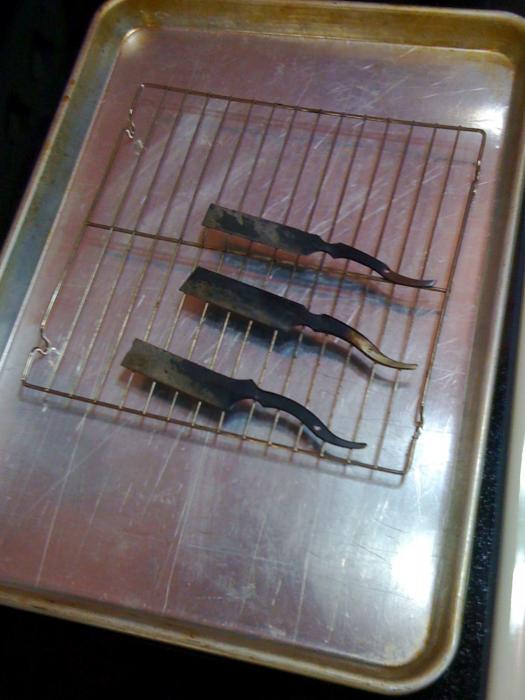
Next, my razors went onto a cooling rack on top of a baking sheet (in order to raise them up off of the sheet) and into a 400 degree oven for 2 hours in order to temper the steel.
After the tempering, I summoned my courage and headed back to the grinder to finish the grinding... (I really was nervous, remember I had never hollow ground before and I really didn't want to ruin everything). I slowly finished grinding the razor, using a fresh belt and constantly cooling the blade in a cup of ice water. When I realized that I was actually done, and the blade hadn't been ruined by grinder heat, I was so excited that I couldn't help but put a test bevel on the blade. Here is what I have now:
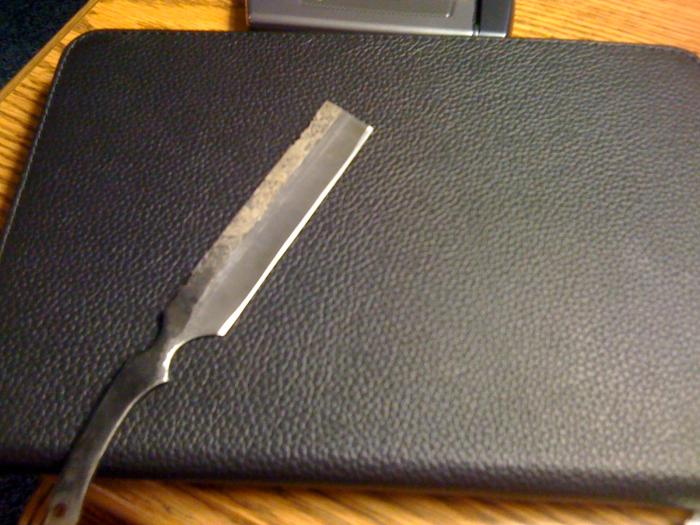
As you can see, there are some uneven spots from my poor grinding, but all in all I am a happy camper. This edge is popping hairs off my arm at 1k... I can't wait to get this finished up and give it a test shave.
Today I only had time to get to the spike, but I'll be doing the final grinds to the other two this week, so wish me Luck!
All comments are welcome, thanks for looking
DaveLast edited by Del1r1um; 01-05-2010 at 05:21 AM.
-
The Following User Says Thank You to Del1r1um For This Useful Post:
FTG (01-12-2010)
-
01-05-2010, 05:36 AM #2
Congrats! Very awesome. I know just enough about steel work to get in trouble. *grin*
I'm glad that your rig is working for you. The more bladesmiths the better.
-
The Following User Says Thank You to shutterbug For This Useful Post:
Del1r1um (01-05-2010)
-
01-05-2010, 11:39 AM #3
That is AWESOME!
Congrats on your success! As Shutterbug says, the more bladesmiths we have out there, the better..!
I love the shape of your designs as well, they are a great mix of old school and new school styling..!
Cant wait to see the finished result!
-
The Following User Says Thank You to Stubear For This Useful Post:
Del1r1um (01-05-2010)
-
01-05-2010, 01:08 PM #4
I agree 100% with the first 2 comments...Great job Dave!. I like your forge, it's way snazzier than mine. If it works, it works.
When I hollow grind I put the grinder on the slowest speed, use a piece of sponge (cut from a sponge sweat band) soaked in ice water, between the blade and my thumbs. It makes a good heat sink. Also if it won't hurt your belt grinder you can use a spray bottle of water to wet the belt (if you use a wet/dry belt). I get the best results from a 150 grit ceramic belt.
Take your time. My Motto is "It takes 2 days to make a razor, and 2 seconds to ruin one".
Keep up the good work,
Bob
-
-
01-05-2010, 02:47 PM #5
That's pretty kewl...keep us posted...
-
The Following User Says Thank You to 1971Wedge For This Useful Post:
Del1r1um (01-05-2010)
-
01-05-2010, 03:05 PM #6
Thats what I call yankee ingenuity.
That set up is sweet !
Nice blades to boot !
Are you sure you aren't from New England? lol
-
The Following User Says Thank You to Whiskers For This Useful Post:
Del1r1um (01-05-2010)
-
01-06-2010, 12:00 AM #7
Awesome forge & I like yer "rail" anvil.
Progressing nicely eh.
Look forward to tha next episode.The white gleam of swords, not the black ink of books, clears doubts and uncertainties and bleak outlooks.
-
The Following User Says Thank You to onimaru55 For This Useful Post:
Del1r1um (01-16-2010)
-
01-16-2010, 06:14 AM #8
Ha ha, that rail is the scrap from the anvil I made OZ... I went up to some railroad guys and asked if they had any pieces and they gave me a 4 foot chunk. The anvil I made is 30lbs (not shabby for a little rail anvil)
FWIW guys I ran my spike project here across the hones a few times and got a shave about two days ago... not perfect, but al in all not bad--long story short, It worked! I will probably consider cleaning up the grind a bit (will help with honing to be sure) and spend a bit more time at the hones (it's pretty hard steel and goes kinda slow) in order to bring the edge to where it needs to be
-
01-16-2010, 10:45 AM #9
- Join Date
- Sep 2008
- Posts
- 74
Thanked: 6I cannot imagine how satisfying that must feel...nice work.
-
01-16-2010, 10:59 AM #10
Looks GREAT! Very creative ways to achieve heat threating. I like it!
“If you always do what you always did, you will always get what you always got.” (A. Einstein)