Results 1 to 10 of 14
 LinkBack URL
 About LinkBacks
-
08-04-2010, 02:02 PM #1Senior Member

- Join Date
- Apr 2010
- Posts
- 142
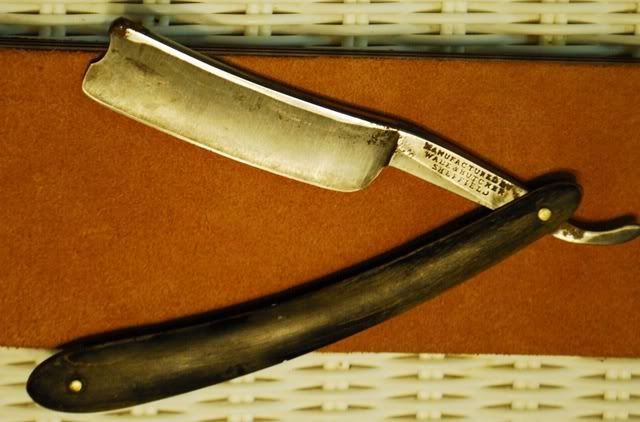
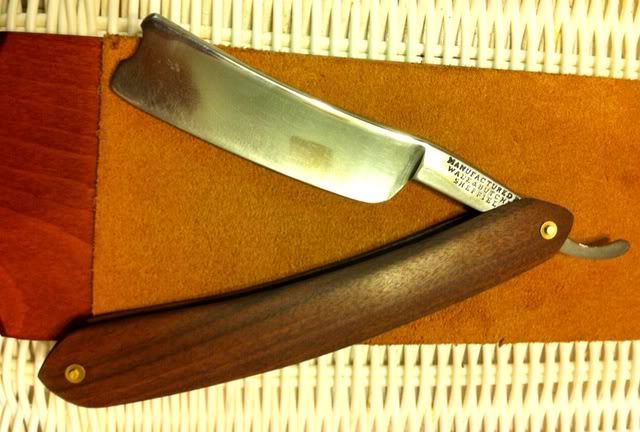
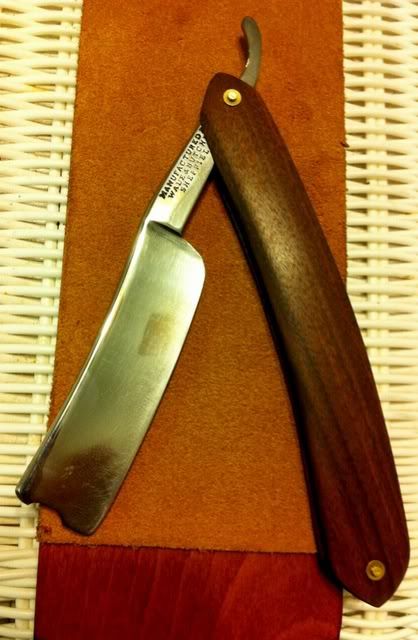
Thanked: 12 Finished 1st restoration - W&B with customer brazilian rosewood scales *Pic heavy*
Ok guys, after 2 weeks of working on this, its finally finished. I have already learned so much and cant wait to finish more.

-
The Following User Says Thank You to eculuke For This Useful Post:
Maximilian (08-04-2010)
-
08-04-2010, 02:03 PM #2Senior Member
- Join Date
- Apr 2010
- Posts
- 142
Thanked: 12
-
08-04-2010, 02:04 PM #3
Good job!
That blade has cleaned up really nicely!
The most important question is of course, how does she shave?
-
08-04-2010, 02:08 PM #4I shave with a spoon on a stick.


- Join Date
- Jan 2009
- Location
- Stay away stalker!
- Posts
- 4,578
- Blog Entries
- 1
Thanked: 1262
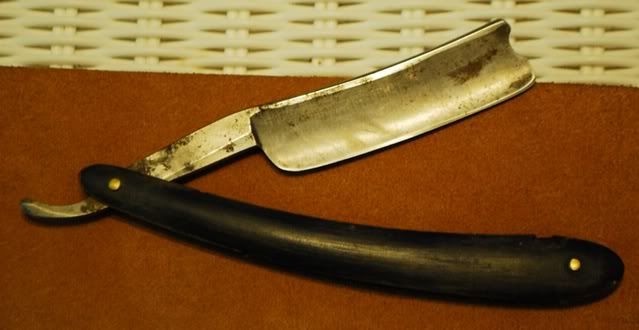
What did you do with the original scales?
-
08-04-2010, 02:10 PM #5Senior Member
- Join Date
- Apr 2010
- Posts
- 142
Thanked: 12
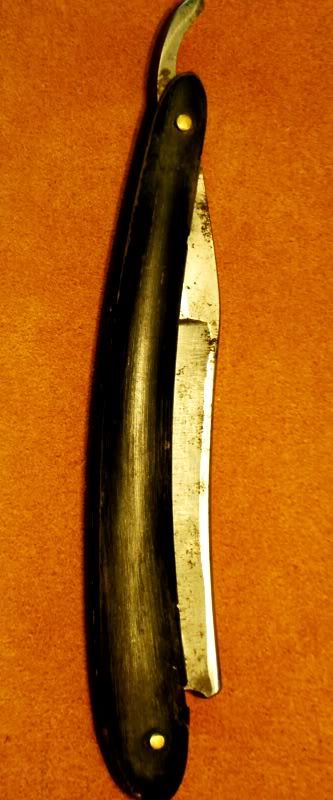
original scales had cracks and worm holes...couldn't save them......
-
08-04-2010, 02:13 PM #6I shave with a spoon on a stick.
- Join Date
- Jan 2009
- Location
- Stay away stalker!
- Posts
- 4,578
- Blog Entries
- 1
Thanked: 1262
boo

They didn't look too bad int he picture, only reason i asked.
Wipe on poly for the finish?
 Originally Posted by eculuke

-
08-04-2010, 02:15 PM #7The Shell Whisperer


- Join Date
- May 2008
- Location
- Sin City
- Posts
- 5,597
Thanked: 3384
That looks amazing. Could you please elaborate exactly what you did? I presume you hand sanded? What grits did you use? How long? How did you did the final polish? Wood treatment/finish? It would sure help others to get an idea how to proceed. You should be proud. Job well done for you first.
And most important. Did you have fun while restoring?
əˌfisyəˈnädō | pərˈfekSH(ə)nəst | eS'prəSSo | düvəl ləvər
-
08-04-2010, 02:31 PM #8Senior Member
- Join Date
- Apr 2010
- Posts
- 142
Thanked: 12
Originally Posted by Maximilian
Absolutely.....I did ALOT of research on this board and watched the soup to nuts video on restores. For the blade I did all hand sanding. I started with 120 wet/dry and made a very slow progression. 120-180-220-320-400-600-800-1000-1500, and finished it up with several hand buffs of MAAS polish. The blade was in pretty good shape so it wasn't like a rust bucket. After evaluation, I decided to rescale. Maybe the scales could have been salvaged but I decided to rescale as I was very excited to work with some wood. I used a drill press to remove the pins. Once I had the scales separated,I traced one scale and the blade on a sheet of paper. Once I had my basic shape on the scale and size I was able to redo the shape a little to my liking. I purchased the wood from rockler in 1/8" thick. I cut the scale shape on a scroll saw and did the shaping on a belt sander with 80-120 grit progression. Once I had my lines down I took to hand sanding the shape. Same progression as blade except I stopped at 800. I decided to use wipe on poly. I would apply a coat, wait 24 hours, sand, and repeat probably 10x times. I tried to pin another test razor and couldnt get it right, so I opted for microfasters. I think these are great! Once I applied my final coat of wipe on, and light sand with micromesh 1800. I hit the scales with MAAS. After that it was basic assembly. Again I learned ALOT in the process and picked up quite a few power tools for the next go round. (drill press, belt sander, bench grinder, scroll saw). I will give you a sneak peak at the next razor which has been done in birds eye
-
The Following User Says Thank You to eculuke For This Useful Post:
Maximilian (08-04-2010)
-
08-04-2010, 02:33 PM #9Senior Member
- Join Date
- Apr 2010
- Posts
- 142
Thanked: 12
ohhh by the way...this razor isnt shave ready. I know NOTHING about honing...so I will probably be sending this off to someone. Honing is next on my list of things to learn.
-
08-04-2010, 02:35 PM #10Senior Member
- Join Date
- Apr 2010
- Posts
- 142
Thanked: 12
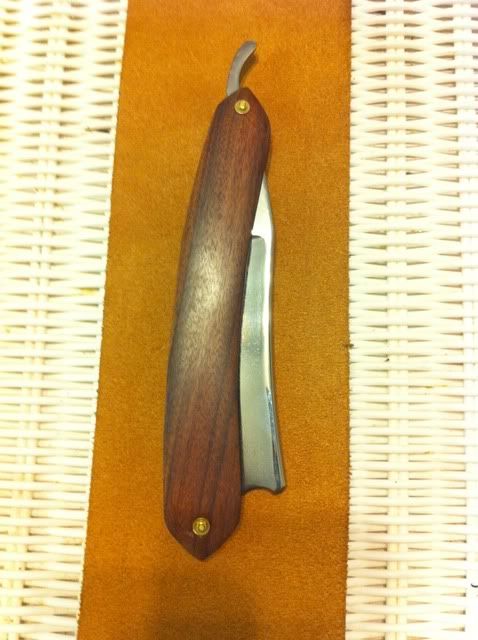
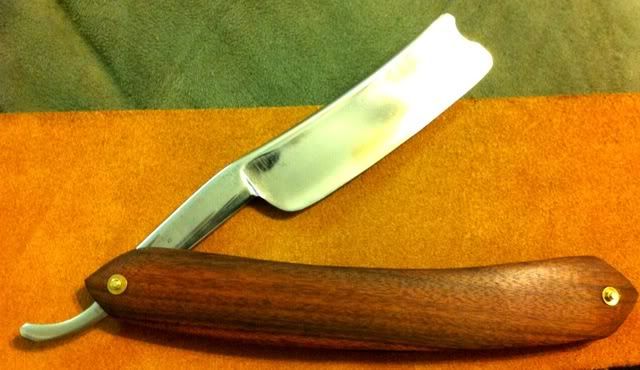
here is a peak at restore number 2....she is almost done


 Reply With Quote