
Results 1 to 10 of 28
 11Likes
Thread: A Weekend at Bob Allman's
 LinkBack URL
 About LinkBacks
-
03-10-2011, 04:34 PM #1AKA "Padlock"


- Join Date
- Apr 2010
- Location
- Auburn, Alabama
- Posts
- 816
Thanked: 646 A Weekend at Bob Allman's
Finally I have a little time to post photos of the awesome weekend I spent with Bob Allman making two razors. Warning - this thread will be photo-heavy! I apologize in advance for the poor quality of some of the photographs. Making razors is not the cleanest adventure, and I was slightly paranoid about not ruining my camera with steel dust and water.
Bob and razormeisters, you'll have to forgive my sometimes inaccurate descriptions of the process. For a novice like me, it was somewhat of a drink from a fire hose. Bob's a patient man - I know I asked him some questions 5-10 times before it partially sunk into my dense skull
A few of you gentlemen will be pleased to catch a glimpse of the razor you commissioned Bob to make for you during the initial stages of its birth.
Bob, you're an awesome teacher, and I can't wait to visit again for round two!
Enjoy gentlemen!
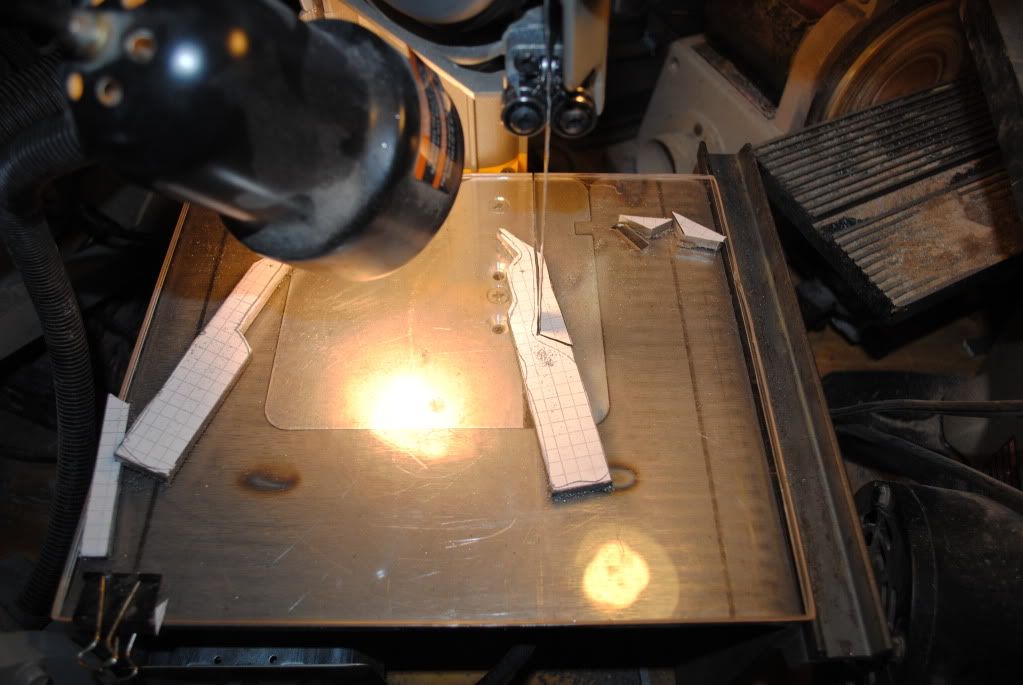
Friday night: Razor contour was drawn on graph paper, glued to a 1" x 6" x 1/4" 1095 steel blank with spray adhesive. A band saw was used to cut out the larger sections of the blank.
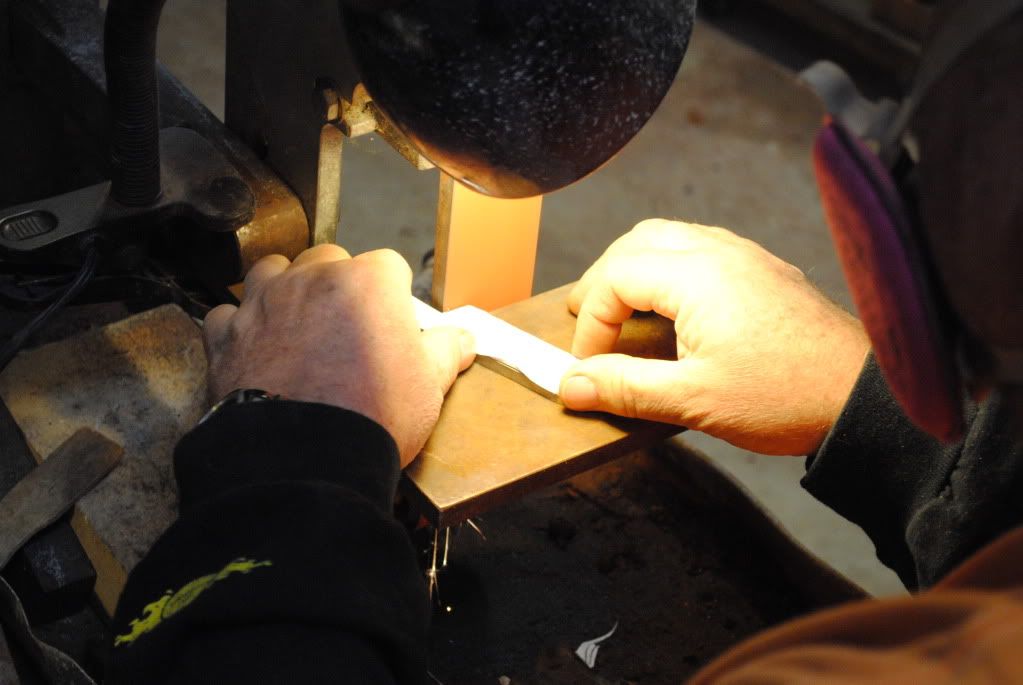
Saturday: 60 grit dry on belt grinder to further define razor contour
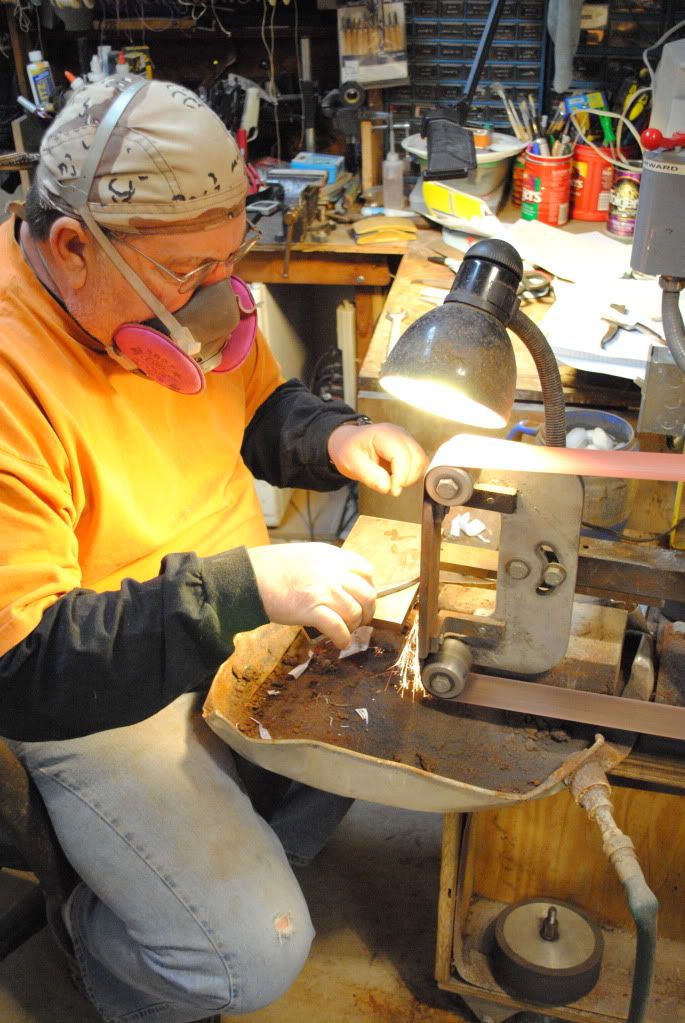
Saturday: Bob contouring the monkey tail
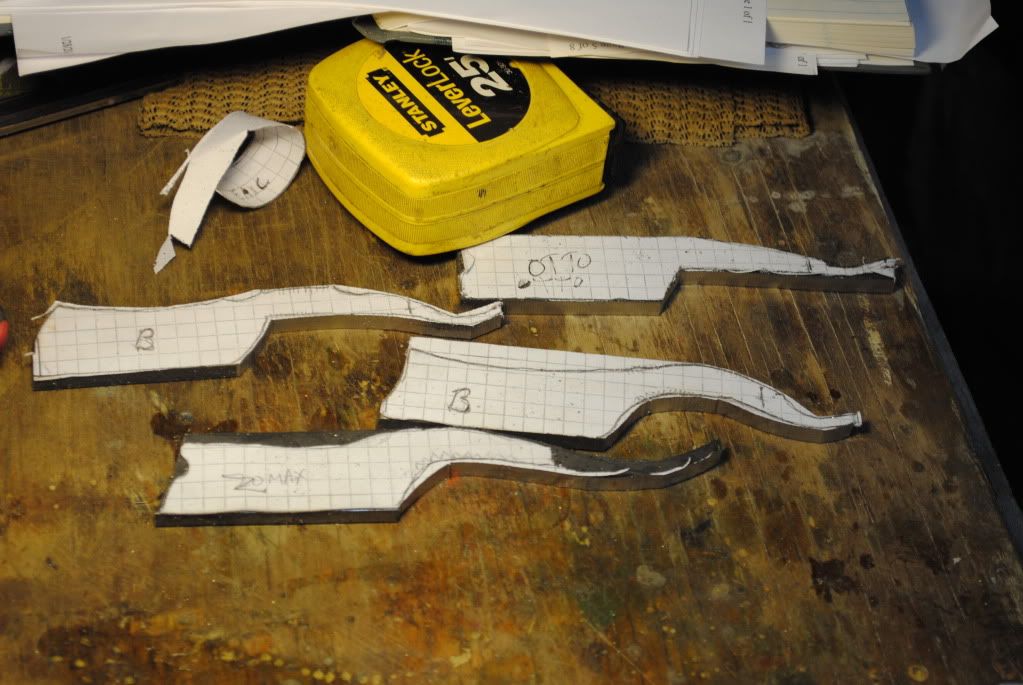
Saturday: Several razors rough contouring completed
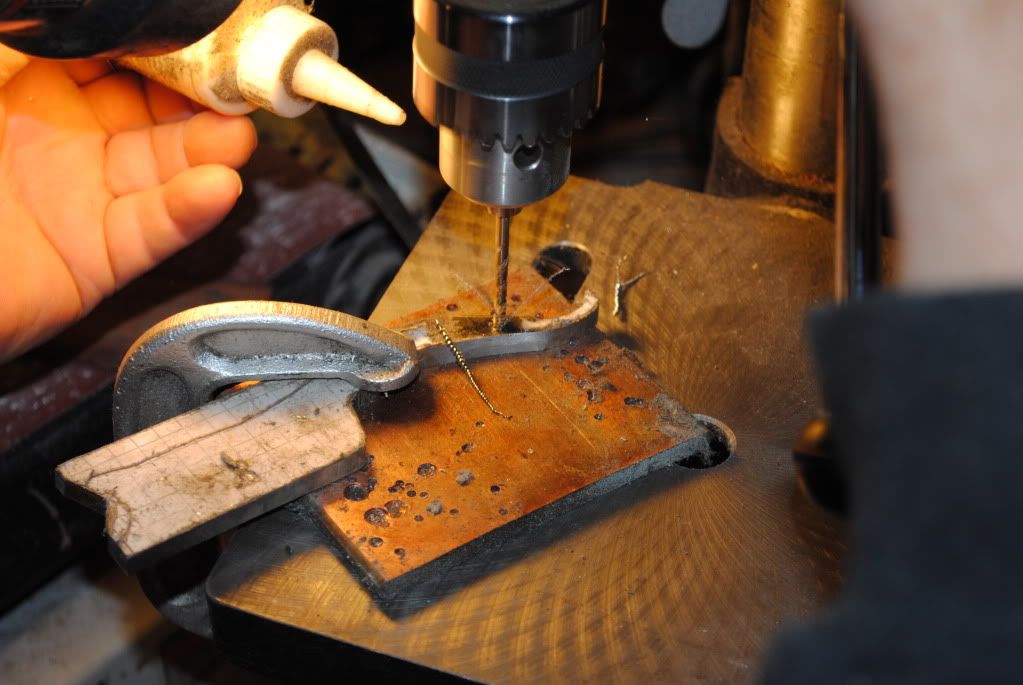
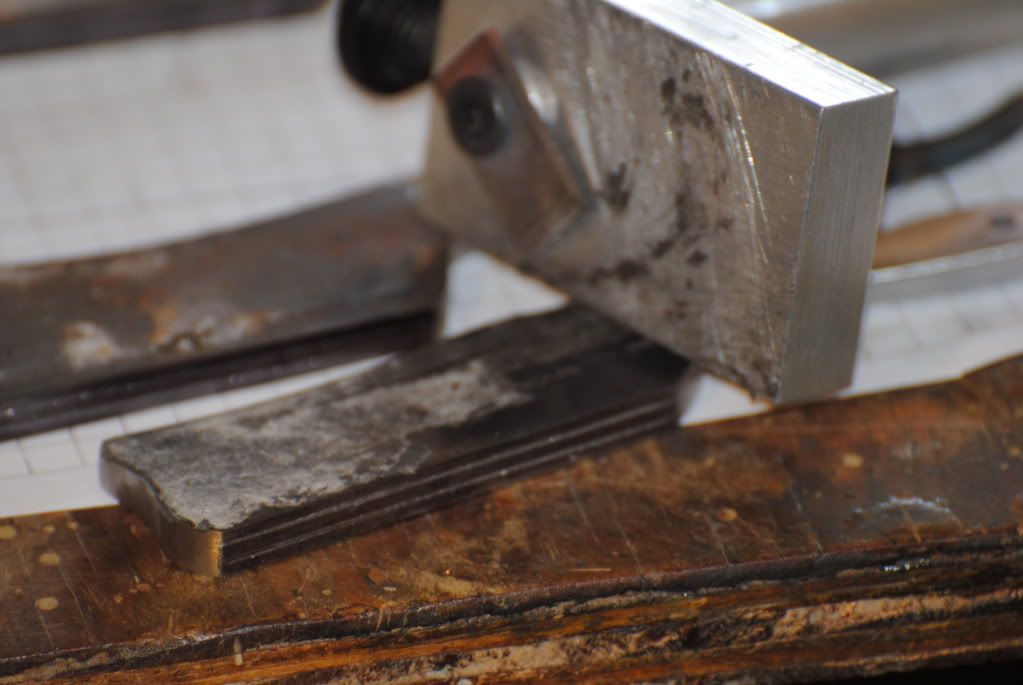
Saturday: Drilling pin hole for scales. It must be done slowly with oil otherwise the bit will heat up and fuse to the steel and the blade's toast.
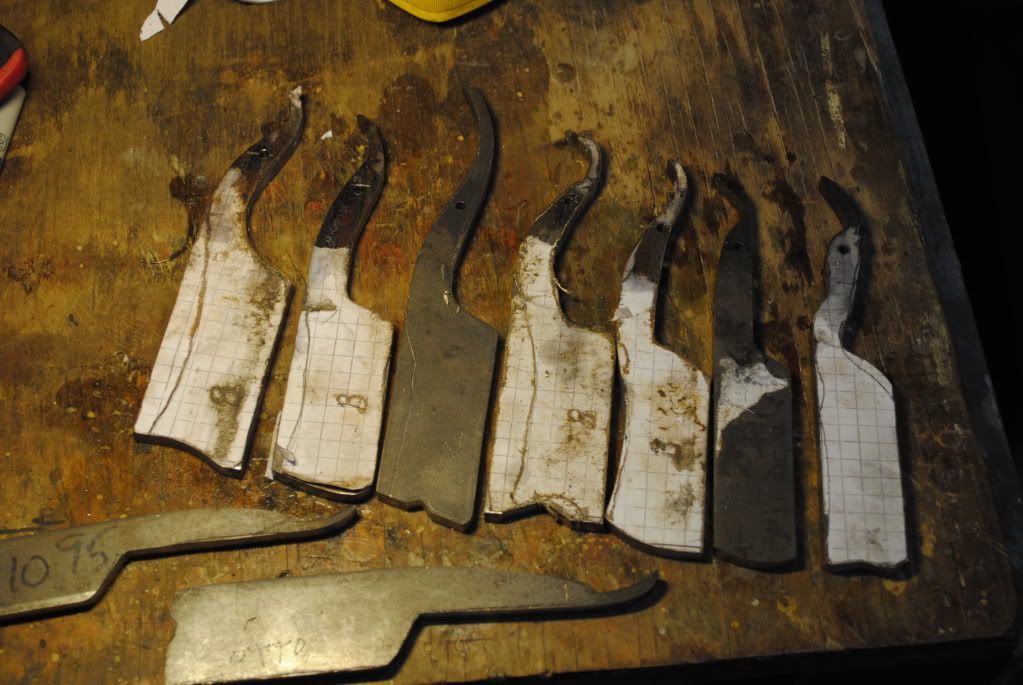
Saturday: Various stages of contouring
(to be continued)Entasis likes this.
-
The Following 5 Users Say Thank You to LinacMan For This Useful Post:
boballman (03-11-2011), Hirlau (03-18-2011), niftyshaving (05-26-2011), Otto (03-10-2011), Utopian (05-25-2011)
-
03-10-2011, 04:45 PM #2AKA "Padlock"
- Join Date
- Apr 2010
- Location
- Auburn, Alabama
- Posts
- 816
Thanked: 646 2nd set of images
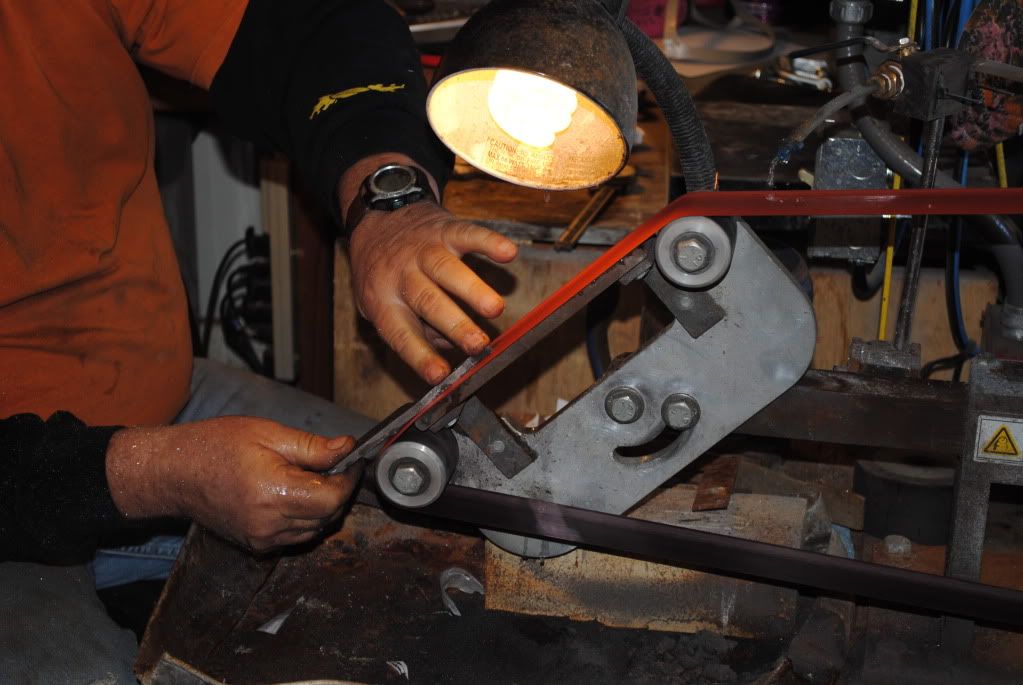
Saturday: Beveling the tang slightly to make it easier for the razor to open and close. It's harder than you'd think to keep it symmetrical. Wet grinding was done at this step.
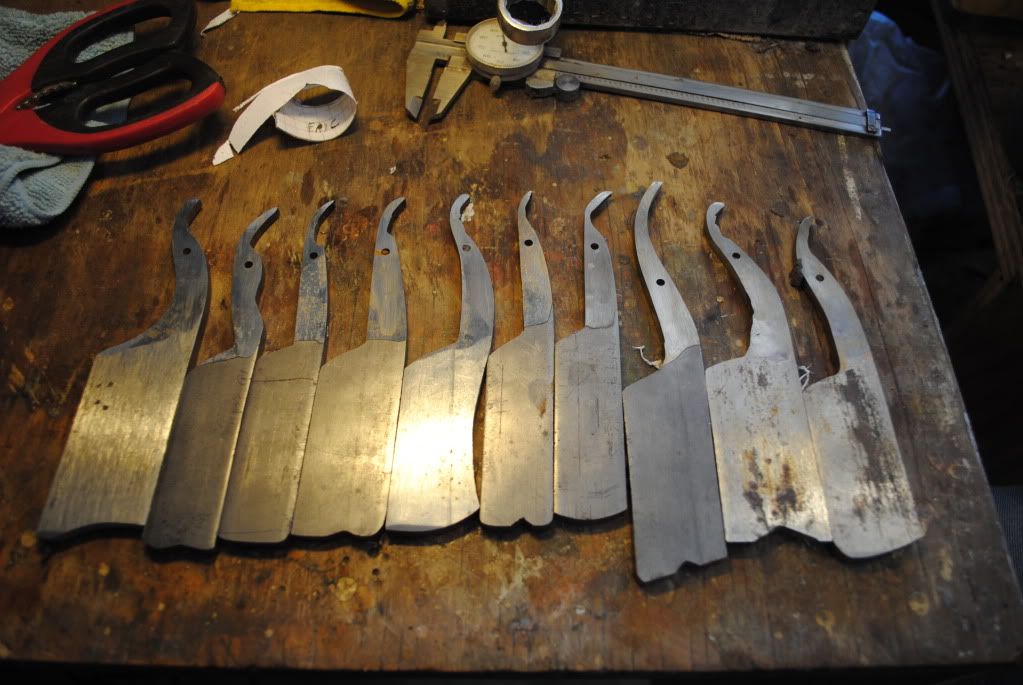
Saturday: All razors contoured and most tangs beveled.

Saturday: It's amazing how quickly rust starts forming!

Saturday: Further defining the tail
Saturday: I wanted a "peaked" spine on one of my razors. To maintain a 45 degree angle, Bob used a wooden form he'd designed to straddle his belt sander.
-
The Following 2 Users Say Thank You to LinacMan For This Useful Post:
boballman (03-11-2011), fonthunter (06-12-2011)
-
03-10-2011, 05:02 PM #3AKA "Padlock"
- Join Date
- Apr 2010
- Location
- Auburn, Alabama
- Posts
- 816
Thanked: 646 3rd set of images
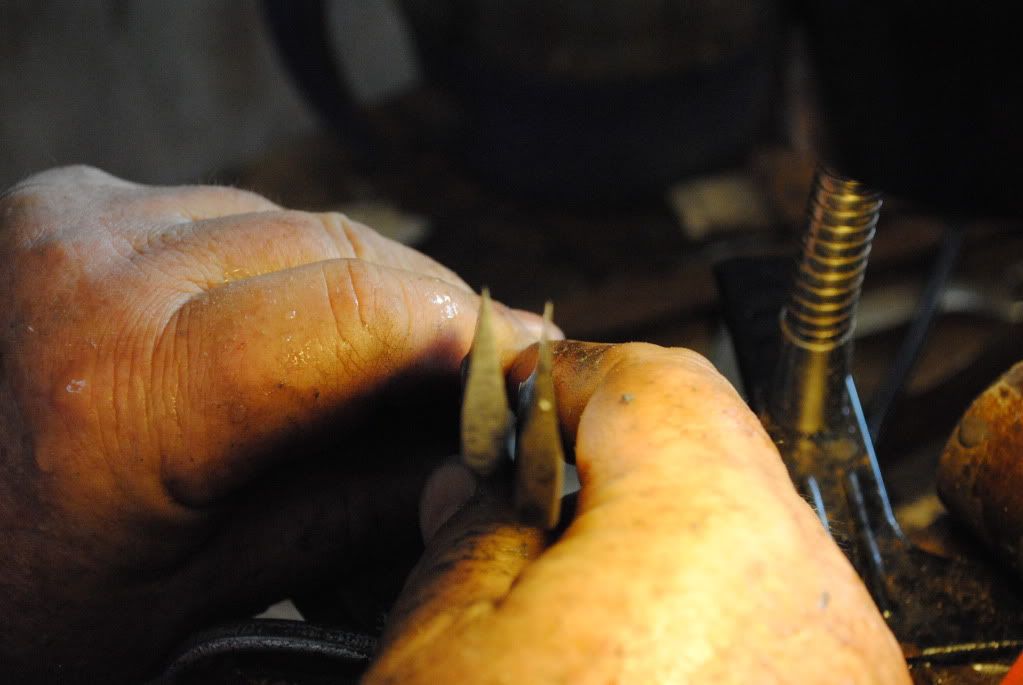
Saturday: Here I'm using a checker file to add jimps.
Saturday: Bob is grinding a gentle "swoops" into the spine of my soon-to-be green-scaled razor (see finished product pics to follow). It was fantastic that Bob let me do almost all of the work on my razors; however, there were a few times such as this step where he said "Here, let me do this part". As Bob said, "It takes about 2 days to make a razor, but it only takes about 5 nanoseconds to f*** one up".
Saturday: Scoring the razor's edge in preparation for rough grind.
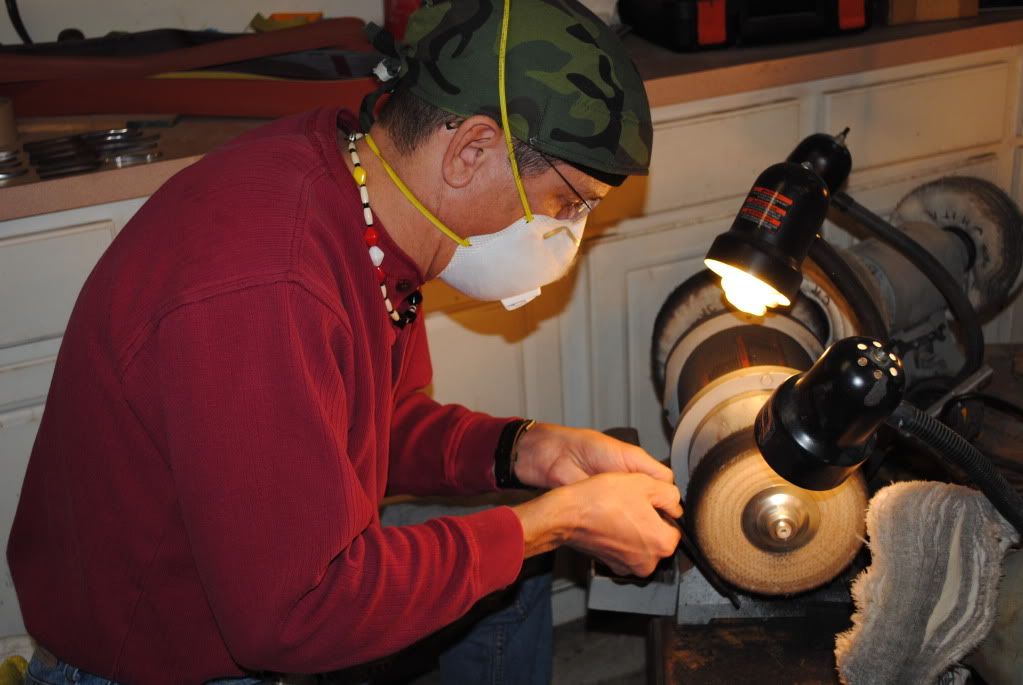
Saturday evening: Cleaning the razors up a little with a sisal buffing wheel and 220 rouge
-
The Following 3 Users Say Thank You to LinacMan For This Useful Post:
boballman (03-11-2011), fonthunter (06-12-2011), Pabster (03-10-2011)
-
03-10-2011, 05:10 PM #4The Shell Whisperer


- Join Date
- May 2008
- Location
- Sin City
- Posts
- 5,597
Thanked: 3384
Thanks for sharing all those lovely pics. Very informative for many of our members.
I feel like I'm in the same room.
əˌfisyəˈnädō | pərˈfekSH(ə)nəst | eS'prəSSo | düvəl ləvər
-
The Following User Says Thank You to Maximilian For This Useful Post:
LinacMan (03-10-2011)
-
03-10-2011, 05:13 PM #5AKA "Padlock"
- Join Date
- Apr 2010
- Location
- Auburn, Alabama
- Posts
- 816
Thanked: 646 4th set of images - "Into the Fire"
You'll notice this set of images aren't the best quality and are of different razors. Bob says the blades have to go from forge to oil in 1 second or the razor's history. It took photographing the process with multiple razors just to get these pics. Dark room, glowing steel, leaping flames, novice photographer... Hey, you get what you pay for
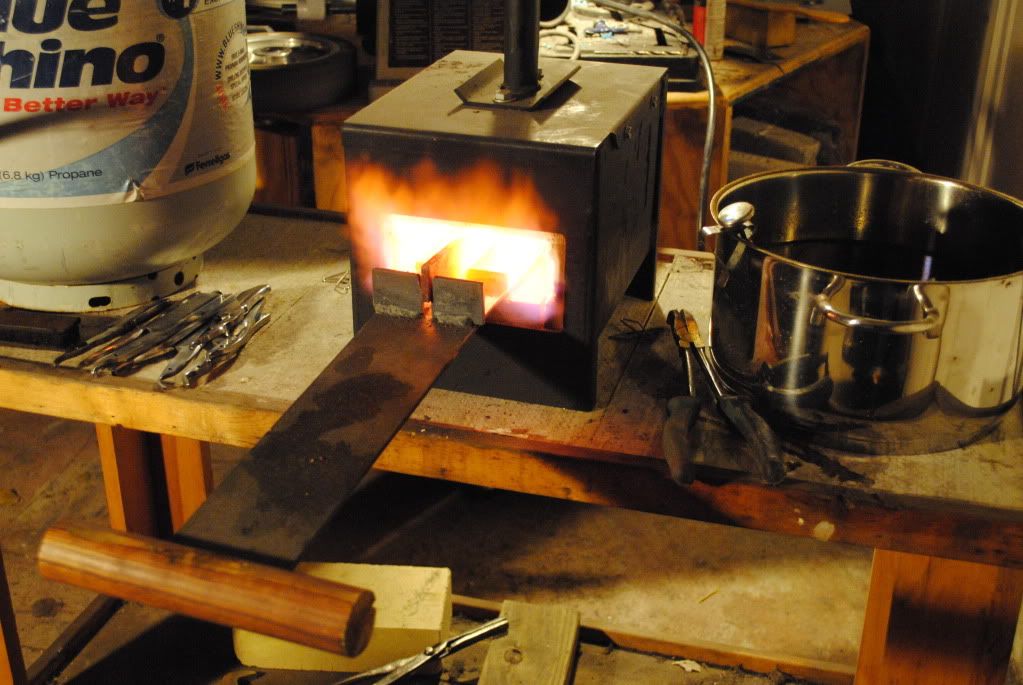
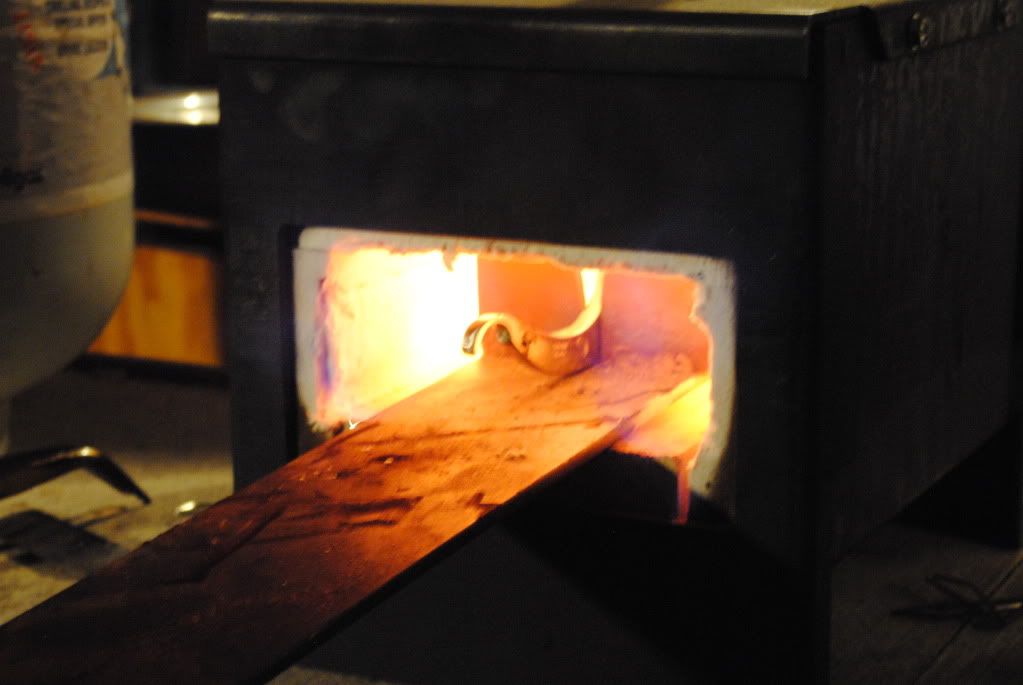
Saturday night: In the forge at some ungodly temperature (Bob?). Heat until non-ferromagnetic. The tang is excluded from this process so it is not hardened like the blade.
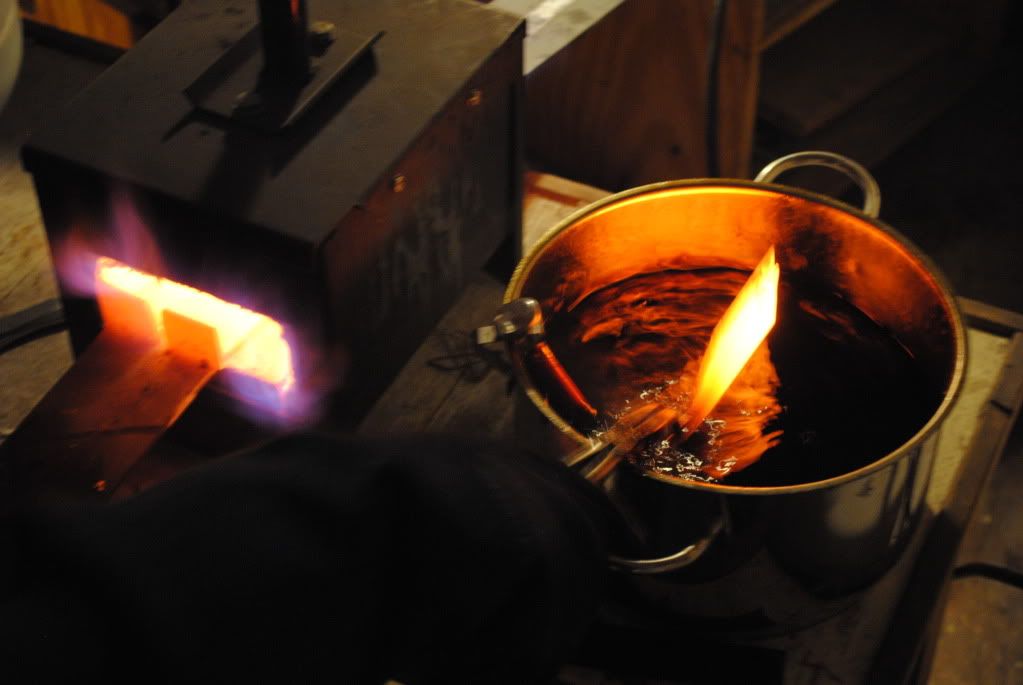
Saturday night: Nanoseconds before the quench in 150 degree oil. It's a miracle I got this picture - Bob was moving really fast!

Saturday night: The quench
-
03-10-2011, 05:24 PM #6Senior Member


- Join Date
- Feb 2010
- Location
- California
- Posts
- 4,833
Thanked: 1841
Thanks for sharing that adventure. It is always interesting to watch a master craftsman at work. I shave with one of Bob's razors and it is a distinct pleasure each and every time.
Bob
"God is a Havana smoker. I have seen his gray clouds" Gainsburg
-
The Following User Says Thank You to lz6 For This Useful Post:
LinacMan (03-10-2011)
-
03-10-2011, 05:29 PM #7AKA "Padlock"
- Join Date
- Apr 2010
- Location
- Auburn, Alabama
- Posts
- 816
Thanked: 646 5th set - Tempering and call it a night
My understanding of forging and tempering steel (anyone who knows what they're talking about, feel free to chime in at this point
):
During forging, carbon atoms move into the lattice of the steel. The quench traps the carbon atoms in the lattice if done quickly enough; however, the steel is not too happy about the change in rooming assignments gets kind of stressed out. For some reason, tempering in 100 degree oil works like one hour in a good massage parlor in Chinatown and everyone is happy.

Saturday night: Tempering in peanut oil for 1 hour @ 100 degrees

Saturday night: Out of the peanut oil
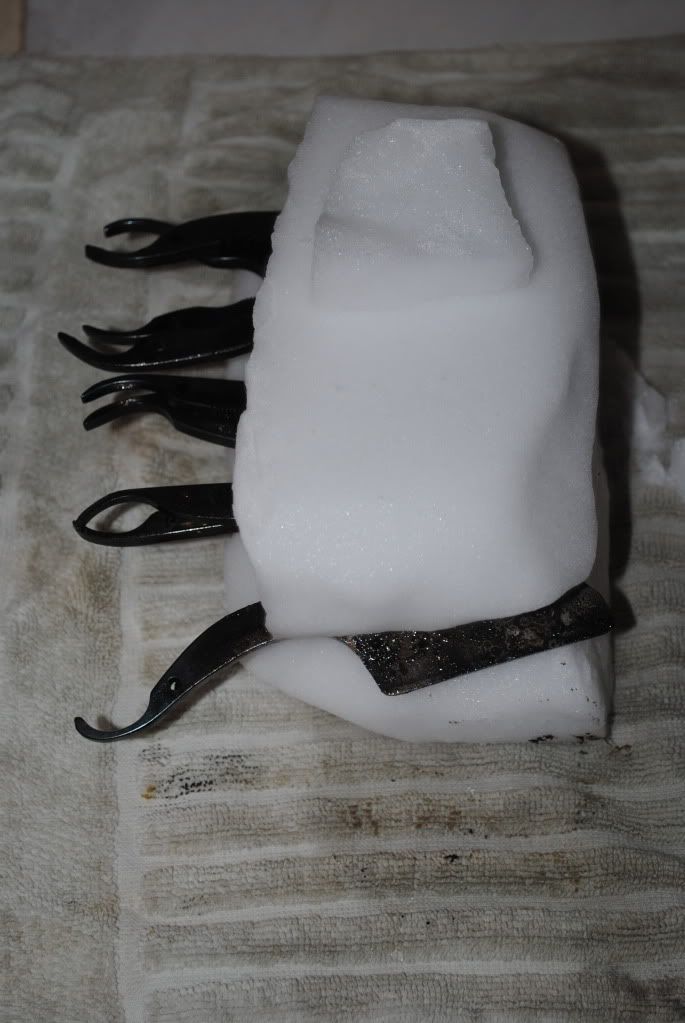
Saturday night: Covered in dry ice and in the freezer for the night. It's a good thing massage parlors don't follow this ritual
-
03-10-2011, 05:58 PM #8.

- Join Date
- Sep 2008
- Posts
- 3,757
Thanked: 3708
Interesting, thanks for sharing.

Yes, one of them is going to be mine.
"Cheap Tools Is Misplaced Economy. Always buy the best and highest grade of razors, hones and strops. Then you are prepared to do the best work."
- Napoleon LeBlanc, 1895
-
The Following User Says Thank You to Otto For This Useful Post:
LinacMan (03-10-2011)
-
03-10-2011, 06:05 PM #9AKA "Padlock"
- Join Date
- Apr 2010
- Location
- Auburn, Alabama
- Posts
- 816
Thanked: 646 6th set: Grinding the hardened steel
Before I awoke Sunday morning, Bob took the razors off of the dry ice and gave them another 1 hour soak in 100 degree peanut oil.
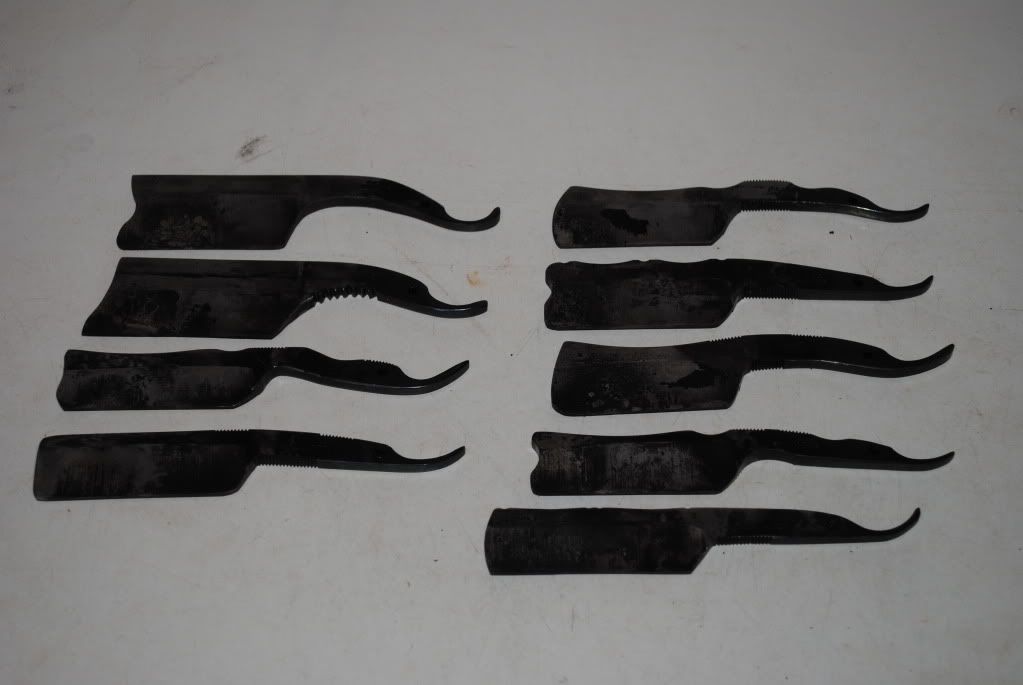
Sunday morning: All of the blades wiped down after their morning soak
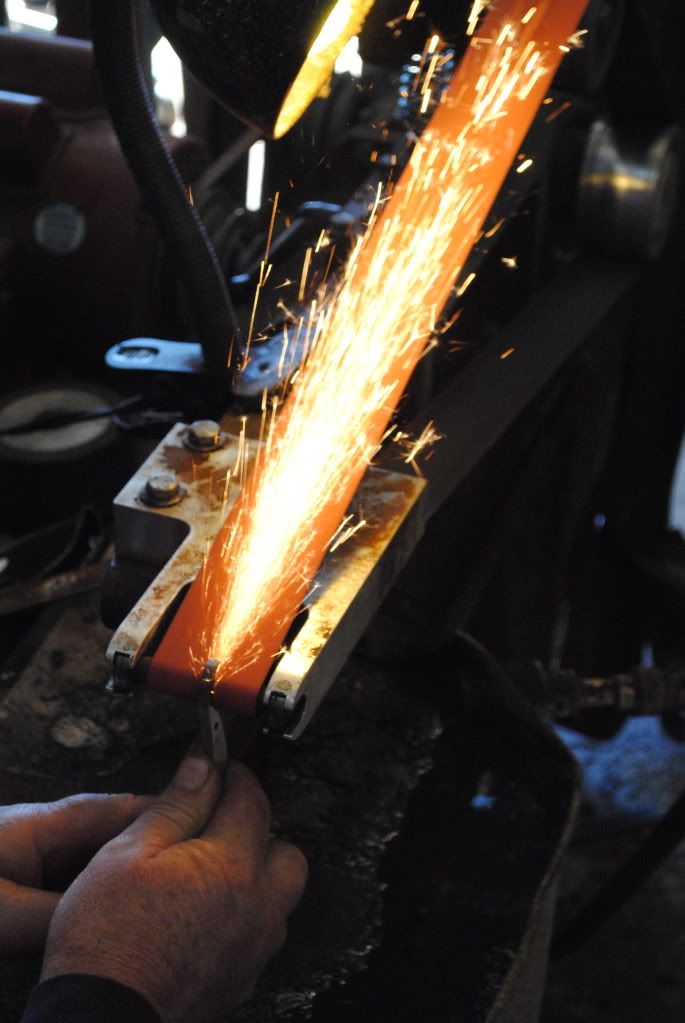
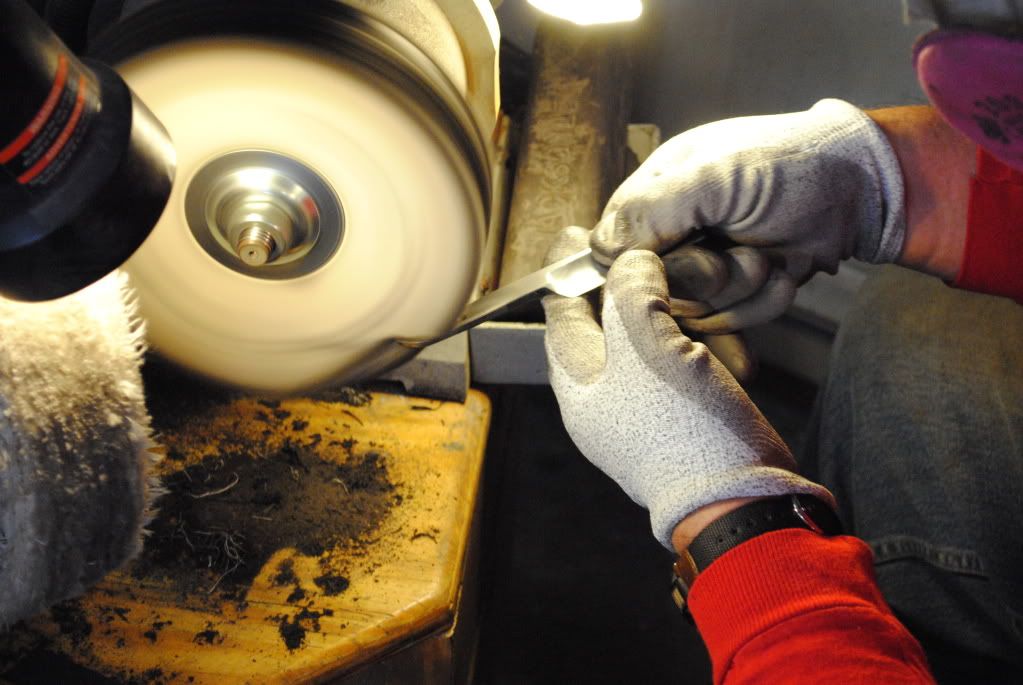
Sunday morning: Wet grinding with 150 grit on 8" wheel. Dripping water falls onto the mid-portion of the belt to keep the blade from overheating. If you're adverse to getting the right half of your body soaked with cold water down to your skivvies, you probably should skip the razor making adventure .
.
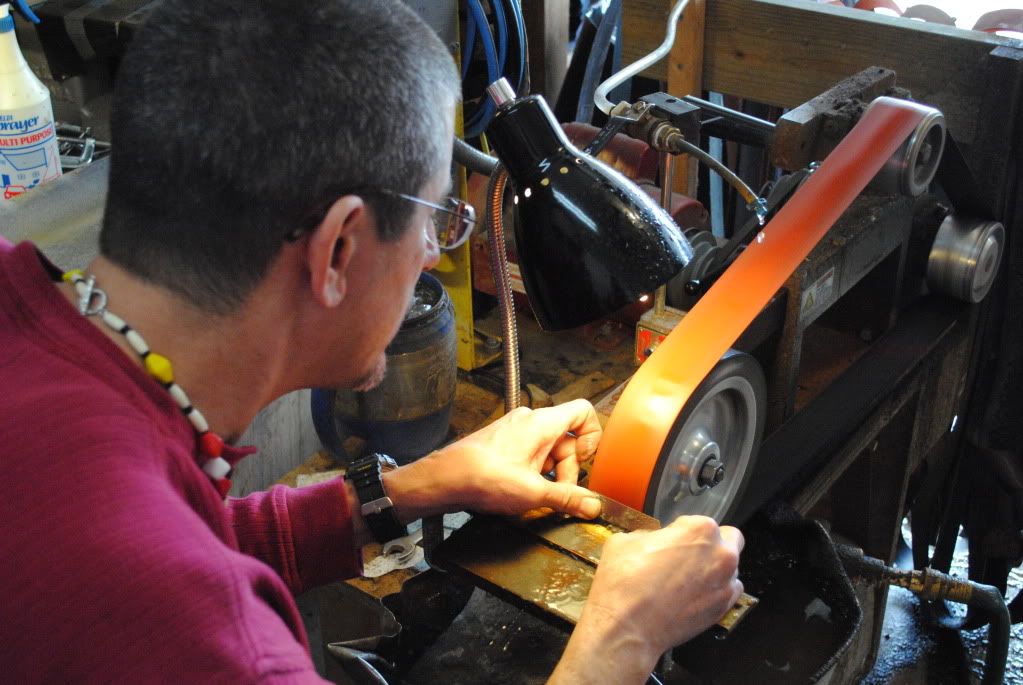
Sunday morning: You can see steel filings mixed with water on the edge blade. I didn't get a close-up picture, the smaller plate that my thumbs are resting on is a metal plate in which Bob has routed a notch out of the edge. This gives a secure groove in which the spine of the razor rests during grinding. There is little clearance between the belt and the spine of the razor. One has to be incredibly careful placing the razor in and out of the "trench" or really bad things can happen (fortunately no disasters for me).
Sunday morning: This image is of my two razors after I've done the first grind. The first grinding is done starting at the spine side of the blade. We progressed from the 8" wheel (150 grit) to 6" wheel (150 grit) to 4" wheel (180 grit) to 2" wheel (180 grit). This progression works first the grind on the spine side of the blade then toward the razor's edge.
-
03-10-2011, 06:16 PM #10AKA "Padlock"
- Join Date
- Apr 2010
- Location
- Auburn, Alabama
- Posts
- 816
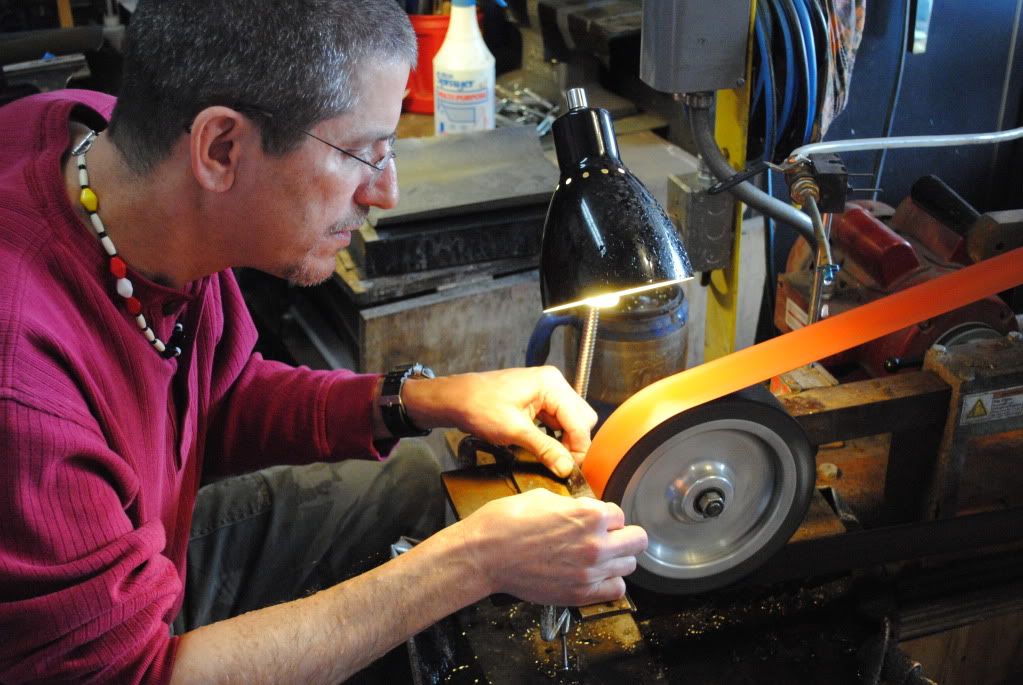
Thanked: 646 Set 7: More grinding
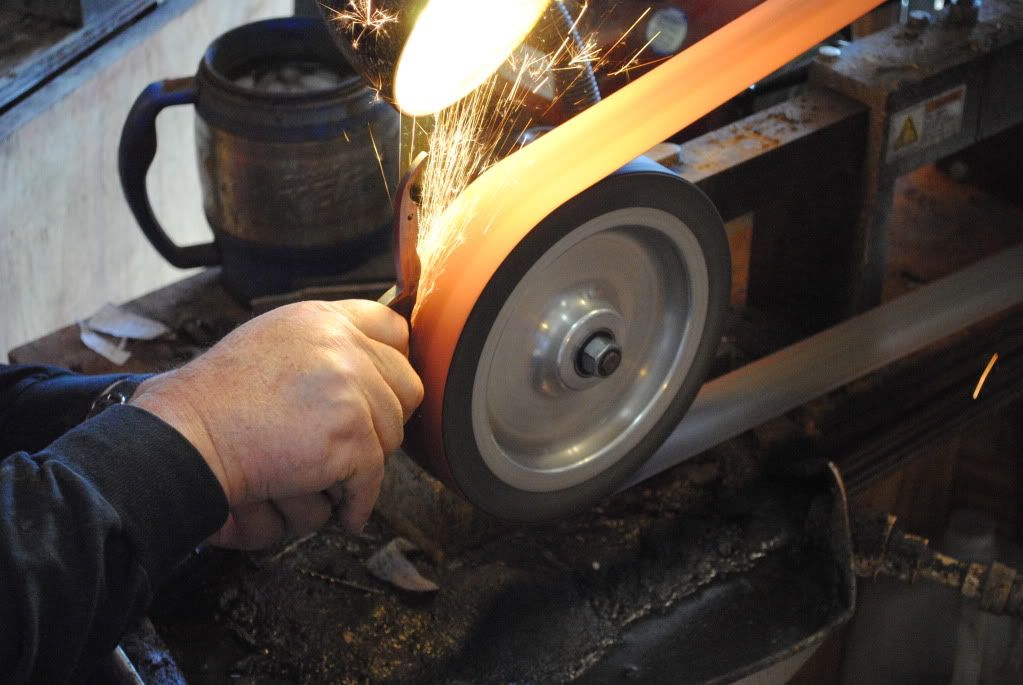
Grinding is an incredibly exciting part of razor making. You're watching your creation actually start to look like a real razor. It's also incredibly intimidating because you know you're just a breath away from ruining something into which you've invested so much time and emotion. The wheel has to be kept wet, and you have to stop frequently to dip the blade in ice water when you feel it begin to warm under the pressure of your fingers.
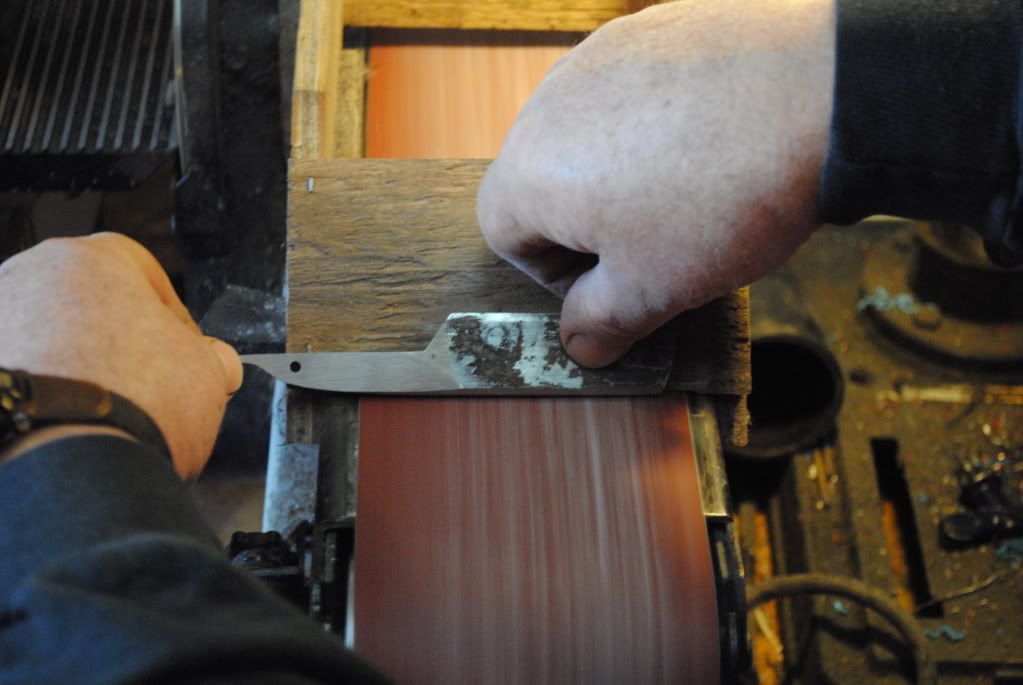
Sunday: So how do you know where the belt is going to grind without messing up the razor? Here Bob takes a fat magic marker and paints the entire edge of the blade.

Sunday morning: Next he places the razor on the grinder with the grinder turned off and hand spins the wheel.
Sunday: It's easy to see where the marker has been removed. Here Bob inspects the scratch marks to see if he has the grinder set up correctly. It's a great mystery how Bob knows exactly how to align the plate and get the right gap with different size wheels.
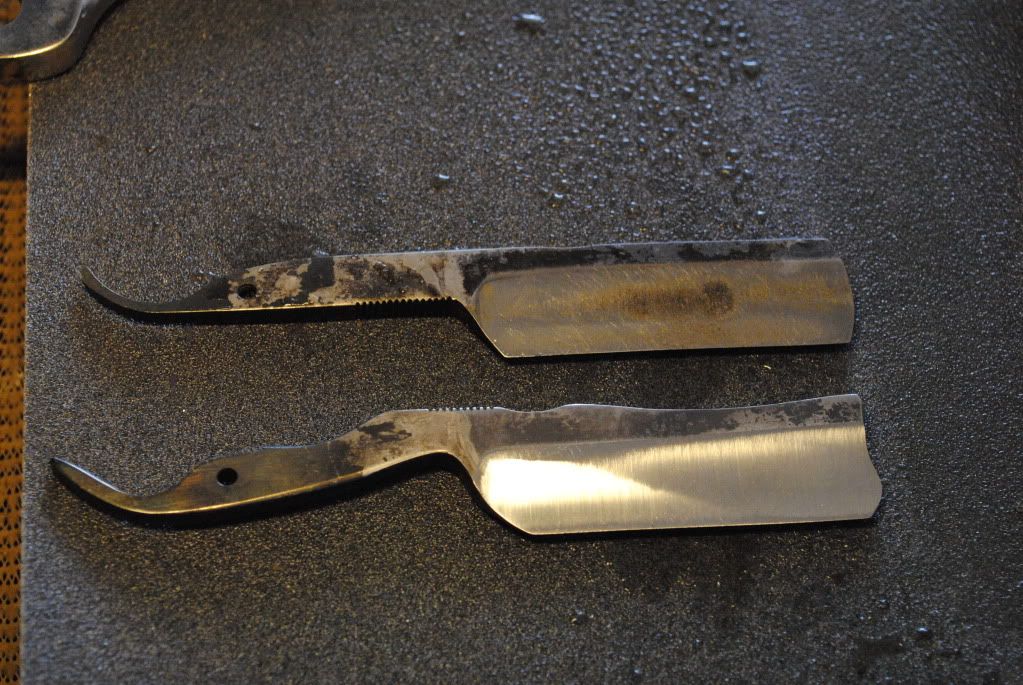
Sunday: Wow, they're actually beginning to look like a true razor!
Sunday afternoon: A quick buffing to remove some of the larger scratches from uneven grinding.


 Reply With Quote