Page 1 of 3 123 LastLast
Results 1 to 10 of 23
Like Tree20Likes

Thread: Full Custom Set - Henckels-n-Brush in Olivewood

  1. #1
    At this point in time... gssixgun's Avatar
    Join Date
    Jun 2007
    Location
    North Idaho Redoubt
    Posts
    26,960
    Thanked: 13226
    Blog Entries
    1

    Cool Full Custom Set - Henckels-n-Brush in Olivewood

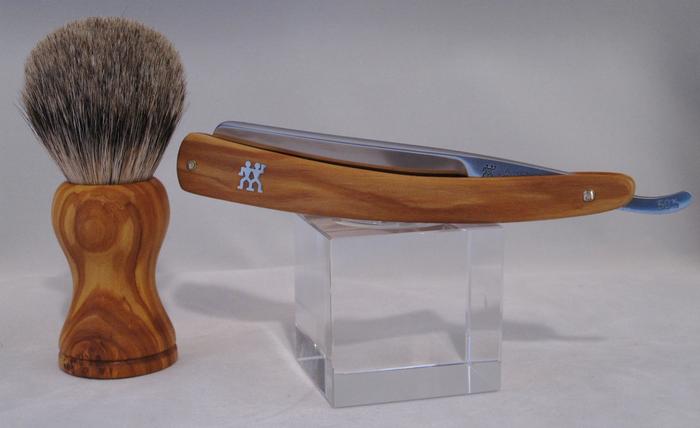
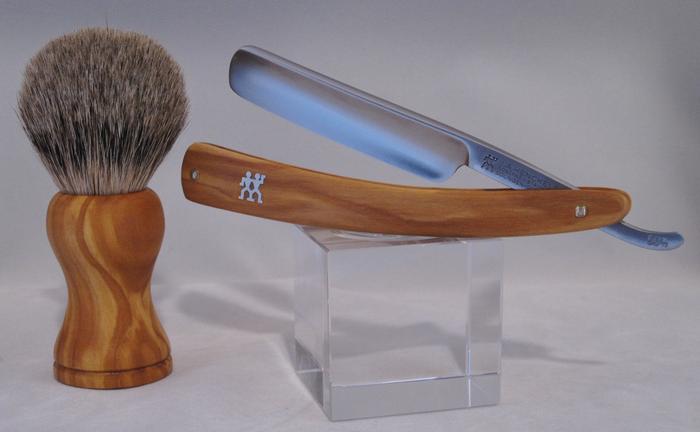
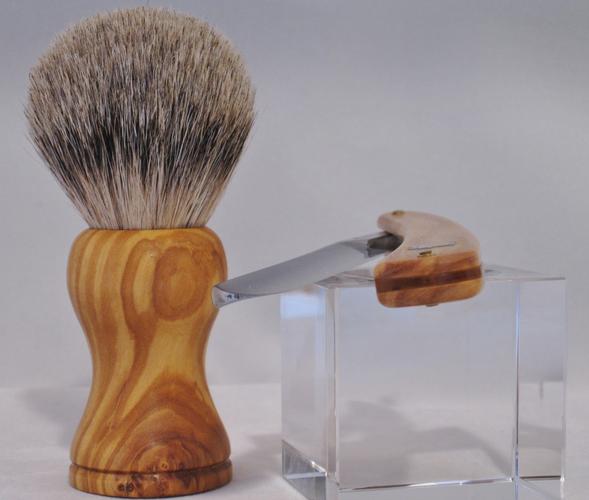
    Another collaboration with WillN on this set, Will turned the handle, while I restored the razor, a 5/8 Henckels 50½, then I finished the scales and the brush to match.. The knot is a 24 mm low loft Silvertip..
    I added the inlay transfer, and here is the finished set...

    Name:  IMG_2575.jpg
Views: 929
Size:  23.3 KB

    Name:  IMG_2576.jpg
Views: 573
Size:  24.0 KB

    Name:  IMG_2577.jpg
Views: 578
Size:  26.3 KB

    Name:  IMG_2579.jpg
Views: 591
Size:  25.6 KB


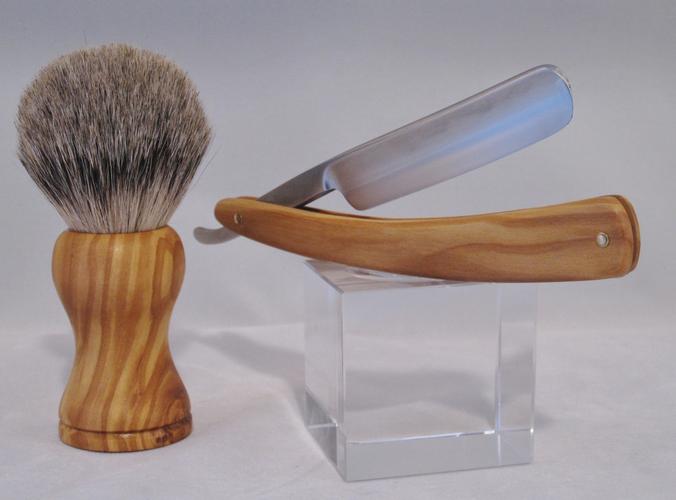
    (The fingerprints in pic #3 I must charge extra for)

  2. The Following 4 Users Say Thank You to gssixgun For This Useful Post:

    jdto (10-24-2011), SirStropalot (10-26-2011), spazola (10-25-2011), WillN (10-24-2011)

  3. #2
    Senior Member blabbermouth
    Join Date
    Jan 2011
    Location
    Roseville,Kali
    Posts
    10,432
    Thanked: 2027

    Default

    Very nice,How do you attach/Adhiese? the transfer to the scale?

  4. The Following User Says Thank You to pixelfixed For This Useful Post:

    gssixgun (10-24-2011)

  5. #3
    I'm on The Straight Road jdto's Avatar
    Join Date
    Sep 2011
    Location
    Toronto
    Posts
    1,371
    Thanked: 183

    Default

    I hate you.

    In a good way.

    That is some phenomenal work.

  6. The Following 2 Users Say Thank You to jdto For This Useful Post:

    gssixgun (10-24-2011), WillN (10-26-2011)

  7. #4
    Poor Fit
    Join Date
    May 2010
    Posts
    4,562
    Thanked: 1263

    Default

    A beautiful set there! Nice work Glen!

  8. The Following 2 Users Say Thank You to Catrentshaving For This Useful Post:

    gssixgun (10-24-2011), WillN (10-26-2011)

  9. #5
    Senior Member
    Join Date
    Mar 2011
    Location
    Corcoran, Minnesota
    Posts
    665
    Thanked: 170

    Default

    Love Olivewood. Did 3 sets of scales in it. You have inspired me to turn a brush to match!

  10. The Following 2 Users Say Thank You to skipnord For This Useful Post:

    gssixgun (10-24-2011), WillN (10-24-2011)

  11. #6
    At this point in time... gssixgun's Avatar
    Join Date
    Jun 2007
    Location
    North Idaho Redoubt
    Posts
    26,960
    Thanked: 13226
    Blog Entries
    1

    Default

    Quote Originally Posted by pixelfixed View Post
    Very nice,How do you attach/Adhiese? the transfer to the scale?
    I use two different techniques depending on the finish/material that I am transfering to...
    In most cases this one included I use Epoxy, if by chance the finish is CA (super glue) then I use that...

  12. #7
    Senior Member blabbermouth
    Join Date
    Jan 2011
    Location
    Roseville,Kali
    Posts
    10,432
    Thanked: 2027

    Default

    Thank you.Do you somewhat feather the edges of the the transfer?,or are they usually thin enough to where it do's not matter.

  13. #8
    At this point in time... gssixgun's Avatar
    Join Date
    Jun 2007
    Location
    North Idaho Redoubt
    Posts
    26,960
    Thanked: 13226
    Blog Entries
    1

    Default

    Quote Originally Posted by pixelfixed View Post
    Thank you.Do you somewhat feather the edges of the the transfer?,or are they usually thin enough to where it do's not matter.
    The cleanest way to do them is to create a "Frame" out of packing tape then the glue stays where you want, after the inlay is carefully placed another piece of tape over the top applies the pressure and allows you to flatten out the epoxy and the inlay creating a near perfect transfer... If you can get away with a softer wood and a few taps of a chasing hammer, you can sometimes get a near perfect look with a slight imprint... Unfortunately we have to come up with fun ways of putting the inlay "On" instead of "In" the scales.. I guess if one were doing resin pours they could try an actual inlay, or if you have a laser..

    Edit: Sorry to answer the exact question, the inlays are very thin, then the epoxy and the inlay are very very very carefully sanded, and cleaned up of any excess, which creates a "feathering" from the process
    Last edited by gssixgun; 10-24-2011 at 05:08 PM.

  14. #9
    Junior Member
    Join Date
    Jul 2011
    Posts
    9
    Thanked: 2

    Default

    It is soooo great!
    BTW, just to brag, it's my set
    mjhammer likes this.

  15. The Following 2 Users Say Thank You to Delije91 For This Useful Post:

    gssixgun (10-24-2011), WillN (10-24-2011)

  16. #10
    lz6
    lz6 is offline
    Senior Moderator lz6's Avatar
    Join Date
    Feb 2010
    Location
    California
    Posts
    4,833
    Thanked: 1841

    Default

    Absolutely superb package! Congratulations to the new owner.
    Bob

    "God is a Havana smoker. I have seen his gray clouds" Gainsburg

  17. The Following 2 Users Say Thank You to lz6 For This Useful Post:

    gssixgun (10-24-2011), WillN (10-26-2011)

Page 1 of 3 123 LastLast

Tags for this Thread

Posting Permissions

  • You may not post new threads
  • You may not post replies
  • You may not post attachments
  • You may not edit your posts
  •