
Results 1 to 10 of 17
 11Likes
 LinkBack URL
 About LinkBacks
-
11-04-2011, 01:53 PM #1Member

- Join Date
- Oct 2011
- Location
- Arbroath, Scotland
- Posts
- 73
Thanked: 15 Wade & Butcher in Cow Horn - First Customization
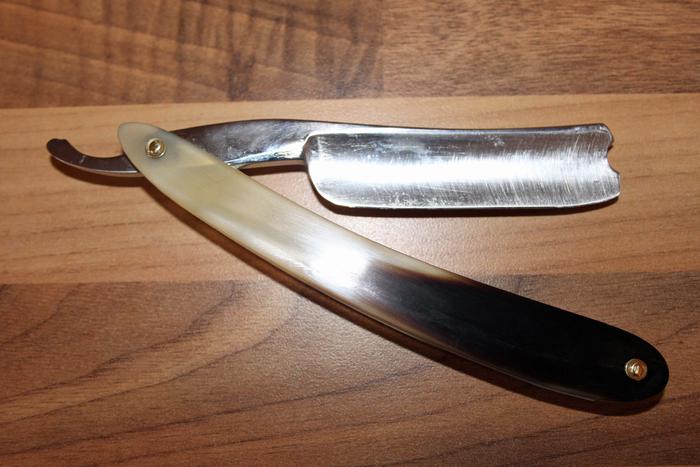
I'd been on the lookout for a W&B to add to my regular rotation for a while. I particularly favour mid-late 1800's blades erring to the low numbers in Henckels' spectrum so was very happy to see this come up on eBay

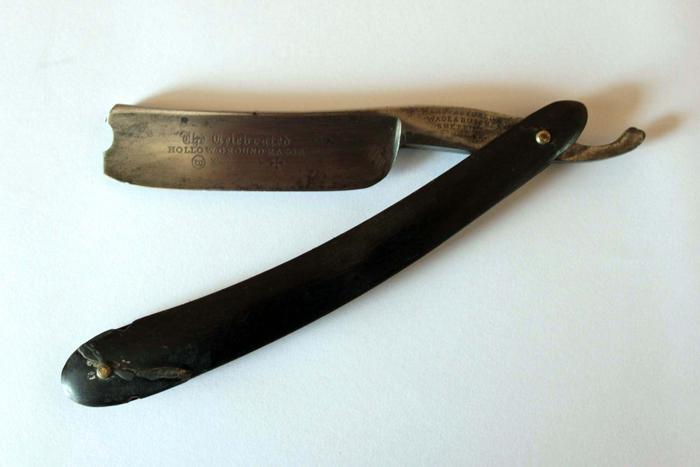
As you can see the scales were not at their best so needed sorting. I've restored a few razors but had not yet had a go at customizing so decided to try something different for the scales.
As I like the look of variagated cowhorn and didn't have any razors in said material I ordered some up and got on with the blade while considering on scale style.

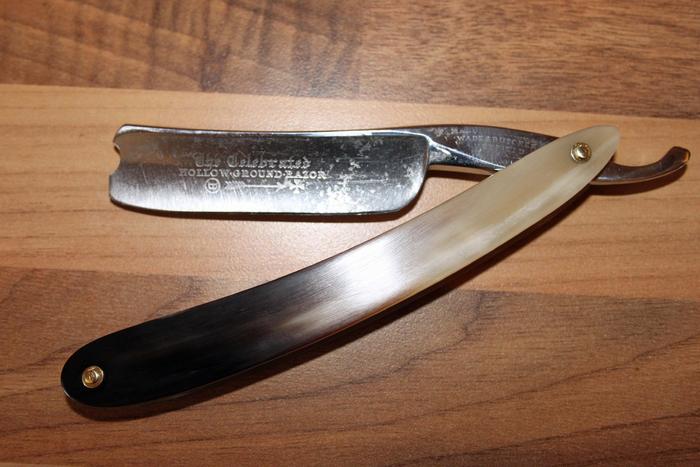
The pitting on the blade was pretty severe tho' apart from a small nick the edge wasn't in too bad condition. I sanded from 120 grit as much as I could without being too detrimental to the engraving then graduated up through to 2500 grit.
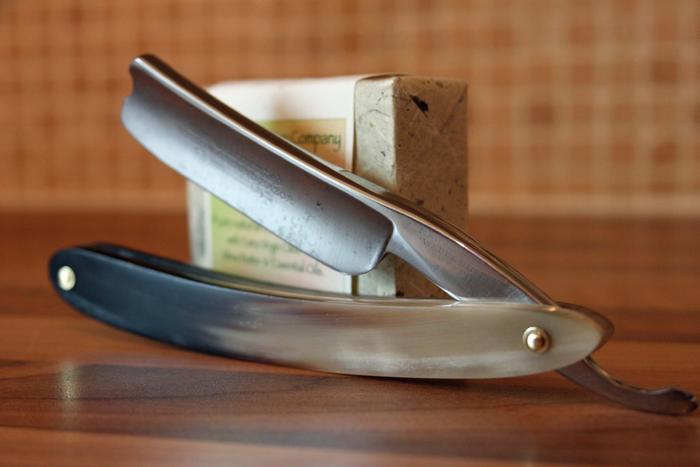
As the pitting was still fairly serious I then cut back the faces with 600 grit (with oil) to give a more satin finish so it didn't look too of place with remaining pitting. The spine, tang and monkey tail were left with a high-polish.
The original scales were fairly large and it's a chunky blade so I decided to stick with this theme and give it pretty beefy scales.
I drew out a stencil from the original scales then played around with it a bit to get the shape I wanted. After initial sanding to flatten and start finishing (from 60 to 320 grit) I cut the scales out with a fretsaw. The scales were then finish-shaped using second-cut then fine half-round files. This was followed by a LOT of sanding up to 2500 grit followed by a hand polish then quick buff. During sanding I was careful to avoid bevelling the scale edges to maintain a blocky look.
The scales are a hefty 3.5mm thick, luckily the blade had a pretty pivot large hole allowing continuation of the big feel by use of 3/32" rod for the rivets (with 8BA washers).
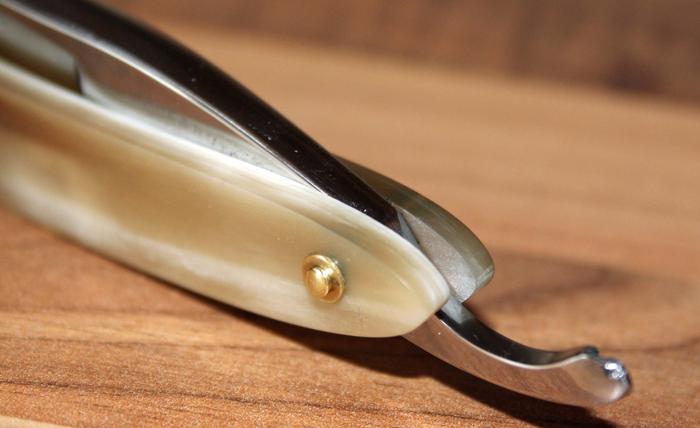
For a relatively subtle contrast I used some honey coloured horn for the wedge.
I did a few final touch-ups to finish the razor this morning and gave the scales a quick rub down with neatsfoot oil and beeswax before taking the final photos. I'm very pleased with the results, razor opens and closes nice and cleanly with plenty of friction to stay open. The blade has been honed (taped to set the bevel on a 1k stone, progressed through 3k, 6k, 8k then finished on a Thuringian).
After posting this I'm off to give it a few more laps on the Thuringian and strop ready for road testing tomorrow
-
11-04-2011, 01:58 PM #2Senior Member

- Join Date
- Jun 2010
- Location
- Durham, NC
- Posts
- 472
Thanked: 86
Looks great! You'll enjoy that one!
"If you ever get the pipes in good chune, your troubles have just begun."--Seamus Ennis
-
11-04-2011, 04:16 PM #3the deepest roots


- Join Date
- Feb 2011
- Location
- Seattle
- Posts
- 1,221
Thanked: 169
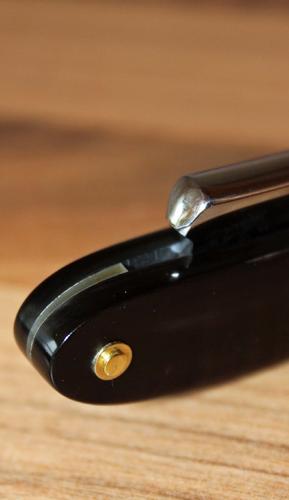
Looks good, my only critique is on the pins. Are the heads of them sticking out from the washer by about an 1/8"? If so, I would sand them down and re-peen so they flush up a little better. Just my 2 cents.
-
11-04-2011, 04:49 PM #4Member
- Join Date
- Oct 2011
- Location
- Arbroath, Scotland
- Posts
- 73
Thanked: 15
No where near an 1/8", they're just under 1/32" above the washers, this was a deliberate aesthetic choice because I felt it added to the chunkyness. They were carefully rubbed down after peening to ensure the don't catch. Originally Posted by TwistedOak
 markdfhr likes this.
-
11-04-2011, 05:17 PM #5the deepest roots
- Join Date
- Feb 2011
- Location
- Seattle
- Posts
- 1,221
Thanked: 169
well alright, carry on.
-
11-04-2011, 10:44 PM #6Razor Vulture


- Join Date
- Oct 2010
- Location
- Lone Star State
- Posts
- 26,086
Thanked: 8612
Nice piece of horn, there! Cool looking old razor, back in business!
"Don't be stubborn. You are missing out."
I rest my case.
-
11-04-2011, 11:05 PM #7Just a guy with free time.
- Join Date
- Oct 2011
- Location
- Mid state Illinois
- Posts
- 1,448
Thanked: 247
I love it man! Excellent choice of materials, and the scales are very nicely finished. I never thought of making a satin blade. I get my one little spot of shine, and then completely zone out on trying to get the rest to match. Is it easier to get a satin finish? I can't even guess how many hours I've spent trying to get a satisfactory finish.
-
11-04-2011, 11:22 PM #8Senior Member

- Join Date
- Dec 2010
- Location
- New England
- Posts
- 110
Thanked: 5
Looks great! Let us know how she shaves!
-
11-05-2011, 01:20 AM #9I shave with Occam's Razor

- Join Date
- Sep 2011
- Posts
- 147
Thanked: 16
A watchmaker friend of mine made a statement once upon a time that I think applies to anyone who does restoration. To paraphrase; " A lot of restorers don't know when to stop." They're caught in a loop trying to make a 100-200 year old watch (razor, chiffonier, etc.) look NOS. Originally Posted by regularjoe
Personally, I'm happy to see some patina on antiques, as I am one myself. Good job sir!
markdfhr likes this.
Good job sir!
markdfhr likes this.
-
11-05-2011, 10:27 AM #10Member
- Join Date
- Oct 2011
- Location
- Arbroath, Scotland
- Posts
- 73
Thanked: 15
The way I do it sanding to a satin finish is identical to achieving a higher state of polish, not any easier but a lot less effort. Originally Posted by regularjoe
In this case I had actually rubbed the razor down to 2500 grit then worked backwards again until I reached a point where I felt the finish blended reasonably with the remaining patina (600 grit).
I feel sanding wet is superior for a satin finish and personally prefer to use oil rather than water. I think you get the best results by using the wet&dry until it's worn so it give's a softer finish.
The only thing you have to bear in mind is that, unlike a high-polish, the finish still shows directional scratches so you need to be careful that you're working across the blade.
The finial finish on this does actually look better in the 'flesh', the photo's make the blade look a bit shinier than it actually is.
I'm glad to report the shave was great, clean and comfortable, the most difficult decision I have now is where to slot it into the weekly rotation - does anyone make fourteen day razor rollLooks great! Let us know how she shaves!


 Reply With Quote