
Results 1 to 7 of 7
 11Likes
Thread: Klein in Black Horn
 LinkBack URL
 About LinkBacks
-
03-10-2013, 05:48 PM #1Senior Member


- Join Date
- Apr 2011
- Location
- Bethlehem, Pa.
- Posts
- 950
Thanked: 555 Klein in Black Horn
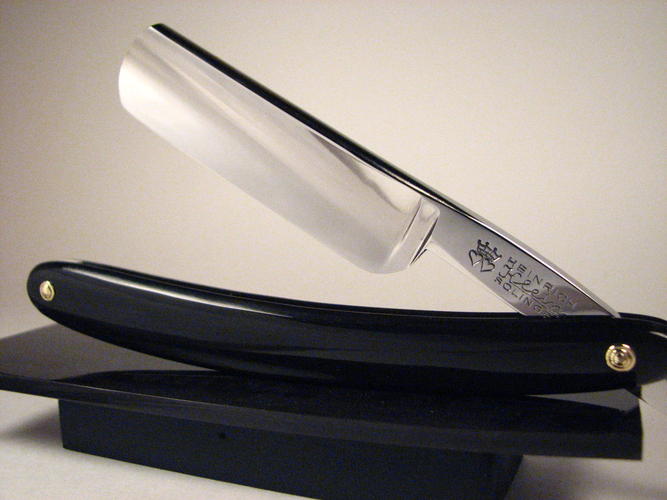
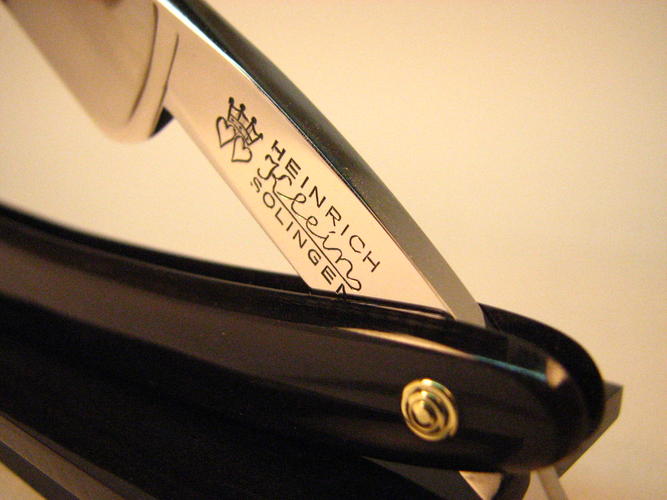
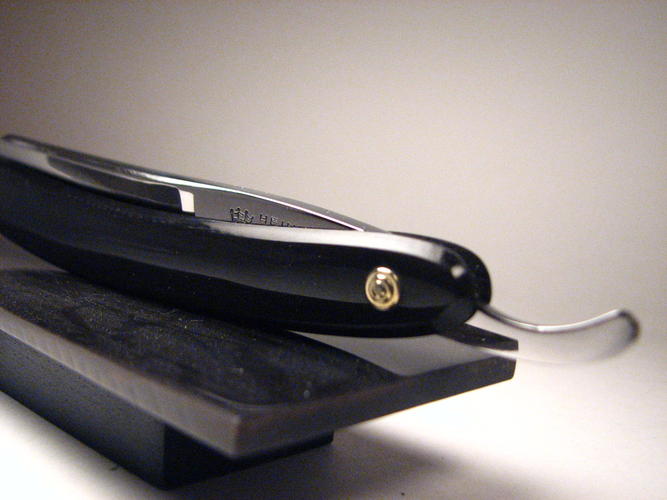
Replacing the plastic scales gave this one a better "feel". Built new ones in the same pattern as the old basically matching the curve, bevels etc.
Added double stacks and polished up the blade and removed the scratches on the shaft. Also added spacers to prevent marring in the future.
-
03-10-2013, 06:01 PM #2Senior Member

- Join Date
- Feb 2012
- Location
- West Midlands, UK
- Posts
- 1,263
Thanked: 360
That's a nice restore. I use black horn a lot but usually round the edges whereas you have kept true to the originals with a bevel - how did you do this? I ask because it would seem to be much more difficult keeping to a straight line - especially if you hand sand like me.
HooliganKing likes this.
-
03-10-2013, 06:16 PM #3Senior Member
- Join Date
- Apr 2011
- Location
- Bethlehem, Pa.
- Posts
- 950
Thanked: 555
Thank you UKRob.
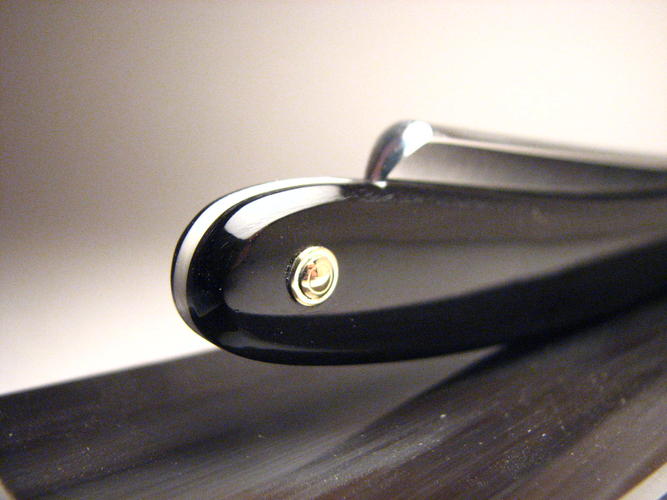
That little bevel can be a bugger. You too understand how challenging it can be to maintain it. Seems simple enough, right? But one flaw and it stands out like a sore thumb.
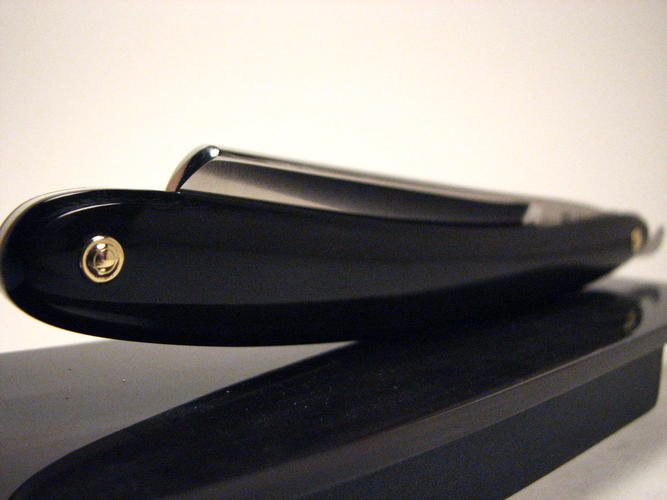
Anyway, I have to tell you, I did it by hand sanding. I first made the slight crown on the surface of the scale ( it's not flat) then polished it leaving the edges square. With the shine it was much easier to see the bevel being created as this surface was dull in appearance. Also , doing it in two stages like this meant I didn't run as much of a risk polishing out that sharp edge at the bevel had I worked hard to achieve had I done it all at one time.
I used a very rigid piece of rubber to wrap the paper around giving me a firm backing for the paper and creating a crisp flat bevel.
Then stepped up in grits until it was nearly polished as best I could with paper. Then used polishing compound on the piece of rubber for the final polish of just the flat to keep the edges crisp.
I also didn't take the bevel clear to the insides of the scales. Doing this would have created a knife edge. Instead I left a very tiny flat there as a sharp edge is more vulnerable to chipping and getting dented /cracked than the way I left this area.
Silly little details nobody notices but may be important at some time.Last edited by mycarver; 03-10-2013 at 06:18 PM.
-
The Following User Says Thank You to mycarver For This Useful Post:
skipnord (03-10-2013)
-
03-10-2013, 06:30 PM #4Senior Member
- Join Date
- Feb 2012
- Location
- West Midlands, UK
- Posts
- 1,263
Thanked: 360
I'm almost as impressed with the explanation as I am with the scales! Maybe in 20, 30, 40 years time someone will pick up this razor and wonder at the effort that went into manufacturing both the blade and scales. Hopefully, in that future time they will have some kind of magical tool that will enable them to access this post so that they can research exactly how it was done.
Great work.
-
03-10-2013, 07:46 PM #5Senior Member
- Join Date
- Apr 2011
- Location
- Bethlehem, Pa.
- Posts
- 950
Thanked: 555
Thanks.
I was afraid I was getting a bit wordy.
-
03-11-2013, 10:34 AM #6Member

- Join Date
- Apr 2011
- Location
- Brisbane, Australia
- Posts
- 1,434
Thanked: 642
Great restore. Very classy.
Stu
-
03-11-2013, 10:55 AM #7Senior Member

- Join Date
- Jan 2008
- Location
- Sweden, Gotland, Visby
- Posts
- 1,888
Thanked: 222
Clean and classic, very good photos too!
Hur Svenska stålet biter kom låt oss pröfva på.


 Reply With Quote