
Results 1 to 5 of 5
 6Likes
 LinkBack URL
 About LinkBacks
-
04-16-2013, 02:52 AM #1Senior Member


- Join Date
- Aug 2011
- Posts
- 174
Thanked: 15 Two razors w/ custom inlaid scales
Hello everyone, been a little while since I posted in the custom built forum. I just finished these two razors :
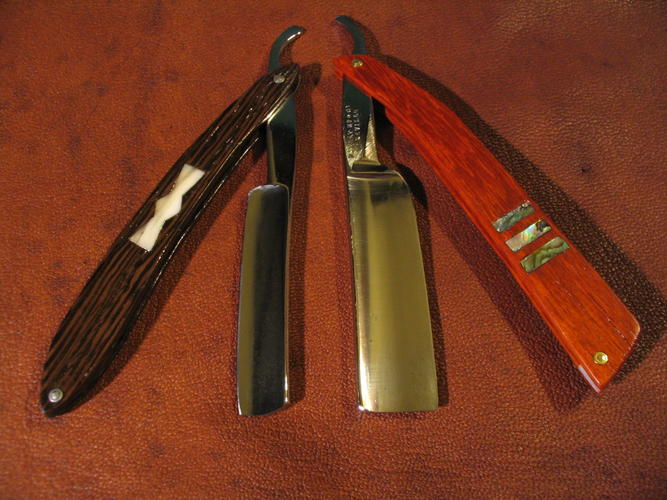
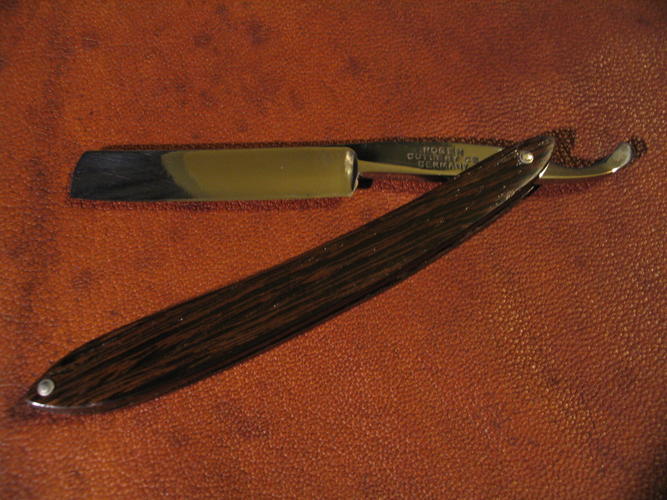
On the left : 4/8 Roger Cutlery with wenge scales and deer bone inlay.
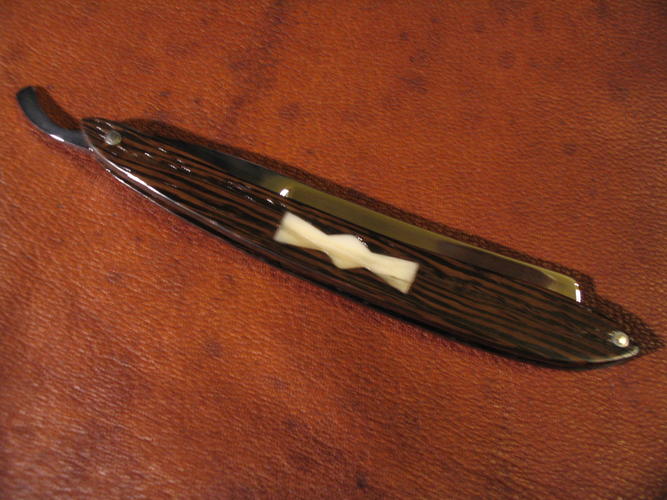
Yes, the inlay is on the "wrong" side. I didn't even notice until I was fitting the blade... Oh well

The blade had a chip that I ground out, and it is closer to a near-wedge style razor now, similar to Rofflers or "sculpting" razors.
The other side, wenge is a nice looking wood
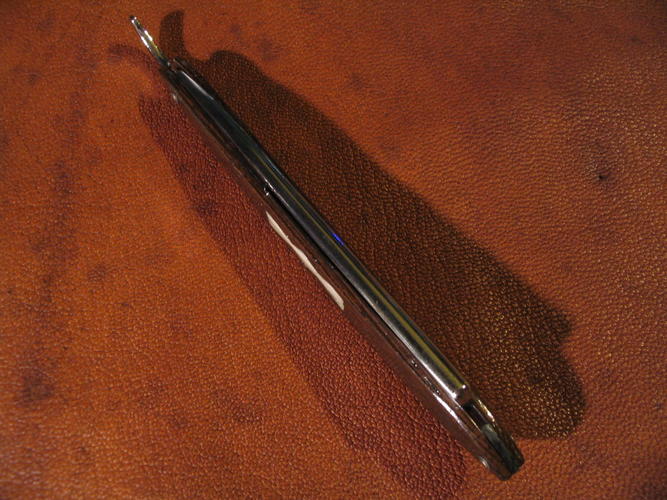
Nice and thin, wouldn't go this thin with anything but durable hardwoods. The wedge is black plastic.
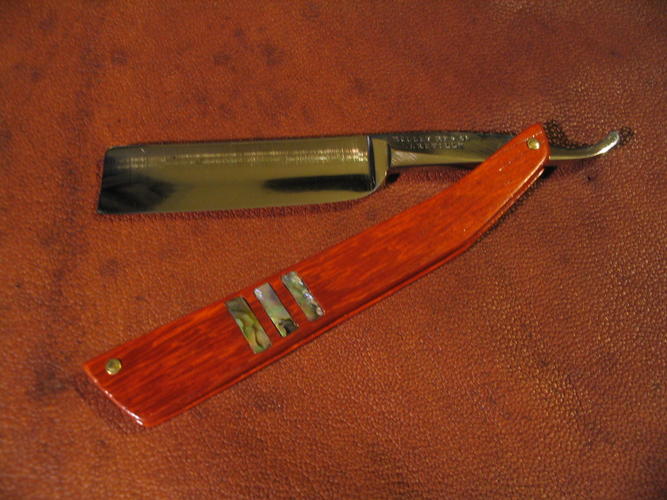
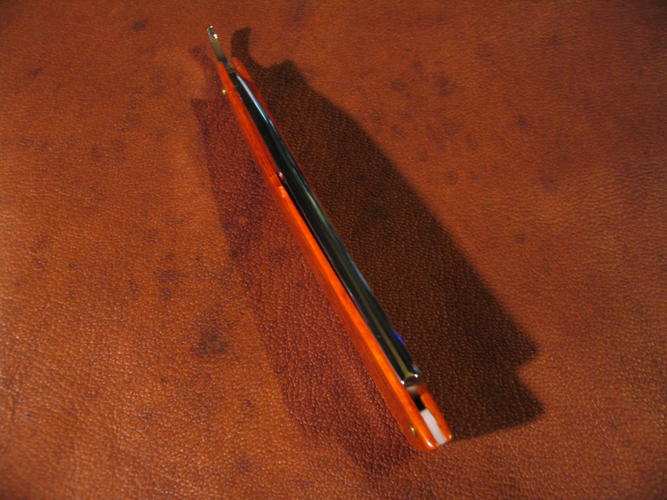
Next up : 6/8 Holley Mfg Co hollow ground in padauk with abalone inlay.
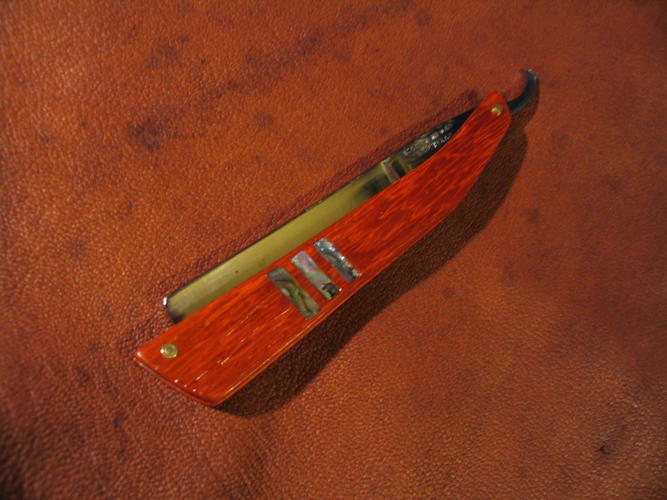
I like these angular kinds of shapes with square point blades.
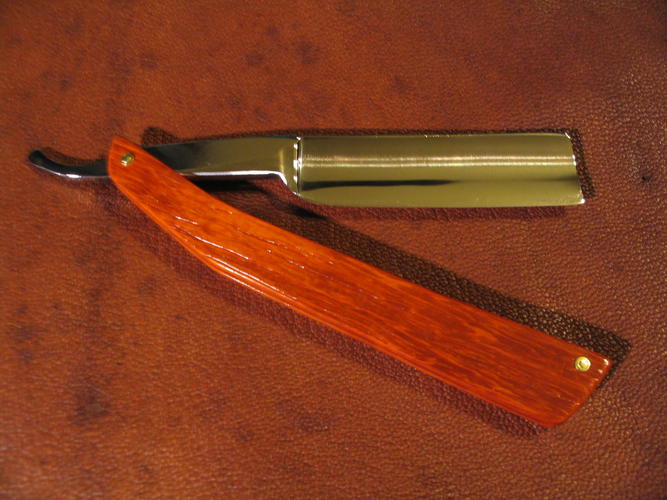
Padauk is lovely, and the sawdust reminds me of eating Cheetos
The wedge on this one is white plastic.
Thanks for looking, guys! Comments always appreciated
-
04-16-2013, 03:18 AM #2Huh... Oh here


- Join Date
- Oct 2011
- Location
- Tri-Cities TN
- Posts
- 2,270
Thanked: 358
The inlay on the Roger may be on the wrong side but it worked so well for the first picture. (I think you had it planned
 )
)
They look great and I realy like the way you carried the angle from the toe and heel of the scales where you normaly would see it into the radius.
Nice work
-
The Following User Says Thank You to pfries For This Useful Post:
dfrazor (04-16-2013)
-
04-16-2013, 04:46 AM #3Senior Member
- Join Date
- Aug 2011
- Posts
- 174
Thanked: 15
It really was a mistake Originally Posted by pfries
 I tend to get really bad tunnel vision when I'm doing a couple projects at once. It did work out really well for the pic though
pfries likes this.
I tend to get really bad tunnel vision when I'm doing a couple projects at once. It did work out really well for the pic though
pfries likes this.
-
04-16-2013, 09:43 AM #4Senior Member
- Join Date
- Dec 2012
- Location
- Melbourne, VIC, Australia
- Posts
- 352
Thanked: 28
Beautiful! I'd love to know how to do this inlay stuff, I'm still fumbling about trying to get my first pair of scales done, NOTE to anyone trying to get started if you want to get a band saw don't skimp and buy a non-working one and try to get it working yourself. ESPECIALLY if the manufacturer no longer makes the parts for it LOL.
I now have a bandsaw that wanders all over the place and have no idea how to make it work any better. I thought I would be able to split my blanks down the middle but I guess I'm just going to have to sand them down.
Can I ask How long have you been doing this for?"In the words of the ancients, one should make his decisions within the space of seven breaths." Yamamoto Tsunetomo
-
The Following User Says Thank You to saitou For This Useful Post:
dfrazor (04-16-2013)
-
04-16-2013, 03:43 PM #5Senior Member
- Join Date
- Aug 2011
- Posts
- 174
Thanked: 15
Inlay is done just how it looks, you cut a small channel or hollow and fit a very thin piece of material into it. It really is something that requires practice more than anything else. I don't have any experience with bandsaws, so I can't help you there. I use a table saw with a fancy blade to cut my wood into slices for scales. I've been restoring razors for a couple of years now, but I've only been doing custom scales for about a year. Originally Posted by saitou


 Reply With Quote