
Results 1 to 6 of 6
 10Likes
Thread: Griffon XX 67 Restore
 LinkBack URL
 About LinkBacks
-
04-20-2013, 03:36 AM #1Junior Member


- Join Date
- Feb 2013
- Location
- Charleston, SC
- Posts
- 26
Thanked: 5 Griffon XX 67 Restore
So, my first restore attempt (there seem to be a bunch of these lately!), so "first" that I haven't even typed an introductory post on the beginner's page....I should probably do that. I'll start with a brief intro though: I started SR shaving in...March, I think, and instantly loved it. My argument to my wife that it'll be less expensive in the long run has, however, fallen through considering I've bought two additional shave ready blades and three blades off of e-bay to restore, along with the required accessories to maintain/restore blades. Currently, she is being surprisingly open-minded about the whole deal....
Anyway, I picked this blade up off of ebay for under 10 dollars with the explicit intent of a full restore, for learning purposes. I was specifically looking to avoid heat damage/discoloration, chips, cracks, and deep rust and was fairly lucky to find this one. I honestly think I could've just polished it up and had a go at it, but like I said...I was in this for the restoration experience. The entire finished product is hand worked/sculpted except for 1) a band saw to cut out the scales/wedge and 2) dremel with a sanding drum to create the initial shape to the scales/wedge. My hand sanding progression on the blade was (dry)220-320-400 (wet)600-800-1000-2000 then Mother's Mag. I actually polished up the entire blade initially, and decided I didn't like the actual blade to be a mirror finish. I went back and re-hit the blade with wet 600 and then Mother's again to create the brushed finish on the blade. The spine, "nose" (edge of the toe?), tang and tail are all mirror finish.
I broke the original scales trying to drill out the pins. I have since acquired a flush cutter and on another ebay find (to be posted later) it worked beautifully. Needless to say, this needed new scales. The scales are black horn, and the wedge is Tagua nut. The sanding progression on the scales/wedge was the same as the blade, and the Mother's Mag produced a spectacular finish on the scales. The pivot pin has double stacked washers, the two pins on the wedge are just single. Some things that I learned doing this:
1) a "dull" razor for restoration will still slice the sh** out of your fingers while trying to hand-sand....
2) rust in the jimps is horrible. so much cursing.......
3) A polished, flat hammer will pin fairly well, but does not create the pretty dome that, I suspect, a ball peen will...I shall have to acquire one.
Anyway, my next step is to pull up multiple videos of Glen and Lynn on youtube as well as my Norton 4k/8k and attempt to hone this. Wish me luck.Last edited by Kalloran; 04-20-2013 at 03:40 AM.
-
04-20-2013, 04:11 AM #2
You did a FINE job on it.
I LIKE it.... It looks GOOD!
-
04-20-2013, 04:11 AM #3
A very nice job of work and I am sure, from experience that the razor will well reward your efforts! The balnce wil be of help in honing the razor! Out of balance razors tend to be hard to hone evenly.
~Richard
-
04-20-2013, 04:36 AM #4'with that said'


- Join Date
- Aug 2010
- Location
- Walla Walla in WA State USA
- Posts
- 11,244
Thanked: 4237
There’s nothing wrong with that work Bubba! Very nice work!!

I was fortunate enough to be able to acquire a very similar model in the original coffin case from some friends of mine. It was his grandfathers and they asked me to clean it up so they could sell it on FleaBay as there was no one in the family who wanted it!! At first I said ok but when I got it in the mail it was beautiful!! All it needed was a little work with some Mothers and Mass.
It honed up so nice and gave such a nice shave I bought it from them! $30!
If yours takes a nice an edge as mine, you my friend are in for some great shaves!!!
Again, Nice Job!!
-
05-28-2013, 01:16 AM #5Junior Member
- Join Date
- Feb 2013
- Location
- Charleston, SC
- Posts
- 26
Thanked: 5
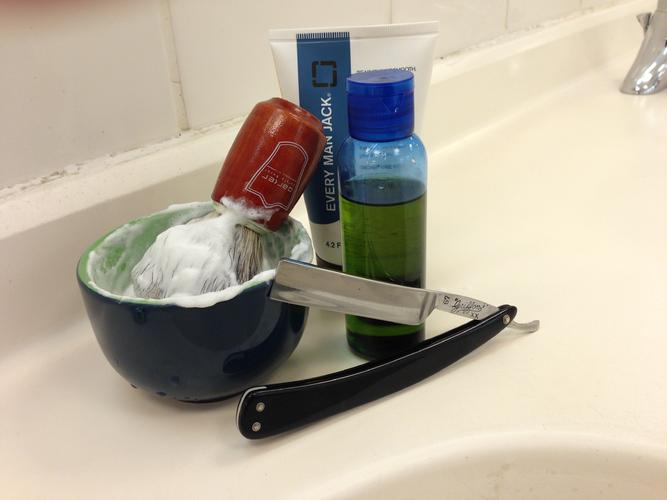
Thanks to a little bit of deployment free time, a lot of patience, and good ol' trial and error, I got her honed up and shave-ready. Along with my first restore, this was also my first blade to be taken from nothing to a shave-ready edge, so I learned a LOT (thanks to Glen and Lynn for the multitude of youtube videos on honing techniques). All I have is a Norton 4k/8k, and Lynn is absolutely right that you can get a comfortable shave with just that. At any rate, I snapped an "action" shot....who says you can't keep it classy during deployment?!
- Jim
-
05-28-2013, 01:28 AM #6'with that said'
- Join Date
- Aug 2010
- Location
- Walla Walla in WA State USA
- Posts
- 11,244
Thanked: 4237
Plus 1 on the Norton 8k shave!
I've posted so many times that if I dropped and broke my Naniwa 12 I could very easily live forever off a Norton 8k edge for the rest of my life!!


 Reply With Quote


