Page 1 of 4 1234 LastLast
Results 1 to 10 of 34
Like Tree27Likes

Thread: Introduction and Forging a Razor from a File

  1. #1
    Member dcraven's Avatar
    Join Date
    Jul 2013
    Location
    Central Texas
    Posts
    39
    Thanked: 9

    Default Introduction and Forging a Razor from a File

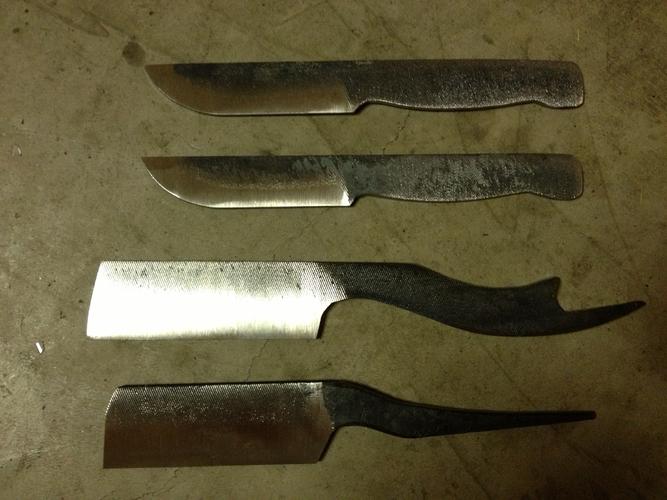
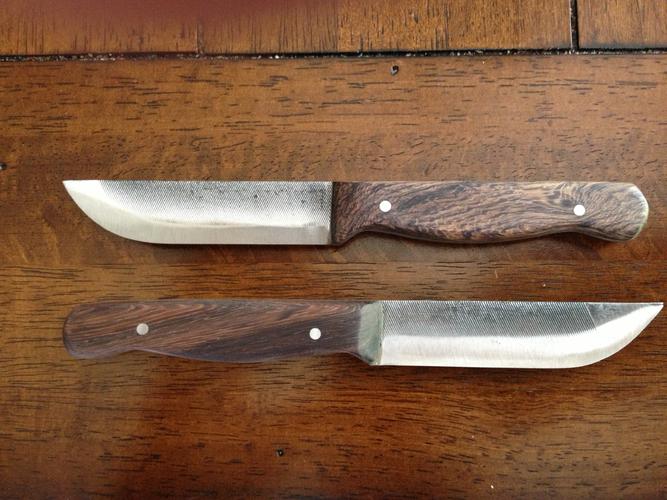
    Hello SRP members, I'm a frequent poster on IFI, this is my first post on this forum. I've been blacksmithing for fun & profit for a year now, recently started turning old files into small paring knives. I had a customer ask me for a straight razor so searching on IFI led me to Bruno who provided more information than I imagined and suggested I join this forum. Thank you Bruno! As it will be relevant to know my setup for any of the following questions here's some of the tools I have. An 11" brake drum forge that I use blacksmith coke in (could use homemade charcoal if needed) 190lb Peter Wright anvil, 4.5" postvise, 5" bench grinder and a 1x30 Harbor Freight belt grinder.

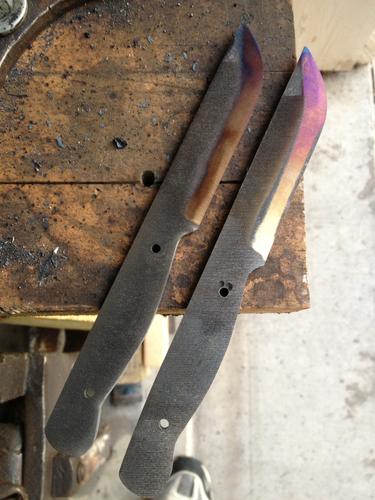
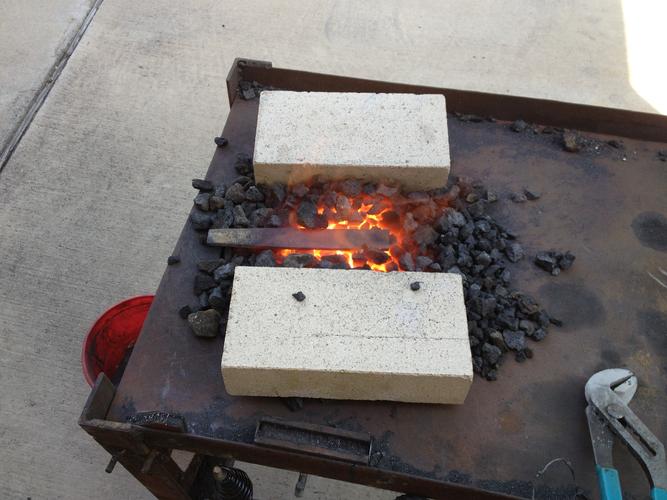
    A summary of the process I've used for the 3 files to knives I've completed was this, forge to shape, anneal overnight in ashes, profile and then rough grind until it's about the thickness of a dime ~.053, & drill holes for scales. Next for heat treating I normalize 2x, then heat to non-magnetic and quench in used motor oil. Then I bake in the kitchen oven at 450' for 1 hour, cool and then temper again using either the stove or propane torch til the spine and point are purple or even blue, and cutting edge a straw or brown. Then a finish grind to 1000 grit. To this point that's work well, I can hammer the point of the knife into wood and twist it out without it breaking and they've held a good edge, at least from what I can tell.
    Name:  misc 002.jpg
Views: 7074
Size:  32.5 KBName:  misc 004.jpg
Views: 5383
Size:  56.4 KB

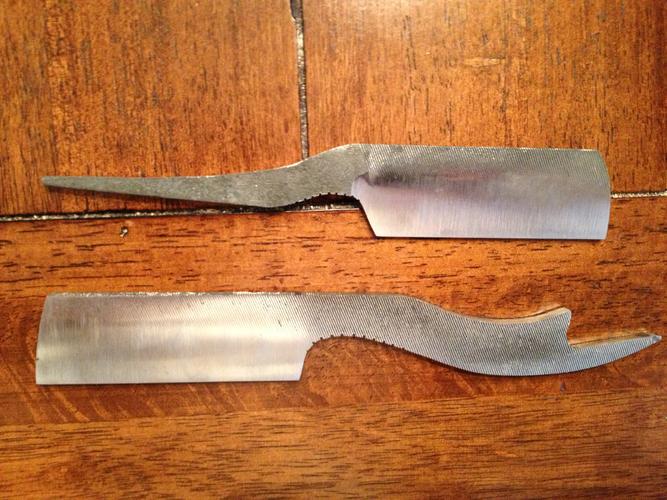
    Here are pictures of my current project, I've been trying to follow what was done in this thread by Grant, aka Baldy. What I'd like is feedback on the above process, I plan on using either vegetable or canola oil for the quench as I know the old motor oil isn't what's recommended. I don't know what is a recommended temper for razors.

    http://straightrazorpalace.com/custo...ile-razor.html

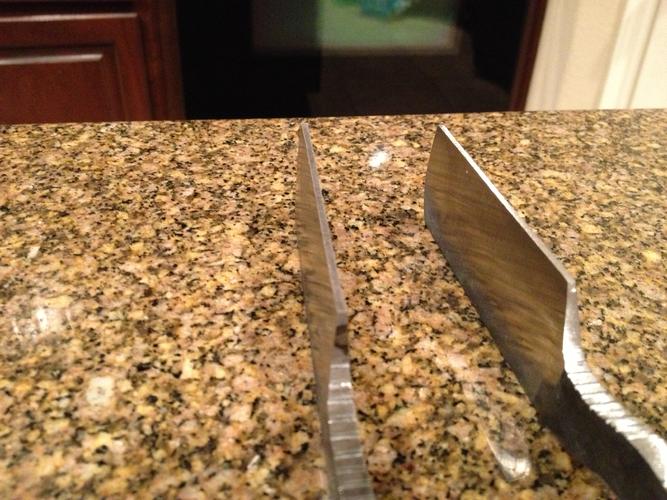
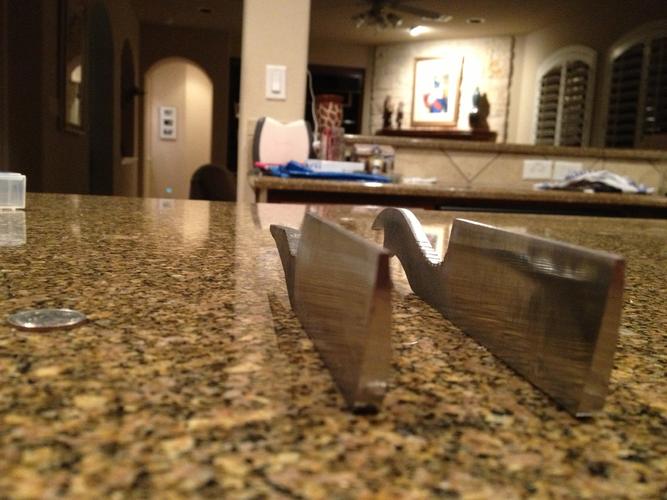
    At the same time I'm grinding the razors I'm also working two small knives, that way I can switch to another as one starts to warmup. I am concerned about the finish grind on the razors after the heat treat and when they start getting thin.

    I was thinking the razors would be a flat grind only as that is what I have experience with.
    Name:  straight razor.jpg
Views: 4613
Size:  47.4 KBName:  misc 024.jpg
Views: 5304
Size:  42.5 KBName:  misc 025.jpg
Views: 3799
Size:  67.2 KBName:  misc 033.jpg
Views: 4278
Size:  69.6 KBName:  misc 030.jpg
Views: 3638
Size:  48.5 KB

    Thank you for your time.

    Dan Cravens
    Central Texas
    Last edited by dcraven; 07-13-2013 at 02:30 PM.

  2. The Following 2 Users Say Thank You to dcraven For This Useful Post:

    ScottGoodman (07-17-2013), Slawman (12-31-2015)

  3. #2
    Heat it and beat it Bruno's Avatar
    Join Date
    Nov 2006
    Location
    Belgium
    Posts
    15,130
    Thanked: 5229
    Blog Entries
    10

    Default

    Hey Dan, good to see you here

    Recommended temper for razors is a light straw color. 60 to 61 HRC is the sweet spot.
    The spine needs to be the same hardness, because both the spine and the edge make contact with the hone, and you don't want the spine wearing out faster than the edge.

    You need to do part of the grinding after heat treatment, because you want the blade near the edge to be as thin as possible, so that the bevels are as narrow as possible. Narrow bevels make the razor much easier to hone, and look much better as well.

    This also means that when you are grinding after HT, you need to use sharp belts, run them at low speed, and regularly dunk the razors in cold water to prevent them from overheating. If the temperature gets too high, the temper is ruined for use as a razor. As soon as you see blue appearing near the edge, the razor is a dud. And sadly, the thinner you get, the more quickly the temperature rises.
    Til shade is gone, til water is gone, Into the shadow with teeth bared, screaming defiance with the last breath.
    To spit in Sightblinder’s eye on the Last Day

  4. The Following 2 Users Say Thank You to Bruno For This Useful Post:

    dcraven (07-13-2013), Steel (06-02-2014)

  5. #3
    Member dcraven's Avatar
    Join Date
    Jul 2013
    Location
    Central Texas
    Posts
    39
    Thanked: 9

    Default

    Hi Bruno, very glad to be here & thank you for all the help in the past!!!

    From the pictures can you tell about how the bevels are so far? How can you measure the angle?

    I know what you say is correct, as from the small paring knives the thinner the bevels the sharper the knife. I've been debating this, but your response confirms holding off on a final grind until I can build a 2x72. The 1x30 belt grinder I have doesn't have a speed option. I also think the results would be more consistent, not to mention probably more efficient. I guess another question would be holding off on HT and maybe doing a hollow grind when the 2x72 is finished. Was thinking an 8" contact wheel?

  6. #4
    Senior Member
    Join Date
    Mar 2011
    Location
    Corcoran, Minnesota
    Posts
    665
    Thanked: 170

    Default

    8 inch is a good place to start. At least a little hollow grind is good - back to what Bruno said about a narrow bevel. If you have a full flat grind, you have to hone the whole side of the razor, and that would take forever. Good luck on your project. There is a wealth of info on this site.
    dcraven likes this.

  7. The Following User Says Thank You to skipnord For This Useful Post:

    dcraven (07-13-2013)

  8. #5
    Heat it and beat it Bruno's Avatar
    Join Date
    Nov 2006
    Location
    Belgium
    Posts
    15,130
    Thanked: 5229
    Blog Entries
    10

    Default

    Angle is simple: you know the with of the blade and the thickness of the spine.
    You'll want to 'scoop out' some metal before HT, because hollowing out a piece of full hardened steel will be a lot more time consuming.You have about the correct thickness at the edge left for heat treatment.

    Also when hollowing out, especially after heat treatment, the diameter of the hollow should be a little bigger than the hollow of the wheel. You rock the blade from spine to edge on the wheel a bit, if you know what I mean. The reason is that that will greatly slow down the heat buildup. If you have a hollow with the same diameter as the wheel, the entire hollow will make contact and the heat buildup will be very fast. I admit I ruined a razor this way. I was regrinding an old wedge, kept the blade cool, but as soon as the hollows became the same, the blade almost instantly flashed blue near the edge.

    Btw, if you are still interested in having me look at them after the post HT grinding stage, PM me for address details. I'm traveling the next couple of days so don't worry if I don't answer rightaway.
    dcraven likes this.
    Til shade is gone, til water is gone, Into the shadow with teeth bared, screaming defiance with the last breath.
    To spit in Sightblinder’s eye on the Last Day

  9. The Following User Says Thank You to Bruno For This Useful Post:

    dcraven (07-14-2013)

  10. #6
    Always Thinkun walleyeman's Avatar
    Join Date
    Nov 2012
    Location
    Grain Valley, Missouri
    Posts
    818
    Thanked: 348

    Default

    If it is any help I did a file/razor a few weeks ago. It was posted in the "gallery". Also Baldy has just posted his latest razor which also was from a file too. You have done a nice job with yours. Keep up the good work and please keep posting your work for all to admire and to imitate. I would have never had tried a file if it wasn't for the posts that I have found on SRP. I am sure you will find a lot of support and knowledge at SRP.
    OOPS! WELCOME my friend!! We hope to see more from you.
    Ray
    dcraven likes this.

  11. The Following User Says Thank You to walleyeman For This Useful Post:

    dcraven (07-15-2013)

  12. #7
    Hones & Honing randydance062449's Avatar
    Join Date
    May 2005
    Location
    Saint Paul, Minnesota, United States
    Posts
    7,973
    Thanked: 2204
    Blog Entries
    1

    Default

    For the proper angle use the ratio method of blade width divided by spine thickness. The ratio should not exceed 4:1 . An example is a blade width of 1" should have a spine thickness of 1/4" or greater. This will result in an angle that will minimize the width of the bevel and make it easier to hone and have a stronger bevel that is less prone to micro-chipping at the higher grits. The historical ratios are 3.5:1 up to 4:1.

    Hope this helps
    dcraven likes this.
    Randolph Tuttle, a SRP Mentor for residents of Minnesota & western Wisconsin

  13. The Following 2 Users Say Thank You to randydance062449 For This Useful Post:

    crouton976 (07-15-2013), dcraven (07-15-2013)

  14. #8
    Member dcraven's Avatar
    Join Date
    Jul 2013
    Location
    Central Texas
    Posts
    39
    Thanked: 9

    Default

    Thank you Ray. It took me awhile to navigate the forum, but I found the thread with your razor from a file build. Very nicely done, I really like the photo showing the phone book and how you kept the old file name & logo! I will update my progress, but from the feedback I've gotten I am going to hold off on these razors until I have been able to buy or build a 2x72. I found a Bader Pro for sale at a reasonable price. If it's still available in a couple of weeks I should be able to get it. If not I'll build my own, there's a lot of good information out there on doing so.

    Thanks Randy for the explanation on calculating the angle and the recommended ratios, that is very helpful. Everyone has been a great help so far. I'll keep y'all updated and take lots of pictures along the way, including the grinder build.

  15. #9
    Senior Member
    Join Date
    Mar 2011
    Location
    Corcoran, Minnesota
    Posts
    665
    Thanked: 170

    Default

    If you haven't already found it, USA Knifemakers in Minnesota has a kit and many individual parts for a no-weld 2x72. Go for some kind of variable speed control, either multiple pulleys, or, best, a phase converter speed control. If you want more info on phase converters, PM me.
    dcraven likes this.

  16. #10
    Member dcraven's Avatar
    Join Date
    Jul 2013
    Location
    Central Texas
    Posts
    39
    Thanked: 9

    Default

    I've been on the USA Knifemakers site quite a bit today and also downloaded the free grinder plans from SRP to make a KMG 3-speed clone. I would prefer to weld an all steel frame together, but should I be concerned about possible heat distortion to the frame and jacking the alignment? For that reason is it preferable to do a no-weld design? I'd be using a Lincoln Tombstone 220 arc as I don't have a MIG or TIG going w/ cold rolled steel. Could peen the welds and keep moving to minimize distortion.

    Sorry, I'm sure this is covered somewhere multiple times in the forum.
    Last edited by dcraven; 07-15-2013 at 10:00 PM.

Page 1 of 4 1234 LastLast

Tags for this Thread

Posting Permissions

  • You may not post new threads
  • You may not post replies
  • You may not post attachments
  • You may not edit your posts
  •