
Results 1 to 10 of 20
 22Likes
Thread: Sleepless? Forge stuff!
 LinkBack URL
 About LinkBacks
Hybrid View
-
09-06-2013, 07:19 AM #1The First Cut is the Deepest!


- Join Date
- Feb 2010
- Location
- Upper Middle Slobovia NY
- Posts
- 2,737
Thanked: 481 Sleepless? Forge stuff!
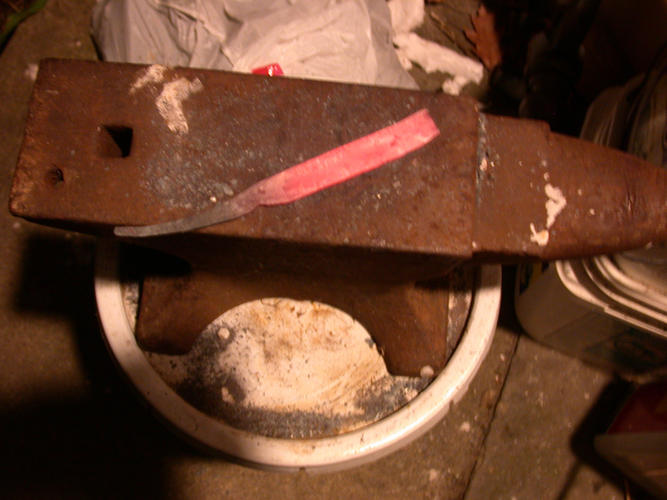
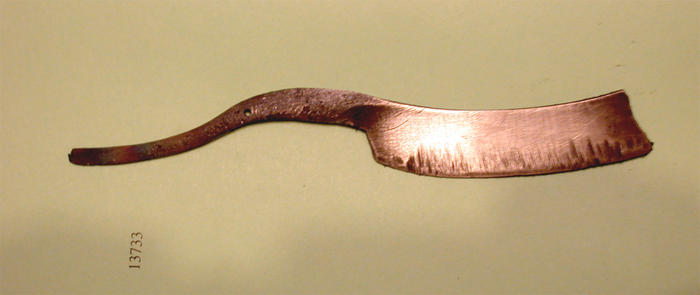
Its a bit after 3am, and I just finished forging up, and filing down my first attempt at a straight. Its a learning experience, and I am already seeing where I need to change, and where I can improve.
Tomorrow I will try heat treating, after I put a few more hours into it. I am finally getting sleepy now, and working tired is always a bad idea.
Feel free to critique
-
The Following 2 Users Say Thank You to Magpie For This Useful Post:
ScottGoodman (09-06-2013), spazola (09-06-2013)
-
09-06-2013, 08:35 AM #2
Is the big smile to help with anger control?

Nice shape.Bread and water can so easily become tea and toast
-
09-06-2013, 01:26 PM #3
Either hot-punch or drill the pivot hole now before HT.
Your life is going to be easier.Til shade is gone, til water is gone, Into the shadow with teeth bared, screaming defiance with the last breath.
To spit in Sightblinders eye on the Last Day
-
09-06-2013, 02:13 PM #4Senior Member


- Join Date
- Feb 2013
- Location
- Haida Gwaii, British Columbia, Canada
- Posts
- 14,457
Thanked: 4830
Love the big smile and simple design.
-
09-06-2013, 02:28 PM #5The First Cut is the Deepest!
- Join Date
- Feb 2010
- Location
- Upper Middle Slobovia NY
- Posts
- 2,737
Thanked: 481
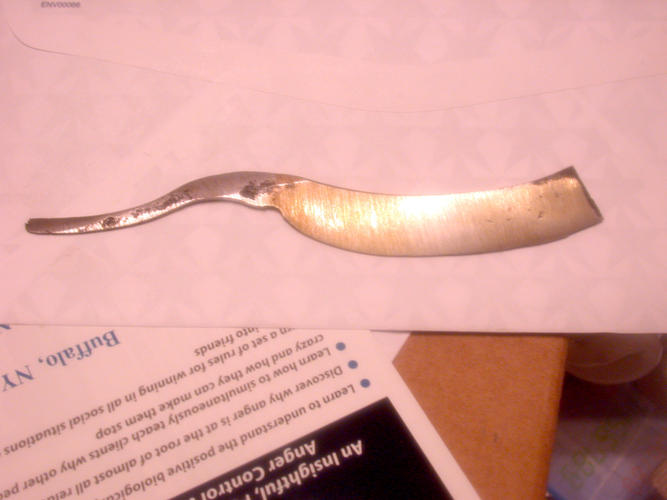
The smile is what I was going for, the length? that just sort of "grew" as I worked it. Currently a blade of 3.5" and a width of .700" the plan right now is to cut a half inch off the end. It just seems a bit off balance with such a long blade.
Advice please (or just opinions)
Second problem is not as easily remedied. Pivot hole will need to be further back than I allowed for (if I want proper balance and handling) in an area of the tang that is already tapered and thinned. Should I simply add a few thrust washers to make up the space? The area of contact/support for scales will be small (.180) and I am worried that it might put too much torque strain on the scales when assembled.
Or would you recommend using a stick welder to build up the area immediately on/around the place where the pivot will go?Last edited by Magpie; 09-06-2013 at 03:04 PM.
-
09-06-2013, 07:49 PM #6The First Cut is the Deepest!
- Join Date
- Feb 2010
- Location
- Upper Middle Slobovia NY
- Posts
- 2,737
Thanked: 481
Bruno? Charlie? any thoughts?
-
09-07-2013, 09:24 PM #7Senior Member

- Join Date
- Jun 2012
- Location
- Manchester, England
- Posts
- 137
Thanked: 32 Sleepless? Forge stuff!
finished a blade today that looks very much the same, was a little close when it came to drilling the pivot hole but I got away with it, partially because the blade is a slim profile and pretty equal to the tang width. I
 how wide is the tang opposed to the blade width on your razor?
Last edited by Manchestertattoo; 09-07-2013 at 09:27 PM.
-
09-07-2013, 10:51 PM #8The First Cut is the Deepest!
- Join Date
- Feb 2010
- Location
- Upper Middle Slobovia NY
- Posts
- 2,737
Thanked: 481
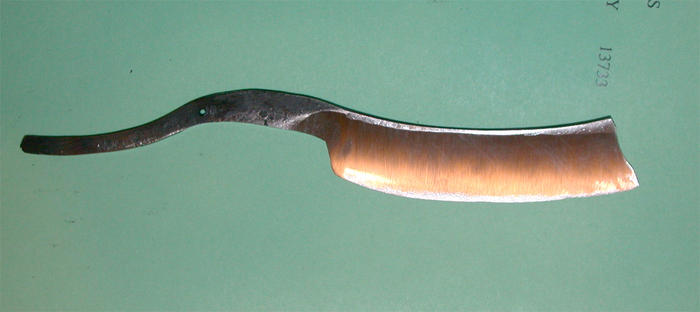
Manchester, your blade looks way nicer than mine! I'm still happy with it, because it IS my first try after all, so mistakes are to be expected. here is a look at how its coming along.
I have also heat treated it now, but would like some advice on the tempering. I shined it up a bit before putting in the oven, and set oven for 350 degrees. Left it there for about an hour and half. Still shining, no yellow yet. Currently cooling off to room temp before the second temper. Is it safe to leave it tempered at low temps like that? maybe triple tempered to be sure? Or would it be wiser to up the temperature a little bit until I see that golden straw color?
-
09-08-2013, 01:35 AM #9Member

- Join Date
- Jul 2013
- Location
- Central Texas
- Posts
- 39
Thanked: 9
I asked the same question which was answered in this thread, http://straightrazorpalace.com/forge...or-file-2.html From my limited experience with razors and more with knives I'd say tempering at 350' at an hour has relieved the stress from forging which is good. I do that with anything I forge even when I don't heat treat. For a knife I temper at 400' for an hour, which is what I'd do in your case.
-
09-08-2013, 04:02 AM #10The First Cut is the Deepest!
- Join Date
- Feb 2010
- Location
- Upper Middle Slobovia NY
- Posts
- 2,737
Thanked: 481
For some odd reason I could not get the oven to stabilize at 400. I could get it to stay right at 360. Right at 380 and right at 420 So, I did a second heat for an hour and 20 minutes at 380. Figured that to be safe enough, and it came out with the ever oh so slightest hint of yellowing, so I am calling this good.
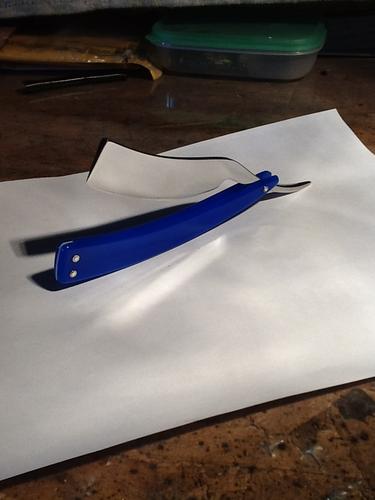
I have ground it some, achieving a fair hollow (no easy task on a bench grinder!) Before I go any further though, I want to hone it up and make sure it even takes an edge. The final dimensions of the blade are 6/8 by a little less than 1/8
I know there is a magic ration of spine to blade width, which I believe was 4/1? That would make this too sharp of an angle. Anybody think two layers of tape will be enough to give it a good show of what its capable of? or should I work up some sort of frameback for it? Here is how it looks at the moment... (I think its progressing nicely)


 Reply With Quote


