
Results 41 to 50 of 61
 29Likes
Thread: Making my own razor
 LinkBack URL
 About LinkBacks
-
02-14-2014, 03:37 PM #41Senior Member

- Join Date
- Dec 2013
- Posts
- 152
Thanked: 5
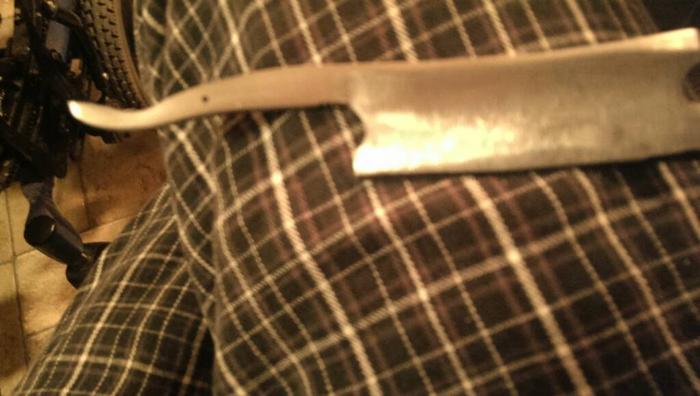 here is the pivot hole
ScottGoodman likes this.
here is the pivot hole
ScottGoodman likes this.
-
02-20-2014, 01:04 PM #42Senior Member
- Join Date
- Dec 2013
- Posts
- 152
Thanked: 5
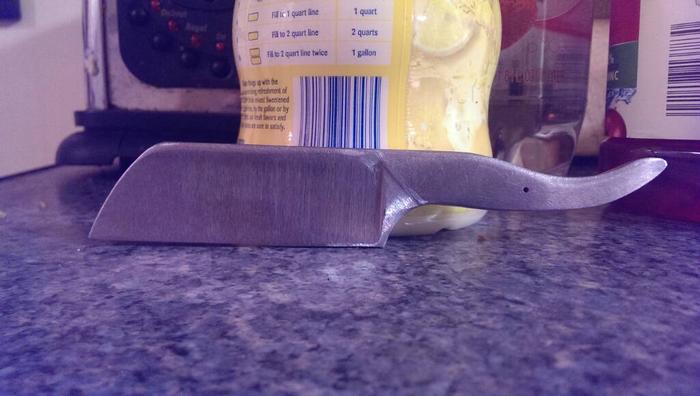 here is some progress on one of my straights. Tapered the tang. Comphy in the hand. Almost ready for heat treatment
-
03-07-2014, 01:13 AM #43Senior Member
- Join Date
- Dec 2013
- Posts
- 152
Thanked: 5
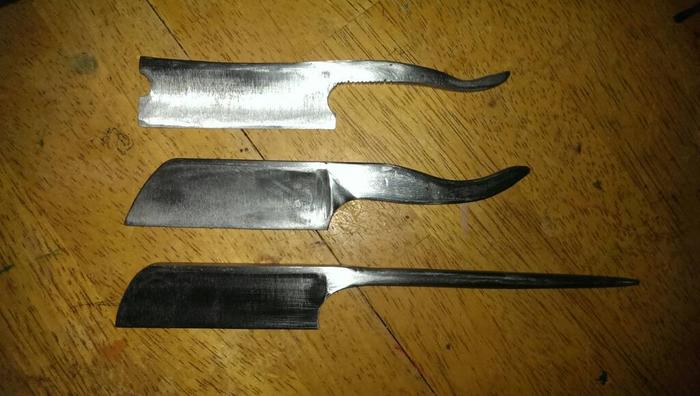 Ok maybe now I got all of this out of my system and I am ready for heat treatment. New Japanese style razor, razor also. I could not resist
-
03-07-2014, 01:21 AM #44Senior Member
- Join Date
- Mar 2011
- Location
- Corcoran, Minnesota
- Posts
- 665
Thanked: 170
Think about bending the tang up a tad on the Kami - I find they are easier to use that way, and most of the traditional one are not straight. Just a suggestion - and very hard to do after heat treating.
-
03-07-2014, 01:23 AM #45Senior Member
- Join Date
- Dec 2013
- Posts
- 152
Thanked: 5
Hmm mm I will have to look at some online to understand what you are saying
-
03-07-2014, 01:41 AM #46Senior Member
- Join Date
- Mar 2011
- Location
- Corcoran, Minnesota
- Posts
- 665
Thanked: 170
Here is an example
http://straightrazorpalace.com/images/attach/jpg.gif
-
03-07-2014, 01:44 AM #47Senior Member
- Join Date
- Dec 2013
- Posts
- 152
Thanked: 5
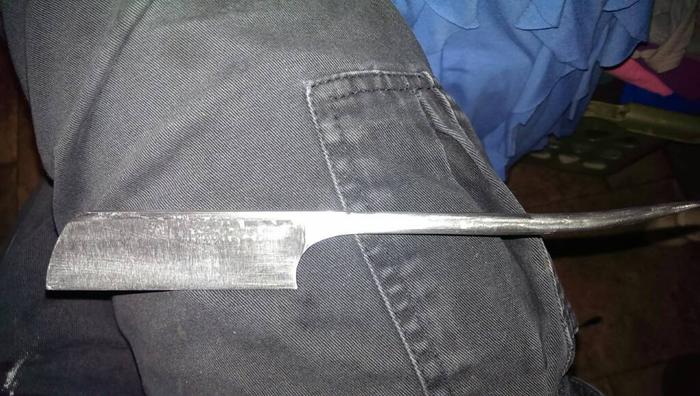 better?
-
03-07-2014, 01:45 AM #48Senior Member
- Join Date
- Dec 2013
- Posts
- 152
Thanked: 5
Or does the slope need to be more gradual?
-
03-07-2014, 03:47 AM #49Member
- Join Date
- Mar 2014
- Posts
- 38
Thanked: 4 Making Razors
To OP, Originally Posted by shooter74743

Quality woodworking suppliers sell marking scribes (single point). These (mine anyway) have a very hard sharp tool steel scribing point. Should work on annealed tool steel with no problem. (BTW - tenoning scribes have two points - unnecessary for your use.) A basic decent single point one should not be too expensive.
If you really get into this, (I speak from knife blade building, not razor making) you might consider a purpose-made belt sander for knife making. Has different size rollers so you can adjust your hollow grind radius to suit. I think the one I used to have was from Grizzly Industrial.
I assume you are starting with an O-1 bar and just doing material removal to shape. Way back, a buddy and I making larger knives were forging the stock to rough size (yes, we built a coal-fired forge), then grinding to final profile. With a power tool as suggested, you can probably rough out a razor blade in a few hours.
My 2¢ - FWIW ;- )Last edited by RandyIdaho; 03-07-2014 at 03:49 AM. Reason: typo
Randy
43.470, 112.041
-
03-07-2014, 08:37 AM #50aka shooter74743


- Join Date
- Sep 2009
- Location
- SE Oklahoma/NE Texas
- Posts
- 7,285
- Blog Entries
- 4
Thanked: 1936
Before you send them off for heat treatment, put your makers mark on them. You will need to do something to your Japanese style razor to help you flip it when stropping. Try it out and see how it strops & works in the hand. A bit more angle as mentioned with the bend close to the blade maybe? THe long cylindrical tang/tail like that just looks like it would be hard to use if your hand were to be slippery or wet.
Southeastern Oklahoma/Northeastern Texas helper. Please don't hesitate to contact me.
Thank you and God Bless, Scott


 Reply With Quote