
Results 1 to 5 of 5
 6Likes
Thread: File kamisori WIP (beta)
 LinkBack URL
 About LinkBacks
-
02-04-2014, 04:00 AM #1Senior Member

- Join Date
- Mar 2013
- Location
- Sydney Australia
- Posts
- 173
Thanked: 40 File kamisori WIP (beta)
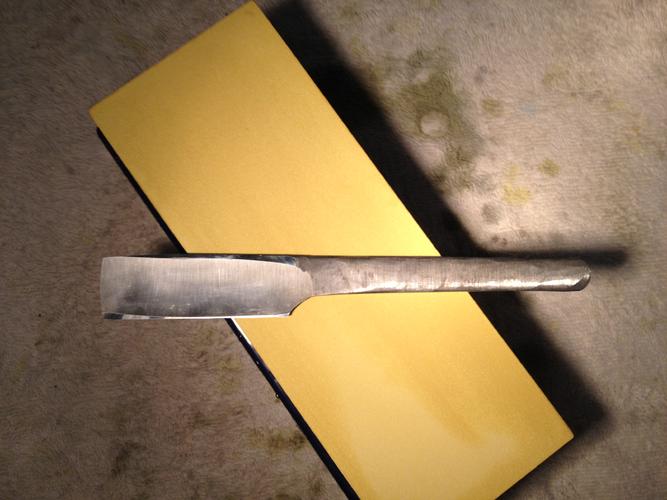
I wasnt really ready to let this out for public consumption yet as its far from finished, but I mentioned it in another thread (where I was a bit of a killjoy), so I thought Id man up and share.
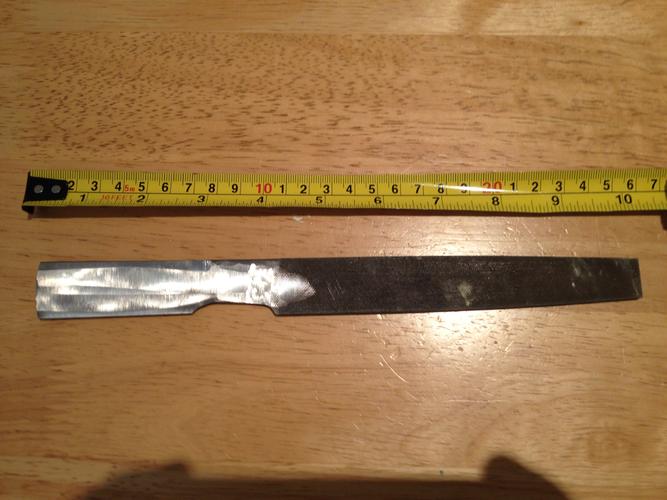
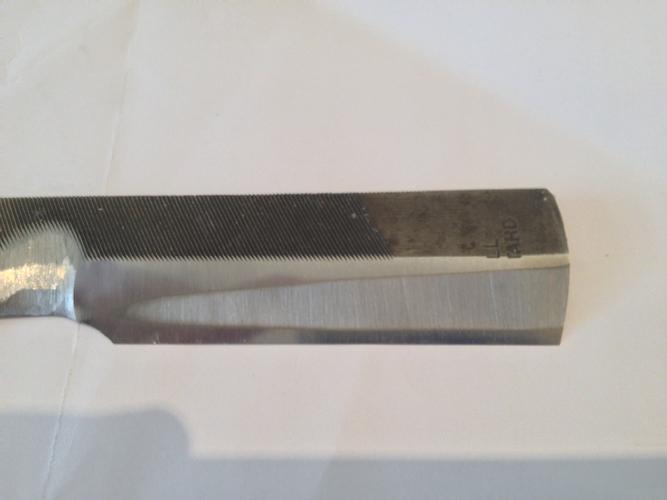
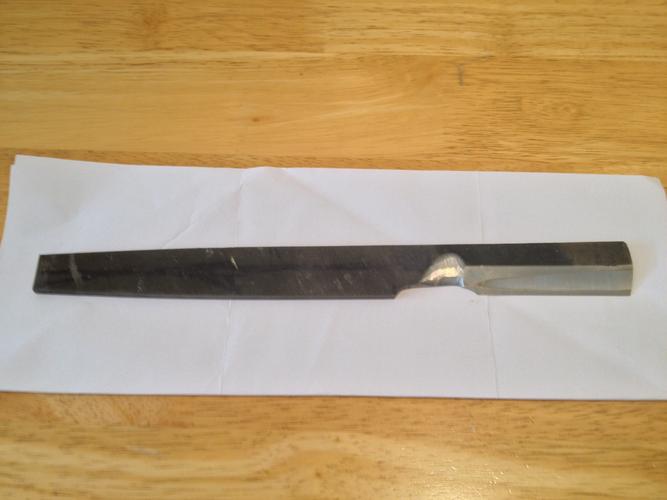
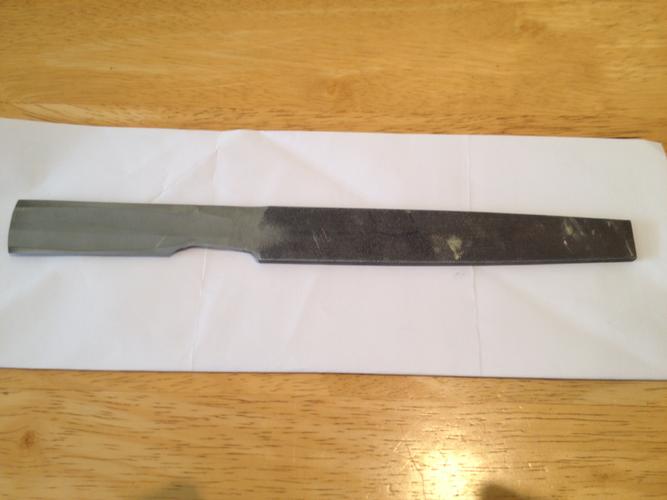
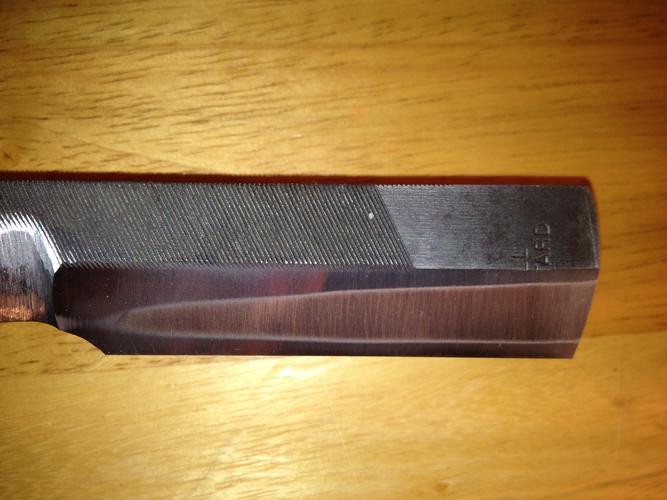
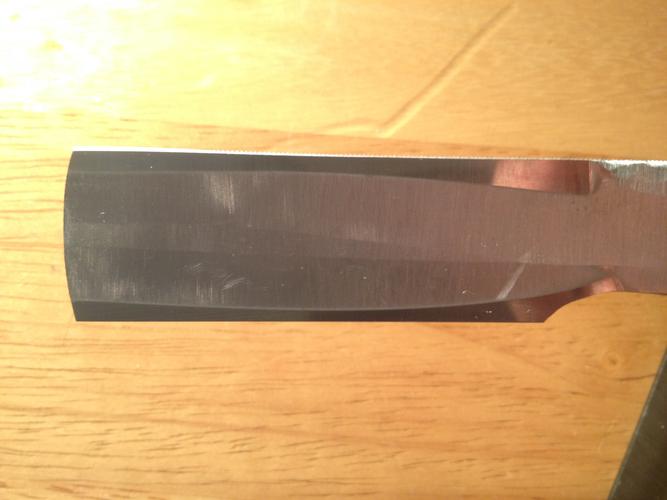
Made from a well worn Nicholson 10 inch mill saw, bastard cut file. Its heat treatment is as it left the factory, it has not been annealed or tempered by me at all.
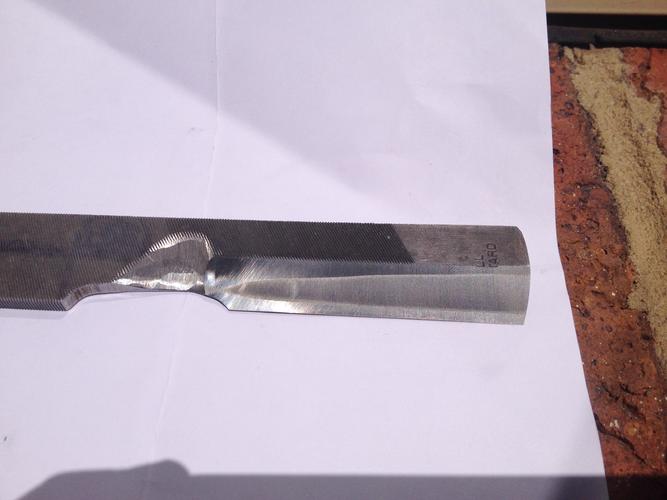
I used a 6 inch bench grinder with a Norton 3X blue grinding wheel I grade (6x3/4x1) to profile the blade (including rough grinding of the omote and ura), being very carful when shaping the edge, heel and toe so as not to overheat the blade,
The Norton wheel is recommended by wood tuners (and knife makers such as Wayne Goddard in his book$50 Knife Shop as it cuts fast and cool (relative to white and grey wheels), but throws of a lot of grit in the process.
From there I used my scheppach 2500 (a considerably cheaper tormek clone), holding the blade in a cobbled together jig composed of several bits of precision ground steel, three parallel clamps and the tormek square edge tool.
The tormek tools are much nicer then the ones by scheppach, and the stone on the scheppach is fairly soft, breaking down quickly and needing regular truing.
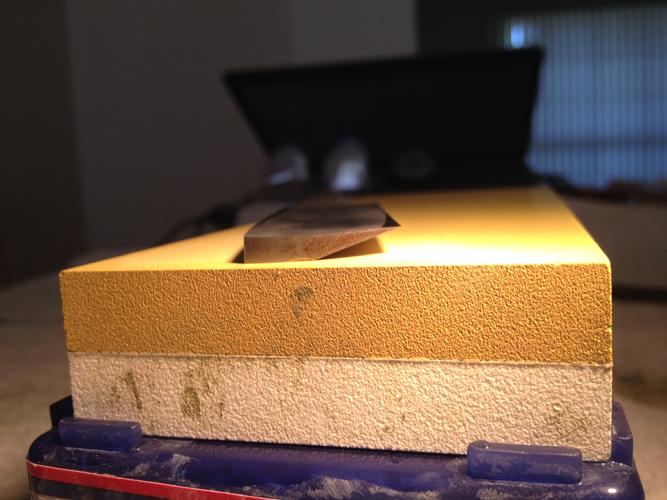
Following on from this I went to my hones (a set of Norton combo stones and an Atoma 400 plate).
In an effort not to ruin the preceding work, I went from the bench grinder to the scheppach to early, then from there to the hones to early, leaving myself a lot of manual work to do.
The atoma cuts really fast and it wasnt long before I had completely flattened the omote and almost flatened the ura.
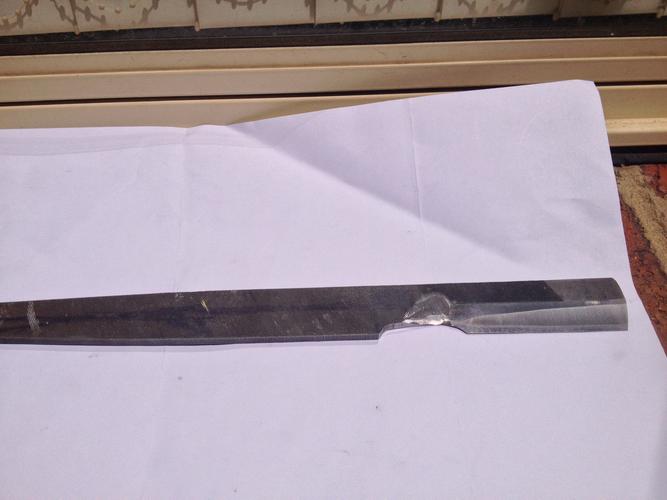
I took the blade back to the scheppach to open these back up, which explains the multiple hollows in the ura and the wonky hollow in the omote. When I thought enough had been done I went back to the hones.
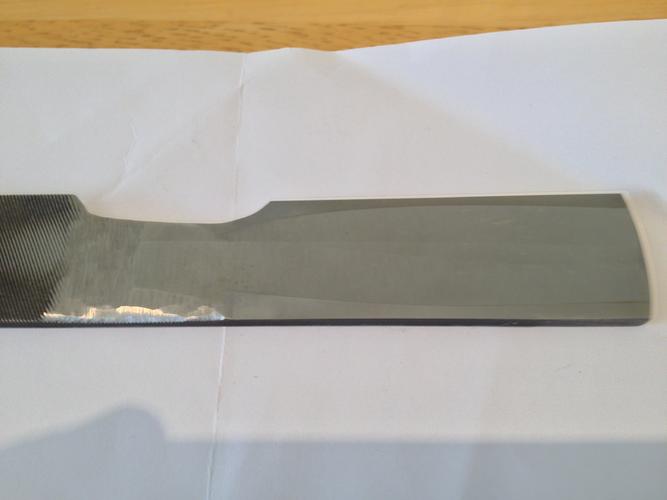
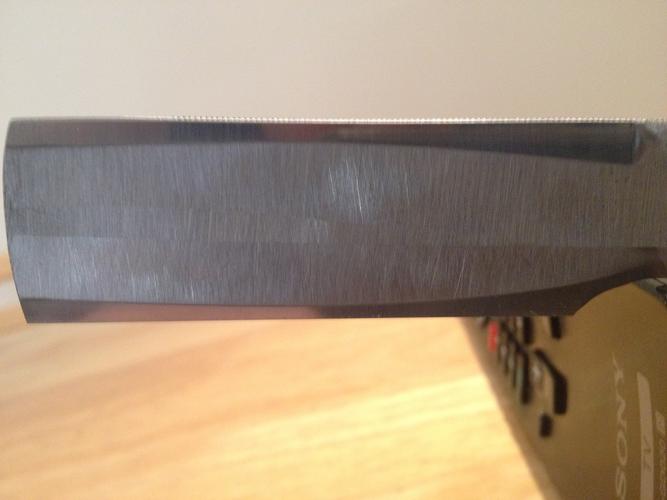
I spent most of Sunday afternoon getting the geometry ground in and the edge set. I had never honed a razor before, though I have set pleanty of edges on wood working tools.
I went up and down the hones, doing circles , x-strokes, Japanese strokes, 45 degree heel forward strokes, forward strokes, trailing strokes etc. using varying amounts of slurry and pressure on each.
It was not the most efficient way to go but I wanted to get a feel for how the steel reacted to the different hones and strokes.
I had to work the heel a lot to get the geometry set (as seen by the substantial bevel width), but I eventually got the edge to evenly form, after which I went back and rewatched gssixguns 2 kamisori videos multiple times.
Starting on the 4k using Japanese strokes with edge pressure on the omote and shoulder/spine pressure on the ura the edge started to come alive, I then jumped to the 8K and did a few laps in a similar fashion.
I was in a bit of a rush (getting near 9pm on a Sunday and eager to try shaving with it) and the bevels had really blown out, so I was using too much pressure on both stones to get any where near the maximum out of them.
The shave was satisfactory; defiantly not shave ready, but enough to provide proof of concept!
My next move will be to take it back to the bench grinder to open up the omote and ura and finish (more like start) profiling the handle and waist. This may not be for several weeks as work/university have my dance card full at the moment.
After that it will be back to the scheppach (maybe followed by a bit of hand sanding) to get the bevels nice and thin and finish up with a patient honing on the 8K.
Given the hardness of the blade, I suspect that the 8K may not be fine enough to get the maximum out of the blade, so initially Ill read the JaNorton thread again to try get the most out of the 8K, then move on to trying my SRD modular Crox paddle.
I may also give 1.0 and 0.3 micron lapping film a go (as the are relatively cheap) or I may use this as an excuse to get one (or more) finishing hones.
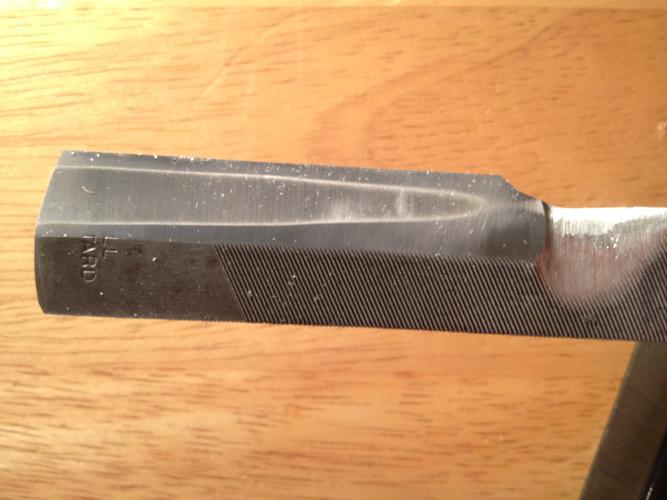
Dimensions :
Total length: will end up being about 160mm
Edge length; 64mm
Total width at toe; 24mm
Total width at heel; 23
Shoulder elevation; 4mm (taken with ura face down flat)
Shoulder length from edge; 13mm
Bevel angle: 17.1
Weight: unknown untill finished
I decided to make my own razor mostly just to see if I could, and to insure I had a ready supply of razors to practice my honing.
It has been an intriguing journey so far, with many priceless lessons learnt. Not least of all I have a much heightened admiration for the skill and talent of those that do this professionally.
Unfortunately I think this has set me of on a dangerous road, as there will now always be new razors to make, new stones to try (I dont know if I want to smile or cry when I think about all the natural stone possibilities) and new razors to aquire (to compare and contrast the work of others).
Ill keep this updated with pictures as more work gets done and I may even include some pictures of the scheppach in action, be fair warned though, the tool jig is an absolute monstrosity.
Thanks for looking.
Any and all critic, comments and questions are more than welcome, theres no need to be coy Im a proponent of the peer review process and I have broad shoulders.
Regards,
Neal.
-
02-04-2014, 04:53 PM #2Senior Member
- Join Date
- Mar 2011
- Location
- Corcoran, Minnesota
- Posts
- 665
Thanked: 170
You are on the right track. You know what regrinding you have to do. Good luck, and keep us informed.
-
02-05-2014, 04:46 PM #3aka shooter74743


- Join Date
- Sep 2009
- Location
- SE Oklahoma/NE Texas
- Posts
- 7,285
- Blog Entries
- 4
Thanked: 1936
Looks promising...
Southeastern Oklahoma/Northeastern Texas helper. Please don't hesitate to contact me.
Thank you and God Bless, Scott
-
02-08-2014, 11:56 AM #4Senior Member
- Join Date
- Mar 2013
- Location
- Sydney Australia
- Posts
- 173
Thanked: 40
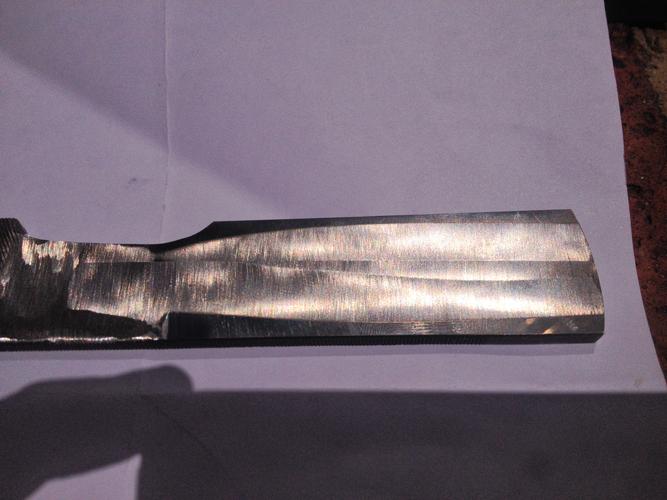
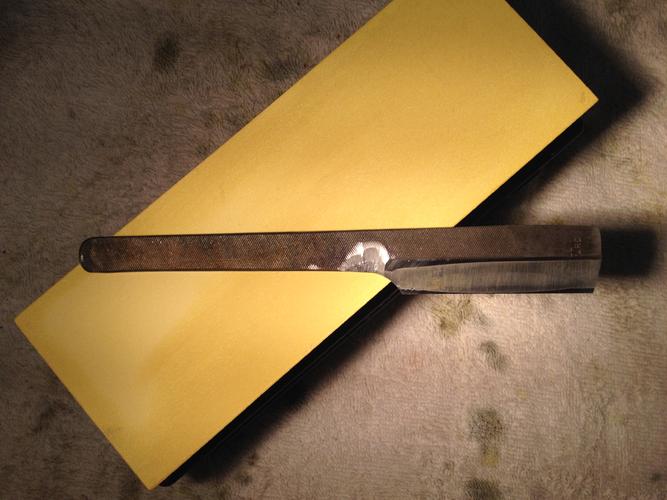
I found some time today to get it to it's final shape and rehone it.
The bevels are still a bit wide and asymetrical but I decided to live with that, otherwise I will be forever chasing the errors that were ground into the geometry at the start.
I'm happy with the rustic finish as this was simply a test to see if I could get a file to a razors edge, the next one will be the looker.
I sliced the thumb pad on my right hand whilst grinding, making it necessary to do the TPT with my offhand, so the test shave wasn't all that it could be. But that will improve as I get more time on the stones, fortunately I just got my DOVO classic back from Oz to provide a very nice reference.
I have definitely learnt from this experiment and will use the wisdom in my next effort, which I am eagerly anticipating.
 Adam G. likes this.
-
02-10-2014, 03:37 AM #5Bladesmith by Knight

- Join Date
- Jun 2007
- Location
- Murrumba Downs, Queensland, Australia.
- Posts
- 571
Thanked: 203
Great stuff.
Next go around, you may want to work your geometry so the handle runs up at a slight angle rather than straight in line with the spine. i did the same as you on my first one. the angled handle makes it a bit easier to hold and keep the edge on the face without too much pressure or angle.
Keep on going. You are doing great.
AdamDrDalton likes this.


 Reply With Quote