
Results 1 to 10 of 20
 46Likes
 LinkBack URL
 About LinkBacks
-
04-25-2014, 07:40 PM #1Senior Member

- Join Date
- Nov 2013
- Location
- Houston, TX
- Posts
- 147
Thanked: 45 How a knifemaker makes a razor or a 7/8 French point WIP and how to
I started working with steel and making it sharp by making knives. Mainly, I make professional kitchen knives. It's only logical that after shaving with a straight razor that I'd want to make one. So I took my knifemaking knowledge and applied it to razors and failed multiple times. I talked with Charlie Lewis and Bob Allman at the Texas SRP meet and they encouraged me to try again and gave me some tips.
With some work, I made one that shaved...well. I was surprised by how well it shaved if I'm being honest. I've made many more after that first one and now have a nice process that I think works. By no means do I think that I have it figured out! I truly want everyone's opinion so that by sharing information we may all be able to benefit from it
Here it goes:
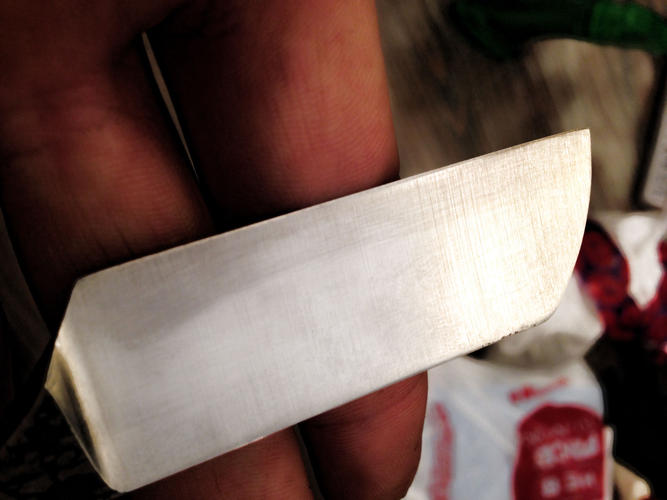
I lay out the razor similar to the way Mastro Livi does it, loosely. Bob Allman told me to start with a 6" by 1" section, using 3" for the head and 3" for the tang and tail with a forward taper of about 1/2" at the heel. I do my version of that. This one is my take on a thumb notch.
![Name: photo 1[5].jpg
Views: 574
Size: 53.8 KB](https://sharprazorpalace.com/attachments/forge/164079d1398451962-how-knifemaker-makes-razor-7-8-french-point-wip-how-photo-1-5-.jpg)
I use an angle grinder to cut this shape roughly out of the billet and clean up the profile on my KMW with a 36 grit cubitron belt. At this point, I let the steel take shape in my hands, letting feel and look dictate form rather than staying inside the lines
![Name: photo 2[5].jpg
Views: 575
Size: 49.7 KB](https://sharprazorpalace.com/attachments/forge/164080d1398452136-how-knifemaker-makes-razor-7-8-french-point-wip-how-photo-2-5-.jpg)
From here, I take it over to the disc sander to square up every edge and make sure everything is nice and flat before I start grinding.
![Name: photo 3[4].jpg
Views: 564
Size: 44.9 KB](https://sharprazorpalace.com/attachments/forge/164081d1398452254-how-knifemaker-makes-razor-7-8-french-point-wip-how-photo-3-4-.jpg)
Once it's flat and square, I take it over to the drill press for a pivot hole. I use an old Delta press that's heavy and exact and drill on top of a perfectly flat, square piece of stock. A master machinist told me to drill at 400 rpms and since I heard that, I rarely break bits
![Name: photo 4[3].jpg
Views: 559
Size: 45.9 KB](https://sharprazorpalace.com/attachments/forge/164082d1398452444-how-knifemaker-makes-razor-7-8-french-point-wip-how-photo-4-3-.jpg)
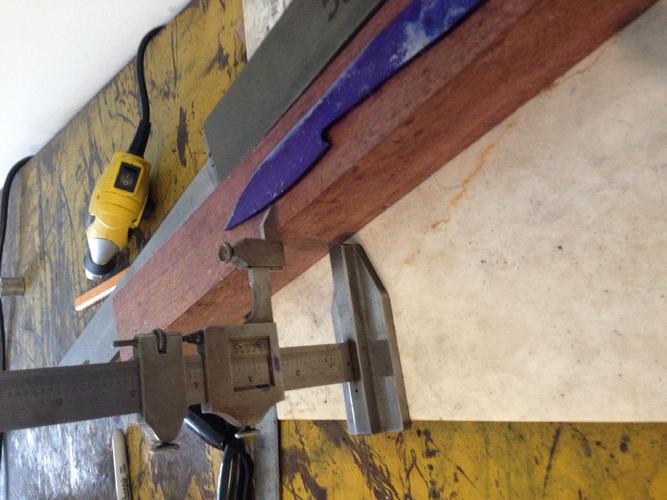
After the pivot hole's in there, I take it back to the disc sander and give the tang and tail a rough taper, which I'll clean up later. Then I take it to the layout part of my bench and hit it with some steel blue to get it ready for scribing.
![Name: photo 1[4].jpg
Views: 614
Size: 58.9 KB](https://sharprazorpalace.com/attachments/forge/164083d1398452707-how-knifemaker-makes-razor-7-8-french-point-wip-how-photo-1-4-.jpg)
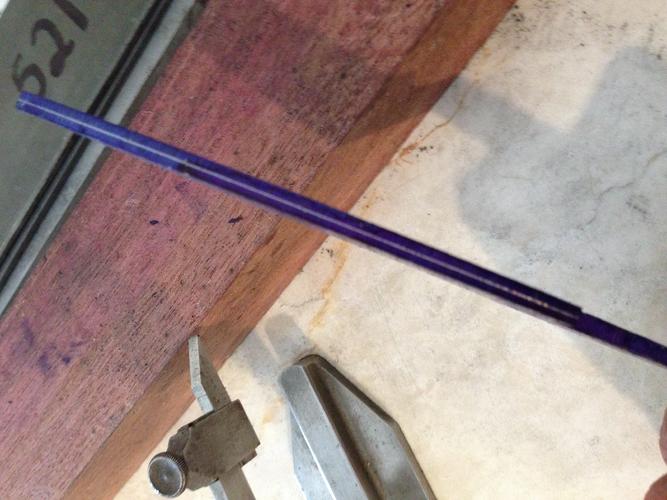
I use a Starrett height gauge to scribe a line dead center all the way around it. Then, I scribe a grind line on each side of the face near the spine. I don't have pictures of scribing the razor, but this is the same process with a knife:
With all my lines scribed, I go back to the KMG. There are a bunch of ways to grind a razor and I don't think that I have a perfect way of doing it. I've tried several ways and this is what works for me. Starting on the cutting edge with a worn 60 grit cubitron, I grind toward the centerline I scribed, slowly moving up the face toward the spine, alternating sides.
![Name: photo 2[4].jpg
Views: 553
Size: 40.7 KB](https://sharprazorpalace.com/attachments/forge/164086d1398453478-how-knifemaker-makes-razor-7-8-french-point-wip-how-photo-2-4-.jpg)
When I've pretty much got my hollows set, I move to an 80 grit Hermes and go with it 'til I'm nice and uniform. From there, I move to a 120 grit Hermes to get everything really close. At this point, I shore up my plunge cuts. I then move to a 220 grit Hermes and get all the 120 scratches out and perfect my plunge cuts. I clean up the sides on the wheel then move to the flat platen to shore up the taper and clean up everything else.
I hand sand to 220 before heat treatment.
![Name: photo 3[3].jpg
Views: 554
Size: 44.5 KB](https://sharprazorpalace.com/attachments/forge/164087d1398453611-how-knifemaker-makes-razor-7-8-french-point-wip-how-photo-3-3-.jpg)
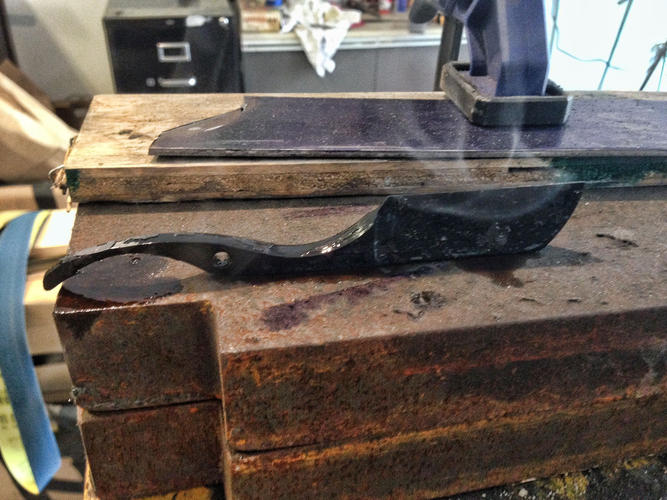
Heat treatment is a long-debated topic and I am not pretending to be an expert. I produce dependable, sharp blades that stand up to rigorous testing and that's what I want. I've learned a ton about heat treatment from reading Verhoeven's Steel Metallurgy for the Non-Metallurgist as well as articles, posts, etc. by Mike Blue, Tim Zowada, and Kevin Cashen. These men are truly amazing. I am only following their lead.
We're dealing with O1, which is about as basic a HT as you can get. Still, there are a lot of different takes on it. Personally mine looks like this:
Stress relieve: heat to 1250, cool in still air. With all that grinding, I make sure I do this to every blade.
Harden: 1450-1500, soak for 10 mins, quench in medium-speed oil
Temper: 400-450 which yields an HRC of 63-61. I like mine a little harder than 61. For the record, 61 is the optimal HRC for O1 meaning that it has both maximum hardness and ductility.
I quench in medium speed oil and interrupt the quench when the oil is still smoking and let it slowly come back down to temperature. It's not really a martemper because I don't have salts, but I've gotten great results with this technique.
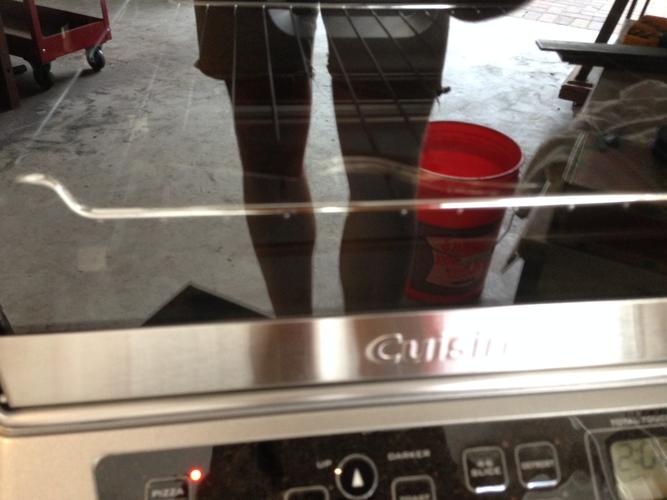
From here, I wipe off the oil and take off some of the scale with just a bit of hand sanding. I pop it into my (wildly accurate, seriously) toaster/tempering oven and temper twice for two hours a time, allowing it to come down to room temp before each cycle.
Also, those are my legs in the photo. I am wearing cutoffs. I live in Houston and am right next to the forge, 'nuff said.
Out of tempering, I take it back to the grinder. I start with the 120 Hermes and get all the scale off and grind very close to the center line. Then, I switch to the 220 and go even closer.
![Name: photo 1[3].jpg
Views: 685
Size: 52.5 KB](https://sharprazorpalace.com/attachments/forge/164090d1398454315-how-knifemaker-makes-razor-7-8-french-point-wip-how-photo-1-3-.jpg)
As a knifemaker, I'm constantly concerned with the state of my plunge cuts. Here they are, nice and even. Go check the razors in your collection; you'll be surprised by how uneven they are!
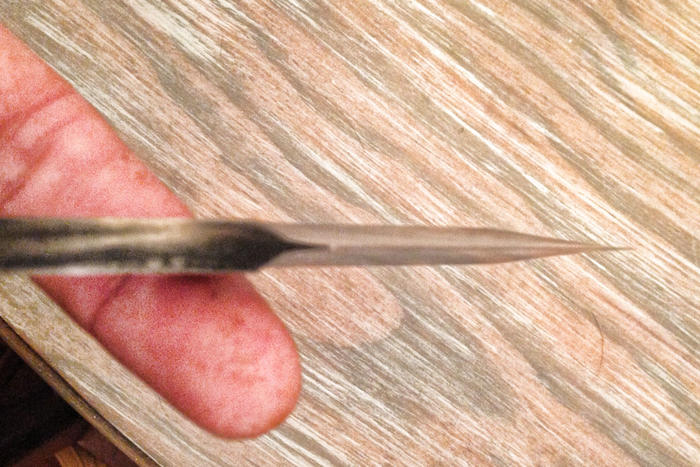
At this point, I tape it and set the bevel on the DMT to see how I did. It's a bit fat and uneven so I take it back to the KMG and work with it a bit. I get it to where I think it should be and then hit it with a 400 grit gator belt to really smooth it out. Then, I go back inside to the DMT again.
I'll let y'all decide, but I think I nailed it
For now, this is where I am. I've still gotta finish sand and everything and make some scales for it. I haven't decided on scale material yet...Opinions?
Thanks for looking y'all!Let me know if you need any help with shaving, honing, etc.
-
The Following 13 Users Say Thank You to PapaTony For This Useful Post:
Adam G. (04-26-2014), earcutter (04-26-2014), Geezer (04-25-2014), jc50 (04-27-2014), Leatherstockiings (04-27-2014), Lynn (04-29-2014), lz6 (04-28-2014), MJC (05-06-2014), Neil Miller (04-28-2014), pfries (04-26-2014), ScottGoodman (04-26-2014), Thisisclog (03-27-2015), Zephyr (04-27-2014)
-
04-25-2014, 08:06 PM #2Senior Member


- Join Date
- Jun 2013
- Location
- archbold ohio
- Posts
- 2,364
Thanked: 545
looks great! can't wait to see the finished product. i'd love to be able to do that kind of work but i've got too many hobbies already.
PapaTony likes this.
-
The Following User Says Thank You to tintin For This Useful Post:
PapaTony (04-25-2014)
-
04-25-2014, 09:15 PM #3Senior Member
- Join Date
- Nov 2010
- Location
- Pequea, Pennsylvania
- Posts
- 2,290
Thanked: 375
Looks good to me, I like the shape you choose. Looking forward to seeing the finished product.
CHRIS
-
04-25-2014, 11:10 PM #4Senior Member


- Join Date
- Feb 2013
- Location
- Haida Gwaii, British Columbia, Canada
- Posts
- 14,395
Thanked: 4821
I know zero about any of the technical stuff, maybe less because I'm not even sure what to call it. The shape is great. I love horn for scales, although carved bone, even just lightly carved, is pretty awesome too.
It's not what you know, it's who you take fishing!
-
04-26-2014, 01:23 AM #5Senior Member
- Join Date
- Feb 2012
- Posts
- 400
Thanked: 61
Having spent the afternoon watching tony work I can firmly say he knows his stuff!!! Thanks for letting me use your band saw! Can't wait to come back to design my own with you!
PapaTony likes this.
-
The Following User Says Thank You to Heespharm For This Useful Post:
PapaTony (04-26-2014)
-
04-26-2014, 01:58 AM #6lobeless

- Join Date
- Feb 2012
- Location
- Kansas
- Posts
- 4,864
Thanked: 762
Super cool!! Thanks for sharing!
David
-
04-26-2014, 02:23 AM #7The Great & Powerful Oz


- Join Date
- May 2008
- Location
- Bodalla, NSW
- Posts
- 15,602
Thanked: 3748
If the spine bevel matches your edge bevel I think you got it all pretty straight .
The white gleam of swords, not the black ink of books, clears doubts and uncertainties and bleak outlooks.
-
04-26-2014, 02:03 PM #8Junior Member
- Join Date
- Apr 2013
- Location
- Stockholm, Swedcen
- Posts
- 15
Thanked: 0
Thank you for posting some WIP pics, I really appreciate it. I am just getting started with my very first razors, so beeing able to read and watch WIP threads helps alot! And the razor looks very nice!
Keep at it and good luck!
-
04-26-2014, 09:48 PM #9Bladesmith by Knight

- Join Date
- Jun 2007
- Location
- Murrumba Downs, Queensland, Australia.
- Posts
- 571
Thanked: 203
Awesome work. Es, your plunge cuts are neater than most I see on modern razors.
welldone.
keep us posted on the rest of this poject please.Respectfully,
Adam.
-
04-27-2014, 01:36 AM #10Senior Member
- Join Date
- Nov 2013
- Location
- Houston, TX
- Posts
- 147
Thanked: 45
Thanks everyone for all of your interest, kind words, and encouragement. I'll definitely keep everyone posted with my progress. I'll resume work on it on Monday. We'll see how far I get
I'm definitely considering the horn/antler!
Let me know if you need any help with shaving, honing, etc.


 Reply With Quote