
Results 1 to 9 of 9
 22Likes
Thread: some mo' blades
 LinkBack URL
 About LinkBacks
-
05-13-2015, 01:26 AM #1Senior Member


- Join Date
- Oct 2013
- Location
- vermont
- Posts
- 778
Thanked: 207 some mo' blades
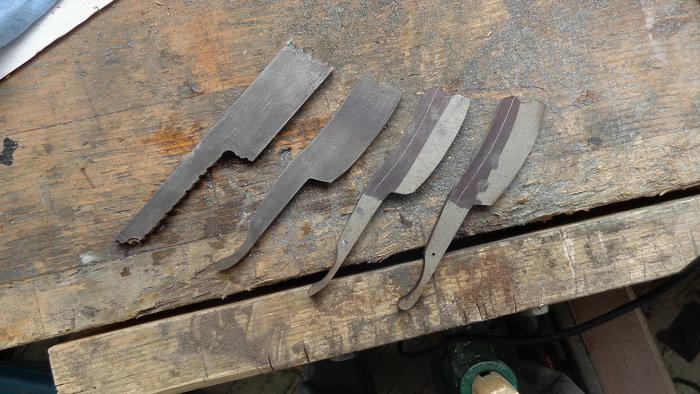
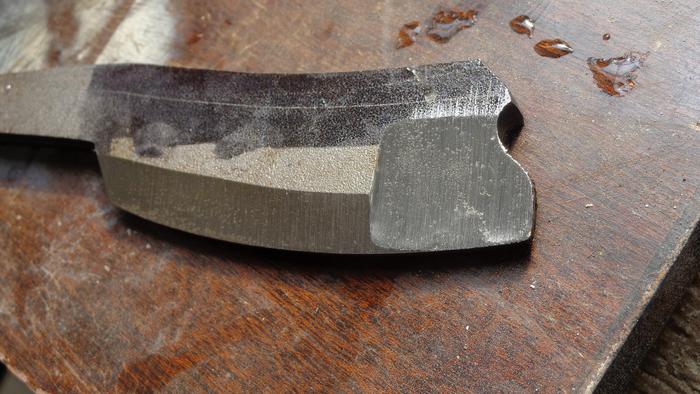
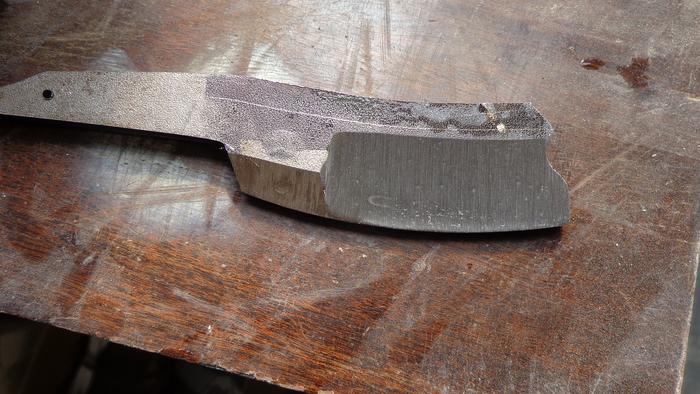
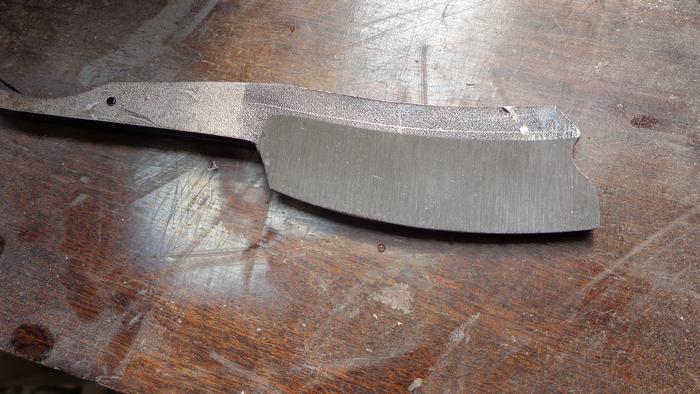
some quick shots of the progression of a rough grind. starting with nested blanks freshly liberated from a bar of O1 i profiled each blank, leaving them all slightly oversized. after profiling i mark center of cutting edge, heel, toe and top and bottom of tang. to start the rough grind i "break the 90s" and bring the cutting edge thickness to just a little proud of where i want it for heat treat. i then grind in the rough hollows leaving meat up top and just connecting each pass down to the thick cutting edge, smoothing it all out on the final pass, narrowing the cutting edge if need be and walking the grind up closer to the spine if need be to make sure all is sufficiently even on both sides and centered to avoid warpage. after roughing in the hollows i rough taper the tang on both sides. once im satisfied its time for heat! once im completed with heat treating, after final tempering i usually let blanks sit for a bit and move on to another quick project. when i come back to the hardened and tempered blanks i can usually come at them with fresh energy and progress through the finish grinding quickly. before finishing and polishing completely i like to test fit mocked up scales just to make sure everything is centering proper and laying in the scales just right. i usually dont need to adjust anything bladewise at this point but i prefer to allow this pause in finishing just in case i do need to adjust. if i take a blade to finished state and then find i have to grind one side of the tang to center the blade properly then........
 just not something i want to experience!
Substance likes this.Silverloaf
just not something i want to experience!
Substance likes this.Silverloaf
-
The Following User Says Thank You to silverloaf For This Useful Post:
williamc (05-14-2015)
-
05-14-2015, 02:30 AM #2Senior Member
- Join Date
- Oct 2013
- Location
- vermont
- Posts
- 778
Thanked: 207
oops, must've forgot pics!
 Silverloaf
-
-
05-14-2015, 03:49 AM #3Senior Member


- Join Date
- Nov 2012
- Location
- Across the street from Mickey Mouse in Calif.
- Posts
- 5,320
Thanked: 1185
Are you grinding with a stone wheel ?
Good judgment comes from experience, and experience....well that comes from poor judgment.
-
05-14-2015, 05:05 AM #4Truth is weirder than any fiction..

- Join Date
- Jun 2012
- Location
- Land of the long white cloud
- Posts
- 2,946
Thanked: 581
Really like the shape of this, nice work.
Into this house we're born, into this world we're thrown ~ Jim Morrison
-
The Following User Says Thank You to Grazor For This Useful Post:
silverloaf (05-14-2015)
-
05-14-2015, 12:45 PM #5Senior Member
- Join Date
- Oct 2013
- Location
- vermont
- Posts
- 778
Thanked: 207
no sir, why do you ask? i do have a large sandstone grind wheel i have used in the past to true up some old sheffield very near wedges but its been in need of some truing up itself and decommissioned for the time being. this is all belt grinder work. Originally Posted by 10Pups
 Silverloaf
-
05-14-2015, 07:09 PM #6
I use mock-up scales without a wedge, before heat treatment.
In effect, I mount unconnected scale halves. Technically, not even scales, but rectangular pieces of wood.
This helps me to verify that the edge will end up in the middle between the 2 scales, that the direction is true, and thatthe plane in which the blade closes is vertical and in the middle between the scale halves. I do any adjustment needed before HT.
After HT I just progressively grind further on both sides. At this point, I don't need to check the alignment again.Til shade is gone, til water is gone, Into the shadow with teeth bared, screaming defiance with the last breath.
To spit in Sightblinders eye on the Last Day
-
The Following User Says Thank You to Bruno For This Useful Post:
bluesman7 (05-14-2015)
-
05-14-2015, 07:23 PM #7Senior Member

- Join Date
- Apr 2014
- Location
- Bristol Uk
- Posts
- 260
Thanked: 57
Love threads like these, lots of hints and tips. Keep them coming👍
silverloaf likes this.
-
05-14-2015, 08:15 PM #8Senior Member
- Join Date
- Oct 2013
- Location
- vermont
- Posts
- 778
Thanked: 207
great tip bruno. i will give that a test on some of these! all ive ever done is use the oldschool method of using a true surface and lay each side of the tang flat on that with a bit of light behind it. i can judge by eye pretty well how evenly the blade lays and how evenly the toe rises above that trued surface. i sight along the tip of the blade as well each time i flip the blade to make sure it has the same relative angle in relation to the trued surface. this is all done during rough grind, checking with each grit. using this simple method i have thus far had zero issues centering a blade post heat treat with the exception of one blade that warped pretty good (not careful enough to grind evenly prior to heat treat). fortunately i was able to correct the warp completely with my finish grind, centered it beautiful! Originally Posted by Bruno
your method is more fool proof and takes a good amount of human error out but i definitely like developing trust in my eyes and hands as i design and build a razor. i actually find a lot of joy in doing it my way but im always open to try and adopt different methods. Silverloaf
-
05-15-2015, 03:49 PM #9
The method you mention, I also use during the rough grinding part.
This works fairly well. When I start higher grit sanding before HT, 120 grit, after hammering in my mark, I do the thing I mentioned earlier to insure that the scalse will sit perfectly. I try to minimize the amount of grinding I need to do after HT. Ideally, after HT, I only clear up the fire scale. The only real grinding is done on the hollows.Geezer and silverloaf like this.Til shade is gone, til water is gone, Into the shadow with teeth bared, screaming defiance with the last breath.
To spit in Sightblinders eye on the Last Day


 Reply With Quote

