
Results 1 to 10 of 10
 18Likes

Thread: First multi layer billet
 LinkBack URL
 About LinkBacks
-
09-30-2015, 08:45 PM #1
 First multi layer billet
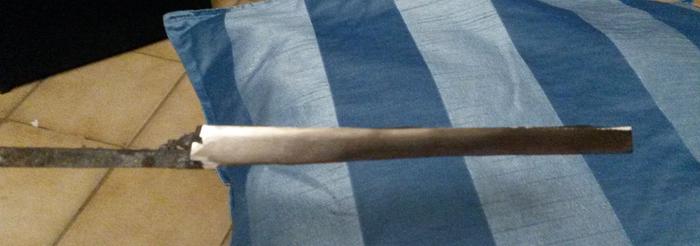
The weather was nice and I had some time, so I decided to finally forge my first multi layer billet. I made a stack of 4" long pieces of steel, placed on top of a long bar of steel for support. The total was 3 layers of O2, and 2 layers of 15N20 iirc. Sadly I forgot to take pics.At that stage. The steel was ground clean beforehand, and when the stack was made, I tag welded it in place.
Heated a bit and fluxed with borax. Heated to red hot and fluxed again. Then heated to welding heat and gently hammered the billet to get the initial welds in place. Fluxed, reheated, and hammered some more.
After a short while, the flux stoipped getting squashed out of the billet, meaning that the billet was solid. At that point I started hammering harder. I have to say that doing this by hand is a real chore. Next time I will ask a friend to strike. When the billet was drawn out a good bit, I let it cool off slowly so that I could grind the sides to inspect the welds. All welds seem to have take hold nicely. It looks like a single solid bar of steel which is good.
Now I can draw it out further to turn it into a razor or knife. I didn't want to do that before because it would be silly to go through all that effort by hand then then discover only much later that one of the welds had failed.
It is quite a lot of work to do this by hand though. But it was fun. Now I have a central core of O2, with 2 bright layers running through the hollows of the razor or the sides of the knife. Not a good way to make Damascus though. I can't see myself drawing this out further, and then folding it and drawing it out again, half a dozen times without a striker.
 Til shade is gone, til water is gone, Into the shadow with teeth bared, screaming defiance with the last breath.
To spit in Sightblinders eye on the Last Day
-
The Following 2 Users Say Thank You to Bruno For This Useful Post:
ScottGoodman (10-01-2015), spazola (09-30-2015)
-
10-02-2015, 08:20 PM #2
Today I drew it out further. I noticed that drawing it out at welding heat, one side peeled loose a bit while I was upsetting it. I fluxed it, and welded it back shut. Then I went to orange heat and gently drew it out further without a problem. I think upsetting at welding heat is not a good idea. I drew out a razor blank from the end (which was not the side that had the peel). The stub that was left I drew out further to a small 4" blade kitchen knife. Both are annealing in my new oven with all the rest I made today

I'm anxious to know how the layers will reveal themselves, both in the razor and the knife. The stack started as 5 mm O2, 3 mm 15N20, 5 mm O2, 3 mm 15N20, 5 mm O2. With the kitchen knife flattened to about 2 mm final thickness, I am curious how the nickel steel layers will look Til shade is gone, til water is gone, Into the shadow with teeth bared, screaming defiance with the last breath.
To spit in Sightblinders eye on the Last Day
-
10-02-2015, 08:33 PM #3Incidere in dimidium


- Join Date
- Mar 2012
- Location
- Val des Monts, Quebec
- Posts
- 4,070
Thanked: 1440
I had the same problem while upsetting. Most of the time peeling the layers further apart, cleaning them, fluxing and re-welding did the trick and then it was fine. From your experience, I wonder if I was being overzealous by opening the split and cleaning before fluxing and re-welding? Something to test next time out.
What do you use as flux? I'm also going to try kerosene as a flux next time as the borax really did a number on my forge lining. I've tried it on a couple of smaller welds and am impressed with the results so far.
With the billet I made I went from 8 to 128 layers. It was a hell of a lot of work and took many hours, but in the end it looked really good. Thankfully it was turned into gifts so I wasn't concerned with getting money back for my time. Those would have been *really* expensive knives if I were to charge enough to get a reasonable hourly rate out of it.
I'm curious to see how this turns out for you.
It was in original condition, faded red, well-worn, but nice.
This was and still is my favorite combination; beautiful, original, and worn.
-Neil Young
-
10-02-2015, 10:06 PM #4
I used borax. It did a good job.
The benefit of borax is that you can re-apply when the steel is hot. I presume that for kerosene it has to be cold?Til shade is gone, til water is gone, Into the shadow with teeth bared, screaming defiance with the last breath.
To spit in Sightblinders eye on the Last Day
-
10-02-2015, 10:13 PM #5Incidere in dimidium
- Join Date
- Mar 2012
- Location
- Val des Monts, Quebec
- Posts
- 4,070
Thanked: 1440
That has definitely been the assumption I have been working with! Originally Posted by Bruno

When I was folding and stacking, I tended to let it cool down anyway so I could grind the scale off and clean up the surfaces a bit, so for my decidedly amateurish workflow, that cool down step wouldn't slow things down too much.
It was in original condition, faded red, well-worn, but nice.
This was and still is my favorite combination; beautiful, original, and worn.
-Neil Young
-
10-02-2015, 10:32 PM #6"My words are of iron..."

- Join Date
- Oct 2006
- Posts
- 1,898
Thanked: 995
Kerosene, any source of fuel, maybe better used if you're going to do a closed box type weld. You want something to burn the oxygen out of the inside. Then most things weld quite nicely.
With open welds, like a laminated billet, borax is more than sufficient and does not flame away. It liquifies and forms an oxygen barrier that is easy to move out of the way of the metal by simple strikes/pressure.
I'm glad to see some learning taking place. Welding is one thing, but if you never had a billet delaminate, you would never learn how to fix it.
It's my habit, and others, to turn the billet sideways and upset down into the layers to test the weld and make sure it stays closed. You've ventured onto a method that is quite acceptable shop practice. Simple reflux, lightly close the gaps, wait until the billet reaches welding heat again and set the welds.
I hope you guys get a bubble. I want to know how you'll fix that. LOL
-
The Following User Says Thank You to Mike Blue For This Useful Post:
Cangooner (10-02-2015)
-
10-02-2015, 10:46 PM #7Incidere in dimidium
- Join Date
- Mar 2012
- Location
- Val des Monts, Quebec
- Posts
- 4,070
Thanked: 1440
I had two of those too... On one, it was so close to the edge I just cut in from the side with a hot cut, then treated it the same way I did a delamination. The other was right smack in the middle. I ended up just cutting the sucker out. Went into it with a chisel like popping a blister, then hacked out the offending bits and cleaned it up a bit with a grinder. Come to think of it, I should probably say it has 127 1/2 layers, rather than 128. Originally Posted by Mike Blue
It was in original condition, faded red, well-worn, but nice.
This was and still is my favorite combination; beautiful, original, and worn.
-Neil Young
-
10-03-2015, 03:01 PM #8
Mike, in your experience, what is the safest way to draw out a finished billet, especially where it concernes upsetting? Orange heat or closer to welding heat? Originally Posted by Mike Blue
On one hand, welding heat would seem safer because then everything is more ductile so there are less stresses in the material. On the other hand, welding heat can also cause less than ideal welds to come loose again, especially since higher ductility can cause those layers to move more easily.
From my limited experience so far with Damascus I've bought and the billet I made myself, I have the impression that orange heat is safest, but I would like to know what you think
Til shade is gone, til water is gone, Into the shadow with teeth bared, screaming defiance with the last breath.
To spit in Sightblinders eye on the Last Day
-
10-03-2015, 03:50 PM #9"My words are of iron..."
- Join Date
- Oct 2006
- Posts
- 1,898
Thanked: 995
I was taught to work pattern welded materials at or near welding heat, but time has also taught me that is not absolutely necessary if I am confident that all the welds in the billet are good. If you think about it, working at welding heat means that any pockets or voids will be more likely to close up. Definitely orange heat for forging and don't work too far below that. It's much easier to heat a hot billet than wait for one to warm up even from red. You get more work done.
Another item to consider is the size of the original billet. Some folks like to lay up a big long narrow thin billet. I like at least a couple inches of square. Once I've set the first weld, reheat, then I work that billet down by at least 50% (from 2 inches to one maybe less) before thinking about folding or cut/restack. That reduction forging "spreads" the weld areas out into a much larger wider connection between pieces and tends to move any flaws toward the outside of the billet where they would disappear into the rough edges. Welds are far more solid and billets are less prone to flaws. So, Stack Tall and Short and forge down to final dimensions. You also get a lot more pattern development and less linear patterns.
On second thought, a four inch tall stack would be a miserable thing for a guy with a hand hammer. I am spoilt by having big tools. Spreading the weld boundaries is still a good idea though.Last edited by Mike Blue; 10-03-2015 at 03:52 PM.
skipnord likes this.
-
The Following User Says Thank You to Mike Blue For This Useful Post:
Cangooner (10-03-2015)
-
10-21-2015, 07:23 AM #10Senior Member
- Join Date
- Feb 2015
- Location
- Florida
- Posts
- 507
Thanked: 49
What I have been doing in recent times is to soak the cold stack in kerosene, throw it in the forge and do two welding presses. I then with over to borax to make sure that the edges are all sealed up. Some of he guys who hipped me to using kerosene or tool cleaner told me that you need to be gentle with the billet because what the kerosene has done is burned up and famed a layer of carbon on all of the surfaces that protects the steel form the oxygen. if you dusted that carbon layer, you can supposedly get scale where you done want it. I ma using a press so things are a bit less violent the with a poor hammer, but I have pressed too hard on one end and cause the welds on the other end to shear. doing two long soaks and two welding presses on the entire 6 inch length of the stack has helped with that i think, but i still try not to press to deeply early on.


 Reply With Quote