
Results 11 to 20 of 20
 24Likes
Thread: Some works in progress
 LinkBack URL
 About LinkBacks
-
11-25-2015, 06:02 PM #11Senior Member


- Join Date
- Jul 2014
- Location
- Denver CO
- Posts
- 4,632
Thanked: 811 I use a piece of iron pipe in a gas forge with a chunk of charcoal in the pipe to provide a CO atmosphere for zero scale and decarburization.
 Originally Posted by EdBrice

Note that this would be dangerous in an oven as the CO is a fuel and could cause an explosion.Last edited by bluesman7; 11-25-2015 at 06:05 PM.
-
11-25-2015, 07:59 PM #12Member

- Join Date
- Nov 2015
- Location
- England
- Posts
- 74
Thanked: 33
Unfortunately I use an electric kiln,which I find convenient but I suppose scale is the downside.
What's the best way to remove the scale ? At the Moment I am using my grinder but the scale seems to shorten the belts lifespan.
-
11-25-2015, 09:58 PM #13
I don't use anti-scale paint or things like that.
I use the iron pipe method, and scale loss is minimal. You have to leave enough thickness for quenching, and that has to be ground away regardless, so anti-scale compounds do not make a lot of sense.
A couple minutes soak is enough, so there is not much scale buildup anyway.Til shade is gone, til water is gone, Into the shadow with teeth bared, screaming defiance with the last breath.
To spit in Sightblinders eye on the Last Day
-
The Following User Says Thank You to Bruno For This Useful Post:
EdBrice (11-26-2015)
-
11-29-2015, 08:47 PM #14Member
- Join Date
- Nov 2015
- Location
- England
- Posts
- 74
Thanked: 33 Some works in progress
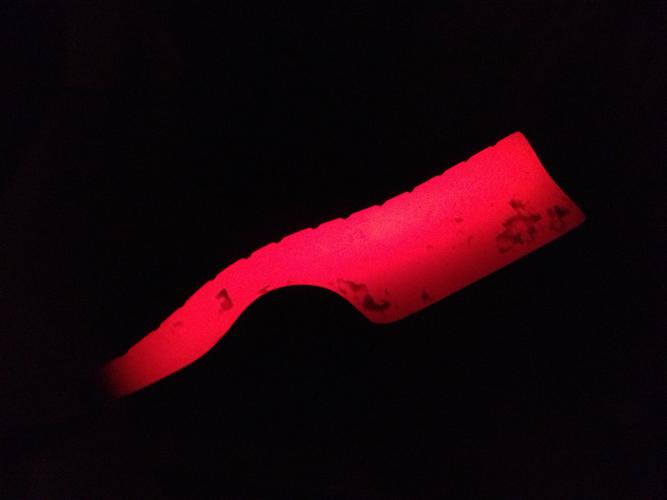
Next up is heat treating ,the first thing I do is bring the razors up to about 810c,to do this I use a paragon electric kiln which is digitally temperature controlled,And then remove them and allow them to cool to room temp I repeat this twice,this step removes any stresses from all the shaping and grinding in the hope that the blades won't crack or warp when quenched.Then they are in the kiln again and when they reach 810c they are held for about 15 minutes to let them soak.Then it's quenching time I use vegetable oil that is preheated to about 50c,once quenched I test the hardness of the blades they are about 65 Rockwell at this point.Then it's back in the kiln again for an hour at 200c I do this twice allowing the razors to cool to room temp in between, when they emerge they are about 62 Rockwell ideal for razors.
Next up finish grinding cheers ed.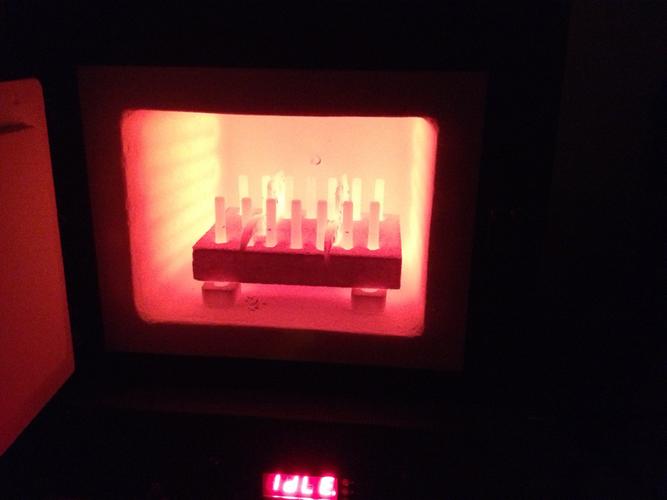
 Chevhead likes this.
-
11-29-2015, 10:06 PM #15
15 minutes is much too long for something as thin as a razor. A couple of minutes is long enough.
Chevhead likes this.Til shade is gone, til water is gone, Into the shadow with teeth bared, screaming defiance with the last breath.
To spit in Sightblinders eye on the Last Day
-
The Following User Says Thank You to Bruno For This Useful Post:
Chevhead (01-18-2016)
-
11-30-2015, 05:34 PM #16Member
- Join Date
- Nov 2015
- Location
- England
- Posts
- 74
Thanked: 33
I was under the impression that 01 needed a good long soak to get everything into solution,I realise that if i get the steel too hot it will promote grain structure growth but my kiln is temp controlled and only fluctuates by a couple of degrees each way so didn't think I was doing any harm? I might have to do some more research as there seems to be so much conflicting advice on soak times and the whole hardening procedure maybe I should drop my soak time to 10 minutes as I see Charlie Lewis does on his videos (Charlie you are my hero and the one who got me going on this crazy adventure!!) how long does everybody else soak 01 for cheers ed
-
11-30-2015, 09:58 PM #17
Soak times are often specified in minutes per mm cross section, for the purpose of making sure that the phase change has happened throughout, and not just the outer area. This is important when working with large objects in 3D (sprockets, dies, etc) but for flat things, the cross section is only a couple mm. For a razor, the cross section that matters is the one at the edge, which may be just a mm.
The flip side of soak is grain growth. And even with perfect temperature control, decarburization is a real issue.
The very edge itself will decarburize, and the longer the soak, the bigger the effect.
Also even if you have a kiln, there can be significant temperature differences inside. The location of the thermocouple is important. That is why it is a good idea to let the temp inside stabilize first, and only place the blades inside from then on. Because the temperature inside might overshoot during the heating phase.Chevhead likes this.Til shade is gone, til water is gone, Into the shadow with teeth bared, screaming defiance with the last breath.
To spit in Sightblinders eye on the Last Day
-
The Following User Says Thank You to Bruno For This Useful Post:
EdBrice (12-01-2015)
-
12-08-2015, 09:38 PM #18Member
- Join Date
- Nov 2015
- Location
- England
- Posts
- 74
Thanked: 33
Now the razors are heat treated it's time for finish grinding,this is probably the most critical step in the process as a minor lack in concentration can ruin a razor in a heartbeat.for this stage I slow the grinder to its slowest speed and constantly dip the razor in cold water as soon as I feel any heat buildup,I grind on the 8" contact wheel with a 60 grit ceramic belt until the blade is around 0.007-0.009" thick then I set the bevel for the first time on a course diamond hone mainly so I can see where there needs to be more material removed from to keep the grind even.Then I repeat this step as I move up the grits and finally finish at about 340 grit.then the rest of the razor is finished up to 340 grit.
Then it's time for some buffer action,I go black emery then green,then pink rouge and by that time the razor has a mirror finish,then I electo etch my makers mark,give another quick buff then it's time for scales.
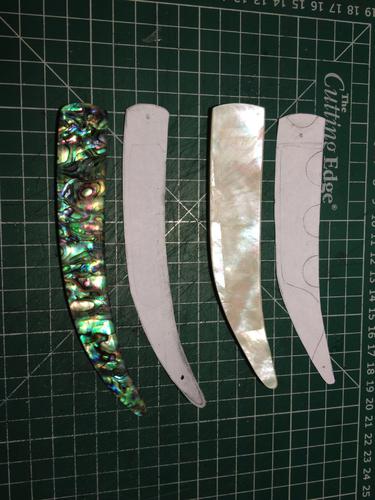
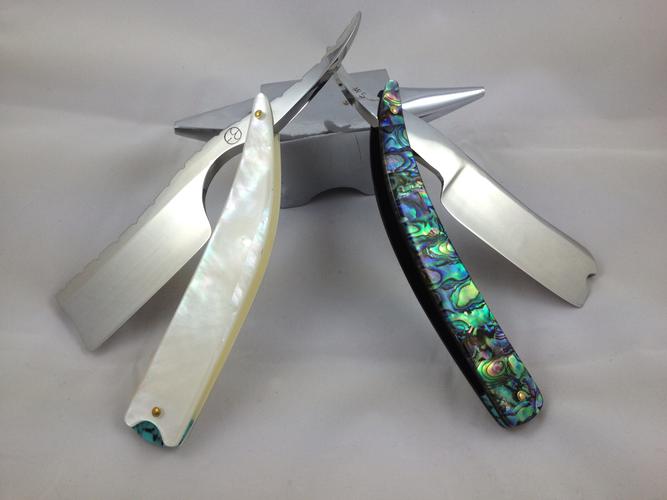
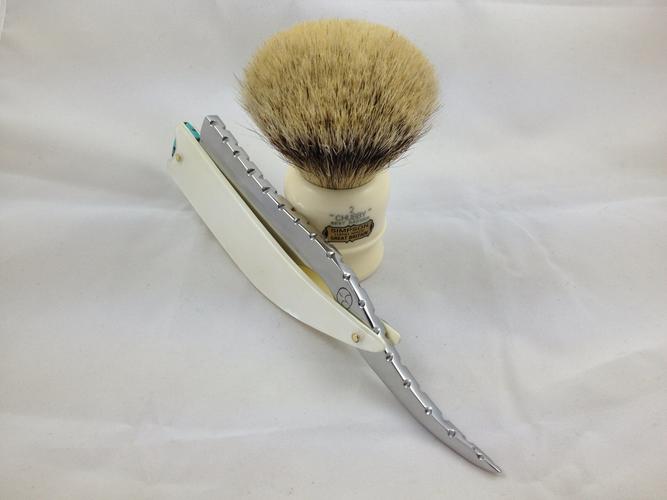
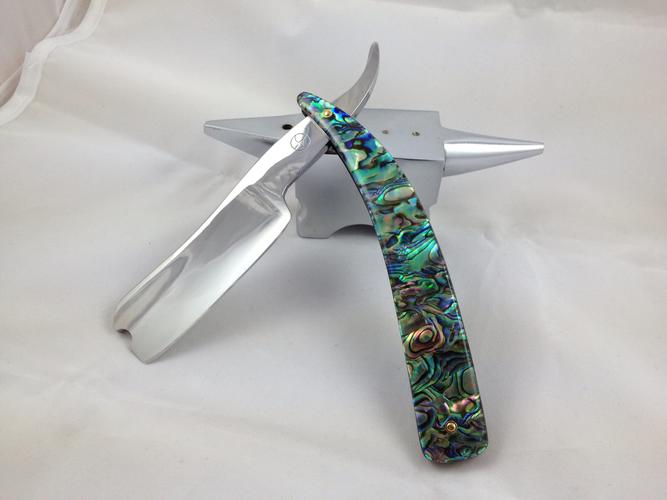
For scales I have gone for paua abalone and mother of pearl with turquoise wedges,pinned with brass rod and washers,I won't go into scale making as that's an art of its own and has been documented many times on the forums ,unfortunately the barbers notch razor did not come out as planned I wanted more spine up top,but cocked the edge up and had to grind further up towards the spine to get the 8/8" blade width that I required.
Finished razor pics to follow cheers ed.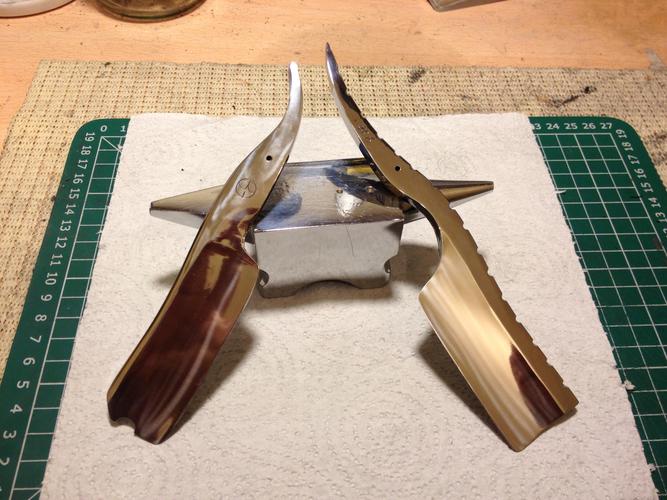
-
01-18-2016, 09:11 PM #19Member
- Join Date
- Nov 2015
- Location
- England
- Posts
- 74
Thanked: 33
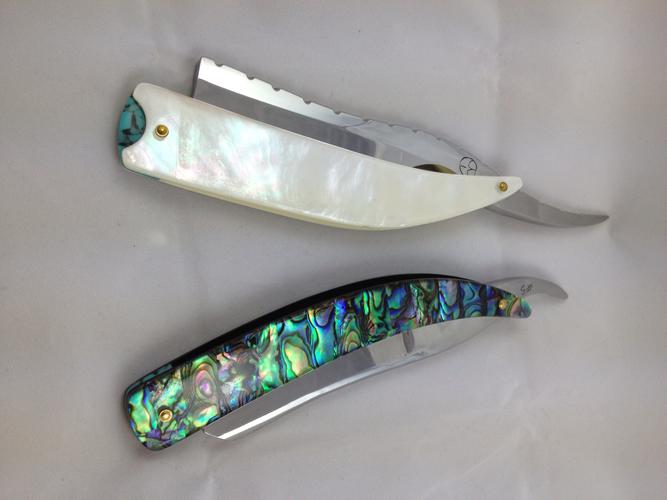
 Next up I hone the razors starting on a naniwa 1k then 5k,8k,12k then I finish up on a shoubudani asagi with slurry then water, then they hit the strop.
Both razors shave beautifully.
Neither razors are perfect but with each one I seem to gain a little bit more insight and gain a few more skills,which is what's it's all about for me.
Here are some pictures of the completed pair cheers ed.
-
The Following User Says Thank You to EdBrice For This Useful Post:
eguilbault (04-09-2016)
-
01-18-2016, 09:40 PM #20
Those look really nice!

-
The Following User Says Thank You to Chevhead For This Useful Post:
EdBrice (01-20-2016)


 Reply With Quote


