
Results 1 to 10 of 15
 53Likes
Thread: Old Razor Repro
 LinkBack URL
 About LinkBacks
-
11-17-2020, 10:02 PM #1Senior Member

- Join Date
- Jul 2020
- Posts
- 270
Thanked: 44 Old Razor Repro
Just completed this Sheffield style razor this morning, a little personal project. 52100 steel, black acrylic scales, lead wedge, bullseye washers.
-
-
11-17-2020, 10:29 PM #2Senior Member
- Join Date
- Sep 2020
- Location
- Austin, TX
- Posts
- 653
Thanked: 56
Looks great.
If you're wondering I'm probably being sarcastic.
-
11-17-2020, 10:38 PM #3Skeptical Member


- Join Date
- Nov 2016
- Location
- Colorado Springs
- Posts
- 10,559
Thanked: 2197
Nice work. As far as I can tell the scales look stuffed with blade.
It's just Sharpening, right?
Jerry...
-
11-18-2020, 03:45 AM #4Member

- Join Date
- Sep 2016
- Location
- Boise, id
- Posts
- 41
Thanked: 1
Can you show a pic of the grind shape? What size wheels did you use?
-
11-18-2020, 05:18 AM #5Senior Member
- Join Date
- Jul 2020
- Posts
- 270
Thanked: 44
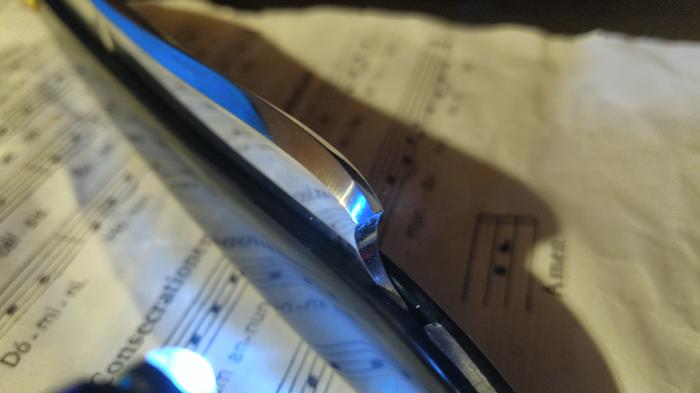
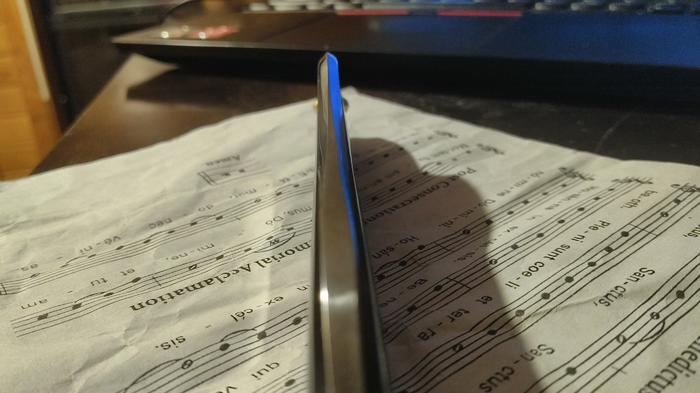
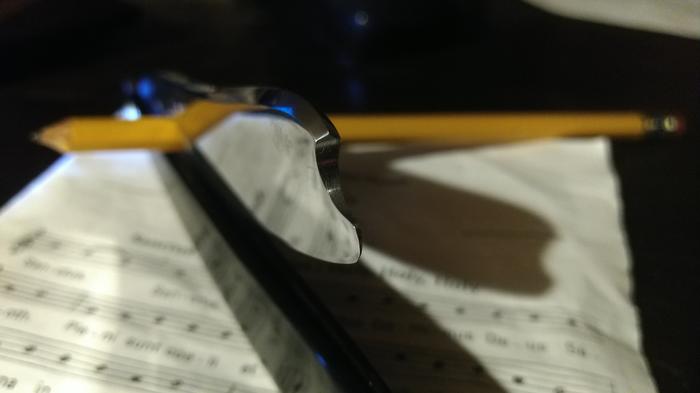
Hope these pics are ok, if not I can take some better ones in the morning. The faces of the blade were ground on a 10 inch contact wheel, but I rocked the blade as I was grinding to create an even larger radius so it's probably closer to something like a 12 inch. The spine is chamfered, the two chamfers come together at the toe and diverge as you go toward the tail; this leaves a flat area for the fingers to grip instead of resting on a peak.
-
-
11-18-2020, 08:32 PM #6Senior Member
- Join Date
- Jul 2020
- Posts
- 270
Thanked: 44
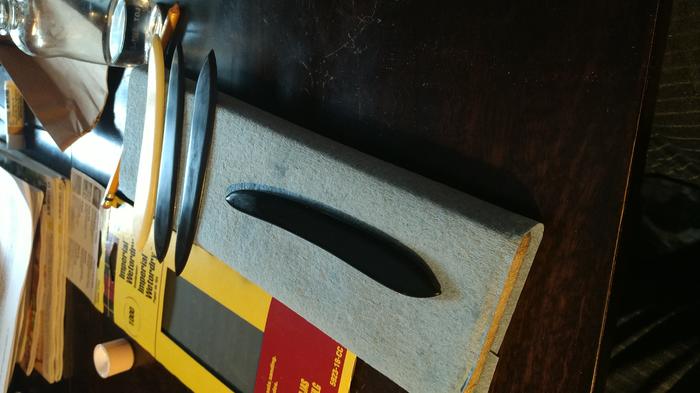
Got a few more of these on the go, finished the grinding today. After hardening all rough work starts out on a 60 grit ceramic belt. Then I progress going over each surface through 120 grit ceramic, 220 ceramic, 400 SiC, 600 Sic, finally ending with a Trizact A16 grade belt which is the equivalent of 1200 grit. This gives a nice glaze type finish, partially reflective with very fine scratches that appear iridescent when viewed through a loupe. On some of the belts I will use a grease to just fine the cut a little and provide cooling and lubrication.


-
11-18-2020, 10:07 PM #7Senior Member


- Join Date
- Dec 2018
- Location
- Gainesville, FL
- Posts
- 6,834
Thanked: 681
Outstanding. Very impressive work. Those look very professionally done and the finished product looks like a name brand Sheffield maker's work. I'd love to see as many pictures as you are willing to post. Thanks for sharing.
Iron by iron is sharpened, And a man sharpens the face of his friend. PR 27:17
-
11-18-2020, 11:18 PM #8Senior Member
- Join Date
- Jul 2020
- Posts
- 270
Thanked: 44
Thanks for the compliments. I don't think I'd put myself in the same league with the old boys from Sheffield though haha. I've only been making razors for about 8 weeks or so, I do have a lot of grinding experience however, first in a roll turning shop in a hot steel mill and then working as a dental/surgical instrument polisher/sharpener. I'm hoping to try make a go at selling some razors to help pay the bills as it were, we'll see. Originally Posted by PaulFLUS


I'm working on some scales atm, some in black or ivory acrylic and some in horn. I'll post some pics tomorrow morning.
-
11-19-2020, 07:40 PM #9Senior Member
- Join Date
- Jul 2020
- Posts
- 270
Thanked: 44
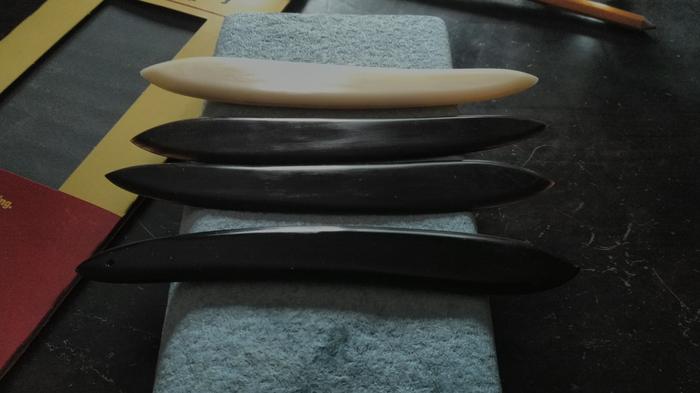
Working on some scales today, I like to do all the rough work down in the shop and then complete the finishing upstairs where it's much cleaner and especially at this time of year warmer

I have template for the shape of the scales which I trace onto the covering paper that comes on the acrylic sheet, or in the case of the horn I cover both sides in masking tape, the masking tape also helps prevent the horn from splitting/delaminating when sawed. I then saw the rough shape out and then use double sided tape to stick two blanks together, that way a pair of scales match exactly. Next I sand the shape down to size going from 60 grit, to 120 grit, to 220 grit.
Next I use my calipers and set a distance from the edge of the scales and score a line, I also score a line around the edge of the scales, this gives me a guide for filing. I use a double cut file to hog of material to create the chamfer around the perimeter of the scales. After that I use a cabinet scraper to remove the file marks; this tool will greatly reduce sanding time.
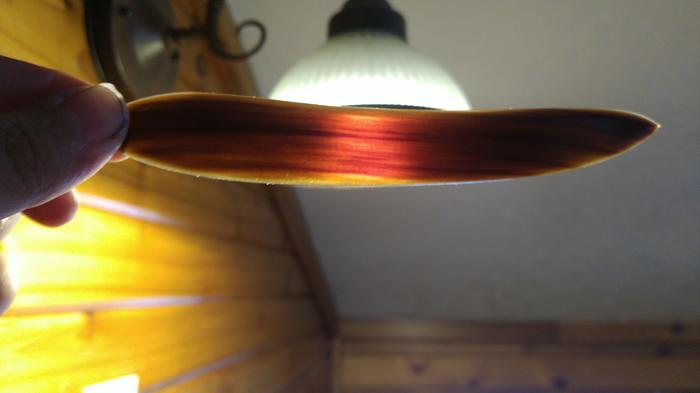
Then comes the hand sanding, I progress all the way up to 1000 grit before buffing with compound. The pics here are of hand sanding at 800 grit and a picture of one of the horn scales showing the nice patterning when held to the light. I use mineral oil as a lubricant to stop the wet/dry paper from clogging up too quickly. In the case of the ivory acrylic scales I might not sand past 800 grit to try replicate the look of ivory texture, I am also experimenting with adding a light dye to the ivory scales then sanding back to create a grain look. Will post pics once I have the process down.
(Pics aren't the best, not very bright here today)
-
11-19-2020, 08:51 PM #10Senior Member
- Join Date
- Jul 2020
- Posts
- 270
Thanked: 44
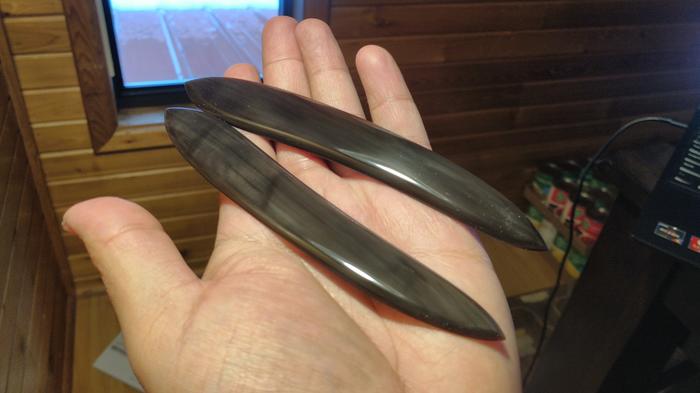
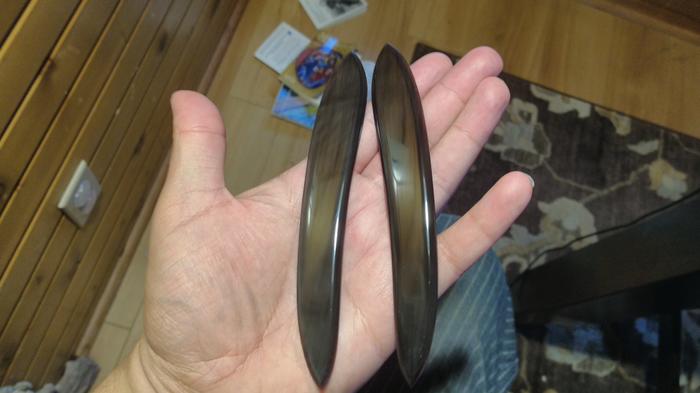
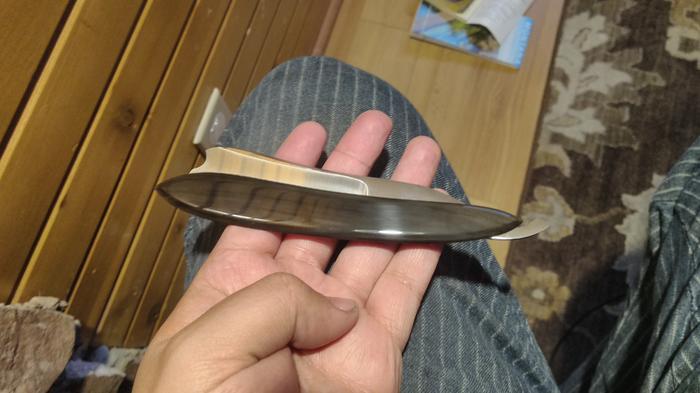
Horn scales after polishing.
Last edited by thp001; 11-19-2020 at 09:03 PM.


 Reply With Quote