
Results 1 to 10 of 12
Thread: First attempt at razors - WIP
 LinkBack URL
 About LinkBacks
-
03-10-2011, 02:12 PM #1Knifemaker


- Join Date
- Feb 2011
- Location
- Aarhus, Denmark
- Posts
- 51
Thanked: 13 First attempt at razors - WIP
Hi there.
I had been looking around when I stumbled into Tim Zowadas' damascus straight razors (Zowada Gallery)
Especially this one
I decided to make my own, of couse, in damascus steel. At the annual knife competition in the Danish Knife Guild, the "special topic class" is folders... And a Straight Razor is a knife that folds
I decided that it would be a good idea to start with a piece of single-steel and wait with the damascus for later, for more experience. So I simply went to the forge and started hammering. I annealed the finished blade and started grinding.
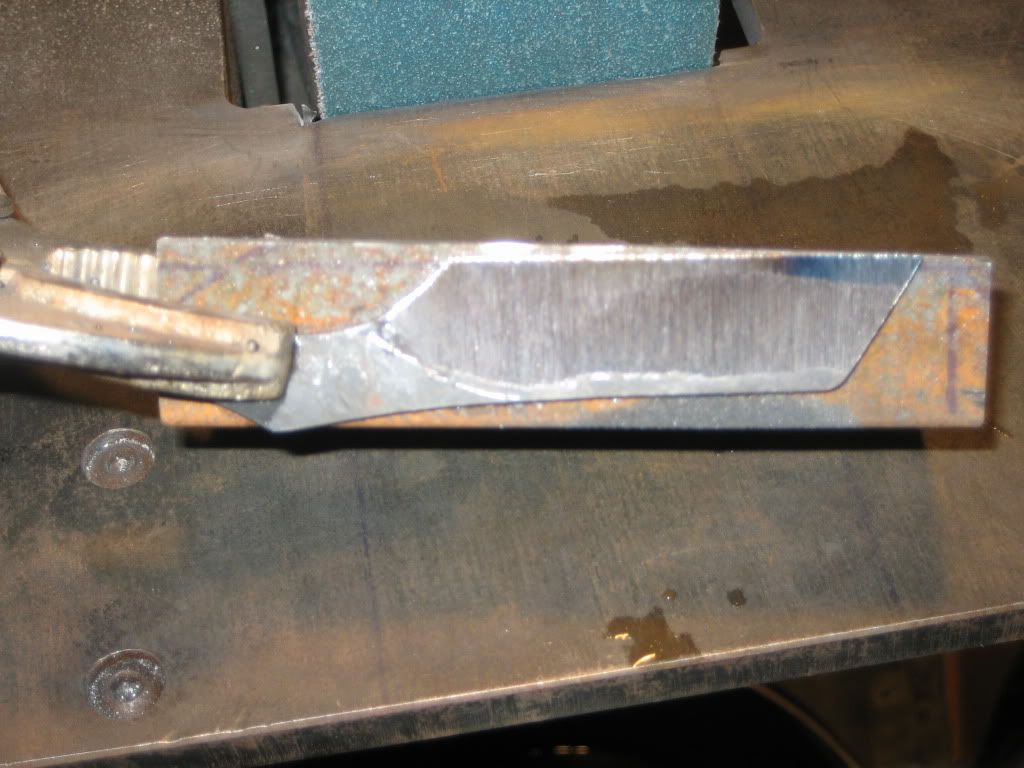
At first, I own a large belt grinder, contact wheel approximately 8", that's 20,1 cm. I needed a jig to fix the blade to, when grinding. I cut it from an old piece of angle iron and shaped it a little.
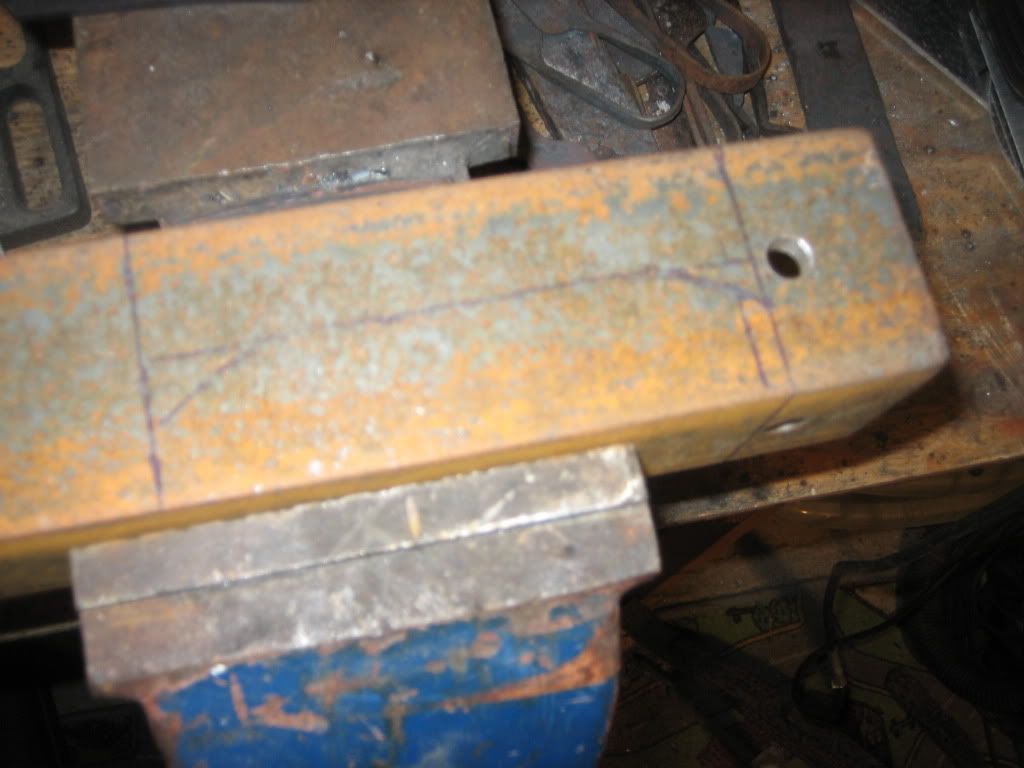
This is how the blade is supposed to sit on the jig.
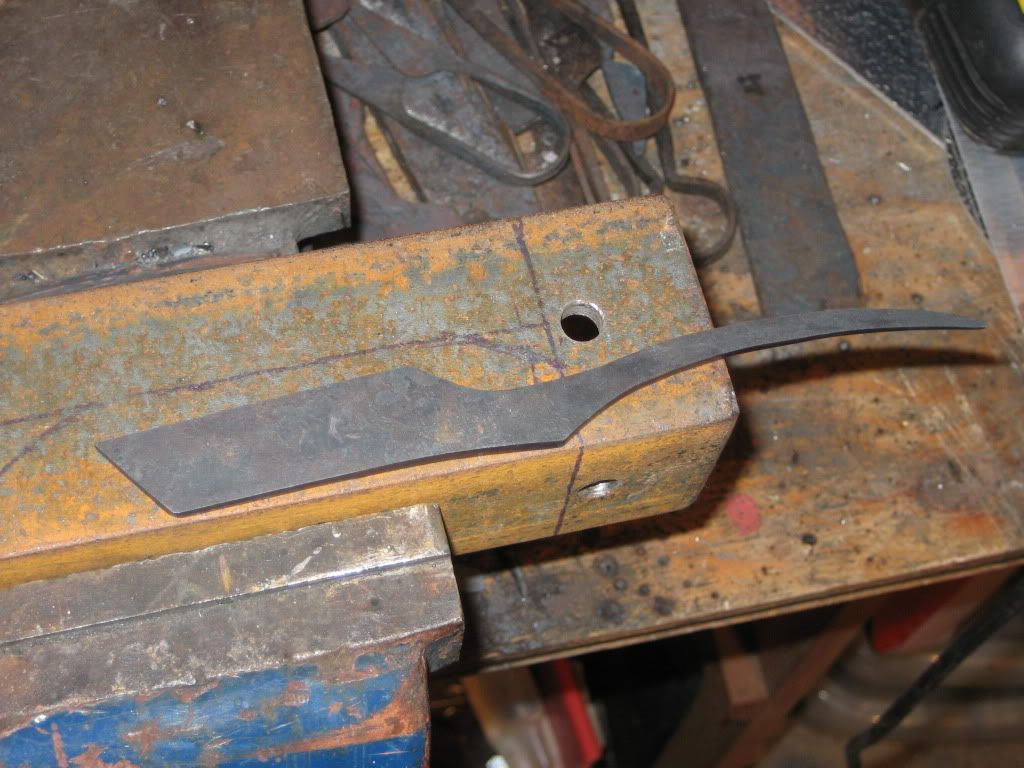
Blade clamped to the jig, facing the wrong direction, just for the fans
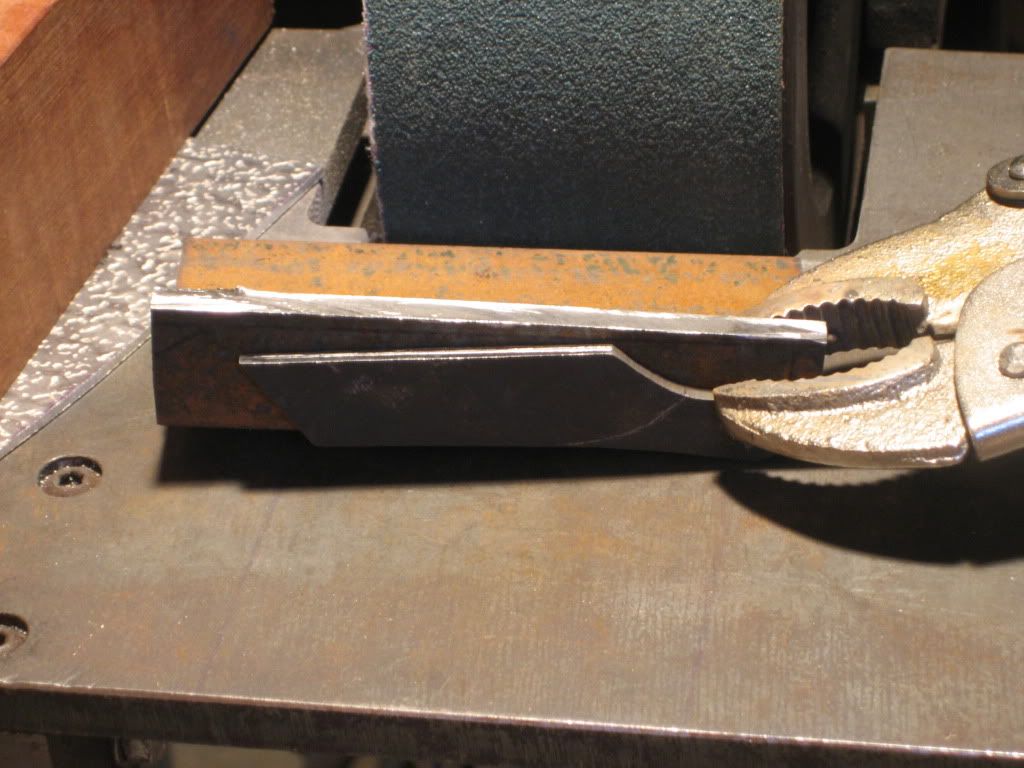
Then started grinding (I usually uses two hands") Blame it on the camera)
Blame it on the camera)
-
03-10-2011, 02:56 PM #2Knifemaker
- Join Date
- Feb 2011
- Location
- Aarhus, Denmark
- Posts
- 51
Thanked: 13
Continued...
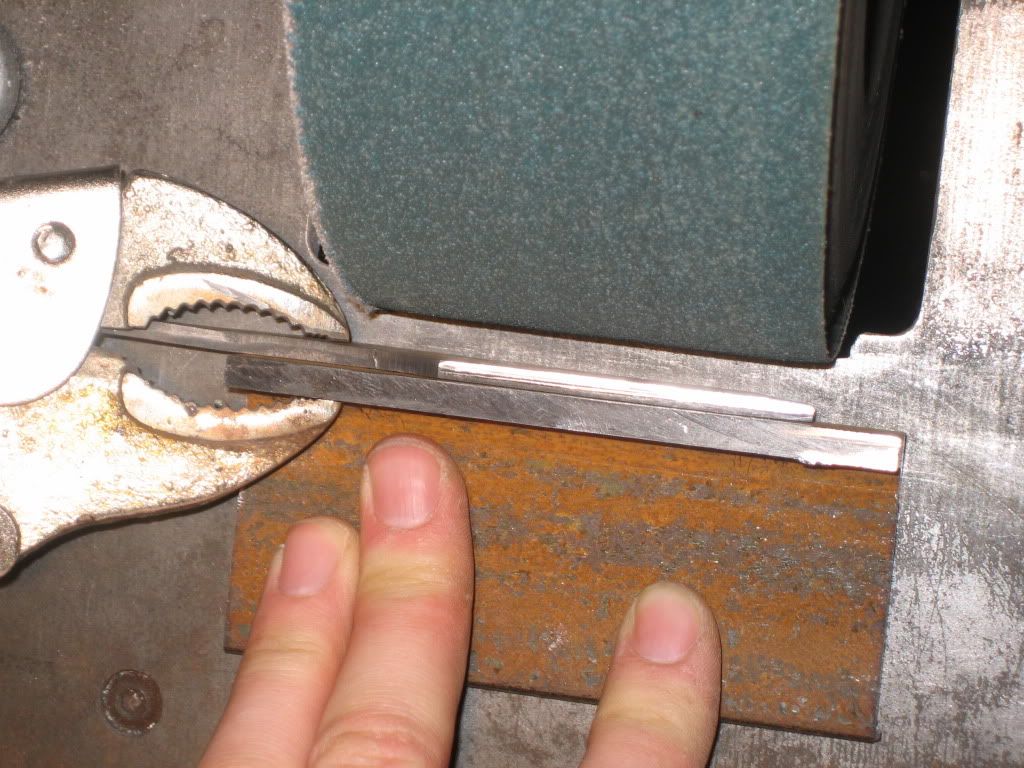
After a couple of minutes on the grinder (that, by the way, runs incredible fast. It's a 4 kW motor... that means that nothing can stop when it gains momentum ) I turned the blade... and discovered the first mistake!
The toe-end of the spine has liftet itself from the original position. I probably didn't tighten the clamp enough. But at this early point, it didn't matter. But from now on I had it in mind.
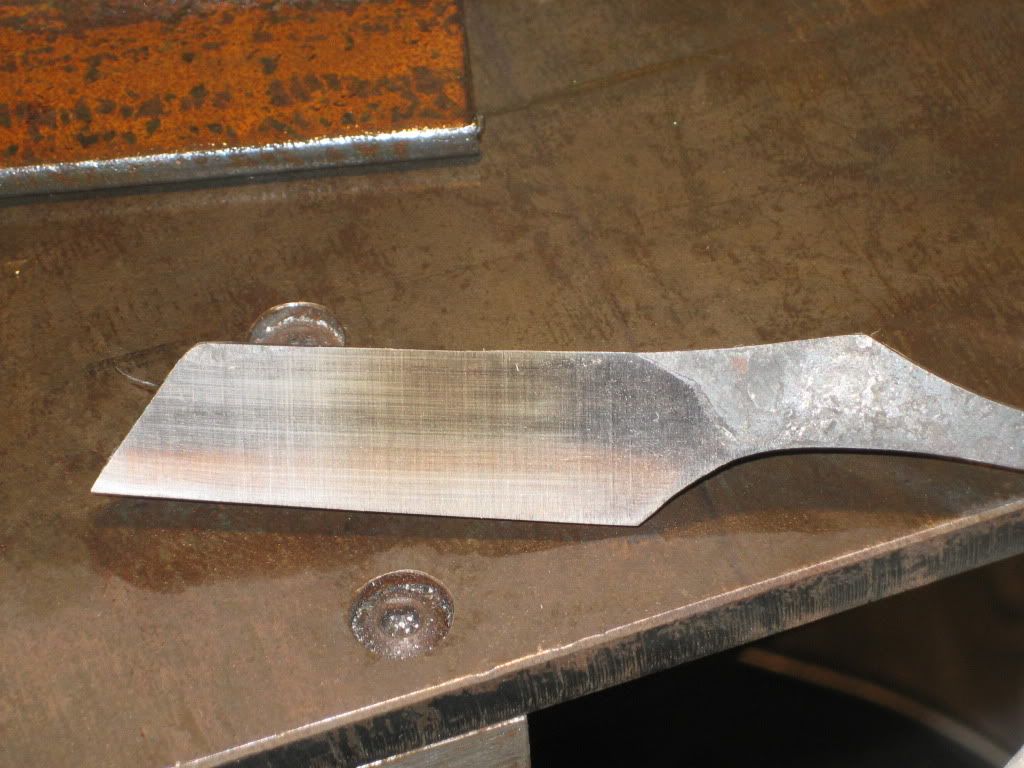
This is how it was ment to be clamped. The blue temper doesn't matter, because the steel hasn't been hardened and is just a grind attempt.
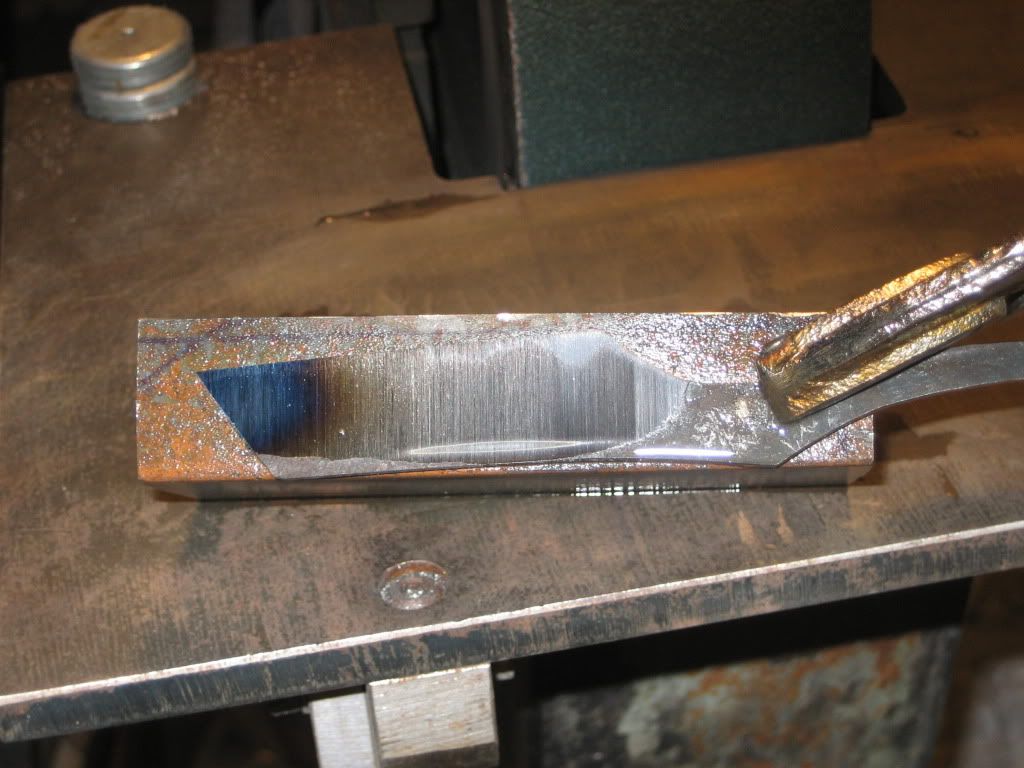
At this point, I got confused. The grind was more "even", better from heel to toe and from edge to spine, on the side that had "lifted" itself from the support plate (the one the jig rests on). *sigh* Please bear with me and my English. I feel like I cannot explain my thoughts properly
On the side that had had full contact with the buttom support plate at all times, the grind at the heel had already reached the spine, but at the toe, there were still a couple of milimeters to go until I could reach the spine.
I tried to rectify the imbalance, so I kept grinding.
After a little more grinding, I got something that looked nice from the side...
But unfortunately had I taken too much material off and I had hit the spine. In my drawings and plans, the spine should be 3 mm thick at all places. Now it was crooked and in my opinion ruined.
It was much more on one side than the other.
To be continued...
-
03-10-2011, 03:14 PM #3Knifemaker
- Join Date
- Feb 2011
- Location
- Aarhus, Denmark
- Posts
- 51
Thanked: 13
Continued...
As I mentioned, the spine was damaged and crooked (most on the right side).
I shot a couple of pictures... They are not the best quality, but they may be interesting.
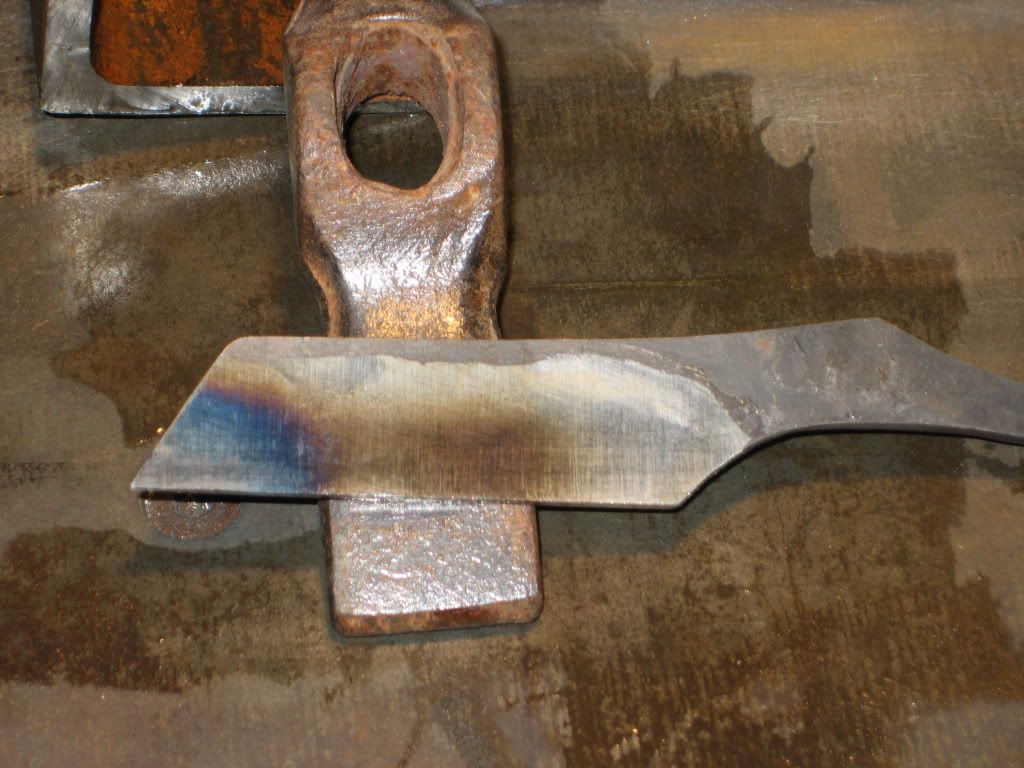
This is seen from the tang, with the heel up. I think it's a nice, symetric grind.

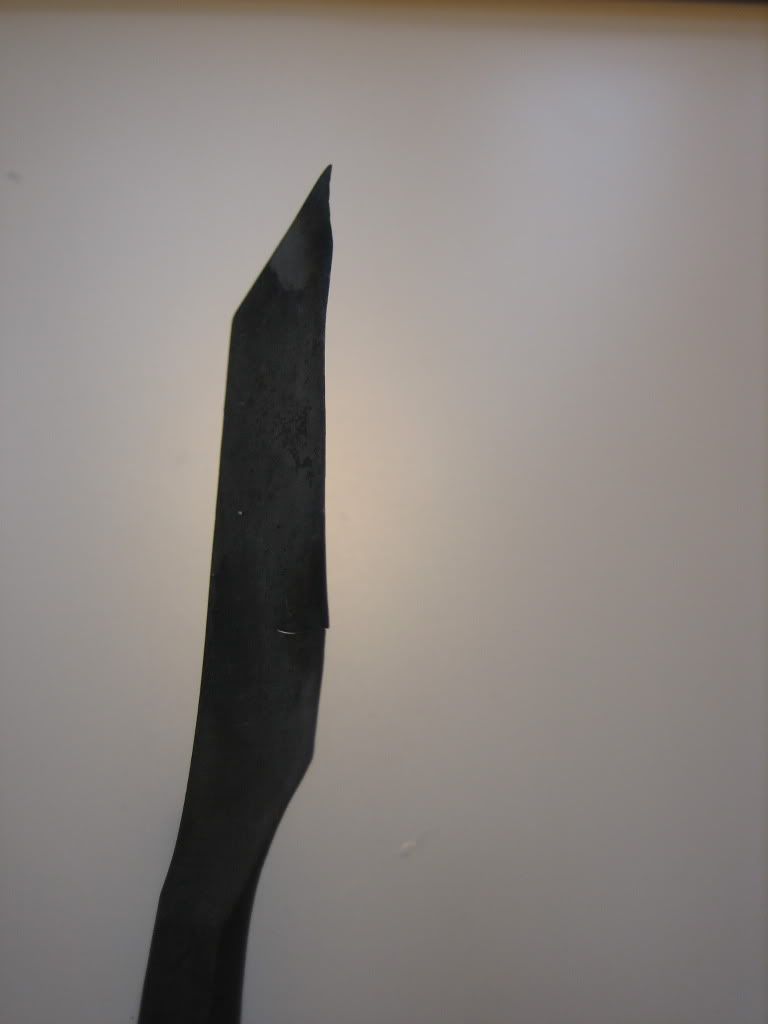
An ugly spine! The "straight" side is actually the one, where the toe end of the spine had risen from the grinding support plate in the early grinding process
Not too bad (In my opinion)
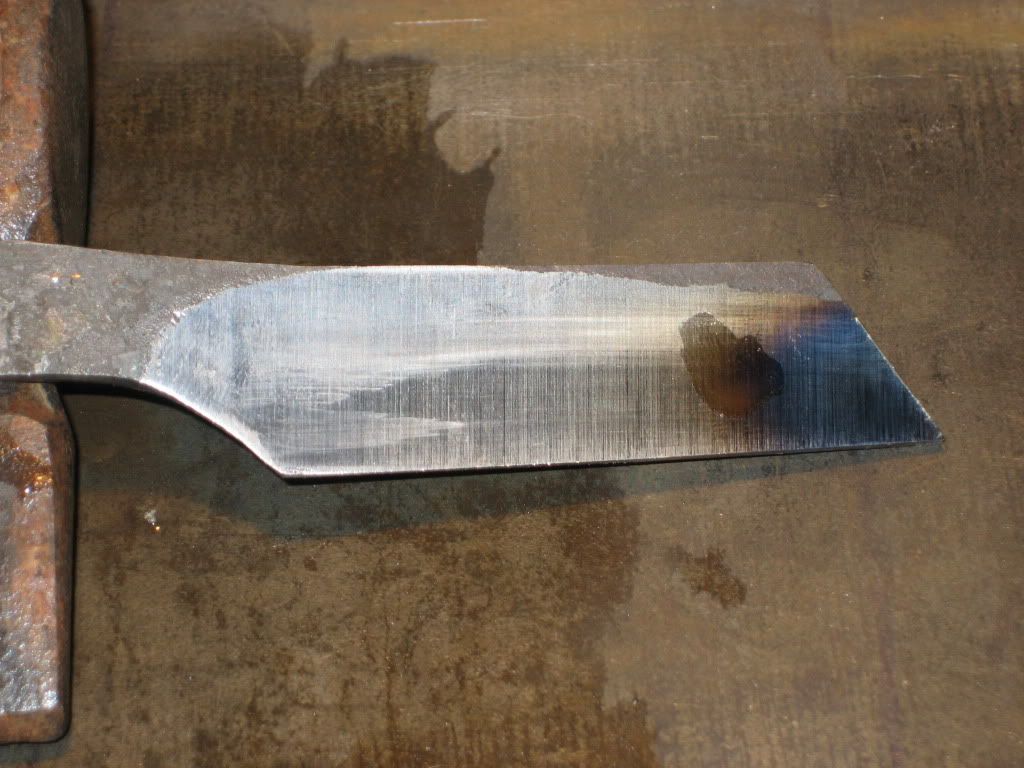
This was already past the point where I should have stopped. It still needed HT, but was probably allready to thin. But, I did not know... YET!
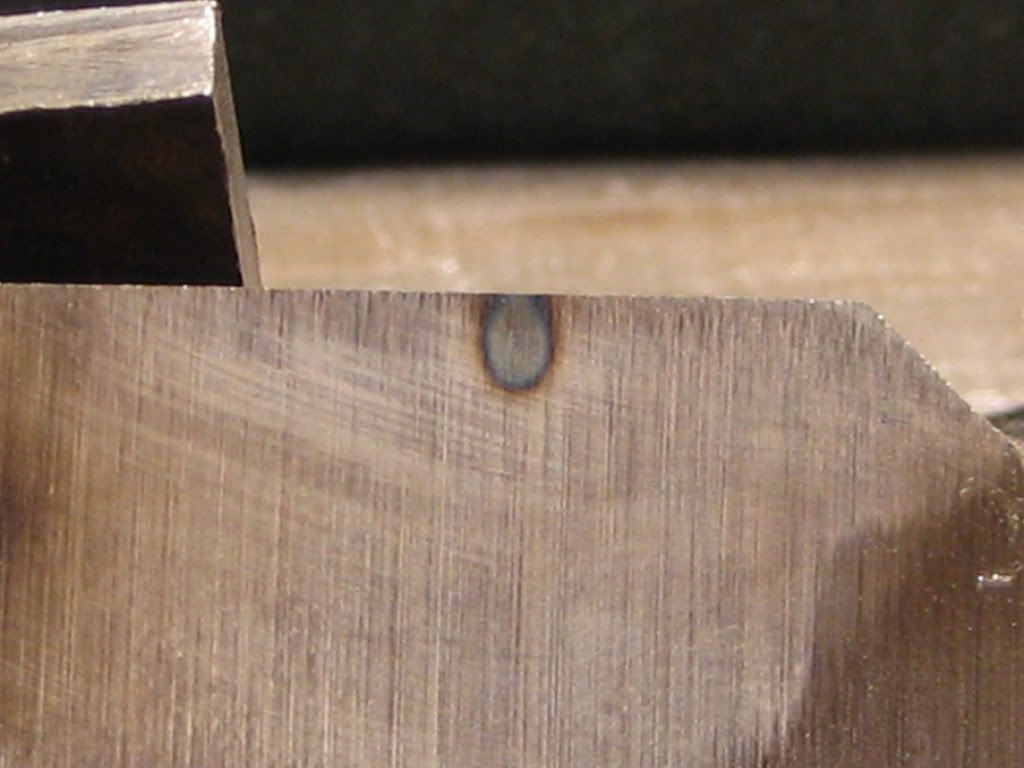
Then sh!t happened. The friction from the belt caused the blade to heat up VERY locally. The blade said a little pang! and it had grown a pimple
To be continued...
-
03-10-2011, 03:43 PM #4Knifemaker
- Join Date
- Feb 2011
- Location
- Aarhus, Denmark
- Posts
- 51
Thanked: 13
Continued...
As I mentioned, the blade had grown an ugly blue/brown pimple. I realized the blade had gone into puberty and would from now on be troublesome and stubborn
I tried to grind the pimple away. That was probably the worst thing I could do... I realized a little later. Then I tried to bend it back by pushing it against the contact wheel on the grinder, but it didn't work. It was now looked more like a potato chip than a straight razor
I sanded it a bit with a piece of steel curved in the same diameter of the wheel, covered in sanding paper. But I couldn't see any solution. I left the blade and went to bed.
One or two days later, I took it in my hands again and decided: It cannot posibly go any worse! And I decided to try to harden it.
Fortunately, my father was preparing the BBQ and it was dark, so I could use the BBQ-starter to heat the blade. I used water to quench... but now the blade was even more potato chip-like than ever before, but the blade wasn't properly hardened, so I tried again. This time, I got a better HT.
I tried to straighten it right away, but of cause I should have tempered before. I just pressed the blade a little and I heard a Click! and long crack had appeared.
I now know what NOT to do. And I've certainly learned something from my mistakes
I've also decided to try a more simple design for my first. Maybe something like this :Image
I'll post pictures, as soon as possible.
And I would also like to say, those designs are under strong influence of/inspired by Tim Zowadas razors. I haven't asked him if I could use his designs, but if any of you know his emailadress or anything, please PM me. Thanks.
Best regards
KristianLast edited by KristianSestoft; 03-10-2011 at 03:45 PM.
-
The Following User Says Thank You to KristianSestoft For This Useful Post:
Mike Blue (03-13-2011)
-
03-10-2011, 04:58 PM #5Senior Member


- Join Date
- Feb 2008
- Posts
- 32,564
Thanked: 11044
Interesting post. Tim is a member here and you can send him a PM by using his screen name which is Tim Zowada . The blade designs Tim uses are pretty much public domain IMO. I don't think you need his permission to make a French point, shoulderless, grind.
 Be careful how you treat people on your way up, you may meet them again on your way back down.
-
The Following User Says Thank You to JimmyHAD For This Useful Post:
KristianSestoft (03-12-2011)
-
03-12-2011, 10:15 AM #6Knifemaker
- Join Date
- Feb 2011
- Location
- Aarhus, Denmark
- Posts
- 51
Thanked: 13
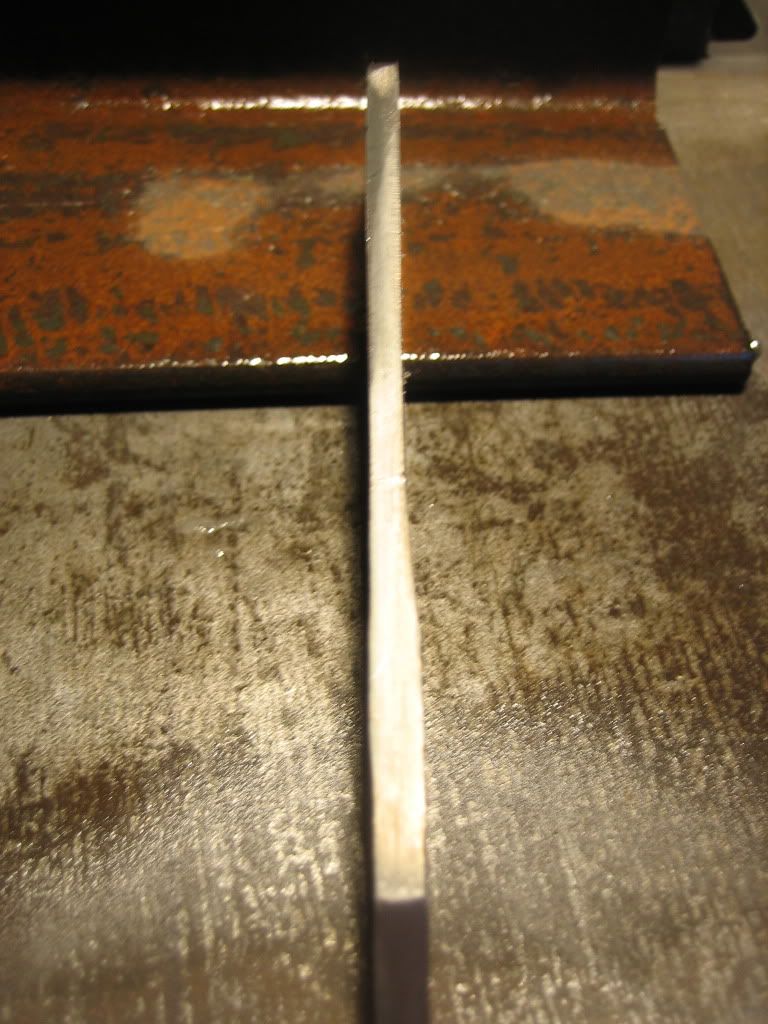
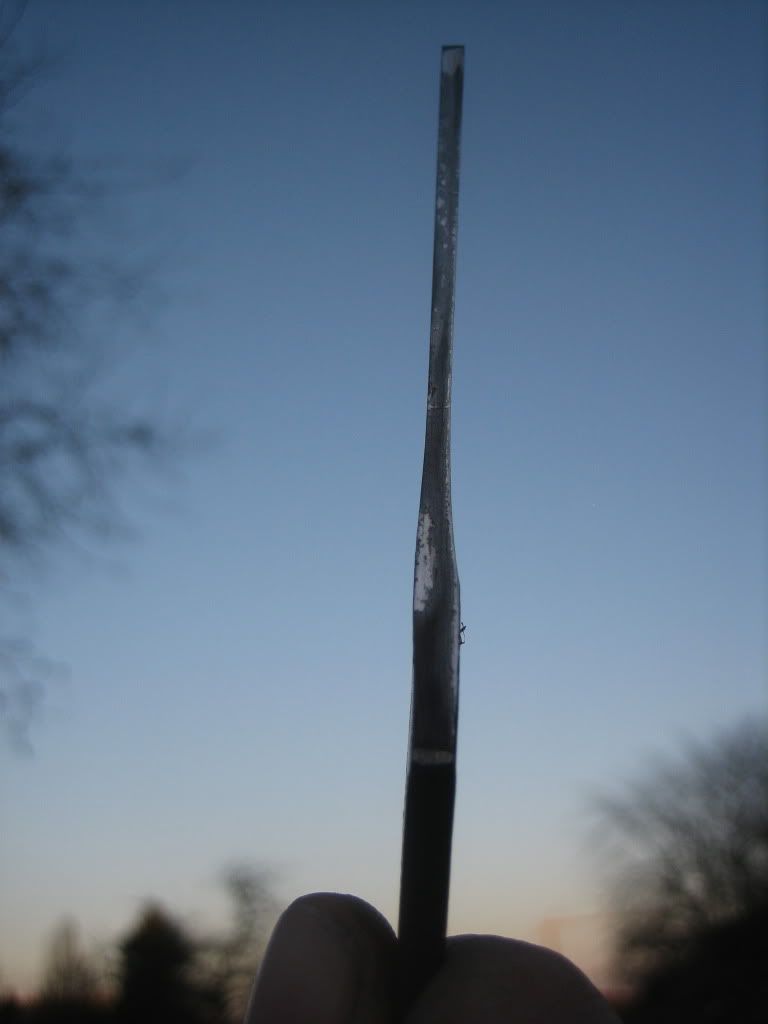
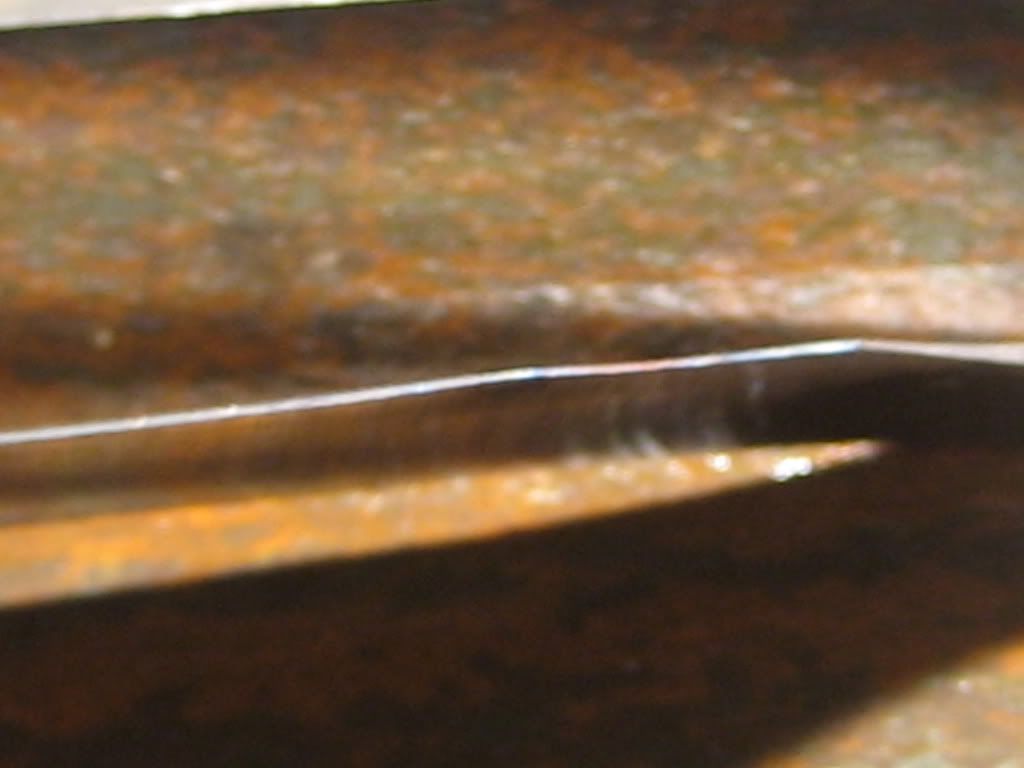
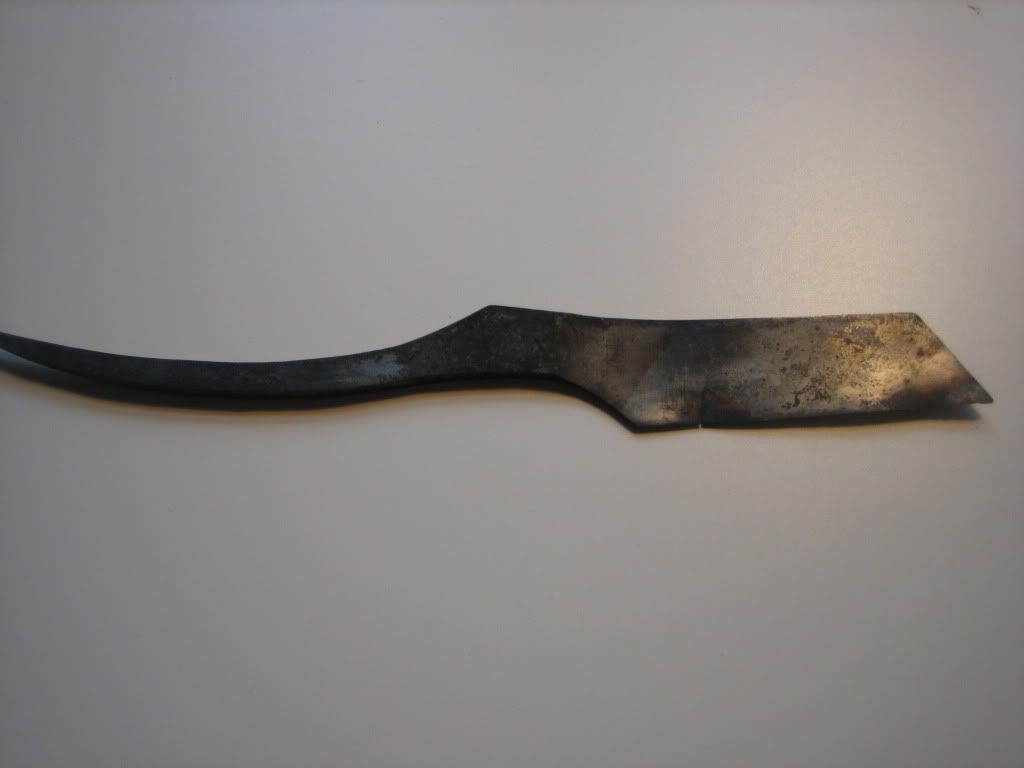
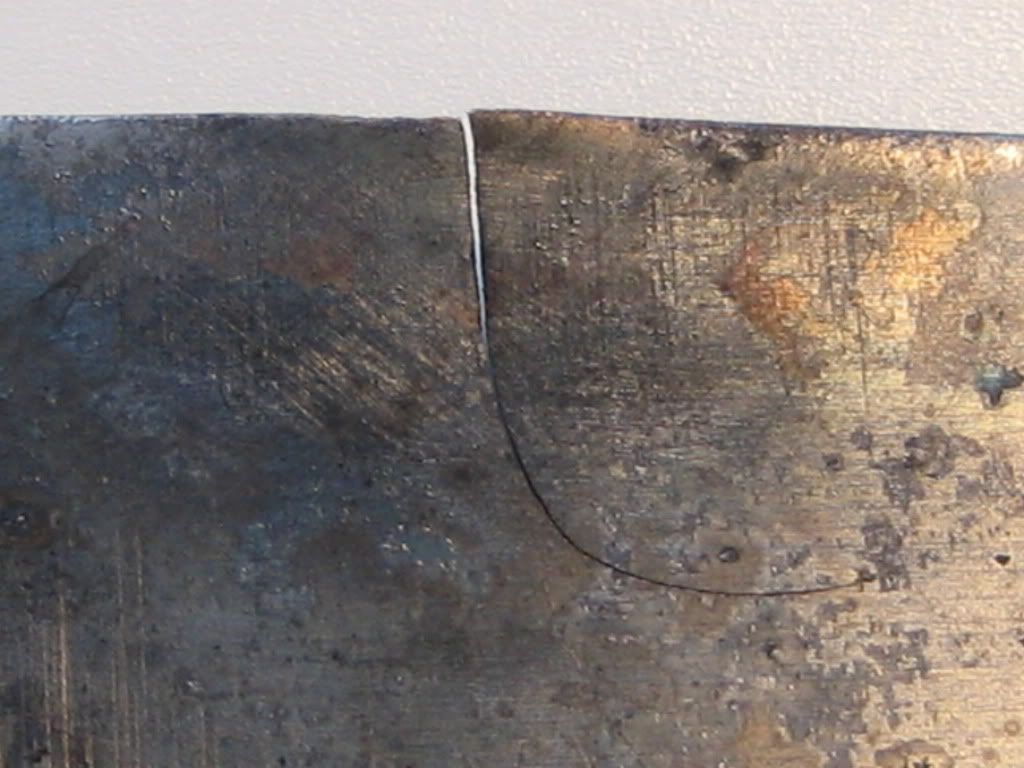
Well, I got to take some pics. I was very surprised to see how much the blade bend. You can allso see the crack quite clear.
Crack closeup
The potato chip razor
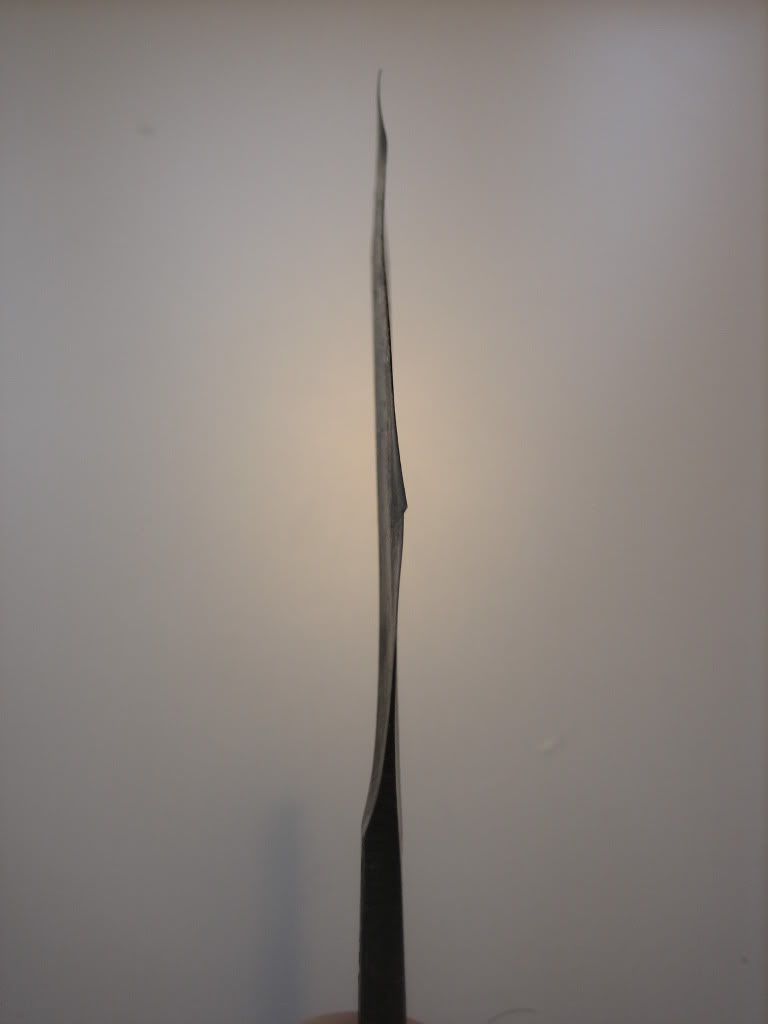
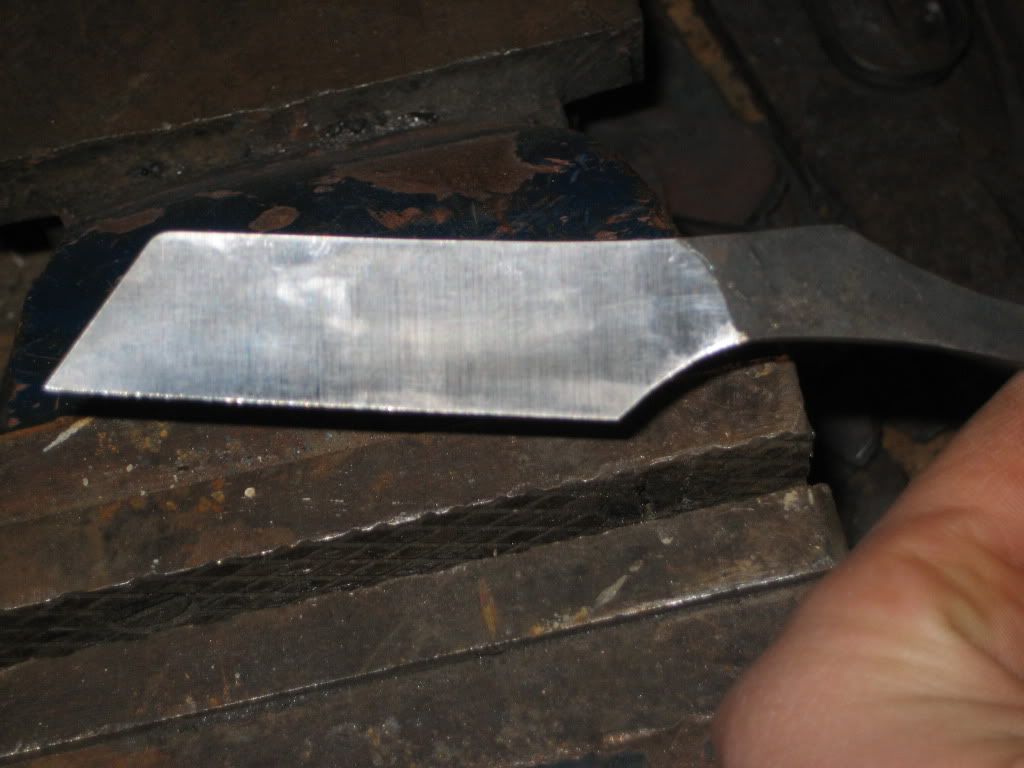
Another pic
There won't be any post from me the next week, since I'm going to Berlin.
Thanks for looking
-
03-12-2011, 12:39 PM #7Member

- Join Date
- Feb 2011
- Location
- Virginia Beach, Va
- Posts
- 89
Thanked: 12
I think...yes, it'll buff out!
That is a lot better than I could do. I am sure you will get it figured out if you keep trying.
-
03-12-2011, 12:51 PM #8aka shooter74743


- Join Date
- Sep 2009
- Location
- SE Oklahoma/NE Texas
- Posts
- 7,285
- Blog Entries
- 4
Thanked: 1936
Thank you for sharing! Anyone who has made razors or knives will attest that not all go as planned. I'm not a pro, but I have made a several straight razors with with success & had some failures. You will need to leave at least 1/16" of material at the cutting edge...go too thin and the edge will "potato chip" or as you saw, possibly crack on you. Sometimes you may need to heat the steel up and let it slowly cool to releave some stresses before the heat treat as well. I think this is why your blade cracked. Sometimes you can think that you have done it all right and the steel will get a mind of it's own and still do something crazy. Keep it up and you will make a successful blade. Slow down on the grinding, use little pressure considering the belt speed, and most of all, enjoy turning a chunk of steel into a tool and in many eyes...a work of art.
ScottSoutheastern Oklahoma/Northeastern Texas helper. Please don't hesitate to contact me.
Thank you and God Bless, Scott
-
The Following User Says Thank You to ScottGoodman For This Useful Post:
KristianSestoft (03-12-2011)
-
03-12-2011, 01:54 PM #9Knifemaker
- Join Date
- Feb 2011
- Location
- Aarhus, Denmark
- Posts
- 51
Thanked: 13
Thanks, all of you.
The blade actually chipped because I tried to cold-bend it back in shape. (I knew it was risky, but did it anyway... I didn't even temper the blade or anything.)
I think it does have huge influence on bending and "potato chip" thing, that the two sides are VERY symmetric. even small irregular spots can possible bend the blade alot in the quench process. It was of couse my own impatiece that did the thing, but I already knew that I had made too many mistakes that I couldn't fix. So it didn't bother me that much when it cracked
Kristian
-
03-13-2011, 01:02 PM #10"My words are of iron..."

- Join Date
- Oct 2006
- Posts
- 1,898
Thanked: 995
This is a good recitation of your journey. Thanks for putting this together. It's not easy to stop and take pictures in the middle of something like this unless it's well planned.
You're paying attention to what you are doing. You started with less expensive materials, that was very smart. You watch how the steel responds to the tools and the heat. All this will write into your brain, how the next one should go. The steel is definitely good enough to be a razor based on the look of that crack. Even in death, and the heartbreak of a failed attempt, the blade has something to teach.
The student of human behavior in me would like to encourage what you have learned about impatience and then pushing a failure further to learn more. This is the part of blade making where mastery hides.
One question: would you consider doing the grind free hand with a push stick instead of a jig? All you need is a piece of scrap wood with a notch ground in to hold the spine of the blade to keep it from moving away from the wheel. I think you'll be able to "feel" the blade better than if it's insulated from you by that jig. But, this is only my thought about a different way. I have noticed that many makers who start with jigs, end up not using them.
There is a universal rule among knifemakers world wide: if you're not breaking blades, you're not making blades.
So, when's the next one?Nothing discloses real character like the use of power. Most people can bear adversity. But if you wish to know what a man really is, give him power. R.G.Ingersoll
-
The Following 2 Users Say Thank You to Mike Blue For This Useful Post:
Geezer (03-23-2011), KristianSestoft (03-19-2011)


 Reply With Quote