
Results 1 to 10 of 23
 16Likes
 LinkBack URL
 About LinkBacks
Hybrid View
-
04-24-2011, 02:37 AM #1Senior Member


- Join Date
- Jun 2009
- Location
- Adelaide, Australia
- Posts
- 254
Thanked: 63
Sublime work Charlie. Your talent never ceases to either impress me or make me feel spectacularly inferior.
 Stozzberry likes this.
-
09-13-2011, 04:40 PM #2aka shooter74743


- Join Date
- Sep 2009
- Location
- SE Oklahoma/NE Texas
- Posts
- 7,285
- Blog Entries
- 4
Thanked: 1936
I wanna be like Charlie!
PM sent on the forge...Would like to make one like this. Could I talk you into a tutorial on how you made yours & where you obtained your wool & mud?
ScottSoutheastern Oklahoma/Northeastern Texas helper. Please don't hesitate to contact me.
Thank you and God Bless, Scott
-
09-13-2011, 05:04 PM #3Senior Member

- Join Date
- Jun 2011
- Location
- Valdosta, Georgia
- Posts
- 454
Thanked: 92
I second the request for a tutorial sir! This would awesome to have in my repituar. Originally Posted by shooter74743

-
09-13-2011, 06:25 PM #4Senior Member


- Join Date
- Dec 2006
- Location
- Burkburnett TX
- Posts
- 3,095
Thanked: 2392
Thanks for the encouragement, my forge works well but if I built again I would change a few things.
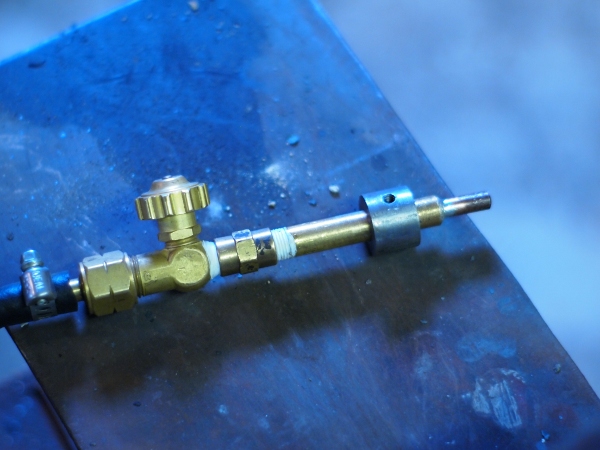
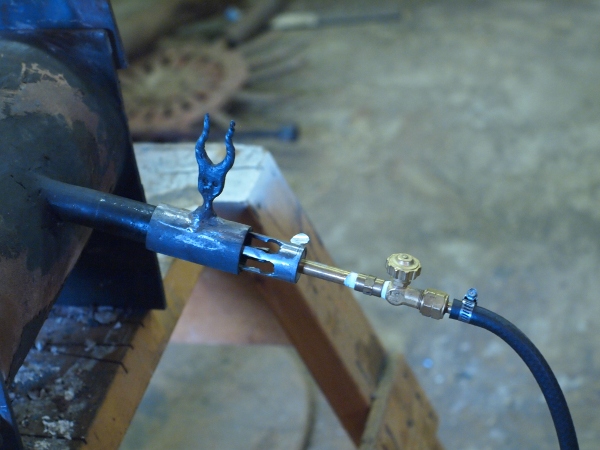
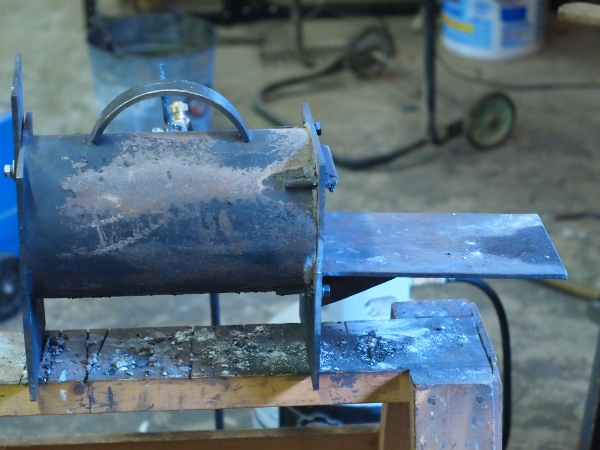
I would not weld the burner to the shell (I would have a mount so I could move around the burner and let a little air in between the burner and the shell) and I would use a lighter gauge metal for the outside shell. There are a lot of how to build forge tutorials all over the web, I am not going to reinvent the wheel by doing another one. I built my forge with a mish mash of ideas from the net and what I remembered of the small forge that was in Mike Blues shop. Thanks to some advice from Mike at the MO meet my forge is working better. I ended up opening up the air-intake holes and putting on a choke tube on the outside of the burner. I also removed the regulator and am running straight off of tank pressure (This made a great deal of difference in the way the forge works).
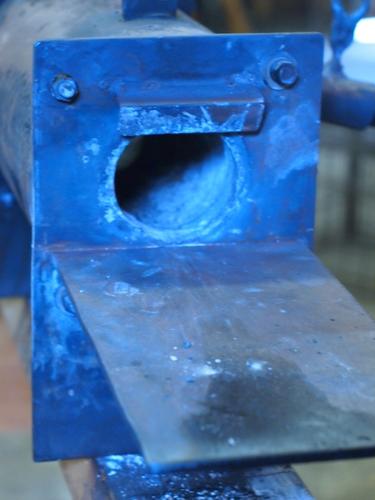
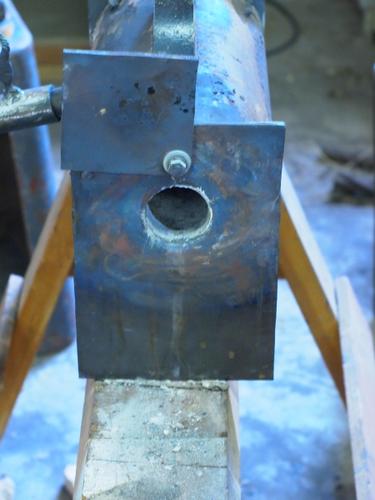
There are some things I really like about this forge, I like the size of interior chamber, about 4 round by 11 works well for me while forging razors. I think around a 6 8 shell is about right. I also like the large front porch and the steel lining that reinforces the openings. I am also happy with the way the flame comes in tangent to the interior chamber and swirls around the heat seems pretty well distributed.
I have bought ceramic wool and satenite clay from High Temperature Tools & Refractory
I used these two links for ideas to rig together my burner A simple homemade propane burner Gas burners for forges, furnaces ... - Google Books
I had a small hole .025 (if I remember right) drilled in a 1/8 brass pipe cap for the jet, recently I changed that out for a mig tip (about the same size hole). The mig tip seems to be working a little better.
This is the second forge that I have made, I am definitely not an expert just a stubborn tinkerer. I have read a lot about forges on the British Blades Forums.
CharlieLast edited by spazola; 09-13-2011 at 06:34 PM.
-
The Following User Says Thank You to spazola For This Useful Post:
ScottGoodman (09-13-2011)
-
09-13-2011, 07:52 PM #5aka shooter74743
- Join Date
- Sep 2009
- Location
- SE Oklahoma/NE Texas
- Posts
- 7,285
- Blog Entries
- 4
Thanked: 1936
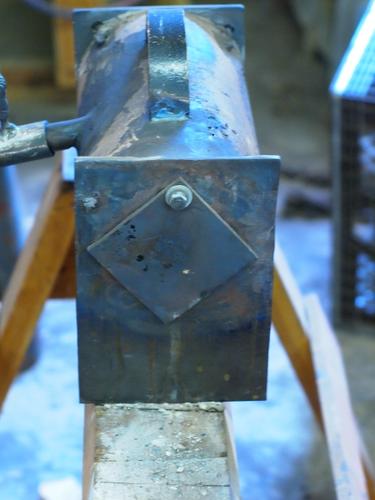
Thank you for the additional information...but do you think you could show a few more pics showing all of the sides? I've got a good visual on the body of the forge, but am hung up on the burner end. What size of mig tip did you use? The size is usually stamped on them (I have a few around since I have a mig myself). On the ends of your forge, is the back solid or does it have a hole in it? My thoughts were to build mine like yours, but have bolt on ends to be able to rebuild the wool and mud.
Southeastern Oklahoma/Northeastern Texas helper. Please don't hesitate to contact me.
Thank you and God Bless, Scott
-
09-13-2011, 09:08 PM #6Senior Member
- Join Date
- Apr 2007
- Location
- St. Paul, MN, USA
- Posts
- 2,401
Thanked: 335
OK, Charlie, so how's it on heating horseshoes?


-
09-13-2011, 10:59 PM #7Senior Member
- Join Date
- Dec 2006
- Location
- Burkburnett TX
- Posts
- 3,095
Thanked: 2392
Here are some more pictures. The tip is a .023. The front is bolted on the back is welded on.
Charlie
-
The Following User Says Thank You to spazola For This Useful Post:
ScottGoodman (09-14-2011)


 Reply With Quote