
Results 1 to 10 of 12
 8Likes
 LinkBack URL
 About LinkBacks
-
07-11-2011, 08:21 PM #1
 Bladesmithing course and my first two custom made blades
Hey folks,
Some of you may know that my amazing fiance got me a bladesmithing course for my birthday which I did a couple of weeks ago at Owen Bush's forge in Welling.
It was a really enjoyable couple of days, hugely educational and I really cant recommend one of Owens courses to anyone who is interested in blade making. Thanks again Owen, it was a great course!
So I thought I'd post about what we covered over the two days and show you the results of my work. I definitely would do certain things differently if I did the course again but I'm pleased with the results. All I need to do now is build a workshop so I can get more practice... Wonder how SWMBO will go with me sticking a power hammer at the end of the garden!
So here we go, two days bladesmithing in pictures!
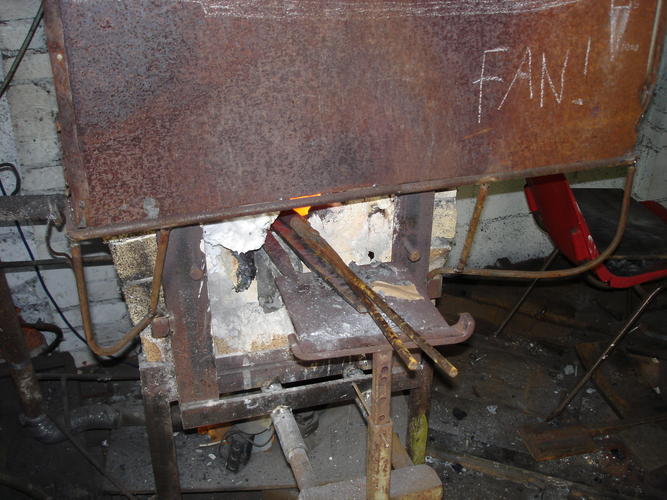
Heating the raw steel:
Owen working the power hammer to shape the tangs into the blanks:
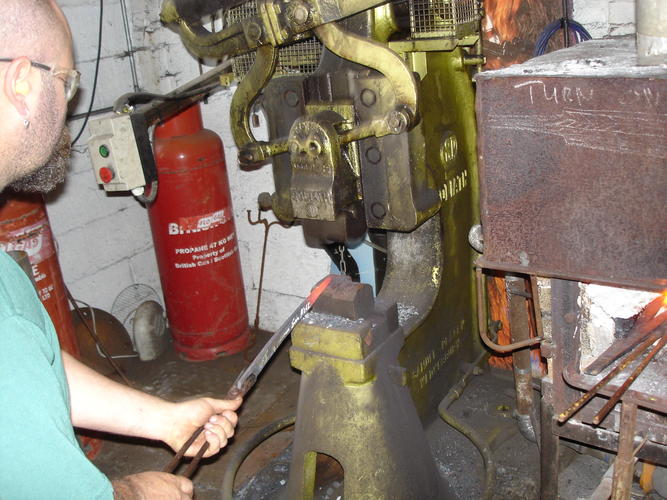
Me working the blanks by hand. You can see how the tang is formed over the side of the anvil. Owen was doing the same thing on the power hammer, just much faster! We also forged a very slight bevel into the blanks as part of this process, and thats what gave them the smiling shape.

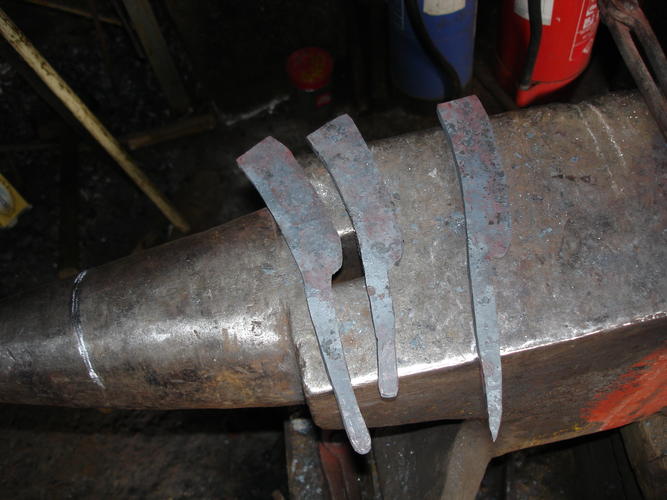
Heres the blanks with tangs forged. We made a fair few of these and picked the best ones. The spares were in case I burned through one with the grinder or wrecked the temper.
Once the blanks were forged we normalised them for the first time.
We did some initial shaping and grinding. Heres Owen showing me what to do, and then the blank after I'd done some more grinding.
Then we did another round of normalising with anti-scaling compound, and then a final normalisation.
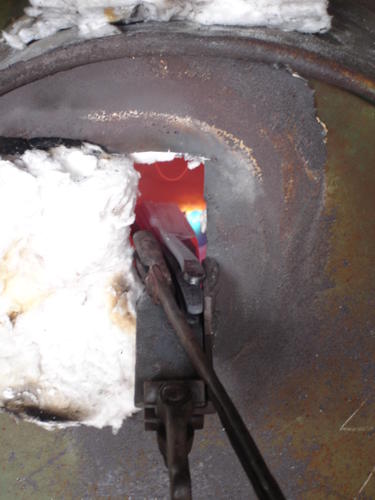
After that we did the heat treatment which was between 770-830 degrees and then quenched into hot oil.
Here are the blades in the heat treatment oven.
After that the tempering was done at 190 degrees for 2 hours (for the smiling wedge which was made from W2) and for one hour for the Damascus hollow ground (which was ISN20 and EN42).
After the tempering we did the final grinding (being careful not to wreck the temper!) and polishing.
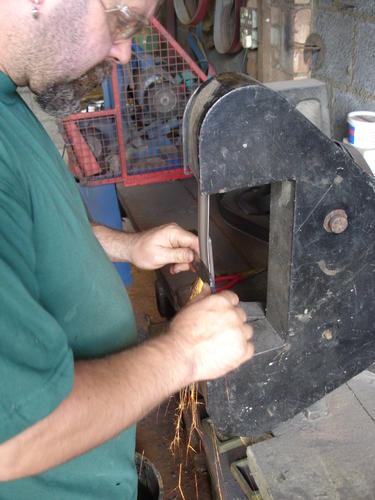
Heres me hollow grinding the Damascus razor on the grinder with a 12" contact wheel.
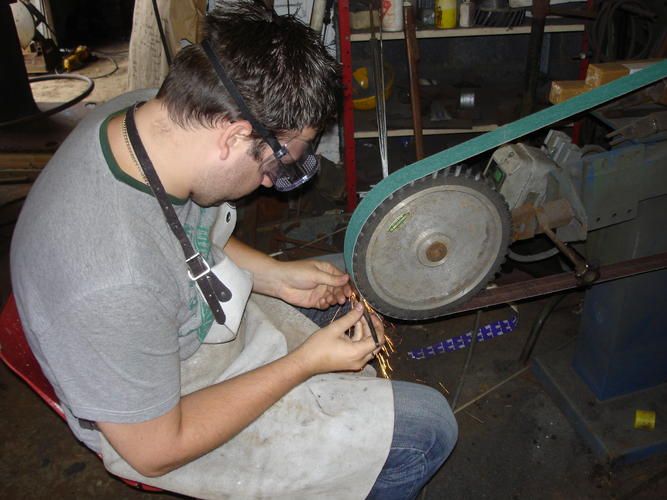
The polishing was also done on the grinder using successively finer belts from 35 (for the hollow grinding) up to 600 grit. This gives a different result to a buffer and lets you keep the really crisp lines on the tangs and on the spine of the wedge.
A buffer apparently can round off the edges slightly.
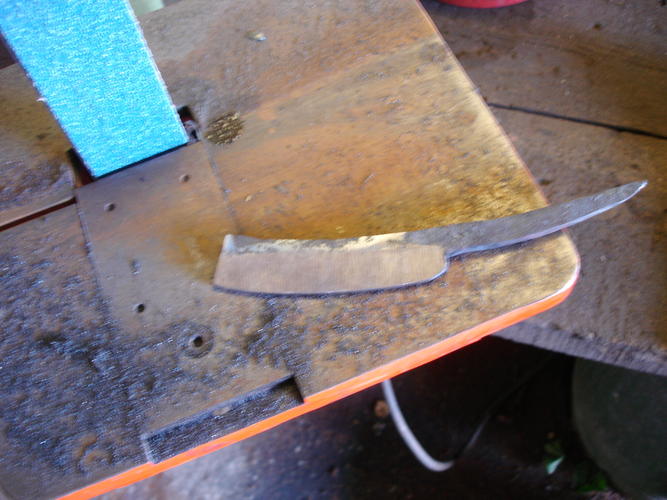
So here they are, the finished items!

They'll be coming with me to the Razorcon on Saturday for folks to check out. All I need to do is drill the pivot (with the drill on the slowest possible setting) and make some scales and hone them up. Cant wait to shave with them and find out what they're like!
So if anyone is interested in bladesmithing I can really recommend Owen's courses. He is incredibly talented and a real fountain of knowledge about all things bladesmithing.
Hope you enjoyed the pics!
-
-
07-11-2011, 08:28 PM #2Senior Member


- Join Date
- Jul 2009
- Location
- Portland, Oregon, United States
- Posts
- 518
Thanked: 125
WOW!! looks like an amazing experience. You'll have to post more pics when you get them all finished up.
Michael
-
The Following User Says Thank You to hornm For This Useful Post:
Stubear (07-11-2011)
-
07-11-2011, 08:31 PM #3Senior Member

- Join Date
- Sep 2008
- Location
- NY, Long-eye land
- Posts
- 944
Thanked: 201
What a great gift !
Awesome pics. Thanks for sharing that story....
I can't wait to see picks of your garage in about a year lol
-
The Following User Says Thank You to Earthdawn For This Useful Post:
Stubear (07-11-2011)
-
07-11-2011, 08:34 PM #4Senior Member


- Join Date
- Dec 2006
- Location
- Burkburnett TX
- Posts
- 3,096
Thanked: 2392
What a great opportunity to get study with someone who is so talented, it looks like a good time.
Your blades look great, I appreciate the in progress pictures. Now you are addicted, Muhahah. I look forward to more pics and work in the future.
I am jealous of you learning opportunity.
Charlie
-
The Following User Says Thank You to spazola For This Useful Post:
Stubear (07-11-2011)
-
07-11-2011, 09:12 PM #5The Shell Whisperer


- Join Date
- May 2008
- Location
- Sin City
- Posts
- 5,597
Thanked: 3384
Stu,
great to see you're enjoying yourself. It always great to get taught by a pro. Makes learning go a bit faster. I presume the tang didn't get hardened in the process if not you'd have a hard time getting that pivot hole drilled. You'd be using up some carbide tipped drills. Take lots of pics at the Razorcorn!
-
The Following User Says Thank You to Maximilian For This Useful Post:
Stubear (07-11-2011)
-
07-11-2011, 09:38 PM #6
I learnt an absolute bundle! We didn't harden the tangs, Owen said the same thing about drilling them. Mainly that it would be impossible without ruining the razor or the drill bit..!

I really can't recommend enough sitting down with someone and picking their brains, it's such an education.
And no worries matey, I'll be taking loads of pics at the razorcon!
-
07-11-2011, 09:39 PM #7

- Join Date
- May 2005
- Location
- St. Louis, Missouri, United States
- Posts
- 8,454
- Blog Entries
- 2
Thanked: 4942
Very Cool Stu!!!!
How long before you buy your own belt sander??????
Have fun
-
The Following User Says Thank You to Lynn For This Useful Post:
Stubear (07-11-2011)
-
07-11-2011, 09:46 PM #8
Too long Lynn!
It's the power hammer that's going to take some real bargaining though. (I jest)
Owen had a new one (new for him) that needed to be placed on a 6'x6'x6' concrete base, so he was going to have to dig a pit to fill with concrete to put it on otherwise it would shake the workshop down..!
I don't think thats an essential for razor making but he did swords, knives and axes as well, and I guess that's where they come into their own.
All I can say is that a fully stocked workshop made my Dremel and tool box feel pretty puny!
Last edited by Stubear; 07-11-2011 at 09:54 PM.
-
07-11-2011, 10:29 PM #9Senior Member

- Join Date
- Apr 2010
- Location
- Yakima, Wa
- Posts
- 1,955
Thanked: 494
Oh man! What I wouldn't give to have spent a day like that. Amazing job.
-
The Following User Says Thank You to deighaingeal For This Useful Post:
Stubear (07-11-2011)
-
07-12-2011, 02:47 AM #10"My words are of iron..."

- Join Date
- Oct 2006
- Posts
- 1,898
Thanked: 995
Then you only must wait until he is ready to let go one of the "baby" hammers. To make more room for something larger. The nice thing about making large blades is that little bits are always leftover to make smaller blades from. Making razors is helping reduce his scrap pile and I suspect, caught his attention as well. I like the pattern welded blade. Well done Stu! Originally Posted by Stubear
 “Nothing discloses real character like the use of power. Most people can bear adversity. But if you wish to know what a man really is, give him power.” R.G.Ingersoll
-
The Following User Says Thank You to Mike Blue For This Useful Post:
Stubear (07-12-2011)


 Reply With Quote