
Results 1 to 10 of 10
 21Likes

Thread: Ground out a custom Kamisori this weekend
 LinkBack URL
 About LinkBacks
-
04-14-2013, 07:17 PM #1Senior Member

- Join Date
- Jan 2012
- Posts
- 388
Thanked: 51 Ground out a custom Kamisori this weekend
Last week I started working on making a razor with the intent of making a frameback. However, the more I looked at the piece of metal I was going to use, I realized that it was just about perfect (in my mind, anyway) for grinding out a Kamisori.
I started with an old Kearney & Foote file. I had been reluctant to use it for a while since I wasn't sure that the metal was suitable. However, after some dubious searching, I found that Kearney & Foote was purchased by Nicholson and that the name was kept for a while after that. Armed with that knowledge, I decided to go for it. The first step was to anneal the file in my forge. The forge is made from some high density fire bricks and lined with refractory cement. I initially had trouble firing it due to the density of the fire bricks, but I found that if I use both my MAP gas torch along with my propane torch that I can easily get smaller pieces of stock to critical temp.
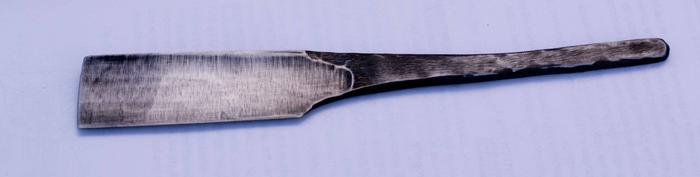
After it was annealed, I scribed a center line on the edge side and started filing.
It took a while, but I finally got the flats filed out. I don't have any pics what the metal looked like at that step... unfortunately. After I roughed out the flats with the file, I pulled out the belt sander, flattened out the file grinds, and then started working out the hollows.
The next step was to bend the handle up a bit. This was easily accomplished with my MAP gas torch and a hammer.
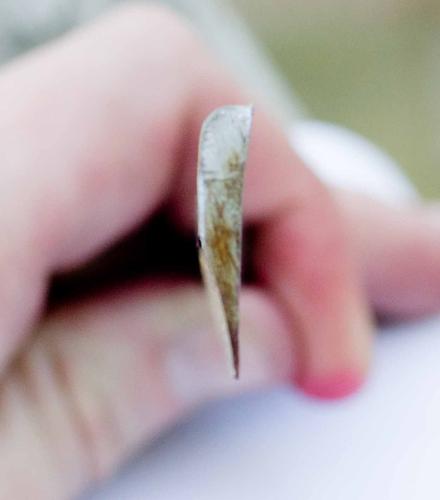
At this point in time (LOL), the next real step was to heat treat the metal but I wanted to see what would happen when trying to sharpen it up. So, I pulled out the DMT325, inked the blade, and honed it a little to see if everything was straight. These next two pics are cruddy cell phone pics.
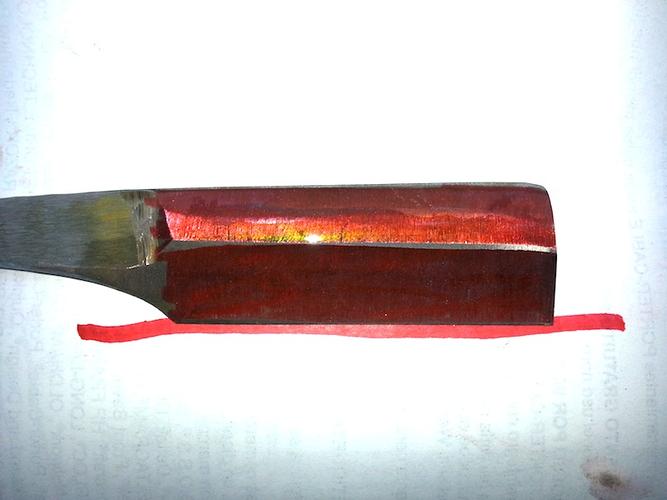
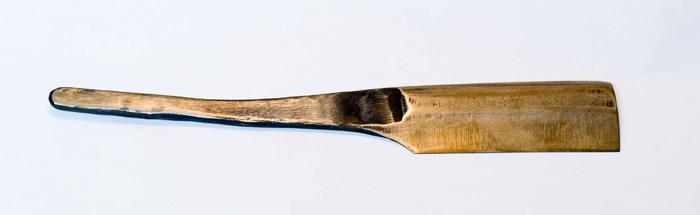
I was happy with the looks of the bevels, so I fired the forge back up and got ready to heat treat the metal. I've had some sporadic successes with heat treatment before, so I was a little nervous about the process. I really didn't want to decarburize the metal by over heating and lose all the work that I had put into the razor. I took my time heating it up, and once it was dull red I held it there as best I could for about a minute then I quenched in oil. Below are some pics post heat treat after I cleaned off some of the scale.
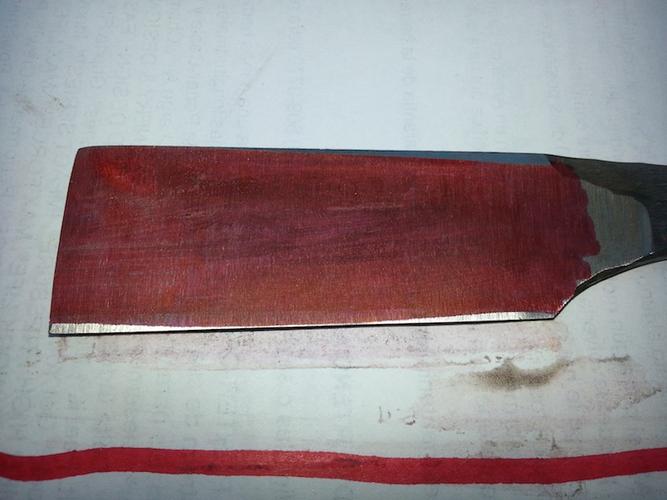
I initially decided to do the tempering in a toaster oven, but it never got hot enough so I did it in the kitchen oven after my wife left. I heated it at a little over 400 degrees F for an hour or so until it was a nice gold-ish color. The color in the pic below is a little off, the gold color was definitely lighter than it appears to be.
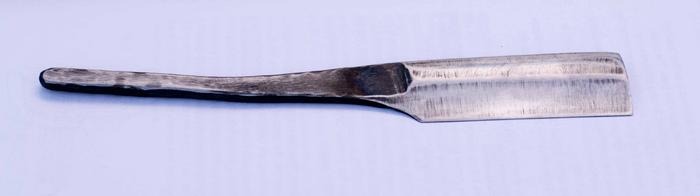
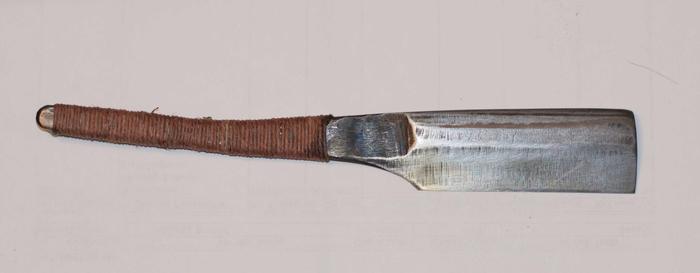
After tempering it, I decided to wrap the handle in some brown-dyed polished hemp twine. I think the end result looks very nice. I can only attach ten pics per post, so the finished picture will be in the next post.Last edited by myersn024; 04-15-2013 at 02:42 AM.
-
The Following 2 Users Say Thank You to myersn024 For This Useful Post:
ScottGoodman (04-15-2013), spazola (04-14-2013)
-
04-14-2013, 07:22 PM #2Senior Member
- Join Date
- Jan 2012
- Posts
- 388
Thanked: 51
So here's a pic of the finished product.
Honing this thing was a bit of a bear. I was initially worried about the heat treatment, but those fears were quickly quelled once I started trying to set a bevel. Due to some problems with the geometry of the hollows, I wound up having to do some post heat treatment grinding. It took a while to get things sorted out, but once that was done, I taped the spine and started to work on the bevel again. It took quite a while, but I finally got a workable bevel set. Given how hard it was to hone, I probably need to temper the blade again to draw some more of the hardness out.
After honing, I stropped it (which was an event in itself; I almost cut my strop in half) and then proceeded to give it a test shave. Never having use a kami-style blade before, it was an adventure. I shaved the right side of my face and neck without incident. The edge definitely needs some more work on the stones, and I'm going to work on that some more later tonight or some time tomorrow. All in all, I'm pleased with the results. Let me know what you think.
-
04-14-2013, 07:35 PM #3Incidere in dimidium


- Join Date
- Mar 2012
- Location
- Val des Monts, Quebec
- Posts
- 4,070
Thanked: 1440
I don't know a thing about either kamisoris or forging (yet!), but it looks great to me.

Good on you for having the flexibility and creativity to realize you had a kamisori lurking in that file!
It was in original condition, faded red, well-worn, but nice.
This was and still is my favorite combination; beautiful, original, and worn.
-Neil Young
-
04-14-2013, 07:39 PM #4Senior Member

- Join Date
- Nov 2010
- Location
- Athens
- Posts
- 900
Thanked: 118
Congratulations

How many hours of work did it take you to make the razor ready for honing ?
-
04-14-2013, 07:53 PM #5Senior Member
- Join Date
- Jan 2012
- Posts
- 388
Thanked: 51
Thanks for the compliments! If I had to guess, there's something around 15 hours of work on this razor.
-
04-15-2013, 03:40 PM #6aka shooter74743


- Join Date
- Sep 2009
- Location
- SE Oklahoma/NE Texas
- Posts
- 7,285
- Blog Entries
- 4
Thanked: 1936
Nick,
You have obviously done your research! I love to see someone take something like an old file and give it a new life...but most of all I like to see a creative mind at work. You took a small amount of tools & lots of creativity to end up with a razor. Props to you my friend!myersn024 and officerdread like this.Southeastern Oklahoma/Northeastern Texas helper. Please don't hesitate to contact me.
Thank you and God Bless, Scott
-
04-15-2013, 03:47 PM #7Member
- Join Date
- Jan 2013
- Posts
- 38
Thanked: 1
Great work, the geometry looks pretty good from the end on picture.
. I thought that generally you have to go back to the grinder after tempering - otherwise the edge can warp during the HT. I'm planning on doing some similar stuff this summer - currently getting the parts for my belt grinder then I'll build my charcoal furnace/kiln/HT thingy.
-
04-15-2013, 03:51 PM #8Senior Member

- Join Date
- Jan 2008
- Location
- Sweden, Gotland, Visby
- Posts
- 1,888
Thanked: 222
This part made my day! "I initially decided to do the tempering in a toaster oven"
Good work, keep it up...Hur Svenska stålet biter kom låt oss pröfva på.
-
04-15-2013, 05:53 PM #9Senior Member
- Join Date
- Jan 2012
- Posts
- 388
Thanked: 51
Yes, the idea is to leave some meat on the edge so that it won't warp during heat treat. I probably took it a little thinner than I should have, and it did warp slightly. However it wasn't that much, and it ground out without too much trouble on my DMT325. My problem was that the hollows were too shallow and I was having to grind quite a bit on the shoulders to get to the edge. That's the real reason I went back to the belt sander, to correct the shoulders, not to thin the cutting edge. Originally Posted by BakerandBadger

Yeah, despite going all the way to 500 degrees F, the toaster oven just wasn't cutting it. Luckily my wife had somewhere to go that afternoon, so I just tempered it in the kitchen oven. Originally Posted by Lemur
-
05-03-2013, 03:18 PM #10Senior Member
- Join Date
- Jan 2012
- Posts
- 388
Thanked: 51
I finally got around to trying to hone this razor again, and I had some pretty good success this time around. The shave was quite good, and I only wound up with the slightest bit of razor burn on my neck... which is a difficult place for me to shave anyway. I'm still not sure if this razor is as sharp as it could/should/would be, but I'm considering it a success thus far.
Jonah likes this.


 Reply With Quote