Results 1 to 6 of 6
 18Likes
Thread: Les Lat repair
Hybrid View
-
10-11-2015, 04:54 PM #1Member

- Join Date
- Oct 2014
- Location
- Germany
- Posts
- 58
Thanked: 10 Les Lat repair
I've had this Les Latneuses for a while. It is really nice to hone on, both the coti side and the 'hybrid' side. Lately it has seen use mostly as a prefinisher before going to a jnat, but it works nice standing alone as well.
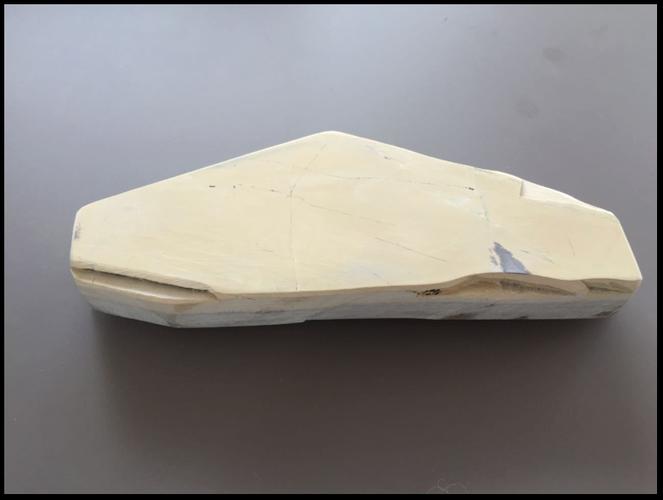
As seen above it had three recesses, or 'missing' pieces and I've been thinking of filling them up to get a better honing surface. Slurry has the habit of vanishing down in them, and I also wanted to complete and making the long side straight for easier use. I wrote to Ardennes Coticule describing what I wanted to do. I'm thankful to Maurice and Anne-Katrien Celis for finding some small Les Lat pieces for me.
I cleaned out the low lying areas, using mostly my diamond plate. A chisel and an old file proved useful for cleaning out the corners. Then I carefully hacksawed the small pieces of les lat along the separation line between the coti and hybrid layers. The coti layer is incredibly brittle in these thin pieces, and the hybrid layer almost impossible to saw through. Working slow is the key to not making coti gravel.
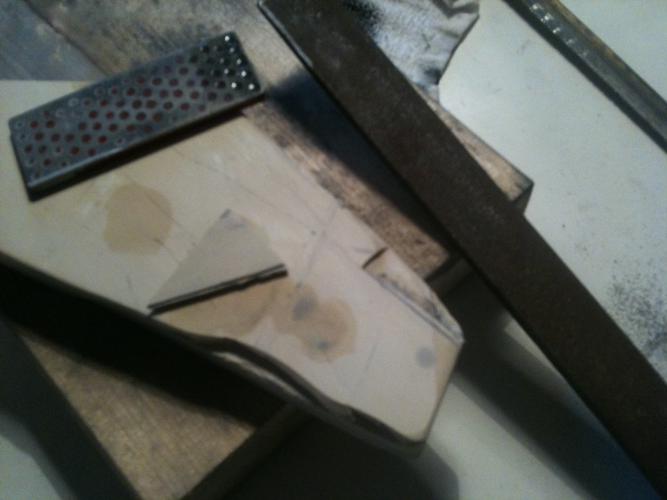
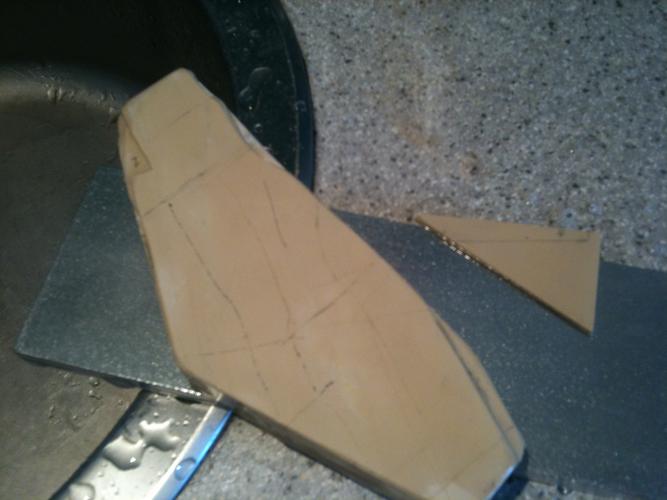
All gluing surfaces were trued on the diamond plate. When dry I glued them into place with CA glue. Since it hardens really fast no clamping was needed. Just hold the pieces together with pressure for a minute or so. With all pieces in place, and before lapping:
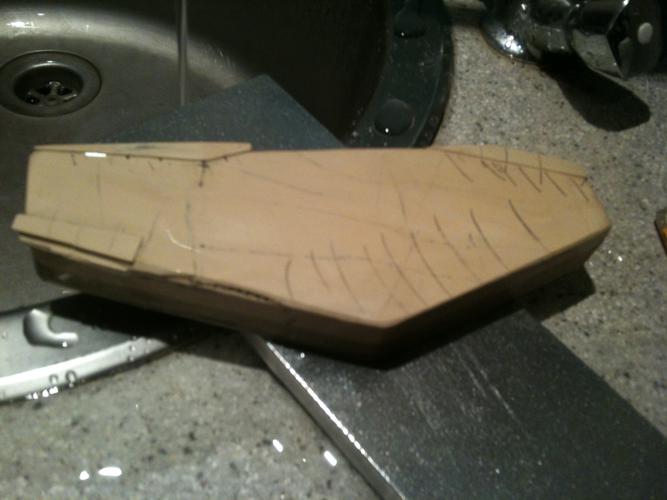
and finally, the reborn surface.
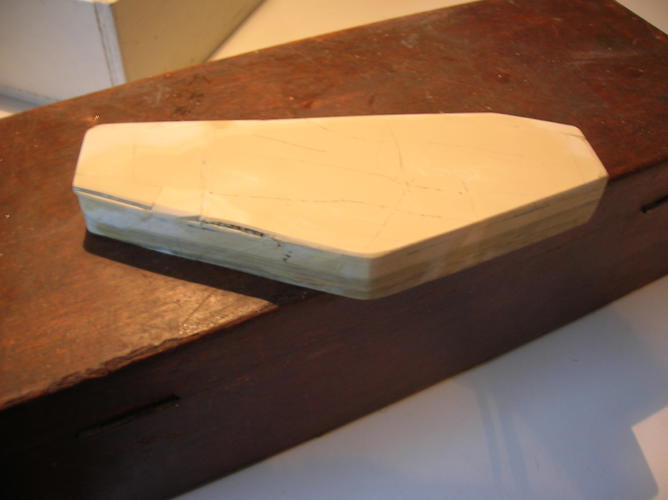
Thanks for watching and keep your projects coming.
-
The Following 4 Users Say Thank You to Sedell For This Useful Post:
AljuwaiedAK (10-11-2015), doorsch (10-11-2015), Geezer (10-12-2015), Srdjan (10-11-2015)
-
10-11-2015, 05:03 PM #2

Well Done Mr. Sedell !! I really like the result you created....
███▓▒░░.RAZORLOVESTONES.░░▒▓███
-
10-11-2015, 09:26 PM #3Senior Member


- Join Date
- Apr 2012
- Location
- Diamond Bar, CA
- Posts
- 6,553
Thanked: 3215
Nice work, good looking stone.
I have had good luck sealing the sides, with water based varnish from a craft store. Tape off the faces with masking tape and lay on a thinned, light coat, wait a day and re-coat.
I put on 4-5 layers to keep water from seeping into the cracks, make sure the stone is good and dry, so you are not sealing in moisture, leave it sitting in the sun for a couple days.
-
10-11-2015, 09:43 PM #4illegitimum non carborundum


- Join Date
- Jan 2008
- Location
- Rochester, MN
- Posts
- 11,552
- Blog Entries
- 1
Thanked: 3795
As I was reading and looking through the early part of your post, I was thinking to myself "no, don't do it!"
It looks like it turned out great!
I'm very glad that I was wrong.
-
10-11-2015, 09:48 PM #5

Very cool, thank you for sharing with us.
-
10-12-2015, 07:49 AM #6Member

- Join Date
- Oct 2014
- Location
- Germany
- Posts
- 58
Thanked: 10
Thanks guys!
Thanks Sebastian, tried it out yesterday and the surface suddenly feels twice as big!
This was my plan, I'm about to seal some nagura and will cover the sides of this one at the same time.
 yes, I had that same thought a couple of times when the edges of the inlay pieces kept crumbling under the hacksaw. I forced myself not to do anything when tired or in short of time and it turned out good.


 LinkBack URL
 About LinkBacks


 Reply With Quote

