Results 1 to 10 of 11
Thread: Picking Toxic Jnat Lines
-
02-04-2020, 04:45 PM #1
 Picking Toxic Jnat Lines
Gentlemen, thereís a discussion over on TSD about toxic glassy jnat lines. I posted about how I manage them and thought that it would be good to post here too. The first question is why bother with a jnat with a toxic line/lines. The reason of course is that some of them are darned fine razor finishers otherwise. Note that in the images, the line is picked and finished, so itís kind of what youíre looking to see in a finished product.
Youíll need a carbide pick/scribe and a fiberglass brush (image 1).
Begin by pushing straight down on the Ďartifactí until it yields (image 2). Youíll have a little divot. Repeat until the line is covered with overlapping divots. If you were to try and just drag the pick along the line, it will skate off and gouge the hone. Youíll make a mess and the line will still be there. Now you can move the tip of the pick along the line, most of it should be lower than the hone surface. Hold the pick vertical just like before and use very light pressure. Youíre tying to break out or remove any remaining unstable material between the divots.
Now you can, again with very light pressure, move the pick at a 45 degree angle to the corners of the line (images 3 and 4). Youíre using the side if the carbide insert to press against the corners of the line and remove any unstable material. Youíre not using the tip of the pick so much.
Repeat the last step with the fiberglass brush, dressing the line and especially the corners of the crack and youíre done. Youíll need to check the line every time you lap and repeat as necessary if the glassy stuff gets up to the hone surface. To finish up, I like to raise a thick Mikawa slurry and rub the area with the line just to smooth things a little. I donít know if this last step really helps, but it wonít hurt.My doorstop is a Nakayama
-
02-04-2020, 06:42 PM #2Senior Member


- Join Date
- Apr 2012
- Location
- Diamond Bar, CA
- Posts
- 6,553
Thanked: 3215
What is your experience with super gluing the crack after the toxic deposit is removed?
-
02-04-2020, 07:51 PM #3

Interesting comment Marty, I thought about mentioning something that Iíve seen before but never tried. I intend to soon though.
Since the line is below hone level and the fiberglass brush is extremely aggressive, Iíve never found a need to put anything in the picked line - the line in the example is hard glassy quartz so itís very unlikely to shed particles. Thatís not true though of all vugs, cracks, etc.
I was browsing an Japanese auction and thought that the light/camera was playing tricks, there were what looked like 2-3 bright green spots on the face of a kiita. I kept looking and could see the green spots in different shots. The stone was very similar I think to the one attached below. Iím pretty sure that the green spots were automotive lacquer putty. This is a fine grained, lacquer paste thatís used to fill small defects in paint and Bondo when structural strength is not required. Makes sense, cashew and urushi lacquer are commonly used on the sides and back of stones.
I have also seen on hones at auction and one from Alex Gilmore, that had pink Bondo reinforcing a highly irregular corner and I assume that they didnít want to just chop the corner of the stone off.
The pits in the stone pictured are what seemed to be present in the auction stone, and those can be toxic - or not - but Iíd also want to dress the edges of them after lapping. But if you fill them with lacquer putty, you wouldnít have to do that maintenance. So this stone is going to get putty on at least a couple of those pits to test. If it doesnít work or I donít like it, a quick soak in alcohol should soften and/or remove the lacquer putty.
BTW, you can hang the spine or nose on those pits doing a rolling x stroke. I havenít damaged an edge, but feeling the blade catch on them is an unnerving experience! Lacquer putty would fix that I think.My doorstop is a Nakayama
-
02-04-2020, 10:58 PM #4Senior Member

- Join Date
- Jan 2015
- Location
- Apex NC
- Posts
- 535
Thanked: 90
I have fixed a nice JNAT that broke in two alone a Namazu line with superglue just like a Coticule and I don't notice it at all. So if done right like say after cleaning the line put painters tape on each side of the line and fill it in with the liquid kind. Remove the tape and lap. It should work fine, but if not needed seems like a waste of time.
-
02-05-2020, 12:15 AM #5

Tom, did you clamp the pieces while the glue set? How did you keep alignment of the sides of the stone?
Now letís try lacquer putty. This stuff is nitrocellulose lacquer putty, so your stone may eventually get cell rot - just kidding lol.
I used to do bodywork as a hobby refurbing Harleys 30 years ago and Iíve used a lot of this lacquer putty. It has an important characteristic both for bodywork and for patching hones; it doesnít swell when exposed to water. You used it dry and sanded it dry over Bondo because Bondo absorbed water. But the same stuff was used over sealer and paint, and wet sanded, and you didnít need to let it dry a lot, an hour was plenty. If it swelled from water exposure and you painted over it, you would see the repair when it dried and shrunk. It doesnít do that.
That means that you can use it on a jnat crack, and when it gets wet it wonít expand and split your jnat. Thatís fairly important. Full disclosure, I donít have much experience using it on hones, for which it was not intended, but based on past experience Iím ivory soap pure sure that it will work. YMMV.My doorstop is a Nakayama
-
02-05-2020, 01:10 AM #6

@Steve56, thanks for the tips!
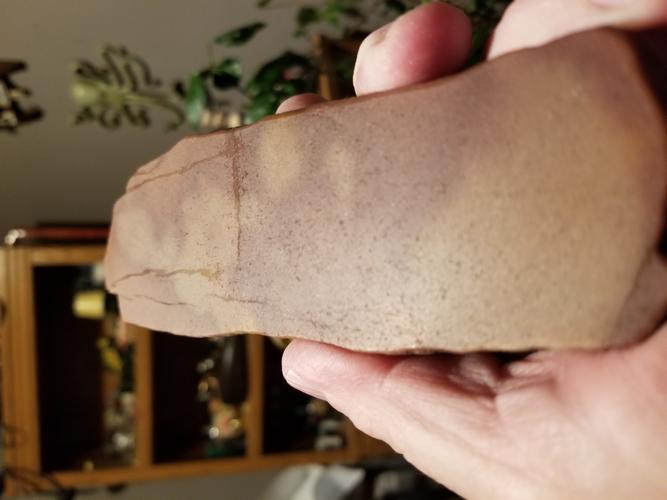
This is a quartzite that had some surface fissures. Filled with super glue about five years ago and it's been my only finisher for most of that time. No issues at all through the years.
This is from the same mother stone as the one I gave to DaltonGang, I believe he filled his with epoxy.
-
02-05-2020, 01:25 AM #7Senior Member

- Join Date
- Jan 2015
- Location
- Apex NC
- Posts
- 535
Thanked: 90
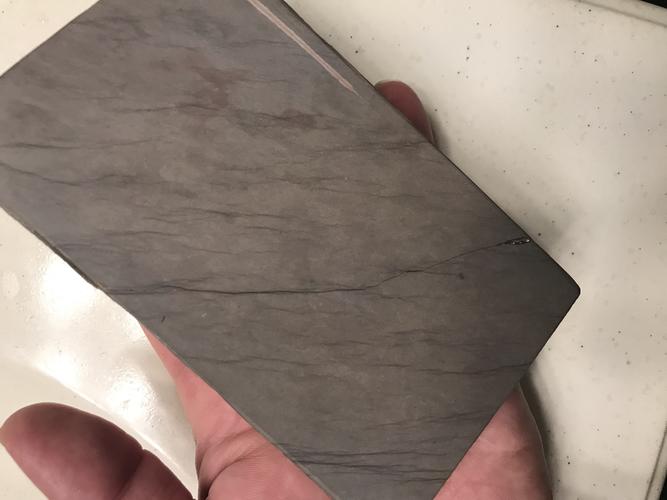
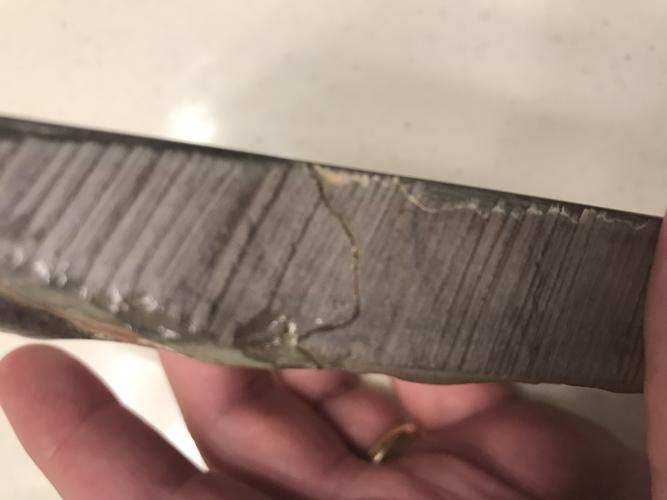
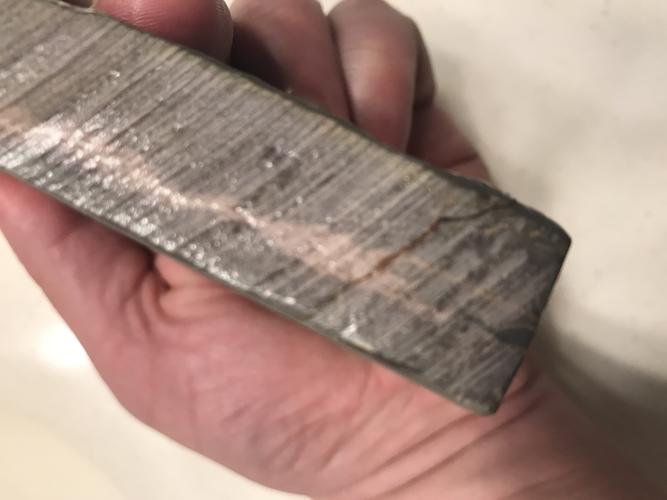
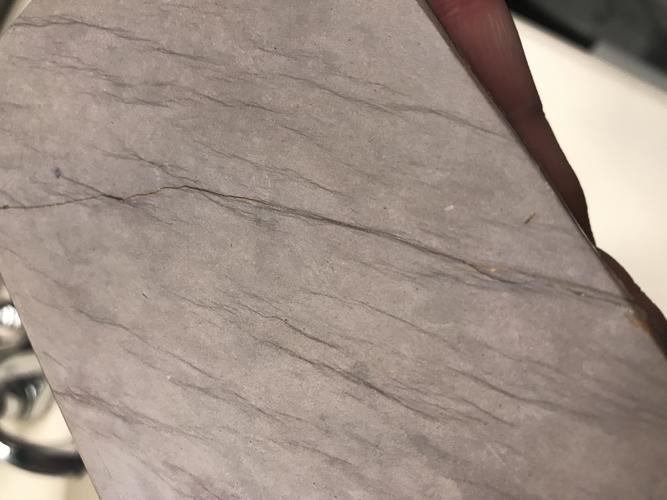
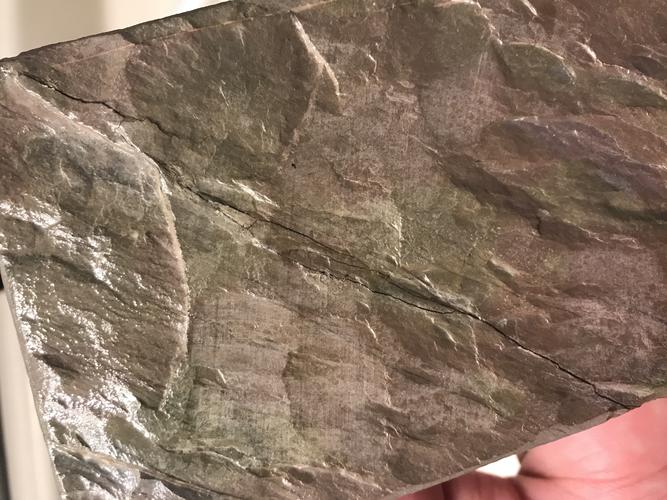
Steve if I remember correctly I lucked out based on the way it broke at the angle it did. I was able to use two clamps one on the side and one on the ends. It lined up perfectly. It had one little divot near the one edge. I added some very fine pieces and dust to the glue in that spot. I also then sealed the sides and bottom of the stone with my spray enamel.
Can only see it slightly when dry. Don’t see or feel it wet. Also I used both liquid and gel super glue.
-
02-05-2020, 03:03 AM #8

Masterful job Tom.
My doorstop is a Nakayama
-
02-05-2020, 03:31 AM #9Senior Member

- Join Date
- Jan 2015
- Location
- Apex NC
- Posts
- 535
Thanked: 90
Thanks Steve,
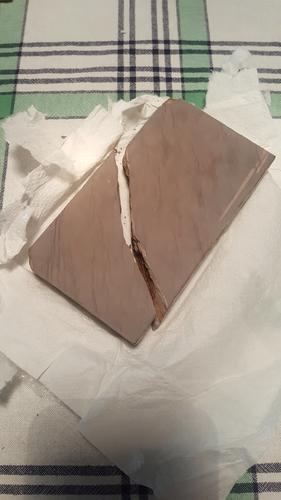
Now look away. The carnage will make your stomach turn. Was in a beat up torn box like the small usps flat rate only thinner and one layer of bubble wrap which had no bubbles left and a thin layer of tissue paper.
-
02-05-2020, 10:54 PM #10

Well, seems to work fine. It took two applications of putty to fill the two larger pits, first dried overnight and the second lesser application several hours. It does shrink when it dries so it needs to be pretty dry when you lap the stone.
Anyway, i whipped up a light slurry and the Gold Dollar did not catch with rolling x strokes.My doorstop is a Nakayama


 28Likes
 LinkBack URL
 About LinkBacks


 Reply With Quote