
Results 1 to 10 of 24
 70Likes
 LinkBack URL
 About LinkBacks
Hybrid View
-
04-05-2020, 05:58 PM #1Member

- Join Date
- Dec 2019
- Location
- Fl
- Posts
- 40
Thanked: 7 Set it face down on a level surface, wrap it with tape, you want the tape wide enough to make the proper depth you want the base to be.
 Originally Posted by ScoutHikerDad

Run a light coat of Crisco, or something similar around the exposed inside of the tape form with your finger, and pour in a 2 part epoxy.
The Epoxy will finds its own level. Voila, nice level base.
All you need to do after it’s set is trim the edges with a bastard file, if that.
Because of the large area. You shouldn’t use a five minute epoxy. It will start heating up and set up too quick. You want to give yourself enough time to properly mix the epoxy, and pour it. A 30 minutes set time should be OK, but you will still have to work quick. Larger and thicker amounts of epoxy set quicker than a thin layer.
Good luck with the project whatever you decide.
-
The Following User Says Thank You to Sl8r For This Useful Post:
ScoutHikerDad (04-05-2020)
-
04-05-2020, 06:20 PM #2Senior Member


- Join Date
- Oct 2010
- Location
- 50 miles west of randydance
- Posts
- 9,575
Thanked: 1352
I prefer the custom fit wooden box idea but this is a good one also. Originally Posted by Sl8r

-
04-05-2020, 07:22 PM #3Senior Member


- Join Date
- Dec 2018
- Location
- Gainesville, FL
- Posts
- 5,984
Thanked: 610
I think a box would be cool also. You could cut the bottom at a corresponding angle to the stone if it is straight and even in that plain. I've always liked the stones made into a box with a lid. You could even make a tag to go on one end or on the top with information about the stone. I'm sure you'll think of something fitting though whatever it is. Love that great big thing.
ScoutHikerDad likes this.Iron by iron is sharpened, And a man sharpens the face of his friend. PR 27:17
-
04-05-2020, 07:25 PM #4Member
- Join Date
- Dec 2019
- Location
- Fl
- Posts
- 40
Thanked: 7
Originally Posted by 32t
^^^
I like the idea of a custom box too, but you still want the stone to be level. I don't mind my beautiful translucent amber base being under a killer stone in a lovely wooden box.
And it would make it easier to build the box.32t likes this.
-
04-06-2020, 12:51 PM #5Junior Member
- Join Date
- Dec 2015
- Location
- Hudson, NY
- Posts
- 18
Thanked: 8
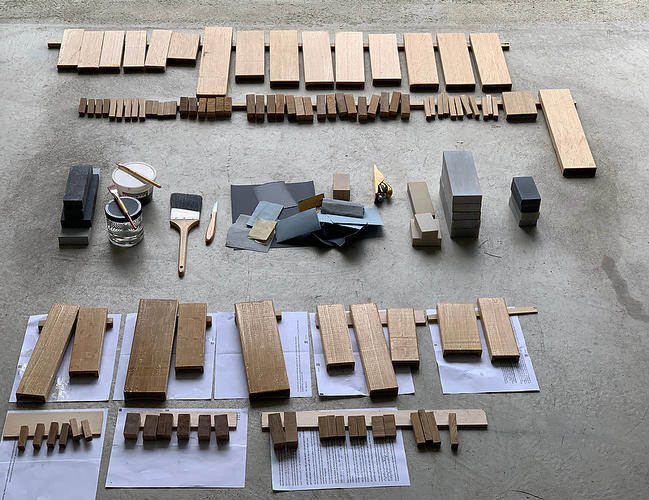

Making boxes for Arks, Summer 2019. Scale in feet.
-
The Following User Says Thank You to cliveruss For This Useful Post:
ScoutHikerDad (04-06-2020)


 Reply With Quote