Results 11 to 20 of 22
-
04-19-2020, 11:13 PM #11

I did a couple hundred laps last night on one of my better edges to see if there was an improvement. I loved the feel of the blade on the stone, it was super smooth and had great feed back. I started with plain water and then went to soap/water. Stropped it half to death and shaved with it today. Didn't really improve the edge much, maybe even a little step backward. Probably my skill not the stone. I'll get it figured out eventually.
SHD: You'll have to wait a bit for the flashlight pic. I seem to have misplaced my tripod and the exposure is to slow in the dark to hand hold.O'Toole's commentary on Murphy's Law: Murphy was an optimist.
-
04-21-2020, 01:18 AM #12

Here's the pics SHD.
It's a little more translucent than I can capture in the photos. The camera I was using was having fits with exposure in full dark, so I had to leave a little room light on. The thicker part of the stone blocks most of the light. The side light image has the light at about the middle of the stone and is closer to what the light from the bottom looks like in full dark.
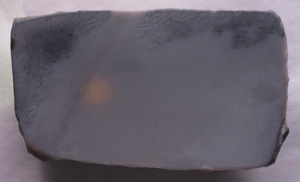
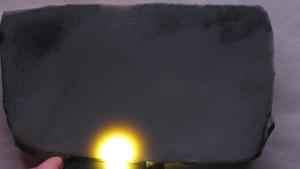
This is a better idea of the little notch on the back that I love for holding the stone.
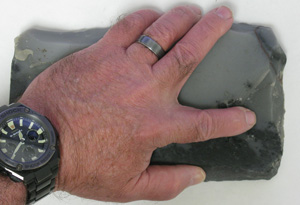 O'Toole's commentary on Murphy's Law: Murphy was an optimist.
-
The Following User Says Thank You to JellyJar For This Useful Post:
ScoutHikerDad (04-21-2020)
-
04-24-2020, 10:42 PM #13

I think I figured out what was wrong on my first try with this stone. I decided to burnish it some more with a softer carbon steel knife blade and felt some roughness at the bevels. I hadn't polished the bevels, just left them at 220 grit. I may have gotten the edge into the rough bevel when I honed it.
I polished the bevels and honed up the Mois No.5 I've been working on. The edge looks good and tests well. I'll know for sure when I shave in a couple of days. I'm going to re-hone the first bade as well to make sure.O'Toole's commentary on Murphy's Law: Murphy was an optimist.
-
04-26-2020, 08:39 PM #14

Test shaved this morning and I was fairly successful with the Mois. Nice shave, though I'm sure I didn't get the edge a good as it could be. Two layers of tape gave me a 15.5 hone angle and the bevel looked thin and even. Some of the original bevel is still present so it looks a little wider. The razor itself was nice. It handled really well and was fairly stiff for a hollow (which I prefer).
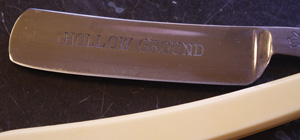
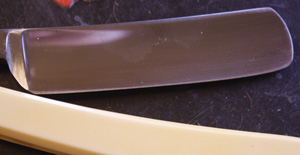
The first razor I tried on this stone was not as successful. I actually made it worse. Not sure where I went wrong, but it'll get there. I need more practice time. Hopefully, I'll be able to get edges that do this stone justice.
Right now though I'm getting a decent shave and really like using this stone.O'Toole's commentary on Murphy's Law: Murphy was an optimist.
-
04-27-2020, 01:30 AM #15Senior Member


- Join Date
- Apr 2012
- Location
- Diamond Bar, CA
- Posts
- 6,553
Thanked: 3215
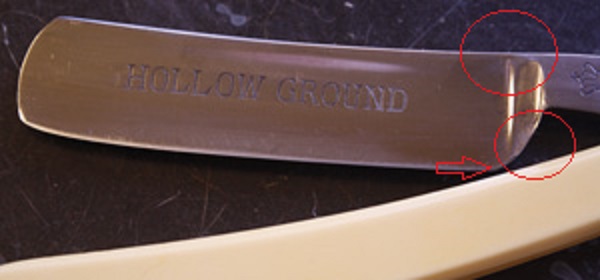
Your heel corner is close to the stabilizer, and you have hone wear over the stabilizer and on the stabilizer. Honing on the stabilizer will keep the edge off the stone and you could be keeping half of the edge from making full contact.
If you go to a Ark the edge must be already refined (at least a good 8K)as they cut/polish slowly, or do a lot of laps.
Reshaping the heel will move the corner further from the stabilizer and prevent riding on to the shoulder. Don’t be afraid to use more pressure with an Ark and lighten up for finish strokes.
-
04-27-2020, 02:10 AM #16

I did some heel reshaping, guess not quite enough. The hone wear on the stabilizer is from the previous user. It had a pretty significant amount of hone wear before I restored it. I just didn't get all of it hidden.
Before resto, just some basic clean up

I'll take some more off the heel when I go back to the hones.
My honing is still a little inconsistent...practice, practice, practice. Sometimes I get a little frustrated with my progress through the grits and have to put it away for a day or so.O'Toole's commentary on Murphy's Law: Murphy was an optimist.
-
04-27-2020, 03:16 AM #17Senior Member


- Join Date
- Apr 2012
- Location
- Diamond Bar, CA
- Posts
- 6,553
Thanked: 3215
Lots of wear over the heel on the spine, the stabilizer has been keeping the edge off the stone for some time. What does the other side look like? Is it just wear or a warp also?
You will need at least 2 layers of tape to make up for lost width of the spine.
Here is another easy test you can do, to maximize your Ark edge. Put on 2 layer of electrical tape, drop back to your 8k and do 40 X laps, 20 with a bit of pressure and 20 lite finish laps, look at the edge with magnification and make sure you are honing to the edge from heel to toe.
Run a QTip along the edge, to ensure there are no microchips, the slightest snag is a chip, or you were not honing to the edge. You should have a substantial secondary bevel.
If it snags, do 40 more, 20 with lite pressure, 20 lite.
Now rinse your razor, your stone and holder, any loose grit can ruin all your finishing efforts. Dry the razor and add a 3rd layer of tape. Now do only 6 X laps, 2 with a bit of pressure and 4 with lite pressure. This will make a fine Ark micro bevel.
Run the tip of a QTip on the edge, you should have a clean straight edge. If you do not, you have an issue with the Ark face, and it need re-lapping.
If you get a nice shaving edge, it is technique and your razor is not making full contact and honing to the edge.
If you do not get a nice shaving edge, it is your stone, it needs lapping or has some other issue.
-
The Following User Says Thank You to Euclid440 For This Useful Post:
JellyJar (04-27-2020)
-
04-27-2020, 03:32 AM #18

Here's the back side before restoration
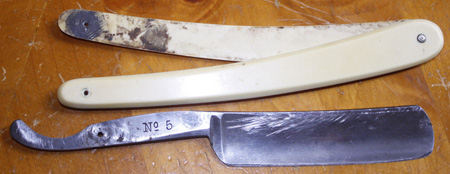
The blade doesn't have a warp that I can detect. It think it just had a bunch of wear and uneven honing. You could see it in the original bevel.
I used two layers of tape, the calculator gave me 15.5 degree angle with two layers (14.9 with one layer). Good Idea about going three layers for a micro bevel, I will definitely give that a try. Should have plenty of room in the angle.
I kind of did this blade as a practice project, but the more I work with it the more I like it. I'm hoping to make it great again.O'Toole's commentary on Murphy's Law: Murphy was an optimist.
-
04-27-2020, 03:43 AM #19Senior Member


- Join Date
- Apr 2012
- Location
- Diamond Bar, CA
- Posts
- 6,553
Thanked: 3215
“The hone wear on the stabilizer is from the previous user.”
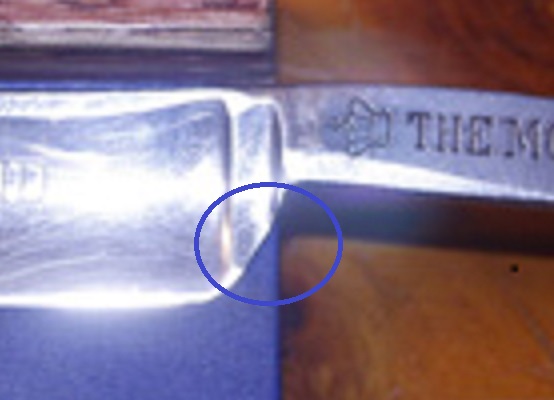
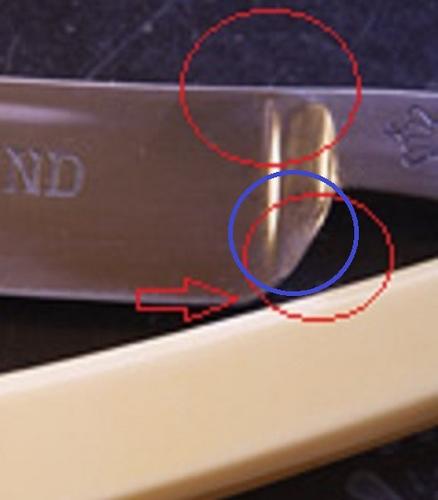
I don’t think so, the top at the spine maybe, but the wear on the stabilizer is new. Polish it out with some 600 and 1k wet and dry or just mark it with some sharpie ink and hone.
It can easily keep half of the razor off the stone, at the edge.
The wear on the back side is the opposite of the front side, indicating a warp. The grinding may have flattened it out and the spine and edge are in alignment now and will sit flat on a stone.
The stabilizer is still keeping the heel half of the front side off the stone.
-
The Following User Says Thank You to Euclid440 For This Useful Post:
JellyJar (04-27-2020)
-
04-27-2020, 04:37 AM #20

Wear from the previous user... I did mean the wear at the spine. I know I got into the stabilizer at the edge a couple of times while honing. I'll get the heel rounded more before I give this another go.
Thanks for the advice. I'll work this over some more. Lots of small details I'm still learning.O'Toole's commentary on Murphy's Law: Murphy was an optimist.


 41Likes
 LinkBack URL
 About LinkBacks


 Reply With Quote