+1 ...Agreed!Quote:
Originally Posted by Lazarus
Printable View
+1 ...Agreed!Quote:
Originally Posted by Lazarus
I killed the edge on the rim of a glass and rehoned up through the 30K - here are the results:
Attachment 144501
Edge still looks the same?
-john
Don't take this the wrong way but...why would you go up to a 30K instead of stopping at 8K and then doing a shave test like recommended? How are you going to figure out where the issue is? You say the edge still looks the same...that's why shave testing after each hone is a good idea. I'd have listened to Jimmy if it were me...I don't see the point in asking for advice if you're not going to take it :shrug:Quote:
Originally Posted by ocelot27
Again, I don't mean any offense, just trying to point out where you could have eliminated some variables that would have gotten you closer to your answer, which would equal out to less head scratching on your end. I'm curious as to what that answer will end up being!
I would start at the 1k, look at the scope, go to the next grit, look etc. Try to see where this edge is going and what is doing it. Interesting post about the shapton 16k and 30k. I never used these so I have no first hand with it. My most refined synthetic is a suehiro 20k which is .5 microns,(the shapton 30k is .49 microns) and have never had a chipping problem nor had any edge that foiled. Lots of different blades, new, old tons of vintages, even gold dollars. This edge looks like a foil edge which can look like an unset bevel. Where this takes place is what I think we all want to know. KWIFCAs post makes a lot of sense. ANd Jimmyhad knows a lot more about this than I do.
Caveat: I'm no expert.
I believe (and correct me if I'm wrong) is that Bill is referring to that line right before you get to the very edge? Your striations are continuous along the bevel then stop just short of the edge. Maybe need to go a little further on 1k so you can't see that line anymore just before the edge. Again not an expert here, just trying learn from this also.
Shane
John,Quote:
Originally Posted by ocelot27
Based on the picture and not being able to handle it, that even line just above the edge usually is indicative of an unset bevel. :( Of course it could be the image. :shrug:
Howard :)
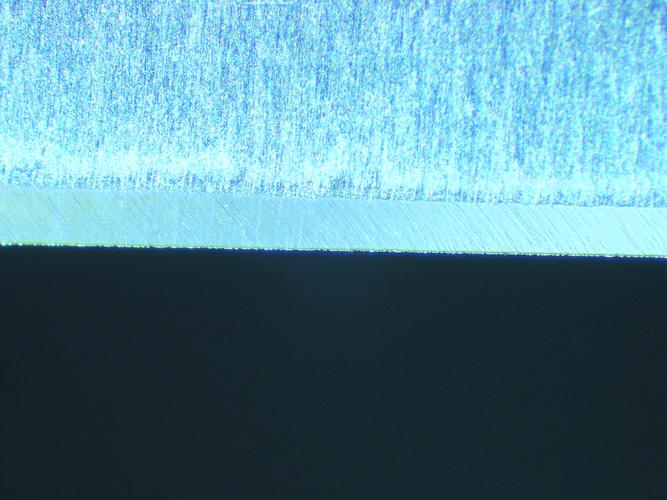
OK - since I can't do shave tests after every hone here is a series of pics taken through the hone - after 1, 4, 8, 16, and 30K:
After 1K:
Attachment 144512
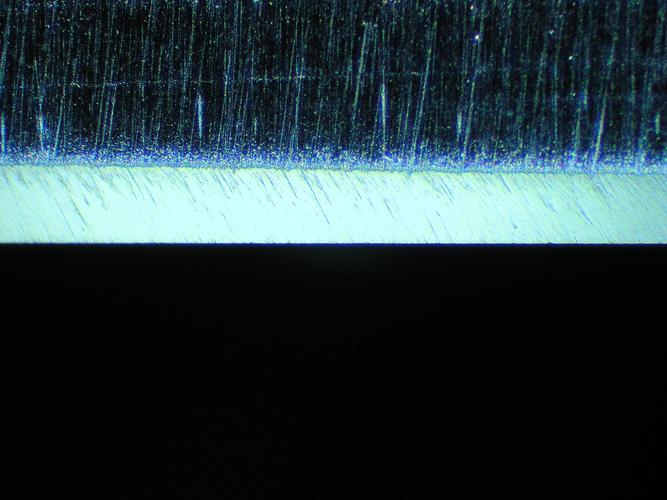
After 4K:
Attachment 144513
After 8K:
Attachment 144514
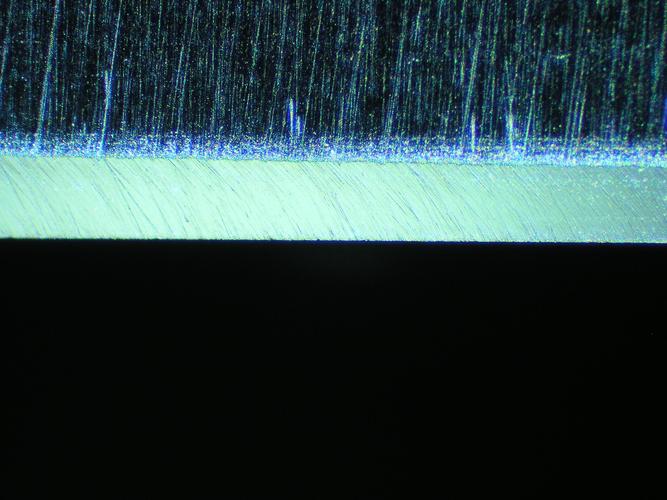
After 16K:
Attachment 144515
After 30K:
Attachment 144516
Any insight?
-john
Your 1k photo appears that the bevel isn't set. The images after show a more polished bevel but all show scratches short of the edge. Stay on the 1k as long as it takes. It should look like a straight line at the absolute edge. All the photo edges look the same, all short at the edge. This is better than having a bad temper, so it will work out once you get that set. Glad to see you are persistent and looking forward to hearing how great it shaves.
Hey John,
For me, it's pretty hard to judge an edge based on images. They're helpful for many things, but I'm a hands on guy. I have to see and feel an edge to really give any suggestion on what you may have.
When I hone, I start testing the edge right at the 1k. I don't shave test yet, and you'll have to calibrate this to your hair and touch, but I will cut a single arm hair at 3 points on the blade, toe, middle and heel. What I'm looking for with my hair is an edge that will basically just lay over a hair on the blade, no ping, etc.. I'm usually close to the base of the hair for this test. When I get to that point, and I've been watching the water on the hone being moved by the edge evenly, then I'm confident with moving on.
There are other ways to test and you'll have to experiment and try them until you've found one that works for you and calibrate it to your circumstances.
It's a lot of work to go through a whole honing regimen and then shave test and find the bevel was not set. Testing and being sure of the bevel at the 1k will sure make honing more fun. :)
:gl:
Howard :)
But of course you can - it just requires a bit of patience. Hone to the 8k level and stop. Wait until your next shave. etc.Quote:
Originally Posted by ocelot27