
Results 1 to 10 of 33
 22Likes
Thread: A Noob & His Hone.
 LinkBack URL
 About LinkBacks
Hybrid View
-
06-22-2015, 07:42 PM #1Senior Member


- Join Date
- Jan 2015
- Location
- Pinole, ca
- Posts
- 1,526
Thanked: 339
Follow euclid's advice, he has helped me tremendously in the past.
check this out:
http://straightrazorpalace.com/advan...ml#post1254386
Get some 1k wet dry. Follow the tutorial in the link. After setting the bevel you can get the rest done on your 12k it will just take some time. Just take your time with your 320 w/d.
Good luck, keep us updated as to your progress.
-
06-22-2015, 07:46 PM #2Senior Member

- Join Date
- Apr 2015
- Location
- Baldwin City, Kansas
- Posts
- 225
Thanked: 44
No advice to give, I am noob at honing as well. I will be intrested to see how this comes out for you.
-
06-22-2015, 08:44 PM #3Senior Member


- Join Date
- Jan 2015
- Location
- N.E. Indiana
- Posts
- 970
Thanked: 134 Progress.
I took the opportunity to work on this after the wife went to sleep last night. I spent a few meditative hours working that chip. No TV, just my supplies, the rhythmic sounds of stone & steel, and my counting. I'll try to break it down without being too long winded lol.
I opted for "splash & go" with a spray bottle of water this time, rather than soaking the stone for 10 minutes. I already planned on spending a significant amount of time on it, so it would be wet long enough through the night without a soak.
Two layers of tape. Watched some vids on circle strokes, gave that a whirl. Seemed to go okay. Sets of 15 circles on each side. I didn't bother counting the number of sets at any point, it was gonna be a long session. Occasionally, doing a few sets of 10-20 straight strokes (angled to fit the whole blade on the stone) on each side.
The water turned grey frequently, and I was rinsing the stone off almost as frequently. Every time I took it to the sink to rinse off, I also gave it a dozen or two swipes on my homebrew lapping tile.
About the third refresh on the tape, I got tired of wasting so much time fooling with tape & scissors. So I put three layers of tape on the spine, and went to town.
At this point, I also changed my stroke pattern again. I went to half laps, edge facing me, staying on the stone for both back & forth motions, angled with heel leading. 10 on each side. Occasionally, I would do this with the blade straight across the stone to change stria direction.
Did I mention changing the tape got tedious? Cause I just left those 3 layers on for the last almost two hours of the honing session. Still rinsed the stone off frequently. That got tedious too. So I put some water in an empty Tupperware the wife uses for crafts, and started using that to rinse off the hone & blade without going all the way to the sink.
I tried breadknifing on the corner of my hone to work the chip out... gave up on that when the chip didn't go anywhere, and the blade put some pretty good grooves in the stone lol. Tufpug 1. Shapton 0. Maybe I'll revisit that with one of the fine files I picked up for de-pinning?
Finally seemed notice some progress a little after bedtime, so I called it for the night.
Brief followup pics to come .
Decades away from full-beard growing abilities.
.
Decades away from full-beard growing abilities.
-
06-22-2015, 09:02 PM #4Senior Member
- Join Date
- Jan 2015
- Location
- N.E. Indiana
- Posts
- 970
Thanked: 134
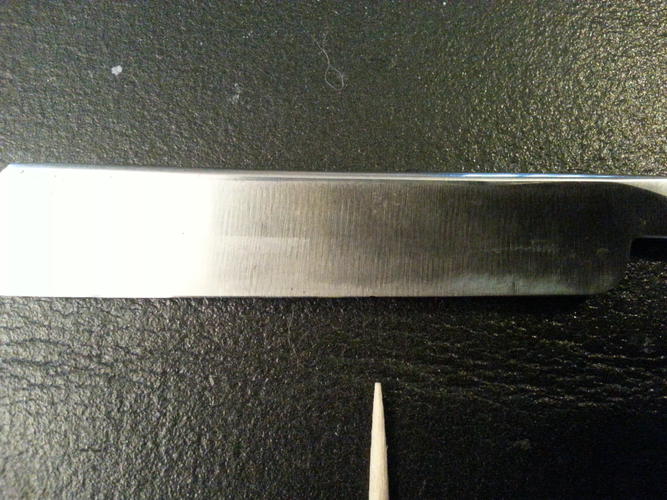
Straight down view. Toothpick pointing to the chip.
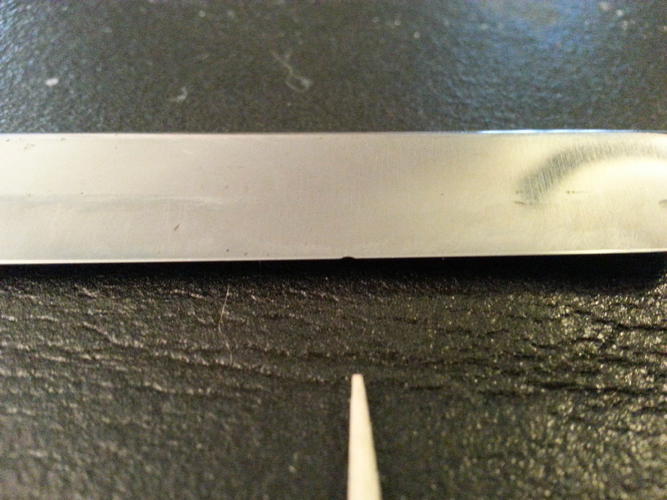
Lower angle view.
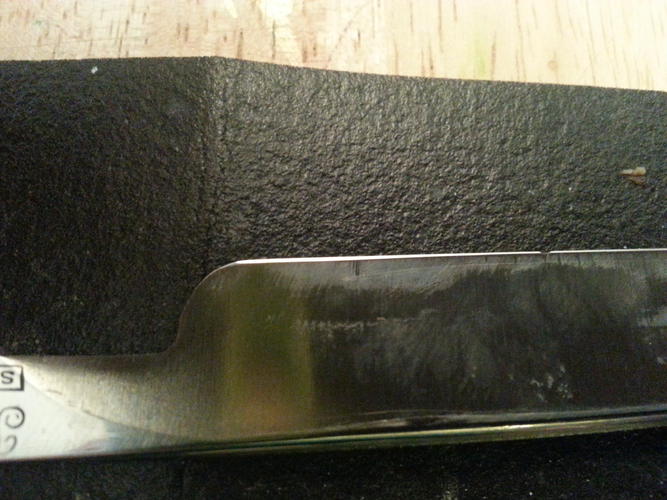
"Face side" bevel shot.
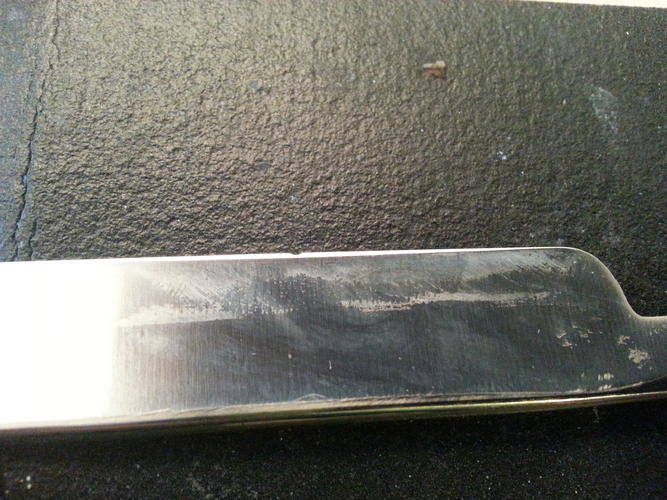
"Back side" bevel shot.
I noticed something during one of the tape changes & accompanying edge inspection. The bevel is shorter in the middle, & longer at the heel and toe on the face side. On the back side, the bevel is shorter at the heel & toe, and longer in the middle. There is corresponding hone wear on the spine from the razor's previous life.
 Logic dictates that this points to a slightly warped blade geometry.
I made note of this & moved on, because my primary goal is removal of the chip & practice honing. I'll burn that bridge when I get to it Decades away from full-beard growing abilities.
-
06-22-2015, 09:45 PM #5Senior Member
- Join Date
- Jan 2015
- Location
- N.E. Indiana
- Posts
- 970
Thanked: 134
Additional thoughts.
I was surprised at how quickly (relative to the length of this honing session lol) a good crisp edge came back to it after each of the several times I tried breadknifing it. Well, good enough to slice skin on my slightly calloused fingers with no resistance or pressure when a slight slicing motion is applied. I realize there may still be a overhonning/foil edge/not absolutely perfectly set bevel.
I bought this razor and an ERN from the same dealer at an antique mall for $24 +tax TOTAL for both... for the soul purpose of teaching myself honing and restoration.
I bought a Dovo Best Quality 5/8 full hollow, and it just came back from receiving it's free re-honing from Sir Lynn Abrams of SRD. So I've got some practice shaving under my belt, and a great benchmark of an edge to grade myself against .
.
I appreciate the offer, Euclid. But seeing as how I bought a couple of razors for the soul intention of possibly screwing the pooch with my DIY skills, it would defeat the purpose and only set me back if I were to send it out.
Yes. I am sometimes stubborn. Having said that, this isn't exactly the same as all those honing posts ("dead blade?") where a noob tries for hours to hone a razor that only needed a refresh on a finisher and keeps because the shave is uncomfortable and the bevel isn't set. It takes time (a lot more than expected when noob + 12k is factored in lol) to remove this much metal to work out a chip.
I did try a few (dozen) laps at a higher, more knife like, honing angle in order to expedite metal removal. But I stopped after a few unpleasant harmonics were heard between the stone & steel. Having the structural integrity already weakened by the chip, I didn't want to risk cracking the blade.
What is left of the chip looked a whole lot bigger last night on my way to bed. Looking at it today, I'm feeling much better about my progress last night.
I didn't take "hone surface clogging" too seriously. Until I looked back in hindsight. I feel like some of the most progress was made after each time the stone was rinsed off, no matter what stroke was used.
I tried to compensate for the possible warp in the blade by applying pressure to the middle of the blade when honing with the "face side" down, amd pressure towards the heel and toe when honing "back side" down.
Looking forward to your thoughtful responses!Last edited by Crawler; 06-22-2015 at 09:54 PM. Reason: Forgot something.
Decades away from full-beard growing abilities.
-
06-22-2015, 09:51 PM #6Senior Member
- Join Date
- Jan 2015
- Location
- Pinole, ca
- Posts
- 1,526
Thanked: 339
chances are the blade is warped, most are, thats why an x stroke is most often suggested. yours looks slight, chances are you could be developing a frown or be working your way towards one. Keep an eye on it. The 12k is a great hone to practice getting the stroke right as you will be wasdting very little metal. It looks to me like in the last pic that you need to spend a little more time on the heel and toe to "even" it up with the middle assuming its the grind not giving it the appearance of being uneven. A quick look down the edge should tell you if you have a slight warp.
I would use an x stroke on the stamp side and a rolling x on the other, should even it right up.Crawler likes this.
-
06-23-2015, 12:40 AM #7Senior Member


- Join Date
- Apr 2012
- Location
- Diamond Bar, CA
- Posts
- 6,553
Thanked: 3215
Looks like good progress, if you use the 45 degree stroke you eliminate the tape all together, until you actually hone it to set the bevel. You don’t even touch the tape until bevel setting.
I would not worry about the bevel being irregular, it’s probably because of the 3 layers of tape, you probably burned through some ta[e and the extra pressure you applied.
Try some of the 45 degree strokes, just don’t use too much pressure and flex the blade, let the stone do the work. Once you get to the bottom of the chip, leaving a little, then hone it with 2 layers of tape. The bevel does not have to be even as long as you get an edge from heel to toe.
Next time use a sheet of 1k sandpaper, it’s a 10min job with a 1k grit.
Don’t use a file unless, it is a 1k diamond file.


 Reply With Quote