
Results 1 to 10 of 18
 33Likes
Thread: Blade Edge Chip Repair
 LinkBack URL
 About LinkBacks
-
08-07-2016, 04:17 PM #1Senior Member


- Join Date
- Jun 2013
- Location
- Midland, TX
- Posts
- 158
Thanked: 10 Blade Edge Chip Repair
Has anyone settled on whether or not to "breadknife"a razors edge to remove a chip?
-
08-07-2016, 04:29 PM #2Senior Member

- Join Date
- Jun 2013
- Location
- Pompano Beach, FL
- Posts
- 4,042
Thanked: 635
I would hold the blade at a 45° angle and remove the chip on a 300 grit stone. Then reset the bevel and ho e it up. That would be the quickest way to remove it with the least amount of metal removal.
-
08-07-2016, 04:47 PM #3illegitimum non carborundum


- Join Date
- Jan 2008
- Location
- Rochester, MN
- Posts
- 11,552
- Blog Entries
- 1
Thanked: 3795
^^^^^Yup.
I would add that if you plan on doing any clean-up of the blade, do it before the edge repair. Also, as you get closer to the completion of the chip removal, lower the angle more so that by the time the chip is gone the spine is on the hone.
-
The Following User Says Thank You to Utopian For This Useful Post:
ajkenne (08-09-2016)
-
08-07-2016, 08:40 PM #4At this point in time...


- Join Date
- Jun 2007
- Location
- North Idaho Redoubt
- Posts
- 27,054
- Blog Entries
- 1
Thanked: 13249
-
-
08-08-2016, 12:22 AM #5Senior Member
- Join Date
- Jun 2013
- Location
- Midland, TX
- Posts
- 158
Thanked: 10
Thanks Glen. Sounds like the best way to approach this.....
gssixgun likes this.
-
08-08-2016, 01:03 AM #6Senior Member
- Join Date
- Apr 2012
- Location
- Diamond Bar, CA
- Posts
- 6,553
Thanked: 3215
How, you do it, really does not matter much, Bread knife, High angle honing or filing with diamond plate or file, spine on the bench. The exact same amount of metal has to be removed.
If you bread knife on a diamond plate or low grit stone, a few high angle laps will set the angle closer to the bevel angle and reduce your bevel set honing, a bit.
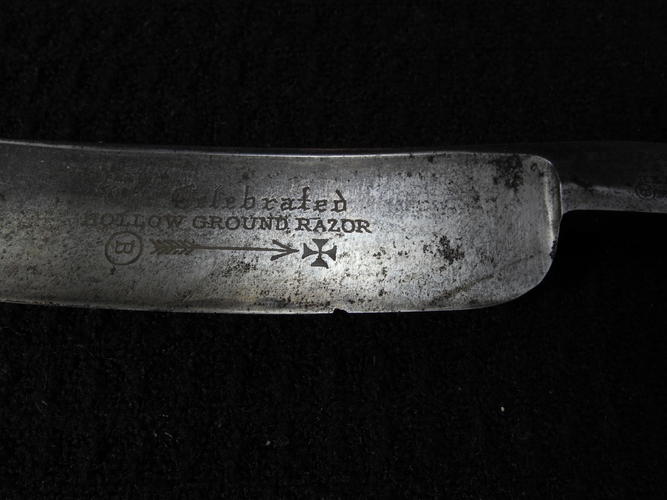
Your spine looks to be curved.
You might want to take a tracing of the blade onto a piece of cardboard and take some measurements from the spine to the edge in 3 or 4 spots to see if you want to reproduce the curve on the edge to match the spine.
Experiment with the template and try tracing the spine curve onto the edge to see what looks best, before you remove any material. Black sharpie ink will give you a good idea of what it will look like.
Simply grinding the edge straight is not always the best course, just a small amount of metal removed from the wrong place, can dramatically affect the look of the blade.
A little planning and experimentation can save you some metal.
-
08-08-2016, 11:16 PM #7Senior Member

- Join Date
- Dec 2014
- Location
- Virginia, USA
- Posts
- 2,224
Thanked: 481
I'd hit it as close to 90 degrees as I could. That would be the most expedient way to get to the low part of that chip, sawing it back and forth heel to toe as gssixgun advised in his thread for the same reasons. Just in case there's a crack wanting to start there somewheres that you haven't spotted yet. Like Euclid says, the same amount of metal has to go no matter what method you use.
Far as the edge contour goes, I like mine to closely follow the spine. So this is a perfect opportunity to break out the calipers and make sure it's as close as you can get it.Euclid440 likes this.
-
08-09-2016, 02:18 AM #8Senior Member
- Join Date
- Jun 2013
- Location
- Midland, TX
- Posts
- 158
Thanked: 10
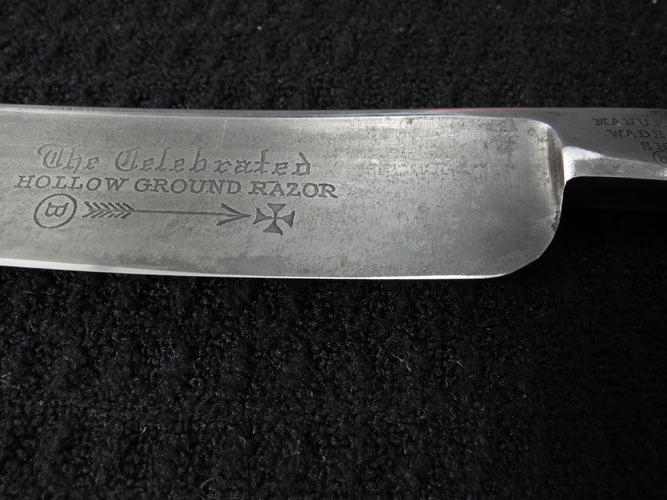
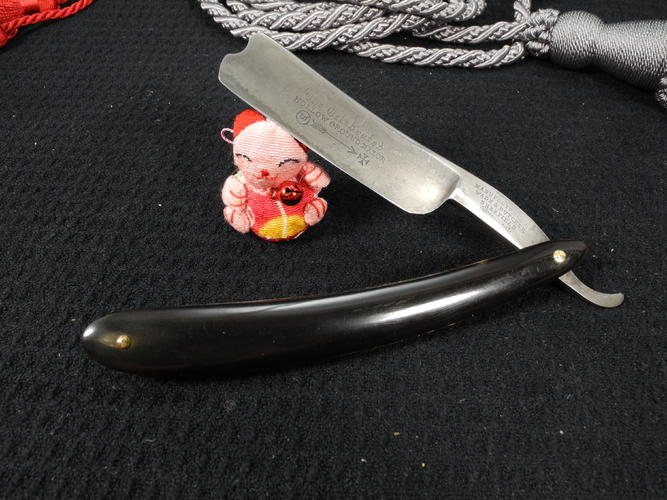
Well, here are the results.
Chip Gone.
Cleaned up good, rust gone, no pitting. I don't polish my razors. I try to keep them as close to original as I can. This one required new scales.
I had to even the bevel on both sides because it really didn't have one. Two strokes to one.
It is now very shave ready and I will give it a shot tomorrow.
No Tape from 4k up.
-
08-09-2016, 03:25 AM #9illegitimum non carborundum
- Join Date
- Jan 2008
- Location
- Rochester, MN
- Posts
- 11,552
- Blog Entries
- 1
Thanked: 3795
It looks great. The remaining patina seems just right.
-
08-09-2016, 04:14 AM #10Senior Member
- Join Date
- Dec 2014
- Location
- Virginia, USA
- Posts
- 2,224
Thanked: 481
Stupid question but...wouldn't it originally have been polished?
I'm picking up what you're putting down though. The patina gives it character. Hope it shaves as good as it looks!


 Reply With Quote
