
Results 1 to 9 of 9
 44Likes

Thread: How to correct/re-profile a heel
 LinkBack URL
 About LinkBacks
-
02-23-2017, 12:56 AM #1Senior Member


- Join Date
- Apr 2012
- Location
- Diamond Bar, CA
- Posts
- 6,553
Thanked: 3215 How to correct/re-profile a heel
Recently in a couple posts, there have been some questions on correcting/re-profiling a heel.
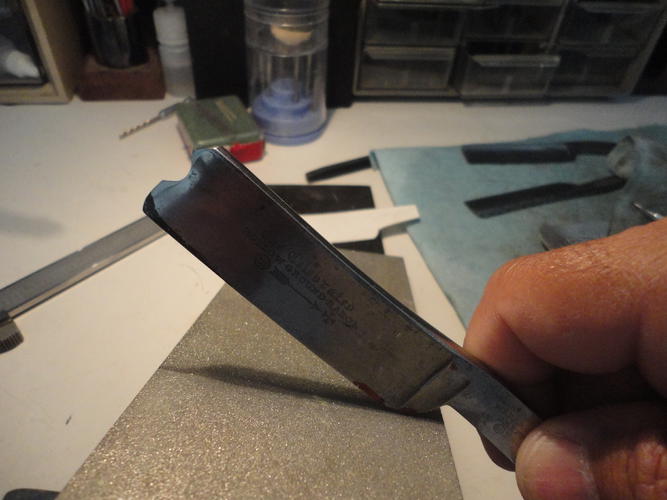
Photo 1 show the heel in question notice, where the corner of the edge ends, well past the beginning of the stabilizer.

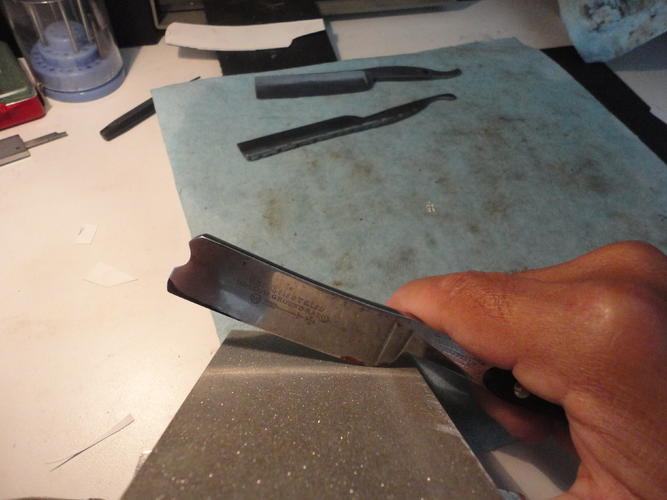
Photo 2 show the corner and the excessive wear on the spine, over the heel, were previous honers have used excessive pressure, in an attempt to get the heel edge, flat on the stone.
Also notice what it did to the bevel and edge.
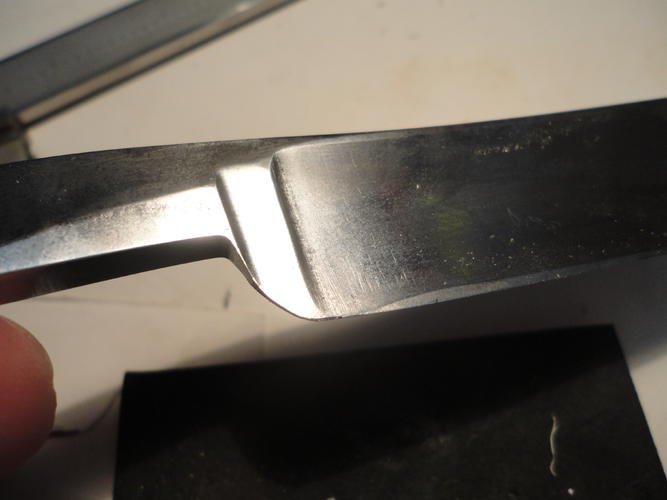
Photo 3 shows the opposite side, the hone-ware is highlighted on the spine, stabilizer and edge. In this case, I re-profiled the whole edge and made a cardboard template of the razor, but you can see how sharp the corner of the heel as become on the template.
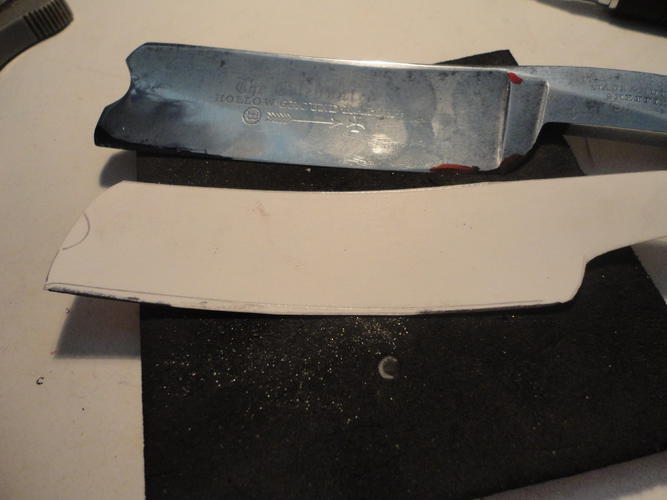
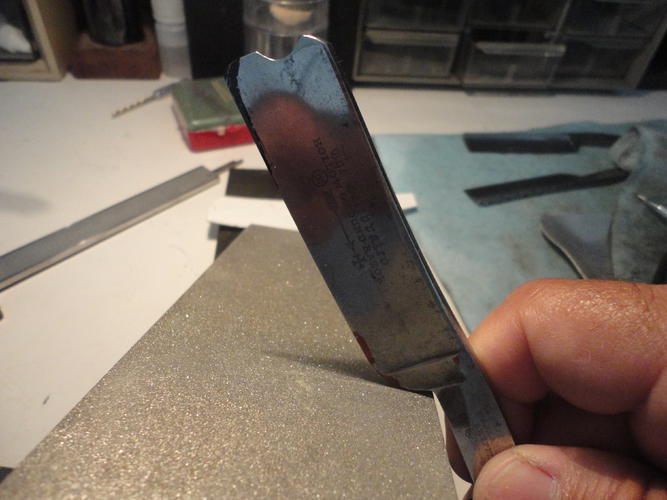
Photo 4 I am using a large washer to profile the radius. Notice how far forward this radius, will move the corner of the edge. Mark with a sharpie, I marked one side in black and the other in red. If you want to make a change, WD40 will remove the sharpie. Really you only need to mark one side, the one that will face you when it is on the stone.
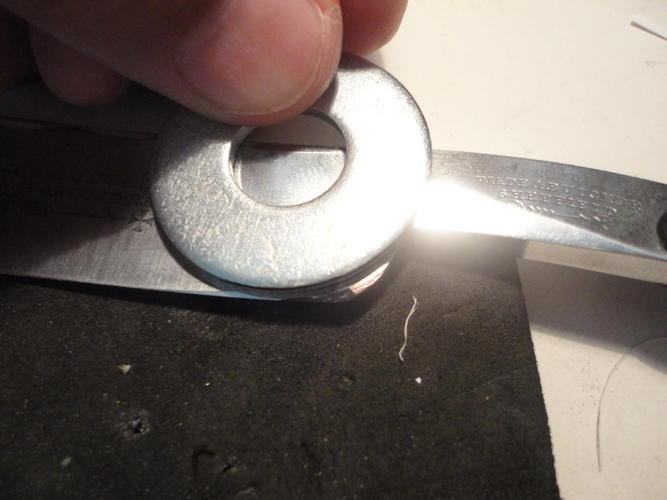
Photo 5 shows the face side marked in black, this give you a very good idea what the finished razor will look like. Notice where the bulk of the material will be removed. The metal is thin here and will go quickly, with a diamond plate, so go slow and do not use a lot of pressure.
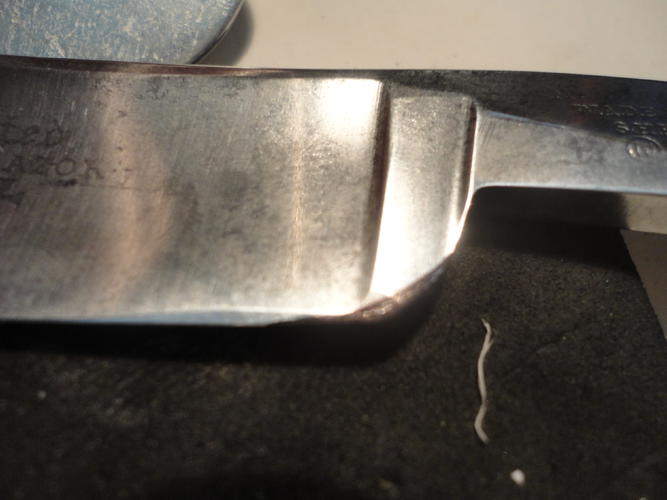
Photo 6 shows removal of the bulk of material in just a few laps, back and forth, maintaining the same angle.
I removed the bulk on the corner then another facet above the first facet and another below, stop when close to the line.
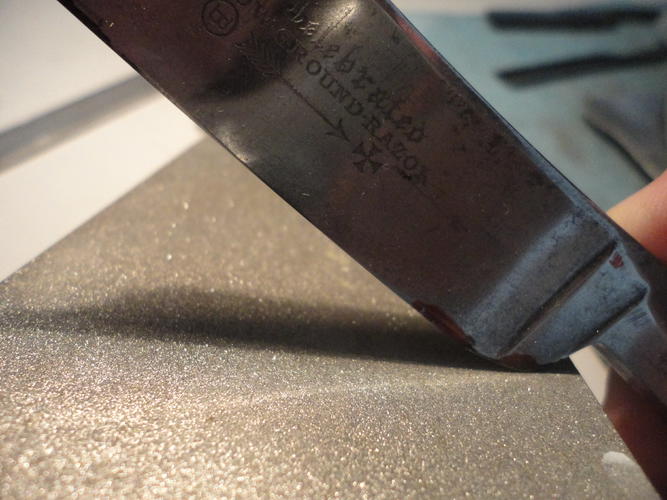
Photo 7 shows what the edge looks like after a few laps.
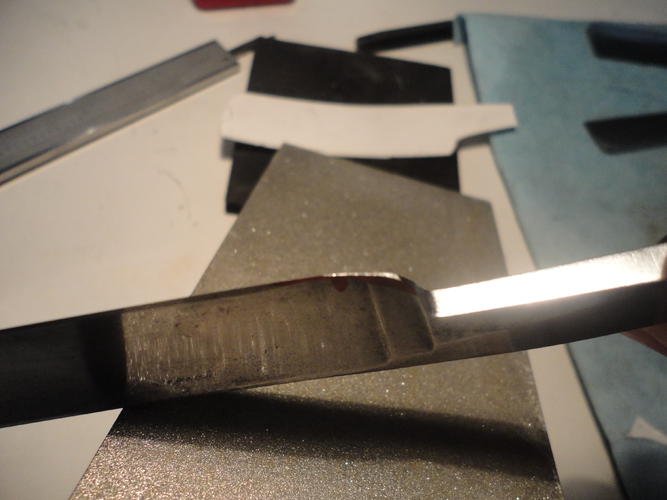
Photo 8 from the other side, the red vertical tick mark is about, where I want the new corner to end, go slow and work up to the line. Still needs a bit more.
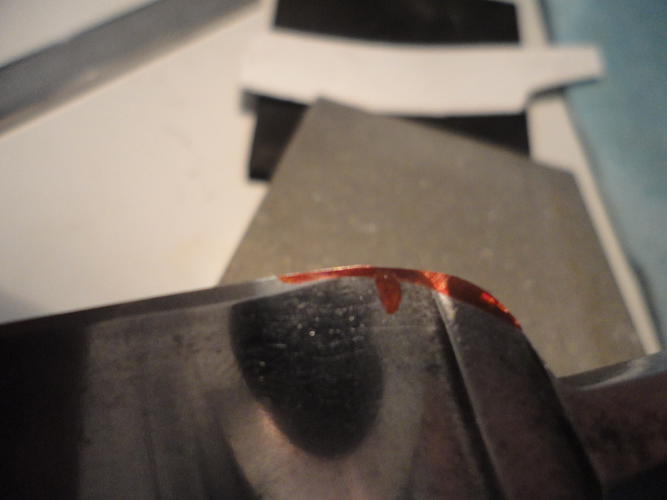
Photo 9 shows the beginning of blending the facets. Start with the razor almost 90 degrees to the edge and as the razor moves down the stone, roll the angle to almost even with the edge.

-
The Following 17 Users Say Thank You to Euclid440 For This Useful Post:
bartds (12-29-2019), Dachsmith (09-17-2018), Dieseld (02-23-2017), DVW (09-06-2020), Haroldg48 (03-09-2020), Hirlau (02-23-2017), JOB15 (03-01-2017), joelkerr (03-10-2020), Longhaultanker (03-01-2017), Marshal (02-23-2017), outback (12-07-2017), planeden (09-06-2020), Slur (02-07-2019), Steel (02-23-2017), tinkersd (03-03-2017), tintin (03-06-2017), xiaotuzi (02-23-2017)
-
02-23-2017, 01:02 AM #2Senior Member
- Join Date
- Apr 2012
- Location
- Diamond Bar, CA
- Posts
- 6,553
Thanked: 3215
Photos 9,10 &11, show the razor rolling from 90 to the edge, as it progresses down the length of the plate.
Photos 12 and 13 are the reprofiled edge, notice where the edge will now end, well in front of the stabilizer. Actually, it will move a bit closer towards the stabilizer once honed, but try to get it about a ¼ inch or 6mm in front of the stabilizers leading edge.

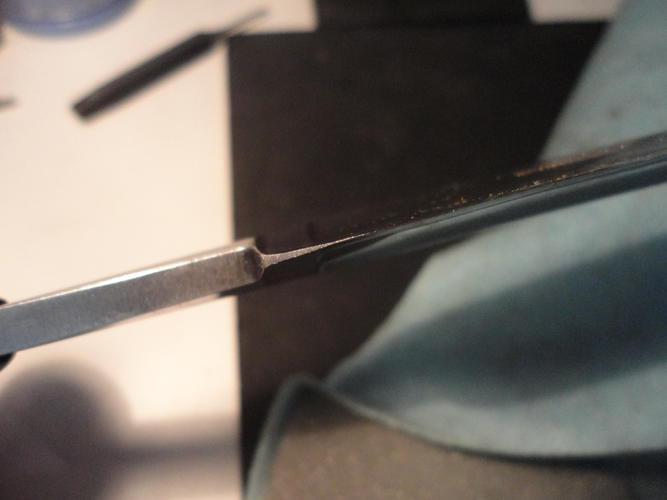
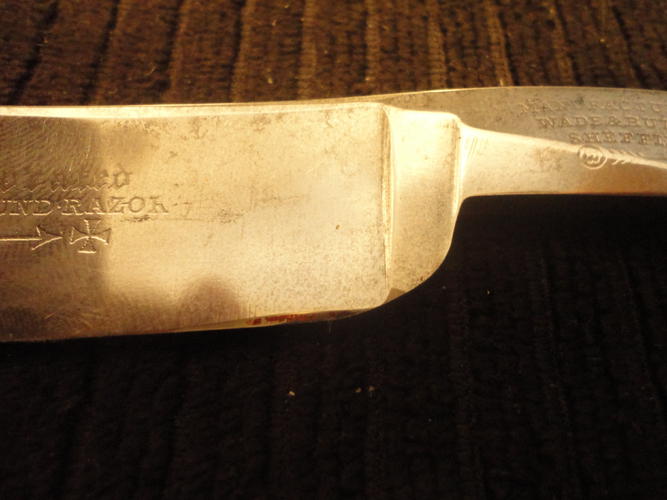
Photo 14 is the finished product.
Once you have done it a few times, it only takes a few strokes on a diamond plate. I usually use a 400/1000 diamond file, but used a diamond plate for this demonstration, as that is what most guys will have.
The diamond file gives you a little more control and I feel lets you see what is happening better. Either way works as does a low grit stone.
If you do this as a preventive procedure, when the edge begins to get close to the stabilizer, or you feel the stone hit the stabilizer when honing, a few rolling strokes, before honing can keep the heel shaped properly.
-
The Following 35 Users Say Thank You to Euclid440 For This Useful Post:
ajkenne (02-23-2017), bartds (12-29-2019), cwomg (04-08-2019), Dachsmith (09-17-2018), Deegee (03-06-2017), Dieseld (02-23-2017), DVW (09-06-2020), eddy79 (03-13-2017), ejmolitor37 (02-23-2017), Eurofighter (02-19-2019), Gasman (03-01-2017), hein31 (02-23-2017), Hirlau (02-23-2017), JackeHj (03-03-2017), JOB15 (03-01-2017), joelkerr (03-10-2020), JoeSomebody (02-23-2017), JP5 (12-31-2017), kelbro (02-23-2017), Longhaultanker (03-01-2017), markbignosekelly (03-06-2017), Marshal (02-23-2017), matt84 (04-09-2022), MedicineMan (03-11-2017), Mrchick (03-06-2017), outback (12-07-2017), prodigy (02-23-2017), randydance062449 (01-17-2021), s0litarys0ldier (02-23-2017), Slur (02-07-2019), Steel (02-23-2017), Steve56 (02-23-2017), tinkersd (02-23-2017), tintin (03-06-2017), xiaotuzi (02-23-2017)
-
02-23-2017, 09:07 AM #3Senior Member

- Join Date
- Oct 2015
- Location
- Knoxville,IA
- Posts
- 2,368
Thanked: 762
Great write up Euclid very very helpful and great description. [emoji106]
Nothing is fool proof, to a sufficiently talented fool...
-
03-01-2017, 08:05 AM #4www.edge-dynamics.com

- Join Date
- Feb 2013
- Location
- London
- Posts
- 3,066
Thanked: 512
Using a larger washer is a great tip.
Excellent job.
-
The Following User Says Thank You to JOB15 For This Useful Post:
Euclid440 (03-01-2017)
-
03-01-2017, 09:17 AM #5Skeptical Member


- Join Date
- Nov 2016
- Location
- Colorado Springs
- Posts
- 10,555
Thanked: 2195
Very nice pics and discription. A+
ejmolitor37 likes this.It's just Sharpening, right?
Jerry...
-
The Following User Says Thank You to Gasman For This Useful Post:
Euclid440 (03-01-2017)
-
03-06-2017, 08:45 AM #6Senior Member


- Join Date
- Sep 2013
- Location
- Åbo, Finland
- Posts
- 143
Thanked: 21
This was most helpful! Answered a lot of questions I didnt really know I had... (If that makes sense) Thanx!
 Quidquid latine dictum sit, altum viditur
-
The Following User Says Thank You to JackeHj For This Useful Post:
Euclid440 (03-06-2017)
-
03-06-2017, 02:05 PM #7Historically Inquisitive

- Join Date
- Aug 2011
- Location
- Upstate New York
- Posts
- 5,782
- Blog Entries
- 1
Thanked: 4249
Very nice write up and pictures, I think its even easier using a diamond file, really like the other post you did on fixing a frowning blade as well : http://straightrazorpalace.com/works...-me-smile.html
ejmolitor37 likes this.
-
The Following User Says Thank You to Martin103 For This Useful Post:
Euclid440 (03-06-2017)
-
03-06-2017, 02:13 PM #8Senior Member

- Join Date
- Jun 2016
- Location
- NH
- Posts
- 1,924
Thanked: 1363
I agree, this is an excellent tutorial, Euclid. I recently used the info here to reshape the heel on a Northfield. Thanks for this.
ejmolitor37 likes this."Go easy"
-
The Following User Says Thank You to xiaotuzi For This Useful Post:
Euclid440 (03-06-2017)
-
03-06-2017, 06:39 PM #9Senior Member

- Join Date
- Feb 2014
- Location
- West Virginia
- Posts
- 605
Thanked: 284
Great tutorial dealing with an issue nearly everyone who hones will have to deal with sooner or later. Thanks !
Marshal and ejmolitor37 like this."It is easier keeping a razor honed than honing a razor."
-
The Following User Says Thank You to Wirm For This Useful Post:
Euclid440 (03-07-2017)


 Reply With Quote