Results 1 to 10 of 51
Thread: Bevel pics
Hybrid View
-
09-15-2018, 01:11 AM #1
 What a curse be a dull razor; what a prideful comfort a sharp one
-
09-15-2018, 04:45 AM #2Senior Member


- Join Date
- Apr 2012
- Location
- Diamond Bar, CA
- Posts
- 6,553
Thanked: 3215
Jerry, you are using way too many stones. For a total bevel set do 1, 3, 8 and 20k Keep it simple. You can make those jumps very easily, I often do fewer, but that is a more advanced technique and do not recommend it until you fully grasp pressure and know your stones potential.
The 5 & 12 do not add much in your progression. For a reset the 5 can come in handy, I have a King 6k I like for that when I need more than an 8k.
I like the 12k for touch up, but in your progression 8 to 20k works well, both are aggressive stones.
The 3k is your workhorse for removing the deep stria, here is where you want to use circles or pressure and maybe a few more laps than other stones. Get the 3k down with no deep stria and it’s downhill from there.
For this blade do not go lower than the 3k.
As I said earlier, you can start each new stone in the progression with circles or pressure and finish with light laps to lower the land of the stria, so it will be easier for the next stone in progression to remove all previous stria.
A given grit will cut the equivalent size grove, e.g. all 1k’s cut 1k grooves, after the groves are cut, if you do lite laps you can cut the height of the groove, the width will still be 1k, but the height could be half or a quarter, depending on the stone. A 1k diamond plate, will cut deeper than a 1k King.
I think you are close. Keep at it trying different technique, strokes and pressure and it will come together for you.
Here is one other thing you can try, that a lot of new guys have had good results with. Do a google search for “the Ax Method Gilmore” it is a half lap, knife honing technique that Alex Gilmore came up with a few years ago. You do 20 half laps, on each side, then 10 laps, 5 laps, 2 laps then one lite lap, 38 laps total, but you do a lot of laps on each side in succession, so you remove material quickly. This stroke has a tendency to put more pressure on the front/edge of the bevel. Just what you need…
Alex has a bunch of good video on You Tube and, on his site, TheJapanStone. Just something else that might work for you.
Almost there.
-
-
09-15-2018, 05:15 AM #3

With my machine, I can't seem to get a pic of the mirror finish. The mirror looks grey. Guessing this has to do with the size of the area in the scope? I just finished another one. I'm ashamed to show the before pic that I thought was done. I hadn't test shaved with it but I thought it was ready. Boy was I wrong!
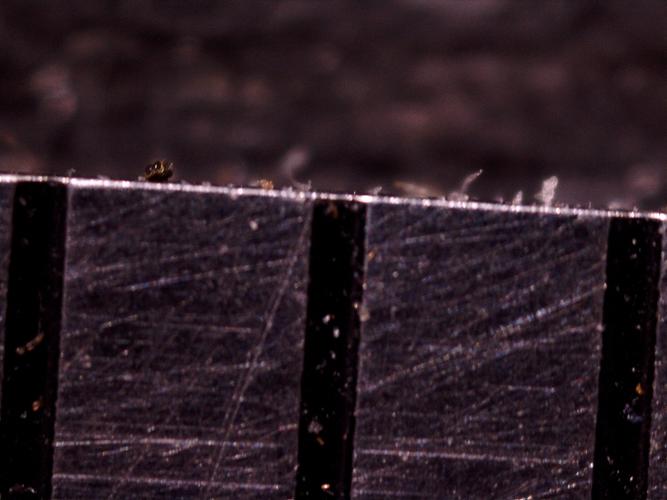
The first pic is just to show the folks here looking at these images of how much of the blade is in the picture. The pic is of a metal ruler and the lines are mm measurements. So I'm guessing that if you split the lines in the middle, it would be one mm apart. So the fact is, The pics are only showing 2mm of the edge. But don't ask me what magnification this is. The scope is saying 250X but I dought it sense it is a cheap scope

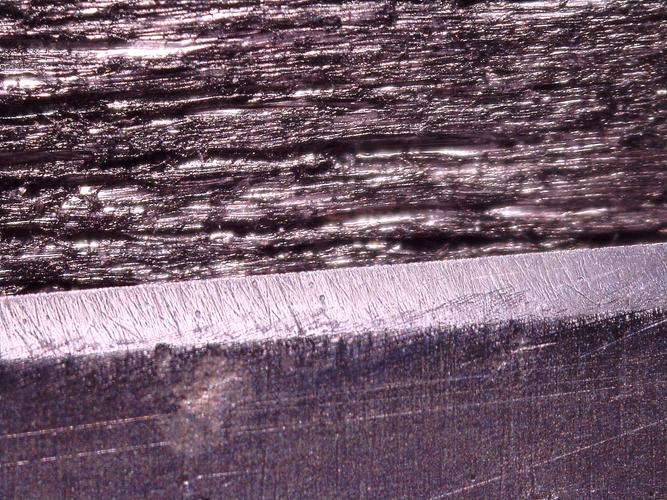
This pic is what I thought was ready for a shave. Scary at this magnification. I'm so ashamed

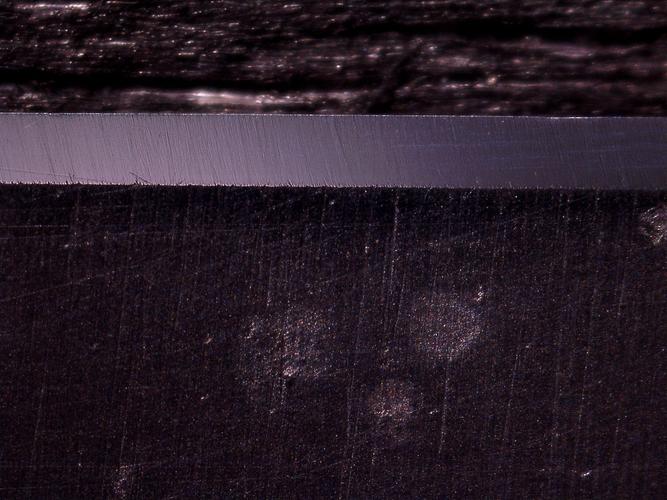
Here it is after going to the 5k and trying to fix the ugly mess, then working up to 20K and stropping...

Pic is a little darker. I must have bumped the light. I'm guessing this edge might shave a little better and the last pic. LOL.Last edited by Gasman; 09-15-2018 at 05:17 AM.
It's just Sharpening, right?
Jerry...
-
The Following User Says Thank You to Gasman For This Useful Post:
bluesman7 (09-15-2018)


 138Likes
 LinkBack URL
 About LinkBacks


 Reply With Quote