
Results 1 to 8 of 8
 8Likes

Thread: Sharpening My First Gold Dollar Razor
 LinkBack URL
 About LinkBacks
-
01-29-2025, 05:25 AM #1Senior Member


- Join Date
- Dec 2020
- Posts
- 176
Thanked: 1 Sharpening My First Gold Dollar Razor
Hello! I am back after a year-and-a-half long hiatus. When I left off, I was struggling to get a good shave out of my Dovo Colonel Conk, and having similar trouble with an expertly honed vintage razor which was gifted to me by @PaulFLUS. Thank you Paul for the razor!
In the mean time, @CrescentCityRazors shipped me a couple blocks of acrylic as well as some lapping film, which is not available for purchase where I live. Thank you Crescent for the finishing stone!
While we're at it, I should also shout out @gssixgun for a zoom lesson some time ago. It was really insightful! My apologies for taking this long to get back to honing.
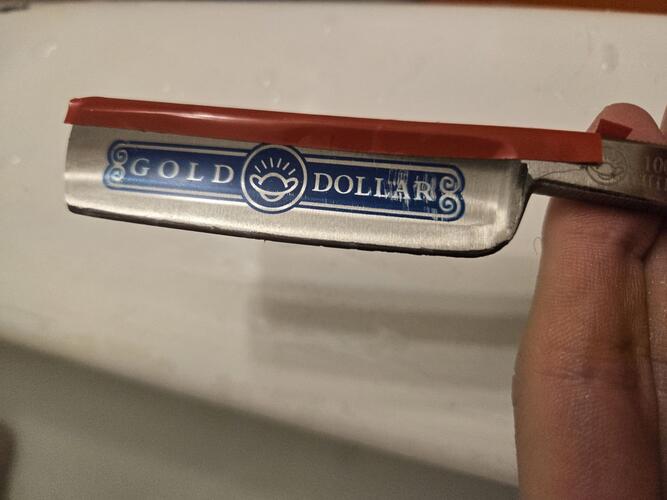
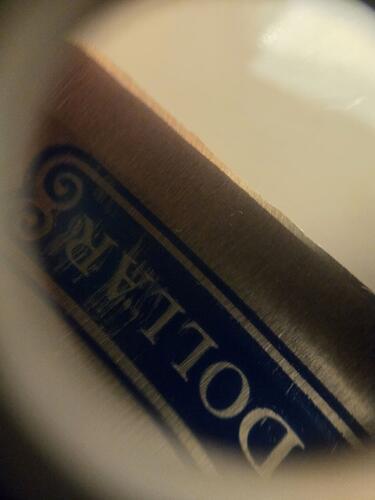
The last thing I did before I left off was order a stack of dirt cheap Gold Dollar straight razors from Aliexpress.
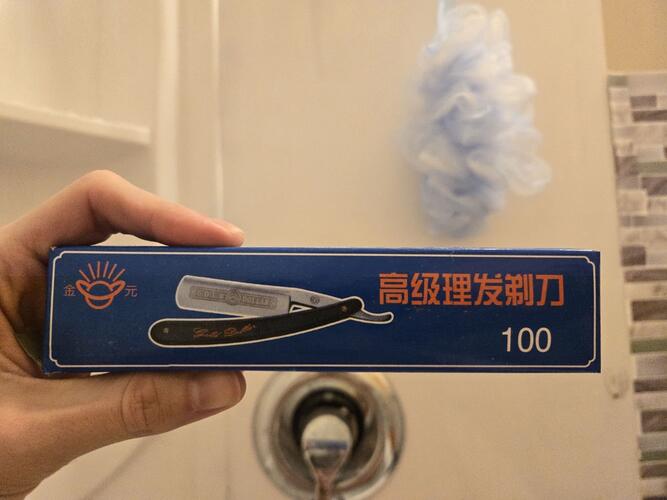
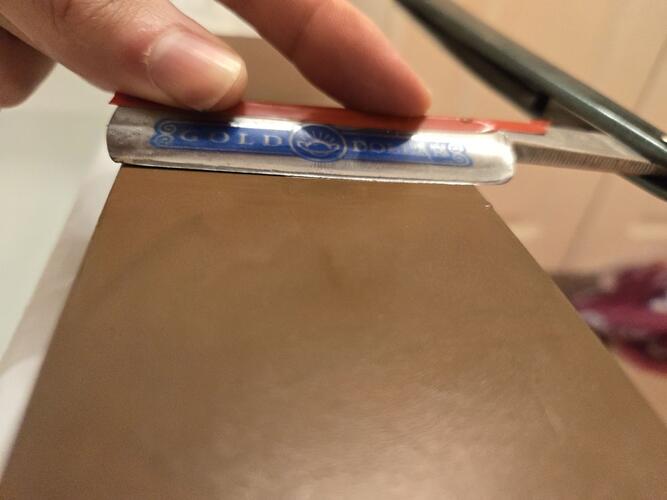
Now, when I say dirt cheap, I mean dirt cheap, I ordered them for approx. $10 CAD per razor, and then during checkout they got randomly discounted to around $1.50 per razor. They must have really wanted to get rid of them! I can see why:
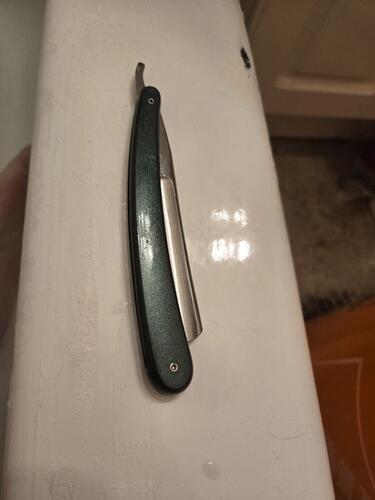
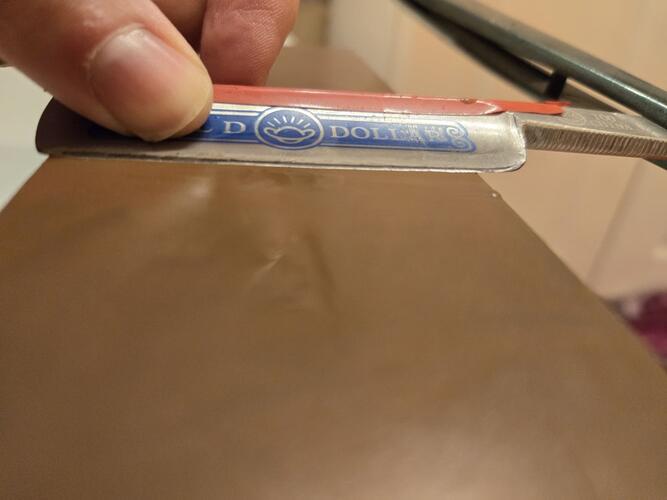
This thing was jagged. You'd probably be better off shaving with a bread knife, frankly. The deepest chips looked to be approx. 1/32" in depth, and there was a lot of them
At least it seemed to sit pretty flat on the hone (that is, only if leaning on the blade, if sitting on the spine it was quite uneven indeed.
I wrapped the spine in a single layer of electrical tape, painted the bevel with permanent marker, and went back and forth for a few strokes. It seemed to wear pretty evenly across the length of the bevel, however it was readily apparent that these chips were not going to disappear without a fight.
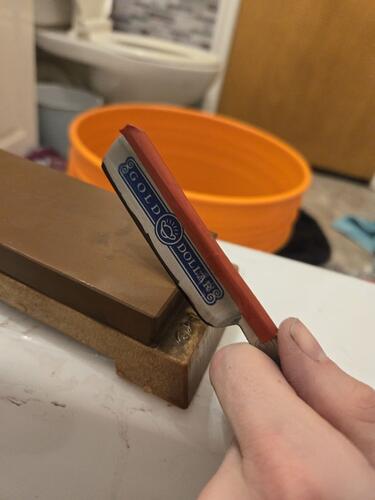
I tried breadknifing against the corner of my hone, which in hindsight doesn't seem to make a lot of sense to do. I think to quickly get chips out, you would probably want to swipe it back and forth against a flatter and rougher surface, like a 220 grit diamond hone perhaps. It did not seem to do anything to make the chips go away. After doing some quick googling, I saw multiple people suggest that you should stop breadknifing once the chips are at approx. 1/32" depth anyway, as you would be wasting metal if you go any further than that. Since my chips were already there, I decided to simply hone them out the long way.
I set a stopwatch and did rolling X-strokes until there were no longer any visible chips. It took approx. one hour at my speed to get them all out. That said, I am inexperienced and was going quite slowly at first, using a technique involving both hands, rolling light pressure from one hand to the other as I went down the hone. As the hour progressed, I made up my mind that this technique is not ideal, as it seems to have a high risk of cutting one of your thumbs open every time you rotate the blade, not to mention the temptation to lean on the razor a bit, applying far more pressure than necessary. By the end, I was using a one-handed technique, quickly swiping back and forth across the hone in a sort of rainbow motion. This feels much faster and lower risk, though also less accurate.
After some time, I tested the length of the blade against my arm hair, all the way down on both sides. It seemed to be doing an okay enough job in all areas, so I moved onto the 4K. This time, I continued honing until the relatively deep grooves from the 1k disappeared. I could not really tell if I was done or not, as it seemed to have a bit of a double bevel, which would make sense considering the electrical tape on the spine. I'm not sure whether or not it actually did have a double bevel, as by the time I finished on the 8k, most of the blade seemed quite shiny.
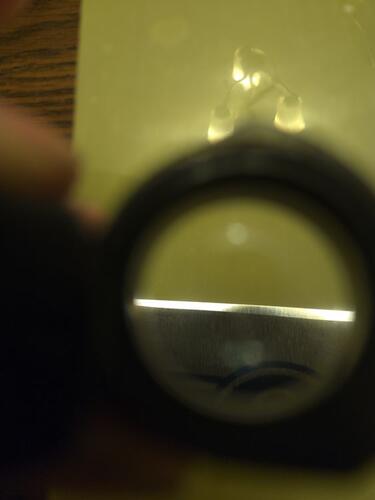
Upon closer inspection, there did seem to be a lot of scratches left. My eye is not well trained, but they appeared to be mostly 4k scratches with the odd 1k scratch leftover.
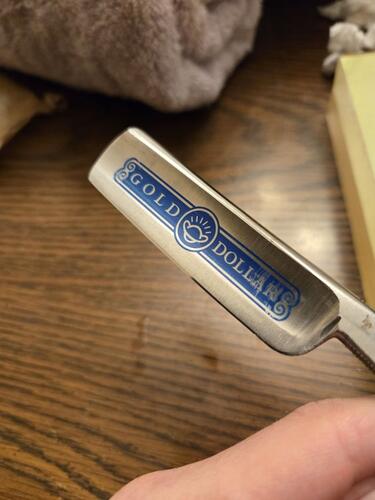
After finishing up on the 8k, I went on to the microfinishing film (please don't kill me if that's the wrong word for it, as I recall there being many very similar looking films with different names, some of which are not appropriate for straight razors.) I lapped it while holding the block in my hand for approx. 5 minutes, then went on to the canvas strop, then the leather strop, skipping the pasted strop in the process.
I'm not sure how great of a job I did overall, but it seems to shaving down my arm quite effortlessly all the way down both sides of the blade, so for now I'll call this mission accomplished!
The real test will be in a couple of days when I try shaving my face with it for real. Time will tell whether it is my ego or only my face which gets beat up
Thank you for reading!Last edited by rickytimothy; 01-29-2025 at 05:29 AM.
-
01-29-2025, 01:02 PM #2Senior Member

- Join Date
- Jun 2013
- Location
- Pompano Beach, FL
- Posts
- 4,046
Thanked: 636
Did you lap your stone flat before honing?
Use a straight edge to check that spine and edge is straight and not warped.Last edited by bouschie; 01-29-2025 at 02:34 PM.
rolodave and rickytimothy like this.
-
01-29-2025, 01:45 PM #3Senior Member
- Join Date
- Nov 2016
- Location
- Chicago Suburbs
- Posts
- 1,103
Thanked: 292
The main problem with Gold Dollar razors is that there is a blade stabilizer on the heel of the razor that prevents the heeel of the razor from laying flat on the stone during the honing process. The first step in honing the razor should be to take a Dremel tool and reducing the stabilizer until you can hone the entire blade from heel to toe. Once that step is completed, the razor will hone pretty much as any other decent straight razor. While Gold Dollar razors use Chinese steel, the quality is pretty decent. They can normally be honed to shave ready status. Because the steel is a little soft, the honing process goes quickly compared to some harder steels. However, because the steel is soft, the edge will need to be refreshed more frequently than some others.
rickytimothy likes this.
-
01-29-2025, 10:46 PM #4Senior Member
- Join Date
- Dec 2020
- Posts
- 176
Thanked: 1
Please link me to a video or written guide on this if you have one. I tried doing something like this before and absolutely mangled the razor in question. Originally Posted by RayClem

Stones are nice and flat, razor spine and edge both sit nice and flat too. All is well! Originally Posted by bouschie
-
02-01-2025, 12:58 AM #5Senior Member
- Join Date
- Dec 2020
- Posts
- 176
Thanked: 1
Update: Was just barely sharp enough to cut, but pulling badly. Will try to reset the bevel and do it over from scratch.
-
02-01-2025, 07:35 AM #6Senior Member

- Join Date
- Dec 2018
- Location
- Gainesville, FL
- Posts
- 6,673
Thanked: 675
Welcome back.
Bevel set is the very most important step but also, somewhat poetically, the hardest to master. To reiterate what others have said many times in numerous places, it takes as long as it takes...period. There's no fudging bevel set. Everything else hinges on it and is for naught unless it is done correctly and completely. Efforts past it are not as crucial and result in a shave that instead of, "WOW," are more, "meh," but usually not, "UGH," which results from improper or incomplete bevel set.
Please take this as constructive critique since that is how it is meant. If I recall, before you were pulling advice and knowledge from a lot of different sources. That is not necessarily a bad thing but it can be if it pulls you in conflicting directions. I think (my $0.02 worth) that you are better served to pick one method from one instruction source and successfully execute it, then branch out to other methods. Once you have gotten a grip on one proven method you have a foundation to build on.
Glen's instruction should have been a boon for you. I hope you took notes. Pretty much any of us who are skilled at it will be willing to help you get there if you are a willing and receptive student.
My advice might be different from someone else's but I know it will work for you if you, for the time being, forget about what Tom, Dick or Harry said and listen to what I tell you. Learn from Tom, Dick and Harry afterwards. Conversely, their ways may even be better than mine but if you are thinking about what I told you while they are showing you it will keep you from learning their way. Especially if you are struggling eliminate the variables. Take one path and make it to the finish. Rabbit trails are a road hazard.
If you want a tried and true method here is one in a nutshell.
1) hone half X's (one side of the blade only) down and back up repeatedly until you acheive a bur you can feel with your finger on one side the whole length of the blade. Pay particular attention to the area(s) that bur last or are hesitant to form one. This can mean many things but for our purposes just store that knowledge for now.
2) Pay attention to, but don't necessarily count, the strokes it took to get your bur the whole length and once you have it reverse sides and repeat until you have a bur the whole length on the other side. This should be half or less the amount of strokes it took you to get the bur on the first side. Again take note of the areas late to bur. If it was the same area this may mean that you need more pressure at that point or you may need to rock the blade. It could just be the nature of the grinding or an incomplete factory edge. If so that should sort out once the bevel is set. You'll know more later as you progress.
3)Now, if it took you say 20 half laps to get to the bur on the second side, reverse and do 10 on the first then the second sides. Then do 5, then 3 etc. The number is not crucial, just reduce the number until you are at 1. The idea is to now lose the bur. After this go to regular X stroke laps using magnification to see that you truly are getting an apex the whole length.
4) Now joint your edge, meaning draw the edge along the edge of you stone with just the weight of the blade. One or two times should be sufficient. This should get rid of any reisidual bur or wire edge.
5) Return to regular X strokes diminishing pressure as you go and checking often with magnificatiin until you cannot see any sparkly bits either from a side view of the bevel or looking straight down on it.
Once you get to this point your bevel is set. It is also helpful to strop along the way but be aware that this can leave metal fragments or grit from stones in your strop. Wiping the blade on a rag will help but I keep a canvas strop dedicated for honing only. If need be, repeat the jointing and x strokes afterwards as this helps clean up the edge. Also look at your edge with magnification a lot at the different stages. This "visual" helps you conceptualize the method. Also, a helpful hint is that the bur is easier to feel if your finger is dry. That one stupid little trick took a while for me to learn.
Again, this is not the only way and not even the best way to reach bevel set but it absolutely will get you there. The "bur" method makes it very quantifiable removing a lot of the guess work. Try this method and once you have been able to repeat it then the lightbulb over your head starts to light up.Last edited by PaulFLUS; 02-01-2025 at 07:51 AM. Reason: Grammatical
Maladroit and rickytimothy like this.Iron by iron is sharpened, And a man sharpens the face of his friend. PR 27:17
-
02-02-2025, 03:48 AM #7Senior Member
- Join Date
- Dec 2020
- Posts
- 176
Thanked: 1
Thank you! I'll return to this method next time I do it. Honestly I forgot a lot of these things, I believe in my lesson I was told to look at sparkles on the edge of the blade. It does make a lot more sense than just trying to guess based on feel, if my feel is itself dull.
One thing though, you mention potentially having to rock the blade or distribute pressure differently depending on the geometry of the blade. I have been shown maybe 4-5 different methods of x-stroke at this point and I'm not sure which one you consider "default" for use in this method. Are you basically running it straight down the stone without any pressure, holding the spine with two hands?
-
02-03-2025, 11:43 PM #8Senior Member
- Join Date
- Dec 2018
- Location
- Gainesville, FL
- Posts
- 6,673
Thanked: 675
Well, I personally palm hold the stone and one hand hone. Everyone has their own way but that is how I feel more in control of the blade. Using this method lets say the heel end of the edge sits up. At the biginning of the stroke I lean the blade back lifting the toe end slightly to make tthe heel end sit down. Then through the stroke "rock" it back so the toe end sits flat.
As to your question about a default. I don't know that there really is one default stroke as each blade is slightly different.Last edited by PaulFLUS; 02-03-2025 at 11:45 PM.
Iron by iron is sharpened, And a man sharpens the face of his friend. PR 27:17


 Reply With Quote