
Results 1 to 10 of 12
 LinkBack URL
 About LinkBacks
Hybrid View
-
05-15-2010, 12:50 AM #1W&B, Torrey, Filarmonica fanboy


- Join Date
- Aug 2008
- Location
- Atlanta
- Posts
- 605
Thanked: 252 Advice needed on honing a Gold Dollar
I have a Gold Dollar marked "208" at the tang that appears to be about 13/16ths, full hollow, round point, with a very beveled heel. It's a big razor, with a nice fat spine. But I've been having some challenges in honing it, and could use some expertise from y'all who have worked with GDs before.
I'm using Naniwas, 1K - 5K - 8K - 12K. I am finishing on Japanese naturals. I've run the entire progression starting with a re-bevel at 1K, twice now.
The first challenge was that this GD is double shouldered, with shoulders that jut out much wider than I'm used to, and interfere with my usual honing stroke I use with other razors. I've adjusted to that now, but my first honing pass from 1K - 5K resulted in chipping right at the heel.
So I "bread knifed" the heel to remove this chipping, ran through re-beveling starting at 1K all the way up through 12K and thought I was good. Popped hanging hairs, but gave a lousy shave. I noticed that I seem now have a "twisting" bevel, when I look under a microscope. The edge is beautiful and deadly sharp on the front 2/3rds of the razor, but twists to form a much duller 2nd bevel in the rear towards the heel where I bread knifed.
I like this razor's size, shape, and grind, and think it has potential if I can figure it out. I am very willing to start over (again) at 1K and am open to advice from experienced GD honers.
(If you think the GDs suck, vent away. But know that I'm under no illusions that I'm honing a Dorko or Puma here, I realize what I'm working with. But I like it, and the challenge. )
)
Thanks!
-
05-15-2010, 01:26 AM #2Senior Member


- Join Date
- Feb 2008
- Posts
- 32,564
Thanked: 11044
I have never seen one up close and personal much less honed one. I do remember someone posting about grinding the shoulder reinforcements down with a Dremel. Using ice water to avoid overheating. IIRC that was one way to approach it. Correct the problem at the heel and then approach it like any other razor.
Be careful how you treat people on your way up, you may meet them again on your way back down.
-
The Following User Says Thank You to JimmyHAD For This Useful Post:
FatboySlim (05-15-2010)
-
05-15-2010, 02:45 AM #3
Are you happy with the front 2/3 of the blade?
I'm not quite sure what 'twisting bevel' means, but it sounds like you have more bevel work to do on the part that you breadknifed.
I don't have personal experience with these razors, so the above is kinda general and useless stuff that you already know, but thought I'd post just in case.
-
05-15-2010, 03:24 AM #4I used Nakayamas for my house


- Join Date
- Aug 2009
- Location
- Des Moines
- Posts
- 8,664
- Blog Entries
- 1
Thanked: 2591
If I understand the description you gave,the problem can be the stabilizers that stick out too much and make honing the last 1/4 or so part of the blade a bit of a PITA.
I would regrind a bit or fully and the issue should be resolved.Stefan
-
05-15-2010, 05:24 AM #5Senior Member

- Join Date
- Jul 2007
- Location
- United State of Texas
- Posts
- 635
Thanked: 139
On the shoulder issue, I used an x-stroke angle that kept the shoulder away from the stone (just as you described).
For the chipping I would lightly BK it and try again (just as you did). The new edge may expose steel that is a little less brittle. Taping might be an option too. A different hone or the same hone with slurry might help as well.
For the twist you will need to find a stroke style that compensates. Check the edge with a loup to see what is working. Another option would be a narrow hone or lapping film on a narrow base. Jende sells sliced up Chocera hones that would work, but they are expensive.
-
The Following User Says Thank You to matt321 For This Useful Post:
FatboySlim (05-15-2010)
-
05-15-2010, 05:30 AM #6At this point in time...


- Join Date
- Jun 2007
- Location
- North Idaho Redoubt
- Posts
- 27,069
- Blog Entries
- 1
Thanked: 13249
Some pics about cutting away the heel and shoulders can be found in that big GD thread...
Here is the thing you can do a ton of creative stokes to hone around that heel BUT you are going to get a "hook" or a "spur" there that is eventually going to cut you...
The heel needs to be fixed on them, the easiest way is a Dremel with a sanding drum but it can be done on a DMT 325 too and a bit of talent...
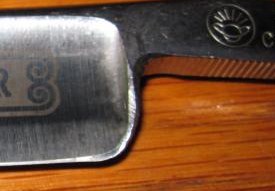
Here is a before the fix, heel that was a partial fix the shoulder was ground down but the heel was not re-contoured and you can see the beginnings of the spur or hook after just one time honing...
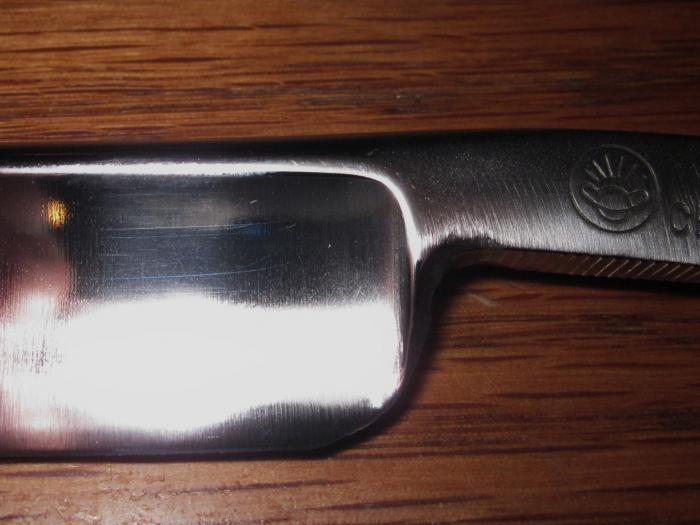
Now here you can see a re-contoured heel where the edge is pushed forward like on most all razors.. The shoulders have been smoothed down and also cut back...
Last edited by gssixgun; 05-15-2010 at 06:11 AM. Reason: added Pics
-
The Following 5 Users Say Thank You to gssixgun For This Useful Post:
Blue (05-16-2010), Disburden (05-15-2010), FatboySlim (05-15-2010), matt321 (05-16-2010), paco (05-15-2010)
-
05-20-2010, 02:23 PM #7Vintage Scent shop clerk

- Join Date
- May 2007
- Location
- Porto, Portugal
- Posts
- 1,023
Thanked: 621
Hi Tim,
So far I've received around 10 GD razors from several customers and so far I haven't had those kind of issues.
For some reason, the heel on your razor isn't touching the hones as the rest of the blade.
The Naniwa's are too wide for this kind of problem.
Try using a narrow hone to set a proper bevel on the heel. For example, use a Coticule with heavy slurry and add water from time to time until it's cleared. This was how I honed last week a very uneven razor a customer sent me. The Naniwa 1k wasn't doing much of a job setting a bevel, so I used the Coti with success.
Good luck
-
The Following 2 Users Say Thank You to Leon For This Useful Post:
alvydas (07-02-2014), FatboySlim (05-20-2010)


 Reply With Quote
