
Results 1 to 6 of 6
 4Likes
Thread: Straight Sock
 LinkBack URL
 About LinkBacks
-
03-24-2014, 10:50 AM #1Senior Member


- Join Date
- Jan 2014
- Location
- New South Wales
- Posts
- 154
Thanked: 22 Straight Sock
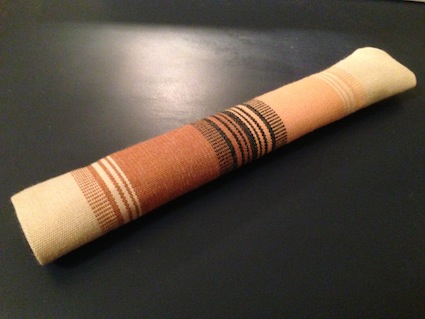
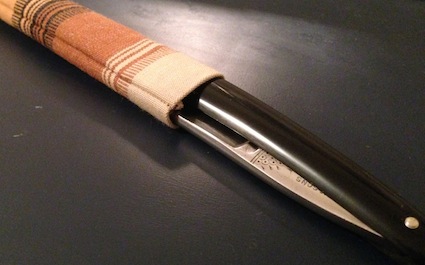
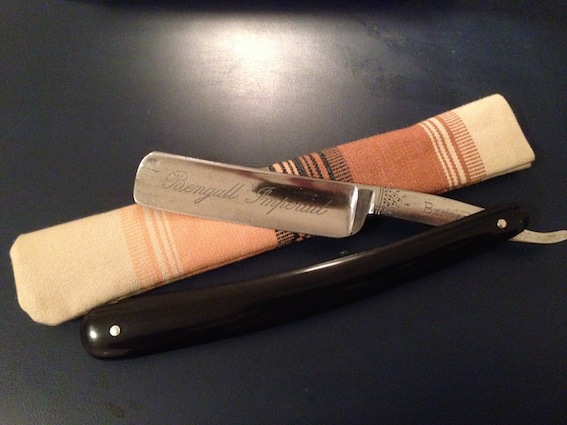
I travel. I wear socks. I decided my straight needed a sock too.
Easy to make if you can sew an 'L' shape on a machine or get someone to do it for you. I used canvas.
Here are the steps if anyones interested.
1) cut out a 8 inch by 3 inch piece of canvas (or something similar - normal materiel will be too floppy)
2) On a short edge mark a line 3/4 inch in (on the side of the materiel that will become the inside), and fold along that line. The end of scissors can crease canvas easily.
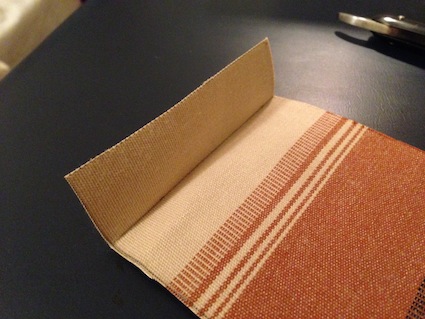
3) Fold the piece in half with the fold back to the outside.
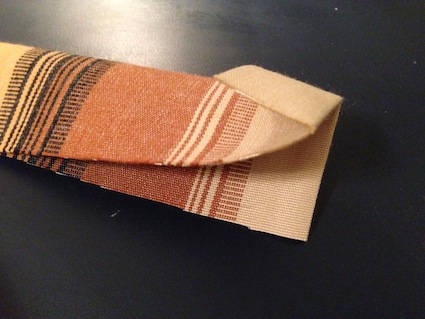
4) Sew down the edge, not too close to it, and turn the corner to do the bottom. I hand stitched the ends of the seam a couple of times to reinforce it a little. The top will come apart easily if the seam has a dodgy finish there.
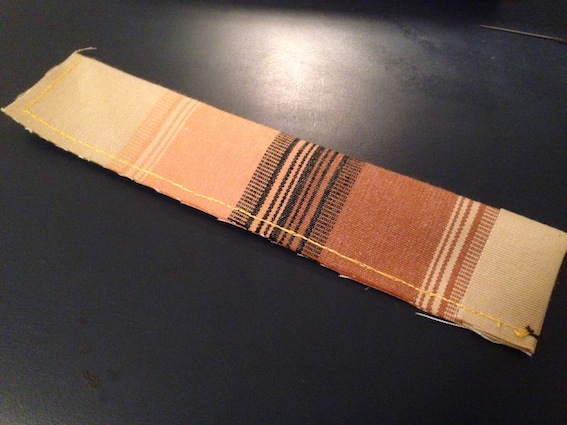
5) Using a pencil or similar start at the bottom and poke it inside out.
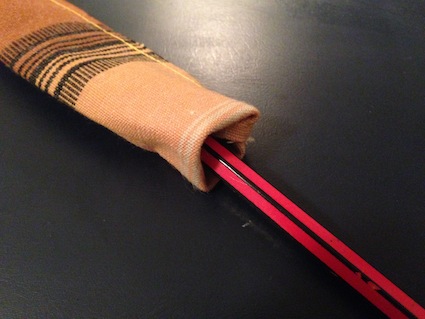
6) show your razor his new sock. You should knock it over in half an hour :-)
-
The Following User Says Thank You to nonick For This Useful Post:
JeffR (03-24-2014)
-
03-24-2014, 12:33 PM #2Silky Smooth
- Join Date
- Sep 2008
- Location
- Southern California
- Posts
- 802
Thanked: 154
That's really neat; thanks for the clear photo instructions!
de gustibus non est disputandum
-
03-24-2014, 01:02 PM #3Senior Member

- Join Date
- Dec 2013
- Location
- North Bay, Ontario & Reno, Nevada
- Posts
- 146
Thanked: 28
Great idea, I may have to borrow that.
Gerry
-
03-24-2014, 01:17 PM #4Senior Member

- Join Date
- Feb 2014
- Location
- Corona De Tucson/Tucson, AZ Area
- Posts
- 270
Thanked: 32
I like it. May even have some scrap material around the house i can use for a couple of those.

-
03-24-2014, 01:48 PM #5Moderator


- Join Date
- Jul 2013
- Location
- Forest Grove, Oregon
- Posts
- 5,162
Thanked: 1228
BIG NOTE: Excellent idea and instructions but please note that some razors are bigger across than others and you might have to increase the 3 inch dimension to compensate. As a fabric person and the father of a general contractor we share the same dictum, "Measure twice, cut once". Measure the width of the closed razor before cutting.
"The sharpening stones from time to time provide officers with gasoline."
-
03-24-2014, 07:29 PM #6Senior Member
- Join Date
- Jan 2014
- Location
- New South Wales
- Posts
- 154
Thanked: 22
Very true! I forgot to mention that thanks. My razor is a regular one I'm not sure on the size but I think it would be 5 or 6/8. A great big 8/8 clever would probably need a little more generous size! Originally Posted by Razorfeld

Once you fold in half you can put your razor in and press with thumb to a snug fit and mark that spot to sew. Trim off excess after you have your seam.
Have a great day


 Reply With Quote