Results 1 to 8 of 8
Thread: Coffin Razor Box
-
01-02-2015, 08:02 PM #1
 Coffin Razor Box
Toe Pincher Coffin Box
There has been interest in the razor box patterns previously posted and an occasional requests for the older style coffin shaped boxes. (Previously, I had posted a tutorial for making rectangular coffin boxes on SRPís forum.) Iíve put in a fair amount of design time, with multiple prototypes and drawing revisions, and Iím now comfortable with making these patterns and a tutorial available.
These are not replicas of the old boxes, but a scored and folded pattern that mimics the shape and look. During my research into how the original boxes were made, I found this old SRP thread, Razor coffin to box question, post #5 which summarizes one possible method of manufacture and suggests a reason for the tapered shape on the old coffins. I also found this from Neil Miller,Coffin Box Deconstructed.
For these boxes, paper with a linear pattern or grain direction will not work well for the tapered bottom section. Solid color, irregular pattern or finely textured paper will work best.
Making the Coffin:
Lay the razor youíre making the box for within the dotted lines of the pattern and determine if it will sit all the way to the bottom. If not, make a mark at the lowest point of the razor. Next, with the razor in place determine the length from the bottom score and the tip of the razorís tail. If this length exceeds 6 5/8 inches, the cap can be lengthened relatively easy.
To adjust the length of the cap, cut the pattern in two and tape one half to another piece of paper. Position the other half using a straight edge, line up the outside edges of the pattern with the desired increase between the 2 halves. Make sure everything is square and straight, tape in place. It can then be cut and scored. To shorten the cap, follow the same procedure but overlap the cut pattern halves by the desired amount.
The general directions for the single or double are similar, with the inserts being the biggest difference. The photos are from making the double.
The first step is to cut the carton pattern away from the other pieces and cut several triangles, as in the photo, with the knife, this allows you to tape the pattern down in several places in the middle, instead of outside edges only.
Position the pattern on the paper and tape it down over the triangles. Here, Iíve used paper medical tape (Iíve found that cellophane tape will often pull up paper fibers when being removed) but a painters tape should work just as well.
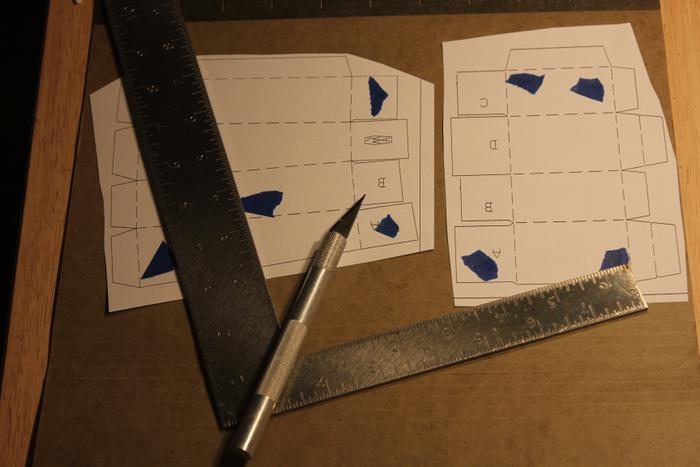
Cut out the perimeter using a straight edge and knife, be very careful not to overcut into other parts of the carton. Separate from the rest of the paper, in some of the tighter areas you may need to carefully use your knife to make any additional cuts. Do not remove the pattern yet.
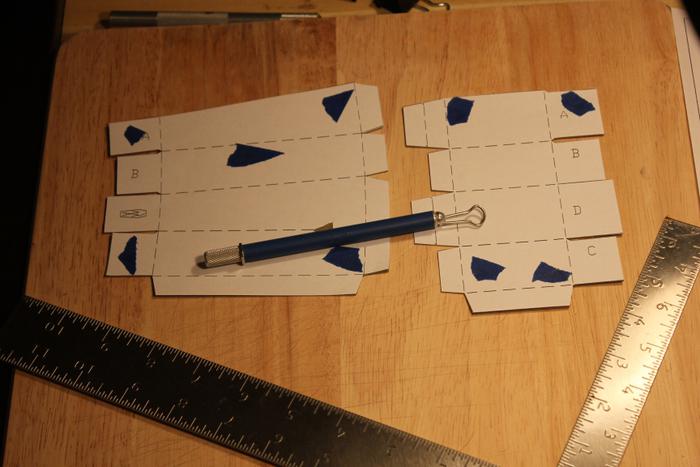
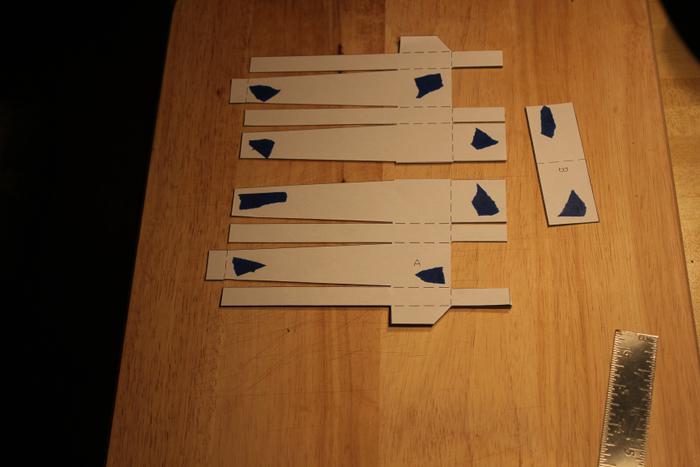
Next up is to impress the score or fold lines. A variety of tools could be used to do this, what Iím using is part of a binder clip mounted in an Exacto handle. Whatever you use it needs to be capable of handling a lot of pressure and be able to move smoothly over the score lines.
Use the straight edge to guide the tool and use a lot of pressure to give it a good impression. Die cutting machines that cut and score in one hit use well over 60 tons of pressure, obviously we canít do that, but a clean line with some compression of the paper will work. Use the straight edge as you begin folding to keep everything straight and crisp. Pay particular attention to the score lines on the tapered bottom piece. The score on each end flap is at a slightly different angle than the one next to it. Crisp, precise, scores and folds will give the best results. Most of the score lines will also benefit from being folded over and rubbed with a smooth surface to flatten them.
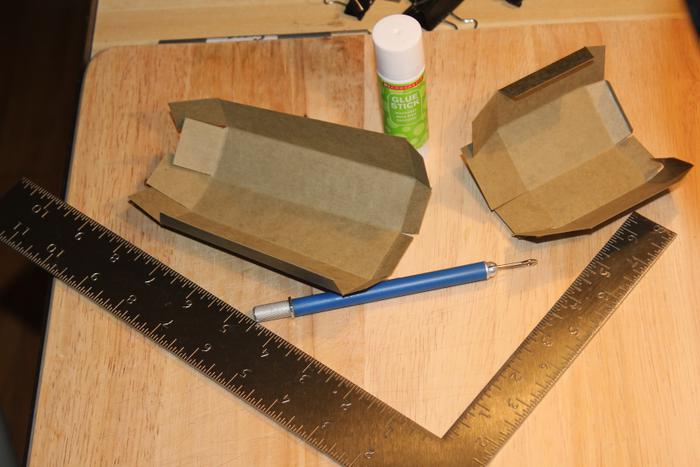
Single coffin:
Begin gluing with the insert. Glue, fold over the long flaps and rub to insure good adhesion. Apply glue to the side tab and fold, inserting the tab under the flap. Here I use craft sticks and binder clips to clamp.
The bottom portion is glued in the same manner, leaving the flaps on the bottom unglued. Clamp the seam line and make sure it is lined up the full length and has good adhesion. The cap has a double fold on 2 faces; make sure that lies as flat as possible after gluing. Fold the cap end flaps and glue following the sequence on the pattern.
On the single coffin, fold the bottom flaps last, after gluing the insert in. Make sure that it sits deep enough that no open corners are visible where the insert and shoulder meet. It will also be easier to ensure full length adhesion of the insert to the inside of the bottom piece. Trim any of the insert that extends past the score line of the bottom flaps and glue the bottom flaps.
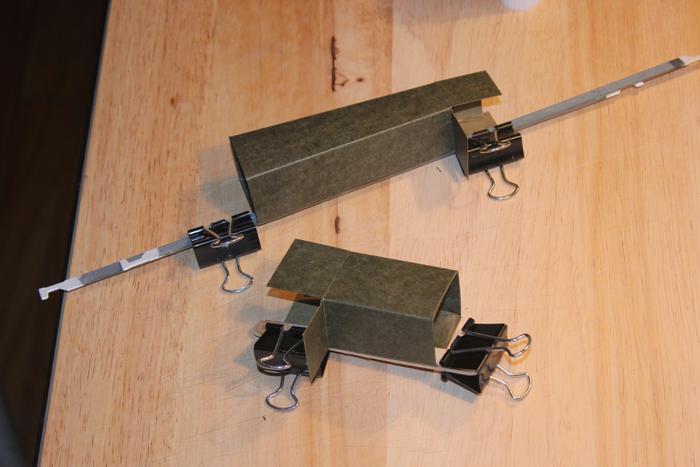
Double coffin:
Cut both of the insert pieces, then score and fold. The folds of each will be mirrored, one left and one right, if your paper is not the same texture or color on both sides be sure to cut both pieces with the patternís printed side up. Glue the sections without top flaps (A) to each other, outside to outside, leaving the area below the score at the bottom unglued. Fold the rectangular piece (B) in half and glue to cover these sections. Glue and complete the rest of the insert.
When inserting into the bottom, glue the rectangular and tapered outside flaps in place, trim if needed. The unglued lower section of the doubled center is opened to make a T that should be flush with the bottom, trim the outside of the T if needed. The first bottom flap is glued to this T and the rest of the bottom flaps are then glued in sequence. This will secure the center divider in place.
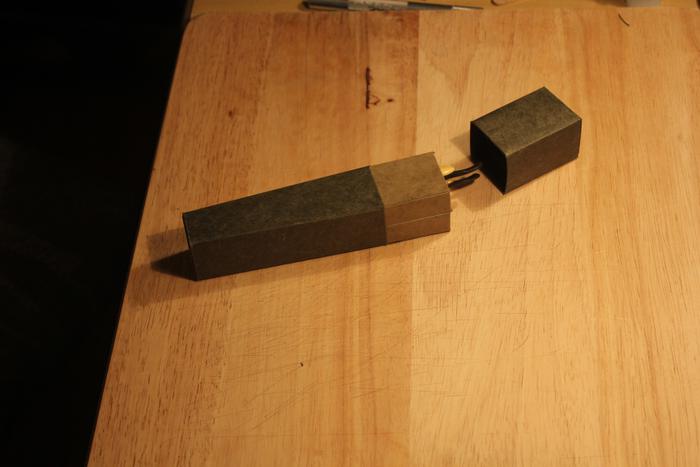
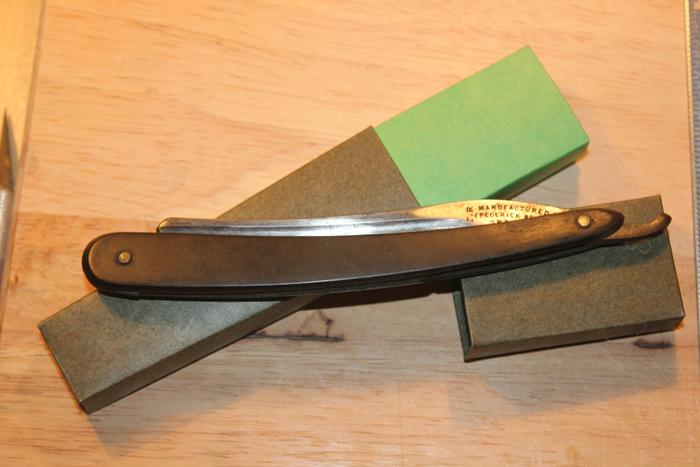
The angles add complexity and would take quite a bit of time for me to modify the drawings, so Iím offering a single coffin pattern in 2 sizes and the double razor box pattern in one size only. It is a large size and should work for most razors.
If you have a CAD program, I will e-mail a .dxf, if requested, so you can modify another size to this style box.
If you would like to try your hand at embossing a pattern, it can be done the same way the scores are made.
I cannot guarantee fit or suitability for any given razor. These coffins are only as sturdy as the paper used to make them, original razor coffins were made of much thicker pasteboard.
Please, post pics of your completed coffins, weíd all love to see them.
-
The Following 15 Users Say Thank You to joamo For This Useful Post:
32t (01-02-2015), bruseth (01-03-2015), Chevhead (01-02-2015), dooey (02-21-2015), Geezer (01-02-2015), MattCB (01-03-2015), MJC (01-03-2015), MODINE (01-02-2015), nipper (02-12-2015), puma (01-02-2015), Redcane (01-02-2015), RezDog (02-12-2015), Substance (02-12-2015), Walt (02-15-2015), williamc (01-02-2015)
-
01-02-2015, 08:06 PM #2Senior Member


- Join Date
- Jan 2011
- Location
- Roseville,Kali
- Posts
- 10,432
Thanked: 2027
Great project
 very well done.
CAUTION
Dangerous within 1 Mile
-
The Following User Says Thank You to pixelfixed For This Useful Post:
joamo (01-02-2015)
-
01-02-2015, 08:37 PM #3Junior Member

- Join Date
- Dec 2014
- Location
- Incirlik AB Turkey
- Posts
- 12
Thanked: 2
This is really excellent. I am going to try this.
-
01-02-2015, 08:47 PM #4

Thank you. Saved for future reference.
"The sharpening stones from time to time provide officers with gasoline."
-
01-02-2015, 09:34 PM #5

Added to my reference file...thank you!
~RichardBe yourself; everyone else is already taken.
- Oscar Wilde
-
01-02-2015, 10:32 PM #6

Me too! thank you.
MIke
-
02-12-2015, 12:03 PM #7

Excellent work Sir
Have some cutting and folding to try out now thank youSaved,
to shave another day.
-
The Following User Says Thank You to Substance For This Useful Post:
admvalentine (02-12-2015)
-
02-12-2015, 04:25 PM #8

That's pretty neat.
No matter how many men you kill you can't kill your successor-Emperor Nero


 13Likes
 LinkBack URL
 About LinkBacks


 Reply With Quote


