Results 1 to 9 of 9
Like Tree13Likes
  • 10 Post By walleyeman
  • 3 Post By walleyeman

Thread: File That Inglorious Bastard

  1. #1
    Always Thinkun walleyeman's Avatar
    Join Date
    Nov 2012
    Location
    Grain Valley, Missouri
    Posts
    818
    Thanked: 348

    Default File That Inglorious Bastard

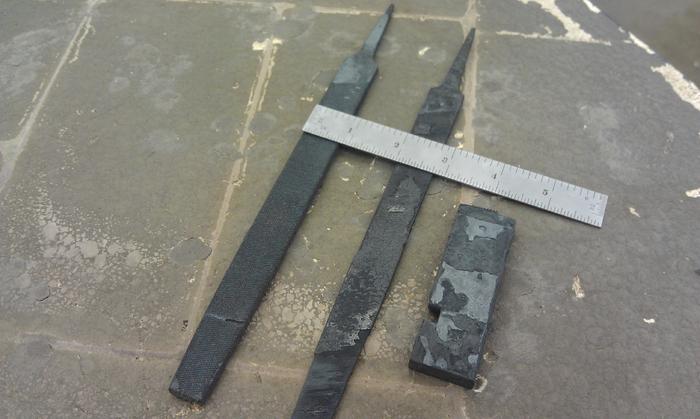
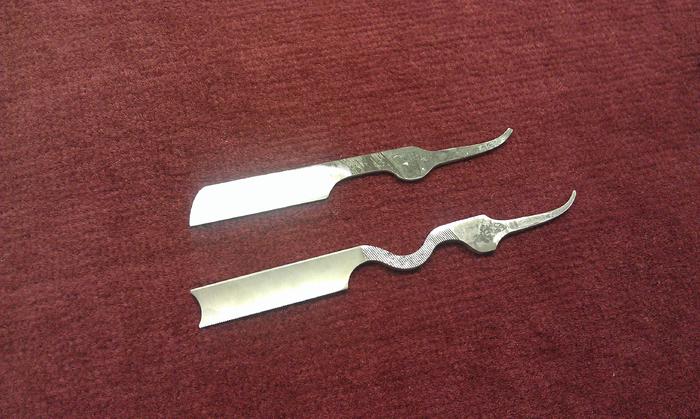
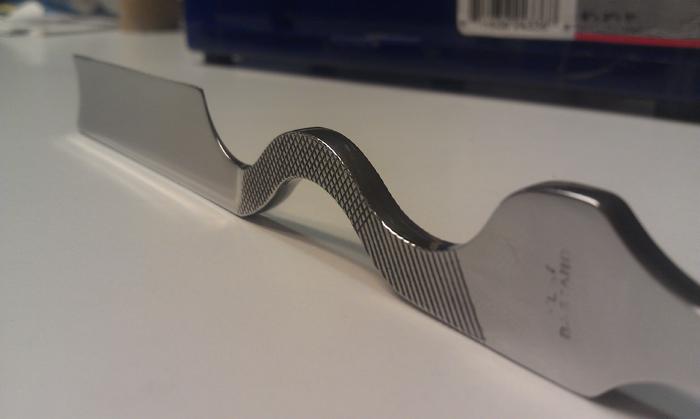
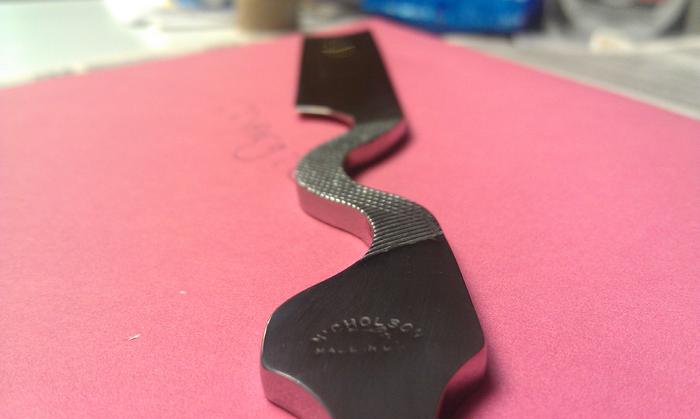
    I would like to start a club of those that have made, purchased,acquired razors made from old files. I am sure there are a few so I will start with my first and only at this point. Hopefully to show more later as I am able to make them. They can be any configuration of a straight razor. One piece, with scales, without scales etc. Feel free to post them and enjoy looking at them. Comments are welcome also!!

    Ray

    Name:  IMAG0244.jpg
Views: 864
Size:  38.3 KB


    Name:  IMAG0247.jpg
Views: 884
Size:  53.0 KB

    Name:  IMAG0250-1.jpg
Views: 837
Size:  56.8 KB

    Name:  IMAG0252.jpg
Views: 1600
Size:  16.2 KB
    Name:  IMAG0251.jpg
Views: 801
Size:  22.0 KB

  2. The Following User Says Thank You to walleyeman For This Useful Post:

    kalerolf (08-21-2013)

  3. #2
    Always Thinkun walleyeman's Avatar
    Join Date
    Nov 2012
    Location
    Grain Valley, Missouri
    Posts
    818
    Thanked: 348

    Default

    Ok come on folks its been over a week!! Surely someone has one, or two ??????
    Ray

  4. #3
    Senior Member Chugach68's Avatar
    Join Date
    Sep 2012
    Location
    Washington state
    Posts
    584
    Thanked: 58

    Default

    What tools did you use to make these? Did you heat treat them? If so, what was the process?
    I choose death before dishonor
    I'd rather die than live down on my knees

  5. The Following User Says Thank You to Chugach68 For This Useful Post:

    walleyeman (08-22-2013)

  6. #4
    Junior Member
    Join Date
    Aug 2013
    Posts
    9
    Thanked: 3

    Default

    Wow...very awesome

  7. The Following User Says Thank You to Mattster For This Useful Post:

    walleyeman (08-22-2013)

  8. #5
    Always Thinkun walleyeman's Avatar
    Join Date
    Nov 2012
    Location
    Grain Valley, Missouri
    Posts
    818
    Thanked: 348

    Default

    Thank you Mattster, And Chugach68 I will go down how I did them and I will try to make it as short as I can.
    1. Old file that has no usable life as a functioning file it even can have some rust on it/them. They need to be at least .170" thick. I learned the hard way on thinner files, as they will warp and tweek with heating processes.
    2. I use a old ceramic kiln as a heat treat oven. Bring it to 1,650 F. Put files in it on their edge not laying flat,that will be another hard lesson learned if they are in the oven flat!!
    3. Heat files for 30 to 45 minutes, the color should be a almost redish yellow color when ready to remove.
    4. Pull file/files out and immediately put in diatomacious clay, "oil dry", make sure the oil dry bag says diatomacious clay or earth. Some oil dry is made from ground corn cobs and that makes FIRE! Bury the file/s in a 5 gal bucket of oil dry and then pour more oil dry on top as an insulator.
    5. Let the file/s sit overnight, "NOT DISTURBING THEM" to see what they look like!!
    6. next day be very careful and remove some oil dry from the top and being very cautious slowly put your hand in the oil dry trying to feel them. If they can NOT be held by hand meaning too hot cover and wait at leist 8 more hours. If they can be held in bare hand, you have just annealed the file/s. Softening them to a very workable metal. A file should be able to scratch them now.
    7. I used a die grinder with carbide burs, a dynafile which is a pneumatic tool that uses a 1/2" wide abrasive belt. It is a hand held tool. these were to get the contours that you see.
    8. After acheiving the desired profile I used a drum sander in a drill press with different grit sand paper to work out the heavy scratches. Also a 800 rpm 8" grinding wheel to grind the hollow grind in blade end but leaving about .040" thickness on the end that will be sharpened.
    9. Now I heat the kiln to 1600 F then put the roughed in file/s in standing on side with the thin end up. Heat again to the same color.
    10. Remove them after 30 to 45 minutes and quench in quenching oil. I used canola oil for these since quenching oil wasn't available locally and I wasn't going to wait.
    Preheat oil before quenching files to 140F to 160F. Put the file in oil and slowly move side to side to give it some circulation.
    11. Leave file/s in quench oil until they are cool enough to hold in hand.
    12. After quenching we then cleaned the oil off and took to wifes oven and put on cookie sheet and heated to 400F. When oven reached temp hold it ther for 30 minutes then shut oven off and leaving them in oven allow to cool down completely. Do this 3 times.
    13. Now the pretty part. I ground the hollow until the thin edge was about .004" thick. Then using 320 grit to start and ending up with 3000 grit at finish to remove scale and grinding marks. stepping up the grit from 320 to 400 to 600 to 1000 to 1500 to 1800 to 2000 to 2500 to 3000. using a lot of hand work and dowel rods and drum sanders wrapped with different grits.
    14. polished on a buffing wheel with black then green compounds and finally a buff with Mothers Mag and Aluminum wheel polish.
    15. Took pictures and then hone setting the bevel at 1000 grit, 3000, 8000, 12000.
    Hope this helps. I had about 30 to 40 hours in the one. The other I still haven't been able to get to yet.
    Chugach68, Slawman and TomP30 like this.

  9. The Following User Says Thank You to walleyeman For This Useful Post:

    Slawman (11-13-2016)

  10. #6
    Senior Member Chugach68's Avatar
    Join Date
    Sep 2012
    Location
    Washington state
    Posts
    584
    Thanked: 58

    Default

    That's cool. Are you going to put scales on them?
    I choose death before dishonor
    I'd rather die than live down on my knees

  11. The Following User Says Thank You to Chugach68 For This Useful Post:

    walleyeman (08-22-2013)

  12. #7
    Sharp as a spoon. ReardenSteel's Avatar
    Join Date
    Jul 2009
    Location
    Nowhere in particular
    Posts
    2,409
    Thanked: 472

    Default

    Here's the link to Grant's, aka "Baldy", file razor:

    http://straightrazorpalace.com/custo...l-chapter.html

  13. The Following User Says Thank You to ReardenSteel For This Useful Post:

    walleyeman (08-22-2013)

  14. #8
    Always Thinkun walleyeman's Avatar
    Join Date
    Nov 2012
    Location
    Grain Valley, Missouri
    Posts
    818
    Thanked: 348

    Default

    These won't have scales but the next couple I do will probably be more traditional with scales.
    Ray

  15. #9
    Senior Member
    Join Date
    Aug 2014
    Location
    East Central Illinois
    Posts
    782
    Thanked: 101

    Default

    Quote Originally Posted by walleyeman View Post
    Thank you Mattster, And Chugach68 I will go down how I did them and I will try to make it as short as I can.
    1. Old file that has no usable life as a functioning file it even can have some rust on it/them. They need to be at least .170" thick. I learned the hard way on thinner files, as they will warp and tweek with heating processes.
    2. I use a old ceramic kiln as a heat treat oven. Bring it to 1,650 F. Put files in it on their edge not laying flat,that will be another hard lesson learned if they are in the oven flat!!
    3. Heat files for 30 to 45 minutes, the color should be a almost redish yellow color when ready to remove.
    4. Pull file/files out and immediately put in diatomacious clay, "oil dry", make sure the oil dry bag says diatomacious clay or earth. Some oil dry is made from ground corn cobs and that makes FIRE! Bury the file/s in a 5 gal bucket of oil dry and then pour more oil dry on top as an insulator.
    5. Let the file/s sit overnight, "NOT DISTURBING THEM" to see what they look like!!
    6. next day be very careful and remove some oil dry from the top and being very cautious slowly put your hand in the oil dry trying to feel them. If they can NOT be held by hand meaning too hot cover and wait at leist 8 more hours. If they can be held in bare hand, you have just annealed the file/s. Softening them to a very workable metal. A file should be able to scratch them now.
    7. I used a die grinder with carbide burs, a dynafile which is a pneumatic tool that uses a 1/2" wide abrasive belt. It is a hand held tool. these were to get the contours that you see.
    8. After acheiving the desired profile I used a drum sander in a drill press with different grit sand paper to work out the heavy scratches. Also a 800 rpm 8" grinding wheel to grind the hollow grind in blade end but leaving about .040" thickness on the end that will be sharpened.
    9. Now I heat the kiln to 1600 F then put the roughed in file/s in standing on side with the thin end up. Heat again to the same color.
    10. Remove them after 30 to 45 minutes and quench in quenching oil. I used canola oil for these since quenching oil wasn't available locally and I wasn't going to wait.
    Preheat oil before quenching files to 140F to 160F. Put the file in oil and slowly move side to side to give it some circulation.
    11. Leave file/s in quench oil until they are cool enough to hold in hand.
    12. After quenching we then cleaned the oil off and took to wifes oven and put on cookie sheet and heated to 400F. When oven reached temp hold it ther for 30 minutes then shut oven off and leaving them in oven allow to cool down completely. Do this 3 times.
    13. Now the pretty part. I ground the hollow until the thin edge was about .004" thick. Then using 320 grit to start and ending up with 3000 grit at finish to remove scale and grinding marks. stepping up the grit from 320 to 400 to 600 to 1000 to 1500 to 1800 to 2000 to 2500 to 3000. using a lot of hand work and dowel rods and drum sanders wrapped with different grits.
    14. polished on a buffing wheel with black then green compounds and finally a buff with Mothers Mag and Aluminum wheel polish.
    15. Took pictures and then hone setting the bevel at 1000 grit, 3000, 8000, 12000.
    Hope this helps. I had about 30 to 40 hours in the one. The other I still haven't been able to get to yet.
    I have a bunch of old files I guess this would be a good way to get into making razors!

Posting Permissions

  • You may not post new threads
  • You may not post replies
  • You may not post attachments
  • You may not edit your posts
  •