
Results 31 to 40 of 356
 880Likes
Thread: Bruno's Blade Club
 LinkBack URL
 About LinkBacks
-
03-14-2014, 06:25 AM #31
 Wow. Well done. This really turned out nice. I love the slenderness of the scales near the tang.
 Originally Posted by showmeshiner
 dexter90723 likes this.Til shade is gone, til water is gone, Into the shadow with teeth bared, screaming defiance with the last breath.
To spit in Sightblinders eye on the Last Day
-
03-14-2014, 02:08 PM #32Senior Member


- Join Date
- Dec 2013
- Location
- missouri
- Posts
- 125
Thanked: 7
Originally Posted by Bruno
Yea I am having blade laser engraved so I wanted it to be visible even when closed.
-
03-14-2014, 02:32 PM #33
From my point of vew as someone who is aiming for a single razor, that sounds like a nuisance, plus most fastners dont like being done up and undone on a regular basis, but it isnt my razor to have to deal with. Originally Posted by entropy1049
Bread and water can so easily become tea and toast
-
03-14-2014, 05:08 PM #34Junior Member
- Join Date
- Mar 2014
- Location
- Cameron,North Carolina
- Posts
- 9
Thanked: 0
I love this thread and this 'blade' is singing to me thru the internet,love it...
-
03-14-2014, 05:30 PM #35Senior Member
- Join Date
- Dec 2013
- Location
- missouri
- Posts
- 125
Thanked: 7
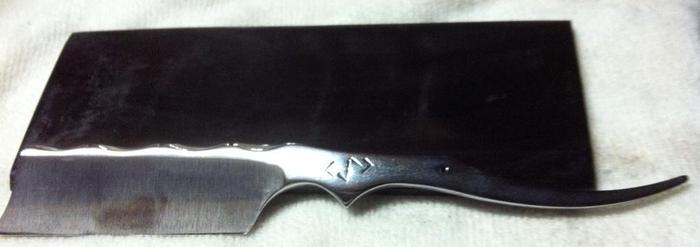
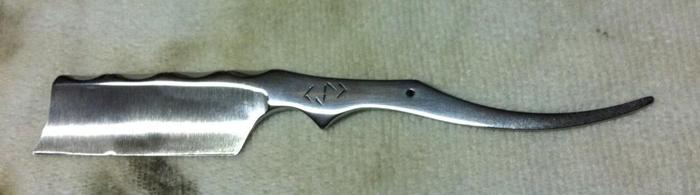
Forgot a fully closed pic :-)
-
03-31-2014, 03:12 AM #36Senior Member


- Join Date
- Jun 2013
- Location
- Gladstone QLD AUSTRALIA
- Posts
- 3,245
Thanked: 804
OK so a quick update of progress after a slow start with the 220 grit I have finished sanding & polishing the tang & spine to 4000 Grit then Autosol polish for a check noticed a couple of scratches still when I polished it so went back a couple of grits & started again.
transition was as follows:
3-4 hrs of 220 then about 1 hour each of the following: 320, 400, 600, 800, 1200, 2000, 3000, 4000, Autosol polish
saw scratched so went back to 800, 1200, 2000, 3000, 4000 about ½ an hour each & then Autosol polish again.

these show the tang finished to 4000 but still the original 80 grit on the blade face
now I have removed the safety tape of the edge & started the blade face
note: I have started with 120 & 180 grits also this time to save a heap of time hopefully on the blade face
I am using the side of my "anvil" (a 2 blind flange) with the wet & dry taped to it as it is about 6 diameter and fits near perfect to the grind curve so I can get all the 80 grit lines out hopefully & giving a quick polish between grits this time
sorry for the bad photos it does look a lot better in the flesh I will endevour to ges ome better photos in the real ligth not my phone in the shed at night LOL
now debating between black or light horn or bone for the scales when i sand away.Saved,
to shave another day.
-
03-31-2014, 05:20 AM #37Senior Member

- Join Date
- Aug 2013
- Location
- New Zealand
- Posts
- 268
Thanked: 75
Thanks for sharing, looking great so far!
I have a twin blade but am a couple of weeks behind you, so really looking forward to seeing you progress as I do. I'm still working through 400 grit now and have decided on stained bone handle with a very unique design in shape. Will share as I take photos.Substance likes this.
-
03-31-2014, 05:28 AM #38Senior Member
- Join Date
- Jun 2013
- Location
- Gladstone QLD AUSTRALIA
- Posts
- 3,245
Thanked: 804
Was trying find some dyed camel bone 6" plus long but not having a great deal of luck so far
Saved,
to shave another day.
-
03-31-2014, 05:41 AM #39Senior Member
- Join Date
- Aug 2013
- Location
- New Zealand
- Posts
- 268
Thanked: 75
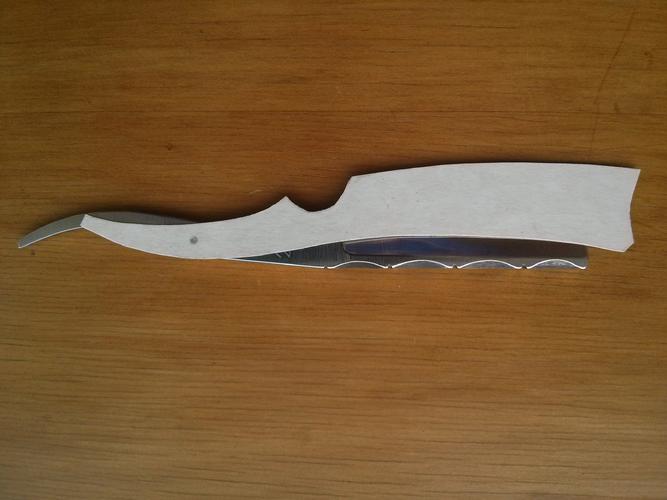
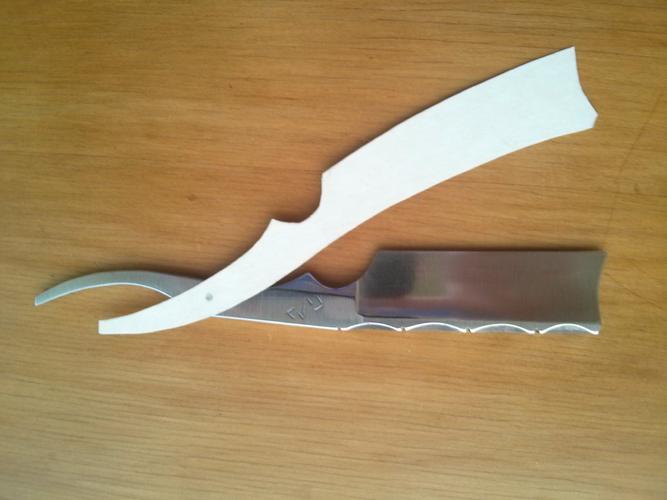
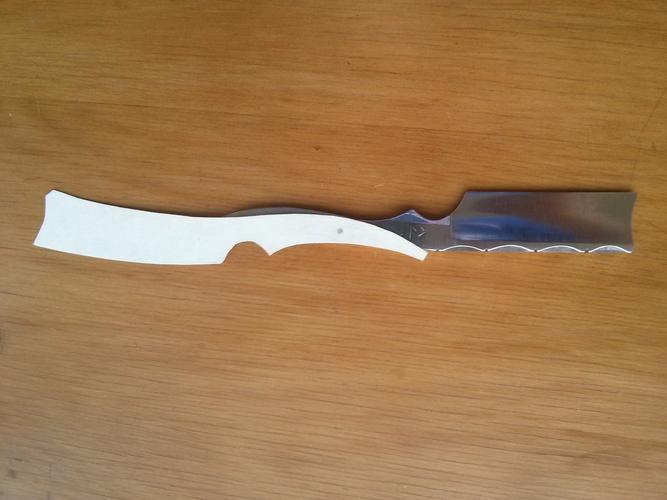
I've decided to stain my own, will let you know how I get on. All going to plan, should have them competed this month.
Here are some photos of the scales template I'll be starting with. I've kept it slightly larger for now but will work the bone down to size and let them take form organically as I go...
(sorry, my phone seems to have uploaded these photos upside down!)
-
03-31-2014, 05:59 AM #40
Looking good. It's an interesting design to make the scales the same shape as the blade.
Til shade is gone, til water is gone, Into the shadow with teeth bared, screaming defiance with the last breath.
To spit in Sightblinders eye on the Last Day


 Reply With Quote


