
Results 21 to 30 of 33
 26Likes
Thread: Dorko 66 just came my way!
 LinkBack URL
 About LinkBacks
-
04-06-2014, 06:48 PM #21the deepest roots


- Join Date
- Feb 2011
- Location
- Seattle
- Posts
- 1,221
Thanked: 169
seems like it can be made usable if the edge is like the 3rd picture all the way down... It'll still be a nice example of a Dorko even missing an 1/8th from it's original size.
-
04-06-2014, 09:59 PM #22Member

- Join Date
- Feb 2014
- Location
- Cold Spring, NY
- Posts
- 91
Thanked: 1
Out of curiosity, does anyone know if cell rot can be halted, at least temporarily, by doing something like freezing the scales?
-
04-06-2014, 10:10 PM #23
it's a chemical reaction and once it starts it can't be stopped. No chemical way I know of to neutralize it but you need to talk to a chemist about that.
No matter how many men you kill you can't kill your successor-Emperor Nero
-
The Following User Says Thank You to thebigspendur For This Useful Post:
gkofsky (04-06-2014)
-
04-07-2014, 03:26 AM #24Member

- Join Date
- Mar 2014
- Location
- Winnipeg Canada
- Posts
- 53
Thanked: 2
There was a post earlier in this thread at one point saying that putting it in the freezer can slow the cell rot but I am not experienced in this so I cannot guarantee that.
-
08-07-2014, 09:09 PM #25At this point in time...


- Join Date
- Jun 2007
- Location
- North Idaho Redoubt
- Posts
- 27,064
- Blog Entries
- 1
Thanked: 13249 Pics !!!!
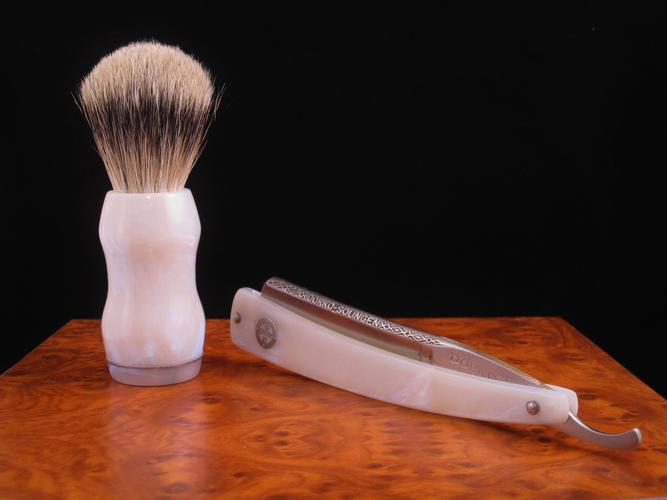
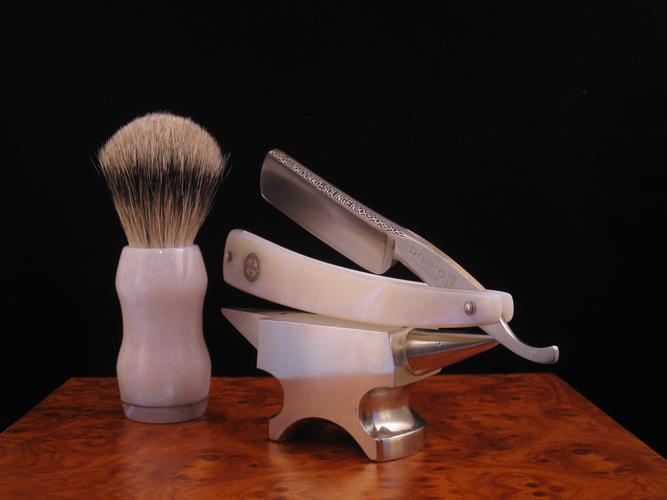
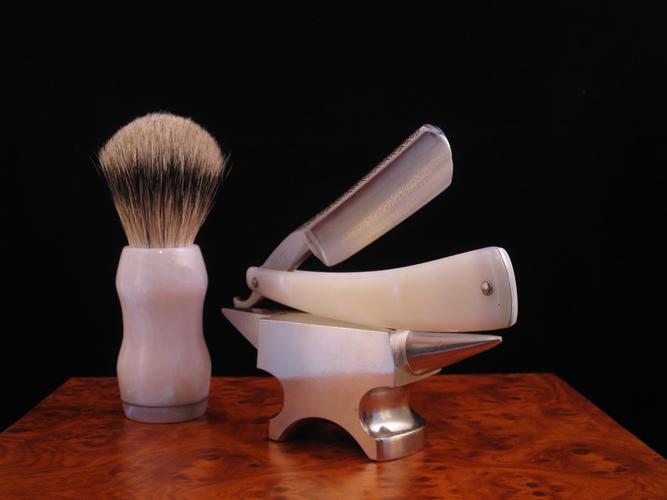
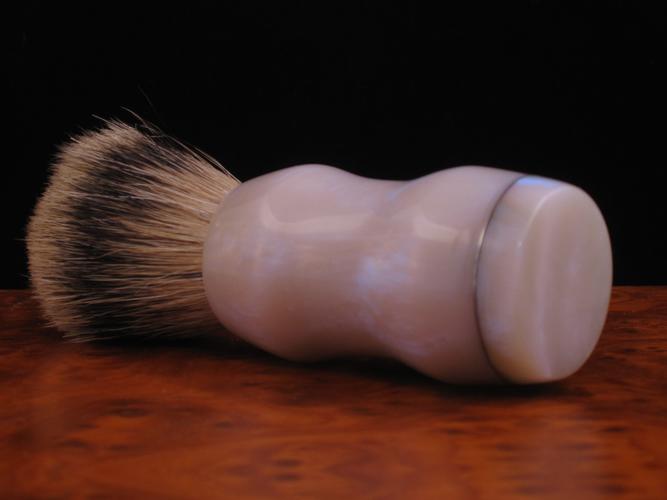
This is the end result
Scales and Brush are Blue Pearl Acrylic scales are @ .110 thickness
The Pins, Wedge, Liner, and Washers are all SS and Nickel Silver
Brush knot is a TGN 22mm Overstuffed Silvertip set at 51mm of loft
I used a new glue to do the inlay transfer, since the scales were mostly white I could not use the normal epoxy and I have never had great luck with Thin CA and Acrylics..
This is the new Gorilla Glue Gel CA and it really worked out well, I popped the inlay the used a piece of scotch tape to hold it steady, "painted" the inlay with the Gel using a cheapo paint brush from Wally World and then positioned it and held it in place over night with the Scotch Tape.. Polished the inlay and the CA using the 3M Cloth from 400 -8000..
And now the pics hehehe
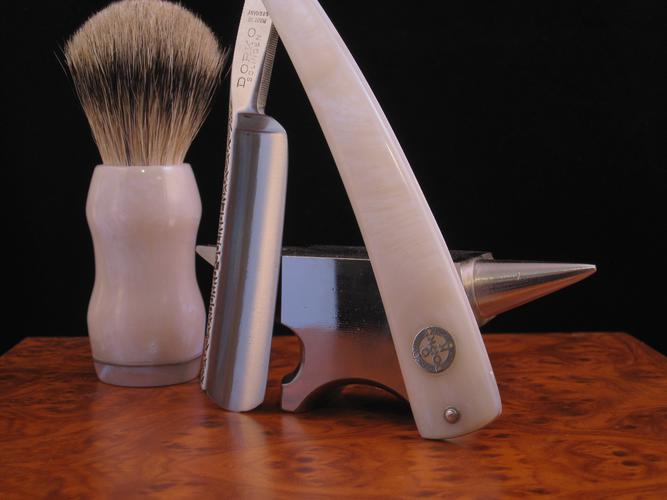
Honing = Chosera 1-5-10 Zulu Grey Finisher
It is really hard to capture the actual flash of Blue Pearl in the pics, also on the gel glue it says "Shake Well" LOL that has to be a joke
Thanks for looking
-
08-07-2014, 10:18 PM #26Senior Member

- Join Date
- Jan 2011
- Location
- Roseville,Kali
- Posts
- 10,432
Thanked: 2027
The silver band at the brush base,what is that?
CAUTION
Dangerous within 1 Mile
-
08-07-2014, 11:10 PM #27At this point in time...
- Join Date
- Jun 2007
- Location
- North Idaho Redoubt
- Posts
- 27,064
- Blog Entries
- 1
Thanked: 13249
 Originally Posted by pixelfixed

Nickel Silver, I just did a liner and a base except the base was the same material as the scales, I wanted to sorta tie the Brush and Scales together with the Blue Pearl and the Silver Wedge and Liner..
I actually drilled tiny holes through the metal and into the base and into the brush so that it would add a type of mechanical lock when the epoxy set up.. Old rifle barrel inlay trick
-
08-08-2014, 01:16 AM #28The Great & Powerful Oz

- Join Date
- May 2008
- Location
- Bodalla, NSW
- Posts
- 15,636
Thanked: 3751
That pearl acrylic is something else. Great set with the brush.
 The white gleam of swords, not the black ink of books, clears doubts and uncertainties and bleak outlooks.
-
The Following User Says Thank You to onimaru55 For This Useful Post:
gssixgun (08-08-2014)
-
08-08-2014, 03:03 AM #29Member
- Join Date
- Mar 2014
- Location
- Winnipeg Canada
- Posts
- 53
Thanked: 2
A big thank you to Glen (gssixgun) for saving this straight razor.
It was handed down to me after sitting around and didn't look to good. Glen has made it into
Something I will be even prouder to own and show my father in law it now looks awesome again and has a second life.
The matching brush is a great addition!
Thank you Glen I appreciate your hard work and attention to detail.
-
The Following User Says Thank You to ADG638 For This Useful Post:
gssixgun (08-08-2014)
-
08-08-2014, 03:20 AM #30Senior Member

- Join Date
- Jun 2014
- Location
- Eads, TN
- Posts
- 1,042
Thanked: 161
Kudos again Glen, I really enjoy seeing the work that you do to these razors. I am in awe of your talent.
SRP. Where the Wits aren't always as sharp as the Razors
http://straightrazorplace.com/shaving-straight-razor/111719-i-hate-you-all.html
-
The Following User Says Thank You to guitstik For This Useful Post:
gssixgun (08-08-2014)


 Reply With Quote