
Results 1 to 10 of 20
 18Likes
Thread: Clark & Hall
 LinkBack URL
 About LinkBacks
-
03-02-2015, 07:38 AM #1
 Clark & Hall
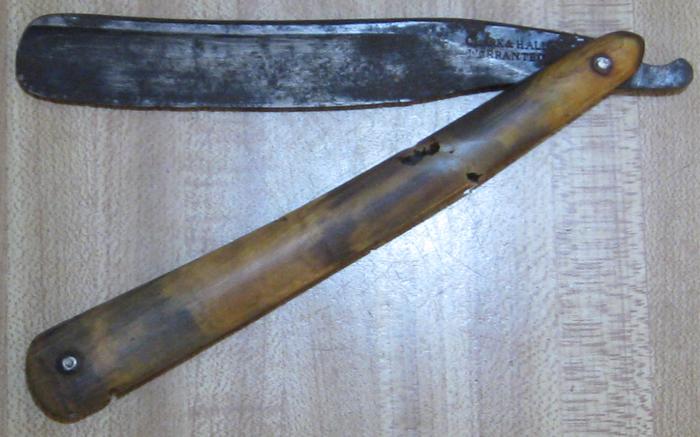
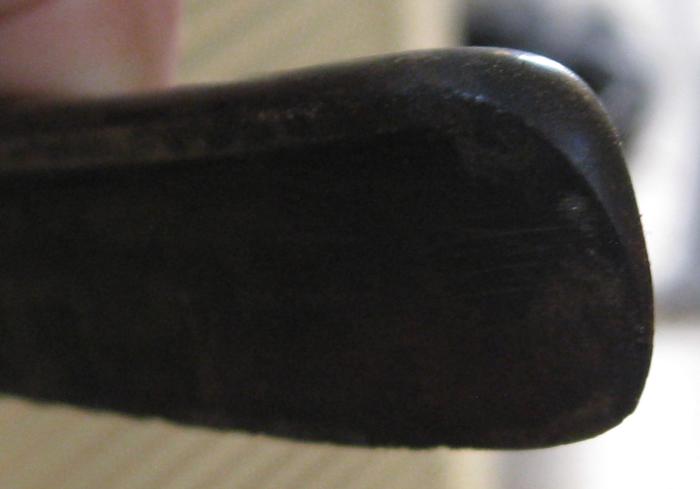
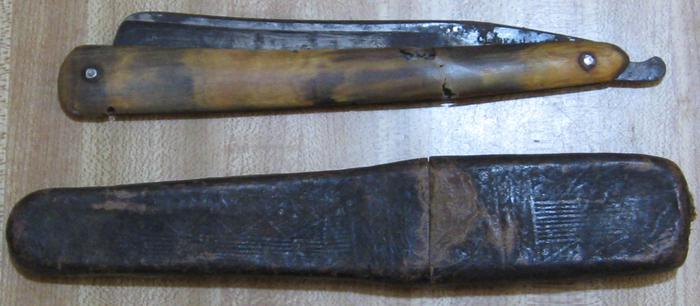
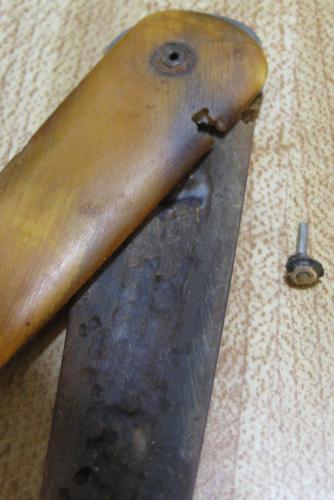
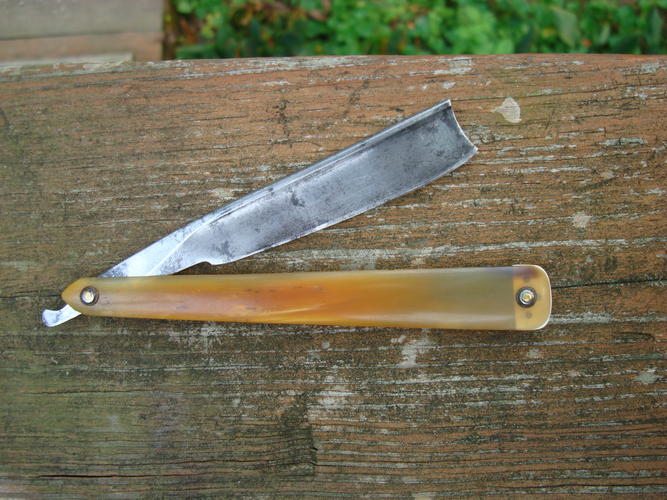
Here's a Clark & Hall many of you might have seen in Show & tell. It is a different one as it has a round point on it. I appears to have been made that way & if it was altered by anyone, it had to be done long ago. The scales are junk so I carefully took it apart & one side was either broken already or it broke when I took it apart but I was very careful to keep at least one side complete so that I could make a pattern from it so that I can make new scales for it.
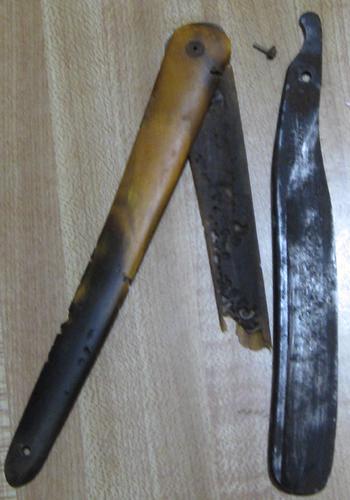
Here it is after I took it apart. This particular straight razor & a few other vintage straights from that era had larger pins in them or like this one, had a small pin but was in a larger sleeve like 2.3 mm with the pin going through it. I noticed this on an old vintage razor I took apart about a year ago. It had the 2.3 mm sleeve or pin. I have had to use this same method in the past when I had some scales that had worn or enlarged pinholes so I would drill them out to 3/32" for that size brass sleeve & use a 1/16" pin to put it together. The blade then actually pivots on the 3/32" brass sleeve rather than the smaller 1/16" pin. The regular size collars will cover the sleeve up but you can also use the larger bullseye collars or the rosette's if ya got 'em. You can see in the pic that when I got the small pin out, the scales stayed together. That was when I suspected that it had the sleeved type. On this one, when I went to drill the sleeve out, the drill bit caught it & just pushed the sleeve out as you see in the pic. I now noticed that the pivot hole in the Clark & Hall blade is larger than 3/32" & is sloppy so I will use a 1/8" carbide drill bit & drill the pivot hole to that size. The 3/32" brass tubing fits perfectly in the 1/8" tubing, so I'll make a brass 3/32" sleeve to fit in the 1/8" brass sleeve. I will then finish it by using a 1/16" pin with larger bullseye collar's on it.
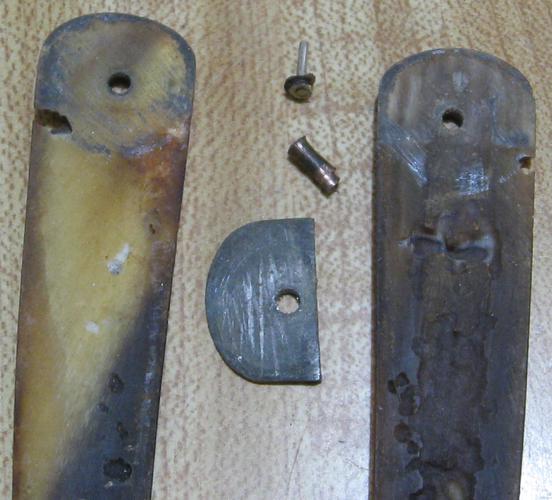
So there ya have it! If you happen to have some scales with an enlarged pinhole in them or you made a mistake drilling out the old pin & went off to the side, you can use a small screw to hold the scales together on one end, keeping them lined up & drill them out to a 3/32" & use a 3/32" brass sleeve with the normal 1/16" pin. You then put that end together using the 3/32" sleeve with a 1/16" screw (temporarliy) & drill the other end out to make it match or you can pin it with a 1/16" pin if just doing a repair & you're going to sell it, but myself, I much rather they all match. You will of course have to drill the pivot hole in the blade to 3/32". If you are working on a Clark & Hall, you will need to drill the pivot hole to 1/8" & make a brass sleeve from some 1/8" brass tubing. You will then have to use a 3/32" brass sleeve inside the 1/8" sleeve & pin it with a 1/16" pin. If you happen to have some collars with a 2.3 mm or 3/32" ID, you can pin it with some 3/32" brass rod which you can get at a hobby store. A welders supply store might even have the 3/32" brazing rod. The De Pew straight razor uses a 2.3 mm pin on those razor's. You can also do this to the blade only if you want it to pivot on a 3/32" sleeve rather for it pivot on the 1/16" pin.Last edited by engine46; 03-02-2015 at 07:45 AM.
-
The Following User Says Thank You to engine46 For This Useful Post:
Geezer (03-02-2015)
-
03-02-2015, 04:36 PM #2Senior Member


- Join Date
- Apr 2008
- Location
- Essex, UK
- Posts
- 3,816
Thanked: 3164
The sleeve is quite interesting and unusual - I had a client that had me rescale or unpin twenty of so of these oldies for a display case and neither these, nor the 50 or so I have done for myself had a sleeve at the wedge end. Originally Posted by engine46

Nearly all had oversize pins, but I just bought the appropriate diameter brass rod to fit - they come in other sizes apart from 1/16th inch at the same place as you buy the 1/16th diameter, usually, knife shops, hardware shops, that sort of thing. If you are an avid restorer it helps to have a range, then you can pick and mix. Then you can re-use the collars, even if a few turns of a rats tail file is necessary.
Not all pins were brass of course. A huge amount of oldies used iron or steel pins, probably iron as it is more malleable. Some appear to have copper pins too. having a drill press or lathe helps, as you can put a small piece of rod )oversized) in the jaws (not a long one - it will bend, just a little more than you need) spin it up and sand or file it to the right diameter.
One thing I have noticed on a lot of oldies is two holes at the wedge, and sometimes - maybe half a dozen times if I recall correctly, a very thin diameter bit of steel was holding the scales together and was situated right by the pinning, so the large pinning boss covered it.gooser likes this.
-
-
03-02-2015, 04:56 PM #3
Neil, you are right. I knew I was forgetting something when I typed this. I have seen the extra pins right next to the other one on the wedge end & I also forgot about the knife shops having the right sized pinning material. And..........yes, I too have had to put a piece in a drill press & use a file to get it to the correct diameter or sometimes I just used sandpaper if it didn't need much. I actually had it already typed up before & I think I accidentally deleted it & was trying to remember everything again when I had to type it all over again. I was going to make it into a blog but I knew I was forgetting some things. I guess I could still do it. Thanks for adding! Originally Posted by Neil Miller
Last edited by engine46; 03-02-2015 at 05:00 PM.
-
03-02-2015, 04:59 PM #4
Where needed, I use eyelets from both sides to secure the blade.
The latest rescale, I used 0.071 (#58drill bit) rod for the pins on a heavy razor. I buy the eyelets by the hundred on line.
They can give the tiny washer look to an older blade rescale.
~RichardBe yourself; everyone else is already taken.
- Oscar Wilde
-
The Following User Says Thank You to Geezer For This Useful Post:
engine46 (03-02-2015)
-
03-02-2015, 07:01 PM #5
Thank you Richard. Originally Posted by Geezer
Also on scales that have a slightly smaller hole in the scales in which the pinning material will not fit or will be a very tight fit, I have gone online & bought some .069" drill bits which are a hair larger in diameter & they make the pinhole in the scales just right to pin them together.Geezer likes this.
-
03-02-2015, 11:24 PM #6Senior Member


- Join Date
- Sep 2011
- Posts
- 1,650
Thanked: 1341
On a lot of razors from maybe 1790-1810 or so, I have seen 4 holes in the lead wedge, one for the pin surrounded by 3 others - there were no holes in the scales for additional pins though. Do you know what this was done for? Here is a pic for lack of better examples, but I have seen it in maybe 10 razors I have owned from the period: Originally Posted by Neil Miller
-
03-02-2015, 11:52 PM #7
ScienceGuy;On a lot of razors from maybe 1790-1810 or so, I have seen 4 holes in the lead wedge, one for the pin surrounded by 3 others - there were no holes in the scales for additional pins though. Do you know what this was done for? Here is a pic for lack of better examples, but I have seen it in maybe 10 razors I have owned from the period:
The only reason I can think they did that was to keep the wedge from spinning. As for more than two, I wouldn't know if that was done by the maker or by someone else between then & now..............
If only these old relics could talk!Geezer likes this.
-
03-03-2015, 12:00 AM #8Senior Member

- Join Date
- Feb 2012
- Location
- Menominee,MI
- Posts
- 1,624
Thanked: 325
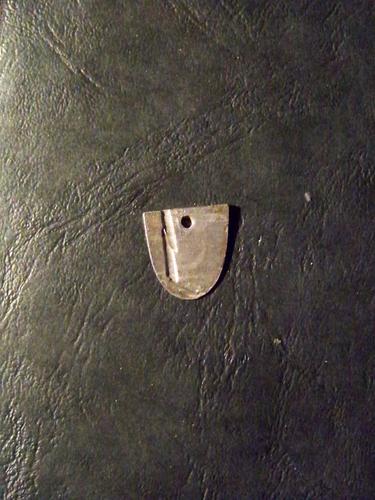
I have seen holes drilled in lead wedges aswell as what looks like grooves from where someone gouged material from the wedge. I was thinking it was done to reduce weight to help balance out a razor. Here is a wedge with the grooves.
Last edited by JSmith1983; 03-03-2015 at 12:05 AM.
-
03-03-2015, 03:22 AM #9
Very interesting! They were well into the craftsmanship of their products back then, not like some things are today! Originally Posted by JSmith1983
-
03-03-2015, 01:47 PM #10Senior Member
- Join Date
- Apr 2008
- Location
- Essex, UK
- Posts
- 3,816
Thanked: 3164
Maybe on this one, the hole when lined up with the scales showed that the wedge did not quite meet the scales on one side, so they hammed it with a blunt piece of metal to expand it a bit? Who knows, but is does expand quite easily. It does not look gouged out to me - you can even see the shape of the tool used, it was struck twice with the same tool. Originally Posted by JSmith1983
Regards,
NeilLast edited by Neil Miller; 03-03-2015 at 04:46 PM. Reason: typo and addition


 Reply With Quote
