
Results 21 to 30 of 33
 4Likes
Thread: george wolstenholm and sons
 LinkBack URL
 About LinkBacks
-
01-14-2016, 02:09 PM #21Senior Member


- Join Date
- Oct 2011
- Location
- Standish, Maine
- Posts
- 816
Thanked: 954
http://www.coticole.be/wedges.hmtl is a great reference for honing in general. There is a pdf document you can download on how to calculate bevel angle. I would not get hung up on how many layers of tape you use on a near wedge. I probably restore 2 or 3 Sheffield near wedges a week. Most are in pretty bad shape to start. Almost all start with 3 layers of tape to see where things are and end with 2 layers. Using the bevel calculator you'll see the bevel angle is still in the 16 or 17 degrees range even with 2 layers.
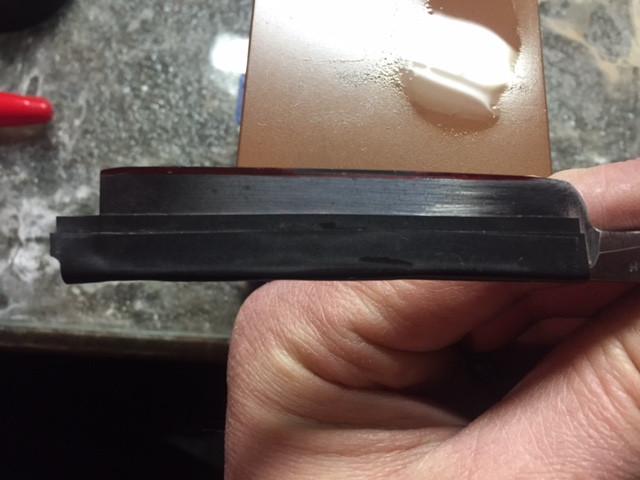
The bevel I can see in your photos looks like an uneven grind. That little wedge is plenty stiff and I doubt you can force the bevel to look like that. The blade will not flex like a hollow grind. The unevenness is just cosmetic.
If you have breadknifed the blade bringing it back on a 1K can be a ton of work. I use a 325DMT like Glen uses in his video. His video series on breadknifing is great. Watch it multiple times. There is just too much there to absorb in one viewing. The DMT is very aggressive and can create a crumbly edge with too much pressure but it will get the bevels to meet much quicker. Don't be afraid to put up the blade up and come back to it later.
Good luck,
KarlLast edited by karlej; 01-14-2016 at 02:47 PM.
-
01-14-2016, 02:31 PM #22Member
- Join Date
- May 2014
- Location
- Tomball, TX
- Posts
- 74
Thanked: 12
Better link...
http://www.coticule.be/wedges.html
-
The Following User Says Thank You to leftyonly For This Useful Post:
karlej (01-14-2016)
-
01-14-2016, 02:32 PM #23Senior Member
- Join Date
- Oct 2015
- Location
- Pittsburgh, PA
- Posts
- 212
Thanked: 21
OK. one hour in and here is what I found:
1. 3 layers of tape applied. Started at 1k and applied red marker to the edge. I took 3 straight passes on each side. The permanent marker revealed that the middle of the blade was hitting the hone, but not the heel or toe.
2. I tried "pushing" the heel and toe in following straight passes (applying pressure on heel and toe), and that didn't seem to do much good. I think the steel is too stiff to make any difference. Likely confirms karlej's response above.
3. I tried a "Rolling X" technique. Putting the blade at a 45 degree angle to the hone, then bringing the heel along an imaginary line down the hone, I would gently push the heel down while bringing the blade toward me. I would transfer the pressure toward the middle, then toward the toe as I completed the stroke. I would repeat this process during the push stroke. My permanent marker would reveal that I was finally making contact along the entire edge of the blade.
...So I think I need to continue using this technique, unless I get input otherwise. Unfortunately, I must have not set the bevel properly at the 1K level, because I progressed through 4k and 8K, and still can't get it to shave hair. I'm going to start over with the "Rolling X" as described above at the 1K until I can get it to pop hairs at the toe, middle, and heel. Then move to the 4K, ensure I'm popping hairs, and then finally the 8K.
A question though: on all of my hollow grind blades that I've done, I can get the edge to pass the HHT along all parts of the blade. Can I expect the same result on this razor? I know the HHT isn't the be all/end all of a razor's sharpness, but can a grind like this also pass the HHT?
Thanks
Jeff
-
01-14-2016, 02:40 PM #24'with that said'


- Join Date
- Aug 2010
- Location
- Walla Walla in WA State USA
- Posts
- 11,260
Thanked: 4238
First and foremost, if there isn't a set bevel then going further is a mute point.
Second, tests are just that 'tests' some work some don't, personally the HHT doesn't work for me.
Third, have you tried the TNT (thumb nail test) I find that very useful when setting a bevel. If you don't know what it is, wet your thumbnail on the hand opposite of the dominate hand then 'gently/weight of razor only' run the edge across the nail. It should be 'catching' all along, if it 'slides' anywhere you haven't got a bevel set yet.
I hope this helps.karlej likes this.Our house is as Neil left it- an Aladdins cave of 'stuff'.
Kim X
-
01-14-2016, 02:44 PM #25Senior Member
- Join Date
- Oct 2015
- Location
- Pittsburgh, PA
- Posts
- 212
Thanked: 21
Yes. I thought I had the bevel set, but obviously I was wrong. The thumbnail test kinda creeps me out. I'll give it a try, but the thought of the razor digging a bit too far in my thumbnail gives me the heebeegeebees! haha.
-
01-14-2016, 02:46 PM #26'with that said'
- Join Date
- Aug 2010
- Location
- Walla Walla in WA State USA
- Posts
- 11,260
Thanked: 4238
Trust me, the razor won't cut deep at all!!! It'll only 'scratch' the surface. Originally Posted by relli1130

 Our house is as Neil left it- an Aladdins cave of 'stuff'.
Kim X
-
01-14-2016, 04:58 PM #27Senior Member
- Join Date
- Oct 2015
- Location
- Pittsburgh, PA
- Posts
- 212
Thanked: 21
Well...success!
Started back at square one. 3 layers of tape, and 1k King.
1. What a learning experience this was for me. Clearly, the bevel was not properly set...Lesson #1! Always, always make sure the bevel is properly set. I could of saved myself a heck of a lot of time had I made sure of that...
2. It is amazing what a permanent marker and loupe can tell you. I took some pics of my progress showing how the marker was able to indicate where the blade edge was NOT hitting the hone.

By paying close attention to my technique and water displacement, AND consistently applying more perm marker and checking the loupe frequently, I was able to see exactly what was happening to the edge. In reality, I found that my razor now has a much smaller, less noticeable edge. A new edge that is uniform below the previous edge.
I proceeded to the 4K once I was confident I had a new bevel set. Making sure my hones were free and clear of any debris, and changing tape before proceeding to the next grit. After the 4K, it was sharp, and shaving hairs, though catching a bit. I could see under the loupe several prominent scratches that I needed to remove. I continued on until those scratches were gone.
At 8 K, it was really neat to see how the edge went from a satin finish to a mirror like shine. I could see again that the scratches, especially the prominent ones were far less noticeable, if not removed completely. It was now shaving hairs off my arm easily.
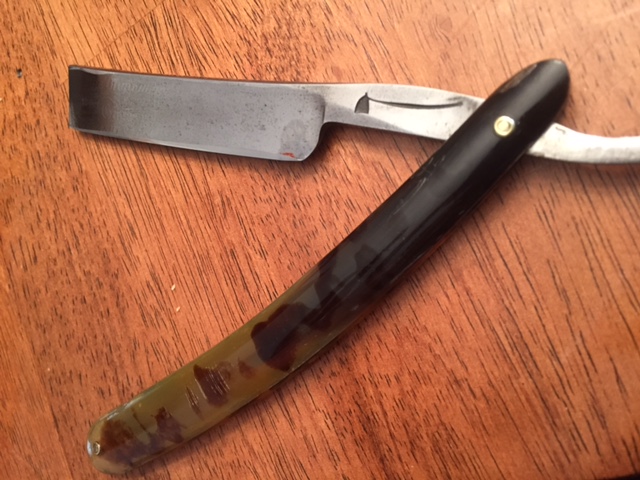
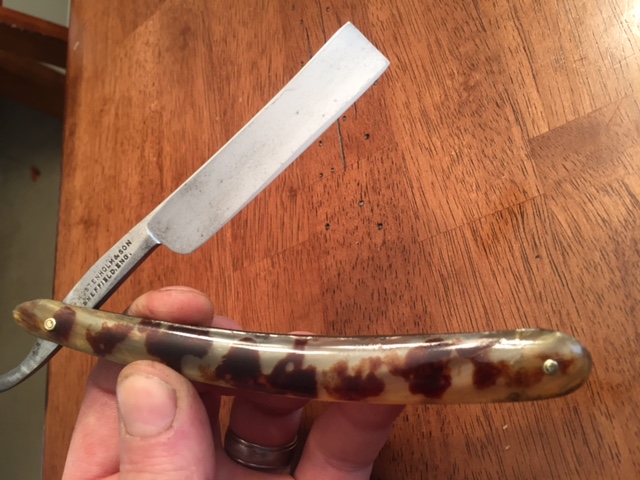
You can't quite see it in the next photos, but under the loupe it is very apparent. A nice, consistent, mirror like cutting edge spans the entire length of the razor now. I took it to the strop, and let it hang a bit looser than normal. Applied light pressure when stropping, and was very pleased with the end result. The razor now passes the HHT all along the blade. Hairs catch and pop clean off with little pressure.
I hit the scales with some MAAS, buffed it out, and applied a little neatsfoot oil afterwards. Hopefully the oil will soak in a bit and rejuvenate the horn...
I'm going to let my beard grow in a bit more before I try shaving with this. I'll report back tomorrow morning...
Thanks everyone for your input. It was critical to my success...NewellVW likes this.
-
01-14-2016, 05:11 PM #28KN4HJP

- Join Date
- Feb 2015
- Location
- Chesapeake, Virginia
- Posts
- 932
Thanked: 261
Congratulations! Looks like you're on top of it now.
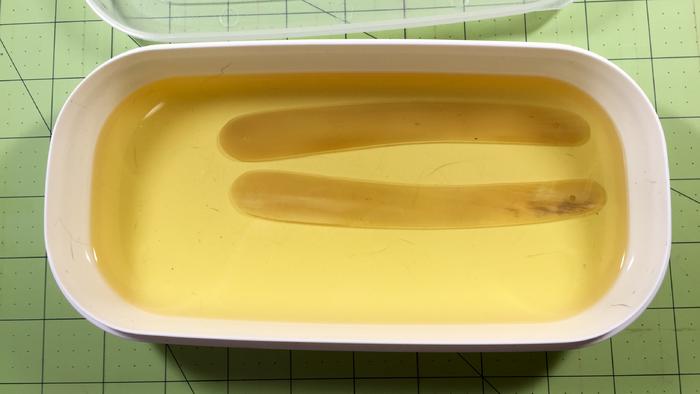
If the scales are really dry, with checking or cracking inside and out, you can put the whole razor in neatsfoot oil for 10 - 15 minutes and then wipe off the excess and allow it to settle. I keep a small covered tray with 1/2" of oil in it for soaking scales and razors. If you don't have enough oil for immersion, you can use pipe cleaners, rags, q-tips, etc. to get a good coating inside and out. Let it set for a bit and then wipe off the excess as above. Too much exposure will soften the horn, but 10 - 15 minutes followed by a good wipedown won't hurt anything and the horn will be greatly improved.
This is my neatsfoot oil tank:
-
01-14-2016, 05:38 PM #29'with that said'
- Join Date
- Aug 2010
- Location
- Walla Walla in WA State USA
- Posts
- 11,260
Thanked: 4238
Sounding good. There is only One Test that really counts and that's the Shave Test! Let us know how it goes.
I hope I was of some help.
Enjoy the ride! It's a long strange trip but well worth the journey
Our house is as Neil left it- an Aladdins cave of 'stuff'.
Kim X
-
01-14-2016, 05:42 PM #30Senior Member
- Join Date
- Oct 2015
- Location
- Pittsburgh, PA
- Posts
- 212
Thanked: 21
No doubt! I did try the thumbnail test. I drug it across my left thumbnail and wet it like you said. It definitely "grabbed" my thumbnail. But there was a bit of discomfort that I felt. So I stopped. Originally Posted by cudarunner
Do you only perform the TNT on the "dead" part of the nail, or on the growing part too?


 Reply With Quote