Results 1 to 9 of 9
Like Tree19Likes
  • 6 Post By Audels1
  • 3 Post By Gasman
  • 4 Post By RezDog
  • 4 Post By Gasman
  • 1 Post By Gasman
  • 1 Post By Euclid440

Thread: Bengall & IVY Super

  1. #1
    Senior Member Audels1's Avatar
    Join Date
    Mar 2021
    Location
    Cranston, RI
    Posts
    336
    Thanked: 7

    Default Bengall & IVY Super

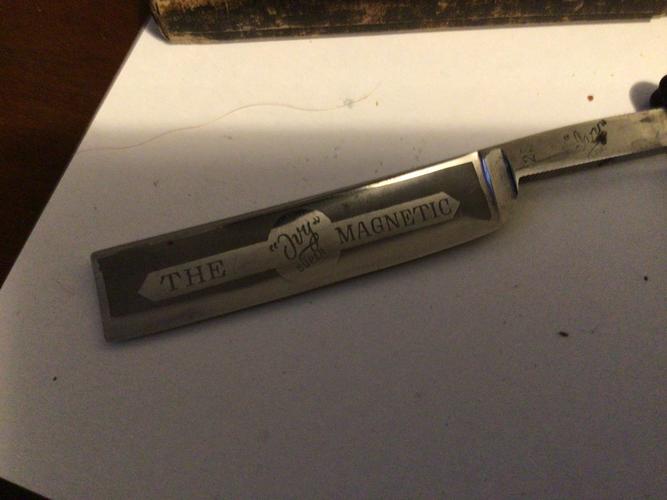
    2 more to disassemble
    Name:  IMG_0235.jpg
Views: 207
Size:  25.9 KB
    Name:  IMG_0241.jpg
Views: 190
Size:  33.9 KB
    Name:  IMG_0242.jpg
Views: 189
Size:  27.2 KB

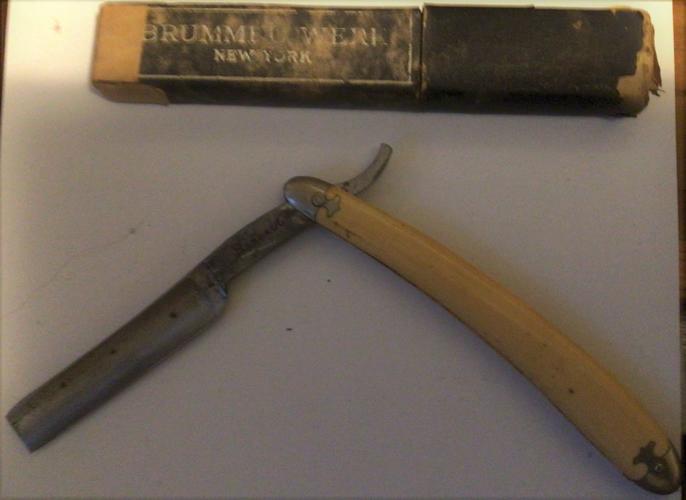
    I don't think the boxes belong to the razors. The Bengall is pretty worn.
    The IVY looks to be in good shape aside from some rust around the pivot. time to see if I not break the scales

  2. #2
    Skeptical Member Gasman's Avatar
    Join Date
    Nov 2016
    Location
    Colorado Springs
    Posts
    10,481
    Thanked: 2185

    Default

    The Ivy looks nice. Just go easy and try not to pry on them to seporate. That is usually the biggest mistake made when removing scales.
    RezDog, PaulFLUS and Audels1 like this.
    It's just Sharpening, right?
    Jerry...

  3. #3
    Senior Member blabbermouth RezDog's Avatar
    Join Date
    Feb 2013
    Location
    Haida Gwaii, British Columbia, Canada
    Posts
    14,395
    Thanked: 4821

    Default

    I do like my pin vise for drilling pins in old scales. There are a lot of threads but only one way to get experience.
    BobH, Gasman, boz and 1 others like this.
    It's not what you know, it's who you take fishing!

  4. #4
    Skeptical Member Gasman's Avatar
    Join Date
    Nov 2016
    Location
    Colorado Springs
    Posts
    10,481
    Thanked: 2185

    Default

    I know by now you have read a lot on removing pins, but here is my way.

    1. Put 2 layers of blue tape covering the pin and the scale end to protect it.
    2. Use a Needle file and flatten the top of the pin by filing thru the tape.
    3. Use a micro Sharpie to put a dot right in the center of the pin to make it easier to see.
    4. Use one of these... But much smaller in my drill press. I chucked up this big one just to show you better what it looks like.
    Name:  IMG_20210601_062502687.jpg
Views: 138
Size:  40.9 KB
    I've put a long wide slot in a board that the scales lay in to help hold it steady while drilling. Drill slowly until the bit grabs the collar and takes it off. At that point, the scales should just about fall apart.

    The bit I use has a tip that is 1/16". The same size as the pin. If your off-center a little a thin piece of the pin will still be sticking up, but it will be so thin it will flex out of the way.

    Good luck! And Practice!
    jfk742, boz, PaulFLUS and 1 others like this.
    It's just Sharpening, right?
    Jerry...

  5. The Following 2 Users Say Thank You to Gasman For This Useful Post:

    Audels1 (06-01-2021), MrZ (06-18-2021)

  6. #5
    Senior Member
    Join Date
    Sep 2020
    Location
    Austin, TX
    Posts
    653
    Thanked: 56

    Default

    Quote Originally Posted by Gasman View Post
    I know by now you have read a lot on removing pins, but here is my way.

    1. Put 2 layers of blue tape covering the pin and the scale end to protect it.
    2. Use a Needle file and flatten the top of the pin by filing thru the tape.
    3. Use a micro Sharpie to put a dot right in the center of the pin to make it easier to see.
    4. Use one of these... But much smaller in my drill press. I chucked up this big one just to show you better what it looks like.
    Name:  IMG_20210601_062502687.jpg
Views: 138
Size:  40.9 KB
    I've put a long wide slot in a board that the scales lay in to help hold it steady while drilling. Drill slowly until the bit grabs the collar and takes it off. At that point, the scales should just about fall apart.

    The bit I use has a tip that is 1/16". The same size as the pin. If your off-center a little a thin piece of the pin will still be sticking up, but it will be so thin it will flex out of the way.

    Good luck! And Practice!
    Is that an "easy out"? Supposed to grab and back out bad screws?
    If you're wondering I'm probably being sarcastic.

  7. #6
    Skeptical Member Gasman's Avatar
    Join Date
    Nov 2016
    Location
    Colorado Springs
    Posts
    10,481
    Thanked: 2185

    Default

    No. Itz a centering drillbit. Drills a tiny hole then follows that up with a larger hole. Helps in getting center.
    Euclid440 likes this.
    It's just Sharpening, right?
    Jerry...

  8. The Following User Says Thank You to Gasman For This Useful Post:

    planeden (06-01-2021)

  9. #7
    Junior Member
    Join Date
    Jun 2021
    Posts
    5
    Thanked: 0

    Default

    Hello. I bought the sane Ivy, but I can't find any i formation about the history and year when it was produced. Maybe you can share something with me?))

  10. #8
    Senior Member Audels1's Avatar
    Join Date
    Mar 2021
    Location
    Cranston, RI
    Posts
    336
    Thanked: 7

    Default

    Quote Originally Posted by razorukr View Post
    Hello. I bought the sane Ivy, but I can't find any i formation about the history and year when it was produced. Maybe you can share something with me?))
    I will gladly but as of right now I have not done any research on it. Someone else may chime in on the subject.
    Last edited by Audels1; 06-29-2021 at 11:52 AM.

  11. #9
    Senior Member blabbermouth
    Join Date
    Apr 2012
    Location
    Diamond Bar, CA
    Posts
    6,553
    Thanked: 3215

    Default

    You can buy Center Drill/Counter sink drills in 1/8th in shaft with a 1/16th cutter. They are stronger and will not flex like a 1/16th in drill bit and cut a single flute evenly and cleanly. They are inexpensive a set of 3 or 4 under $10 and last forever. It is how you are supposed to start a hole drill metal.

    If you center punch the flattened pin with a sharp awl, you can drill down the middle of the pin. You just need to remove the crown of the pin.
    Audels1 likes this.

Posting Permissions

  • You may not post new threads
  • You may not post replies
  • You may not post attachments
  • You may not edit your posts
  •