
Results 1 to 6 of 6
 11Likes
Thread: My first restore...
 LinkBack URL
 About LinkBacks
-
10-08-2012, 04:27 PM #1Seeking Shaving Zen


- Join Date
- Aug 2012
- Location
- Yakima, WA
- Posts
- 825
Thanked: 132 My first restore...
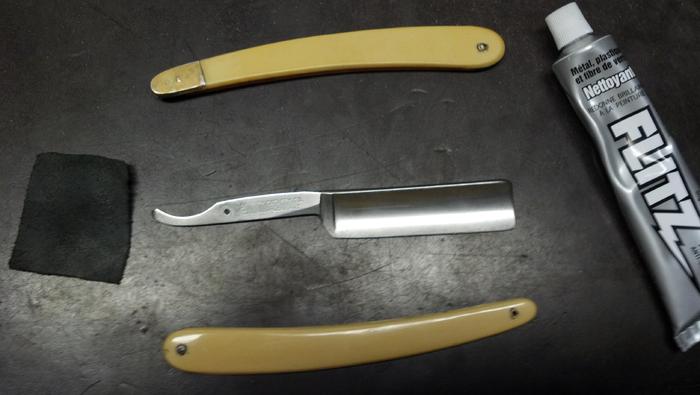
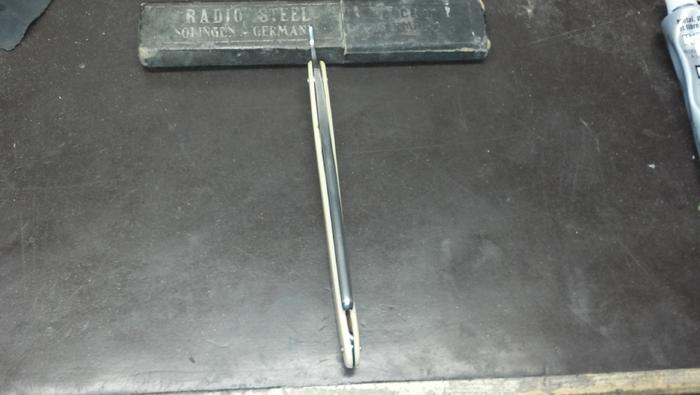
I picked this razor and box up from eBay and decided to give it a try doing all the polishing by hand using a little square of leather and Flitz. I forgot to grab the 'before' photos which is unfortunate as the change was dramatic.
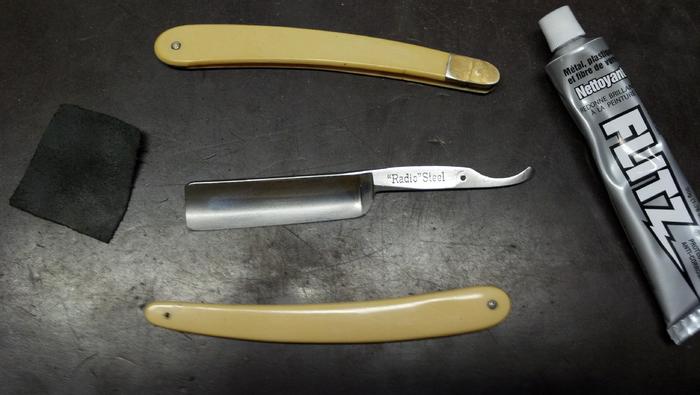
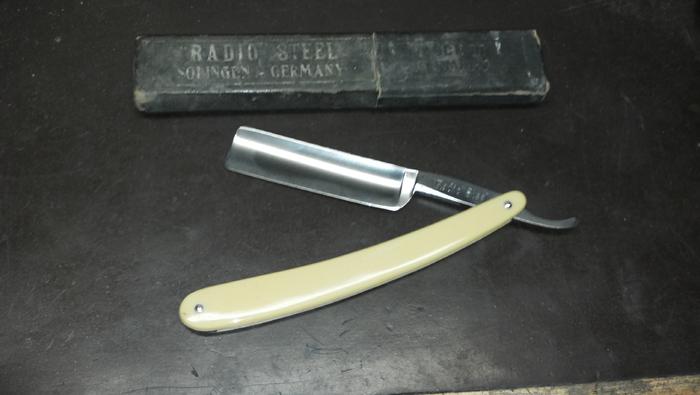
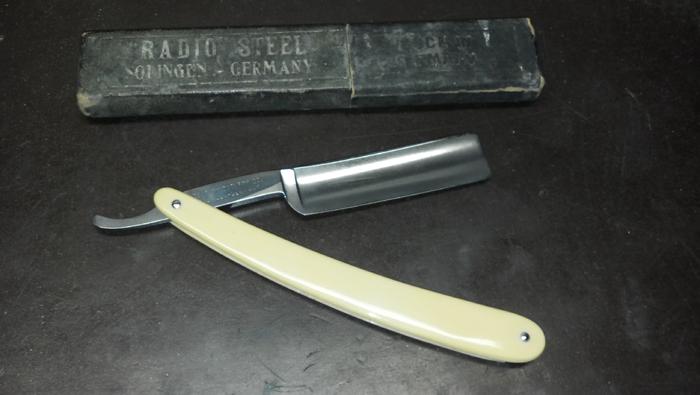
The Razor is Century Cutlery (I'm pretty sure... Posting from work and don't have the razor to double check but fairly certain it is Century...) "Radio Steel" and the top pics show the original scales which were broken wehn I got them but with some type of fix using what I think is lead tape over the pivot that you can see in the pics. The blade was functional but very loose and with that lead tape/whatever it is I could not adjust that. So, I ended up finding the donor scales thrown in with a razor deal at a big flea market and decided to put 'em on. The most interesting thing was that after all was said and done I was replacing the blade in the box and felt the razor hitting on something so I dug it out and turned out to be a piece of a broken scale that nearly matched the donors I put on it!
Something that was interesting was I could tell with the scales that the previous razor had contact to one side during open/close and when I got this one finished it moved toward that same side. I need to look more into that but I guess the way the scales have been drilled would account for that? Learning how to address that issue will be my next adventure.
I guess you can never tell where a razor has been in its' history but that was pretty interesting to go through all that work and end up with a random eBay find then a random flea market scale grab only to have, possibly, the razor be re-scaled with nearly the exact same type of scales it may have come with originally. Or, those are just a very common style scale and it is normal coincidence... But, I'll stick with the more romantic version.
-
10-08-2012, 05:48 PM #2Senior Member

- Join Date
- May 2012
- Location
- Oxford, Al
- Posts
- 1,605
Thanked: 407
Great job! the scales cleaned up very nicely. Hand sanding that steel is a PITA, but in the end I like the look, and you don't have to worry about ruining the temper like greaseless compounds can. Your next razor start dry sanding on every grit you use, yes some say its contraindicary but before you move to the next grit, wet sand it with the same grit, that thing will shine like no one elses business! Your peening looks clean and flush with the washers, that takes some real patience to do so kudos sir!
Prahston likes this.Mastering implies there is nothing more for you to learn of something... I prefer proficient enough to not totally screw it up.
-
The Following User Says Thank You to tiddle For This Useful Post:
Prahston (10-09-2012)
-
10-08-2012, 08:16 PM #3Seeking Shaving Zen
- Join Date
- Aug 2012
- Location
- Yakima, WA
- Posts
- 825
Thanked: 132
@ tiddle... Thanks for the info and the kudos! I went back and forth on the peening and think I could still get it a little cleaner but just stopped as I was afraid I was gonna miss and smack a scale. I did this one all with just Flitz as I didn't have any other materials to use and wanted to ease into it. I will definitely try wet sanding with same grit in the future!
-----
Moderators... I just realized I posted in the wrong area... I intended this to go under Show & Tell. If it is fine here that's okay with me... Otherwise, if you could wave your wand and move 'er over that would be great! Sorry for the weird error.
-
10-08-2012, 08:25 PM #4Senior Member
- Join Date
- May 2012
- Location
- Oxford, Al
- Posts
- 1,605
Thanked: 407
I get you on the peening. I was working mine with the original scales too and was afraid of that, but in the end you can always go back and sand that out, sometimes you'll screw up more trying to be too careful (go figure right). Yeah I get all my wet/dry paper from the autoparts store pretty cheap. The hardest part is not trying to rush to see what the finished product is going to look like
Well keep us posted and pics of the other stuff you do. Good luck.
Prahston likes this.Mastering implies there is nothing more for you to learn of something... I prefer proficient enough to not totally screw it up.
-
The Following User Says Thank You to tiddle For This Useful Post:
Prahston (10-08-2012)
-
10-09-2012, 01:35 AM #5Senior Member

- Join Date
- Feb 2011
- Posts
- 217
Thanked: 33
nice restore, congrats.
Prahston likes this.
-
The Following User Says Thank You to rarreola For This Useful Post:
Prahston (10-09-2012)
-
10-09-2012, 01:39 AM #6Senior Member


- Join Date
- Dec 2010
- Location
- South Florida
- Posts
- 13,530
Thanked: 3530
Great job, keep up the good work & thanks for sharing.
Prahston likes this.
-
The Following User Says Thank You to Hirlau For This Useful Post:
Prahston (10-09-2012)


 Reply With Quote