
Results 11 to 20 of 37
 25Likes
Thread: A couple more into rotation
 LinkBack URL
 About LinkBacks
-
04-16-2015, 02:40 AM #11Senior Member


- Join Date
- Mar 2015
- Location
- Akron, Ohio
- Posts
- 11,995
Thanked: 4306
Sorry geezer, dont know what happened. Grandkids were here. Yep 47 yrs. Old and 2 grandkids, but lets try again
-
04-16-2015, 03:00 PM #12Member
- Join Date
- Mar 2015
- Location
- Livonia, MI
- Posts
- 35
Thanked: 1
WOW, Thanks for details. Your initial bundle of blades look familiar, as I have many such bundles of older but nice ones that need a fresh face. Although I can hone most of them to shave ready, they dont always show well, let alone sell. I have been reluctant to do much to them beyond rust removal and general cleaning (as one should not polish the base of a Tiffany lamp e.g.), but my premise is sales will improve if they show clean and shiny. Seeking inspiration here and on u-tube, I was convinced I need a bufffer, wheels and compound to achieve that result, thus my question. So you may have just saved me upwards of $400 (I dont do things half-way!). Guess I need to get to Auto Zone for StarBright and paper with more than 400 grit.
Retired at 62 with only one grandchild, I have the time to address the over 200 SR's that I've acquired. Not by chance, I started buying them here and there 12 years ago, as a hobby and to set up a table at various fairs and flea markets. Retirement Income I've gotten pretty good at Dremel pin-removal and re-pinning with rods and washers from Maggard's (I'm in Michigan also), so cleaning the blades properly is my next hurdle. I've been concerned about the safety and mess with a buffer, and I think I can handle a few while golf is on the TV, so I appreciate your confirmation that good results are possible without the machine. Again, Thanks to you and the Geezer too!!
-
04-17-2015, 04:29 AM #13Senior Member
- Join Date
- Mar 2015
- Location
- Akron, Ohio
- Posts
- 11,995
Thanked: 4306
Your very welcome. But i did forget something that makes a huge differance.
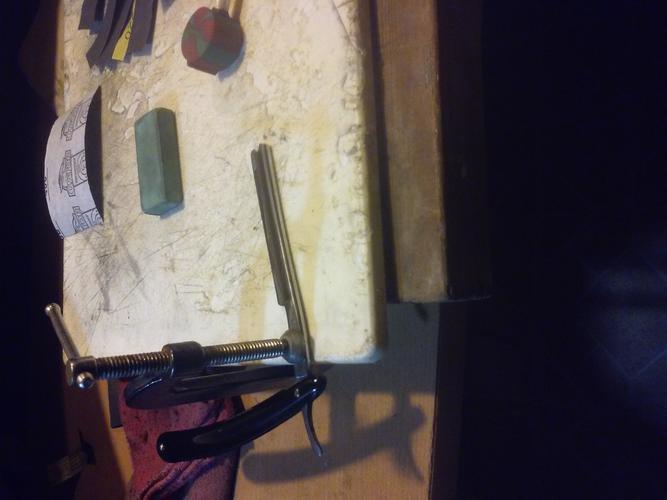 now you can put some really good pressure on it. Carful not to sand off of the edge, or up over side of spine. The round eraser keeps that from happening
Geezer likes this.Mike
now you can put some really good pressure on it. Carful not to sand off of the edge, or up over side of spine. The round eraser keeps that from happening
Geezer likes this.Mike
-
04-17-2015, 02:41 PM #14
Well done! This could be a sticky for all the good information you have shown!
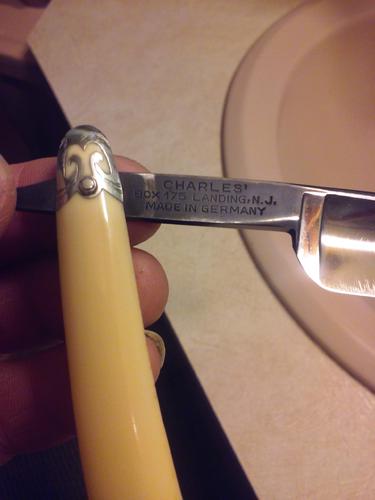
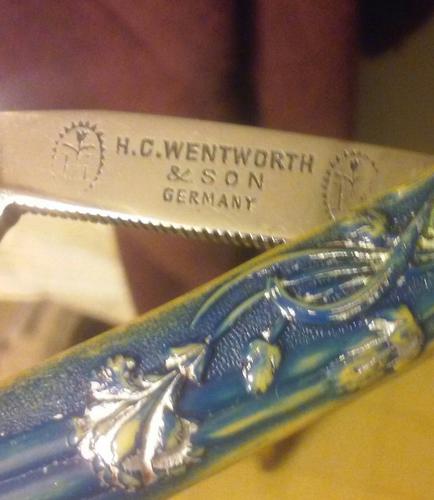
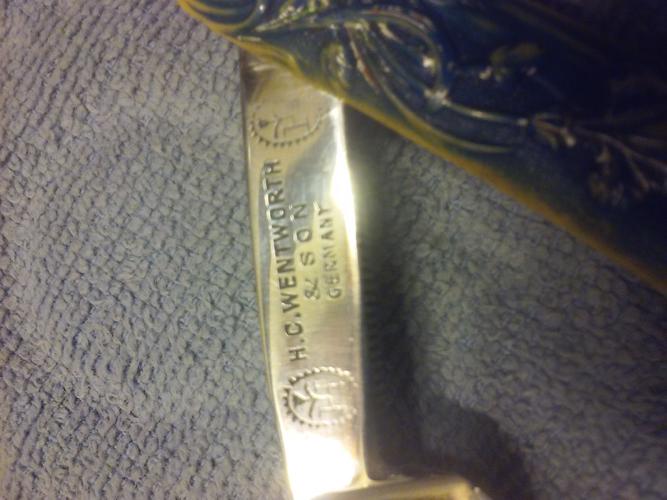
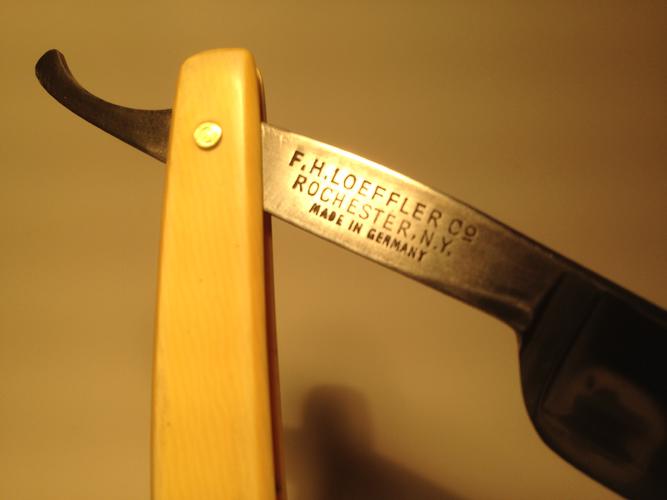
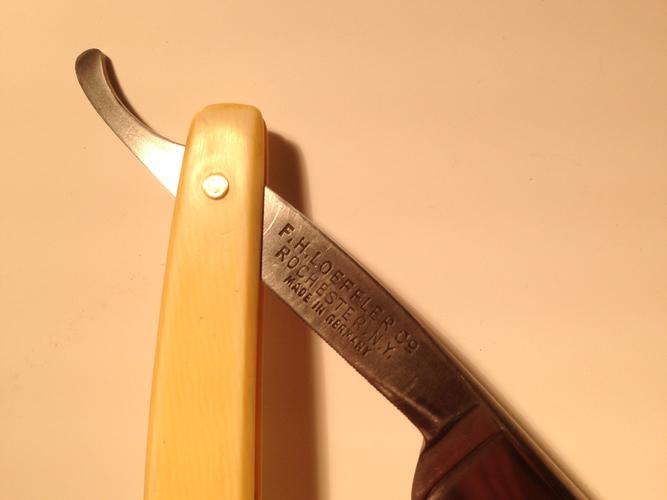
I would still like to see the make of the razor with the very fancy, flowery, blue? scales.
~RichardBe yourself; everyone else is already taken.
- Oscar Wilde
-
04-17-2015, 02:55 PM #15Member
- Join Date
- Mar 2015
- Location
- Livonia, MI
- Posts
- 35
Thanked: 1
OB: Yea, I figured that out after trying freehand. More effective and safer when clamped down. And the rounded eraser only makes sense. Anyway, got to the Zone for full range of papers. They have 3k and 5k in a sponge like pad for wet sanding. After serious effort with the 180 & 320 for rust and pitting, the finer grits really polish it nice. While my results may not have quite the mirror finish of a blade that spent 3 hours on buffing wheels, it certainly is effective and more economical. Thanks again.
-
04-18-2015, 01:29 AM #16Senior Member
- Join Date
- Mar 2015
- Location
- Akron, Ohio
- Posts
- 11,995
Thanked: 4306
Just for you geezer
-
04-18-2015, 01:33 AM #17
And muchly appreciated! Thank you!
 Originally Posted by outback

~RichardLast edited by Geezer; 04-18-2015 at 01:35 AM.
Be yourself; everyone else is already taken.
- Oscar Wilde
-
04-18-2015, 01:53 AM #18Senior Member
- Join Date
- Mar 2015
- Location
- Akron, Ohio
- Posts
- 11,995
Thanked: 4306
Flybare, use the cr/ox first then flitz. Afrer sanding. Of course. Use a fabric like blue jeans for the cr/ox. Just rub the part of the rag your going to use. Not the whole thing. Lots of pressure not excessive. Circles, diagonally, across, ect. The more you rub the better it works. The heat that is created melts the cr/ox into the rag. Thats when it starts working the best. Whew ! Ha Ha keep going your arm isnt hurting YET.. Now take a break, now rub some more. I think you see where im going.

-
04-18-2015, 04:37 AM #19Member
- Join Date
- Mar 2015
- Location
- Livonia, MI
- Posts
- 35
Thanked: 1
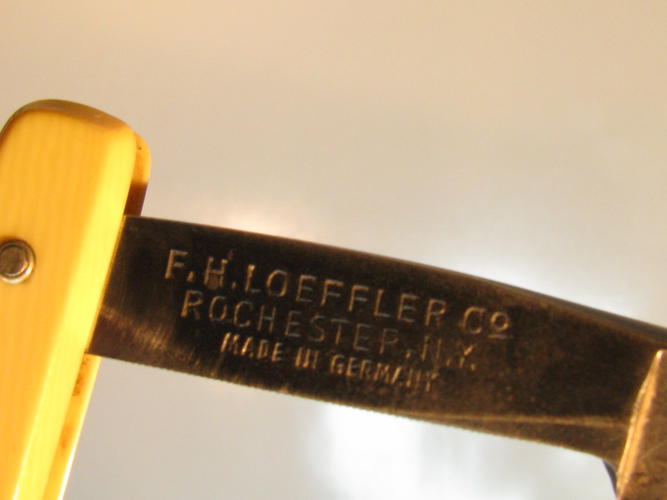
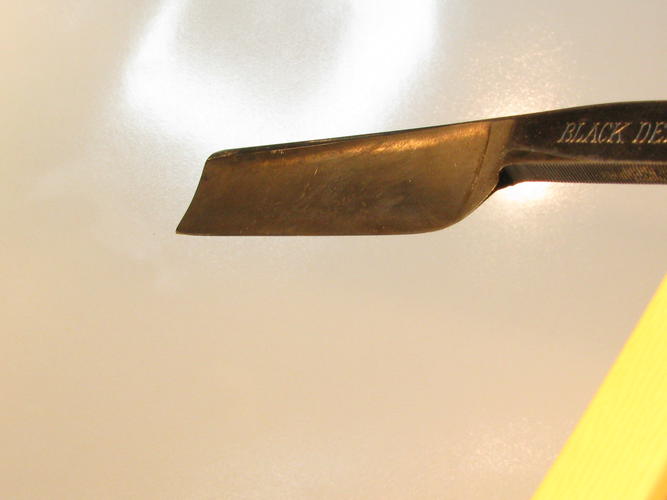
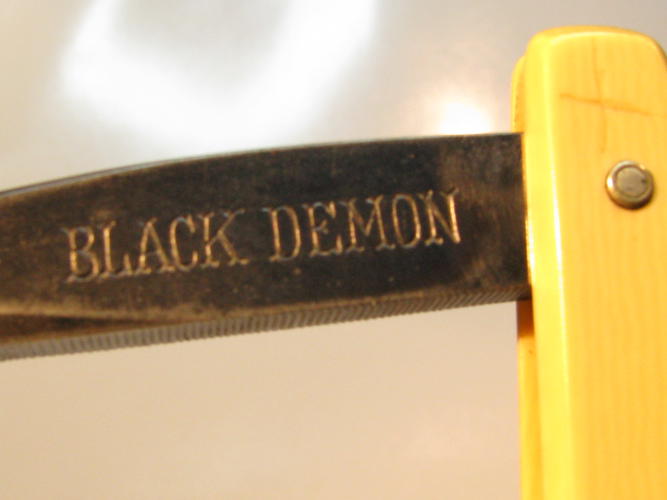
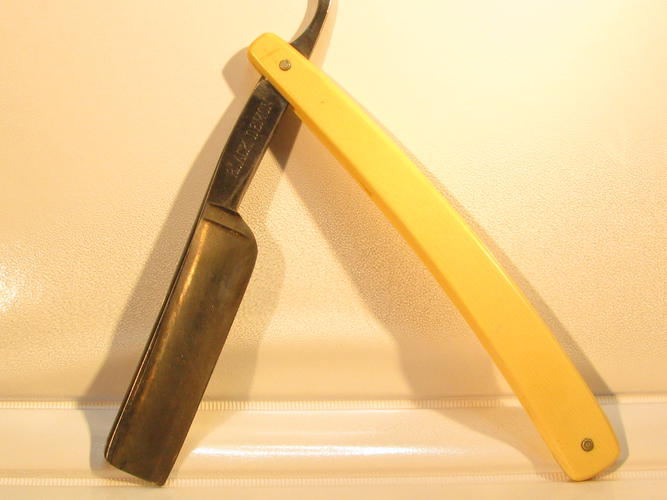
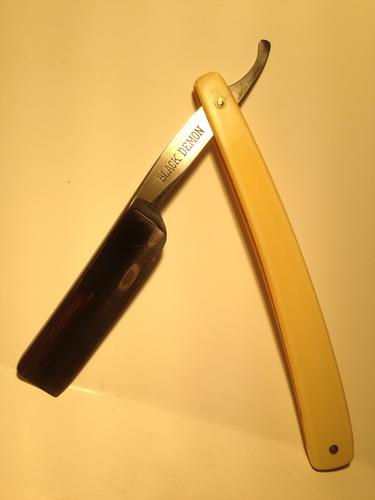
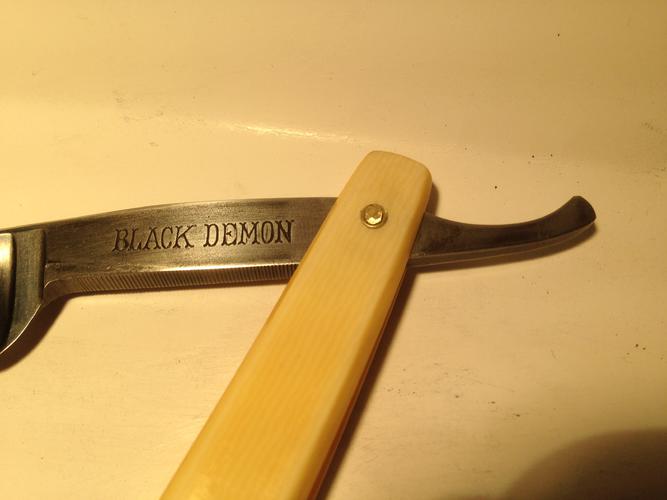
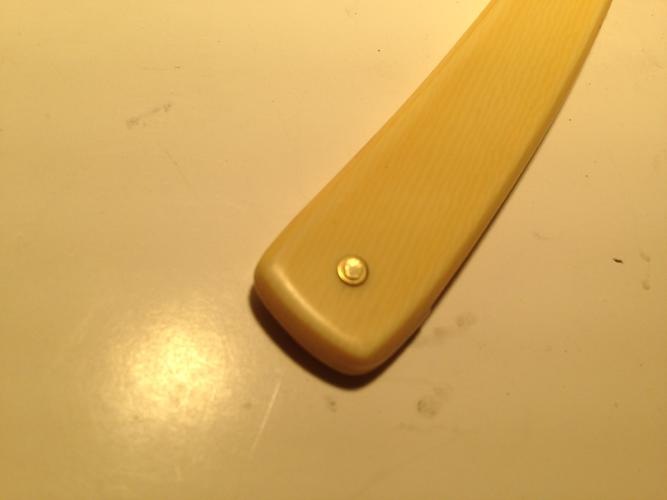
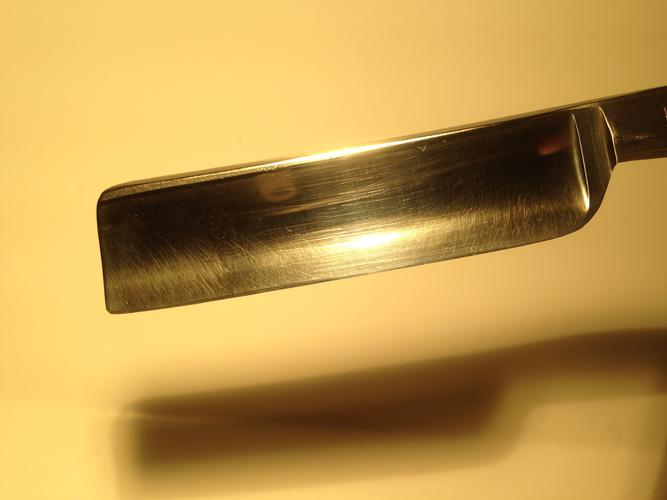
OK, here's my update. Took an old BLACK DEMON. There was an X at each end on opposite scales. Here are some old pictures of it.
Following the advice of the venerable Outback and Geezer, I used progressive wet/dry papers, here from 320 to 5k grit. I haven't obtained any cr/ox yet but did use the Flitz. Moreover, I removed both pins without damage to the scales, sanded out the X's and overall then polished them and re-pinned with brass (kit from Maggard's). My first real de-pin re-pin effort . I'm elated and afraid it might be contagious. I have pondered this awhile and think I at least passed the test with at least a C+
I'm not sure I would be so satisfied with a bench buffer, as doing it by hand and saving some bucks. But then I tie my own trout flies. Thanks for the advice and inspiration from you both.
-
04-18-2015, 04:46 AM #20Member
- Join Date
- Mar 2015
- Location
- Livonia, MI
- Posts
- 35
Thanked: 1
Besides, old Lawyers never die, nor do I, and "Outback & Geezer" is a good group to work with

-
The Following User Says Thank You to Flybare For This Useful Post:
outback (04-18-2015)


 Reply With Quote
