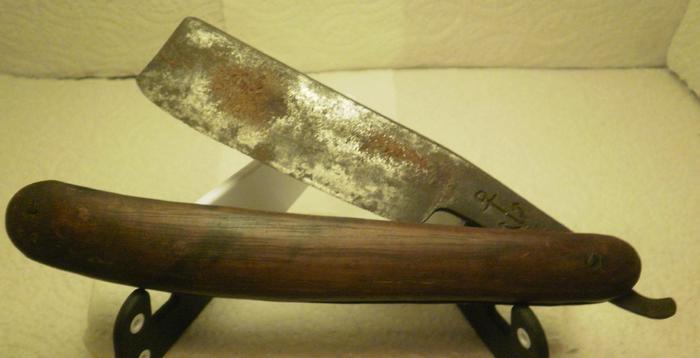
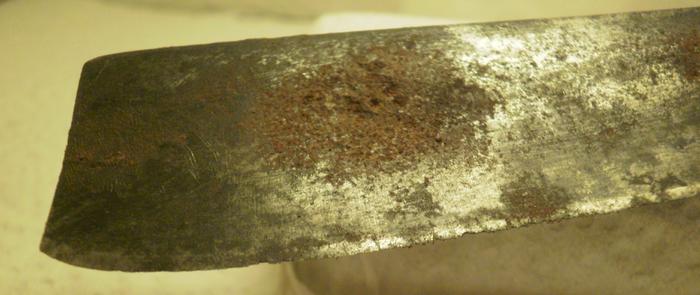
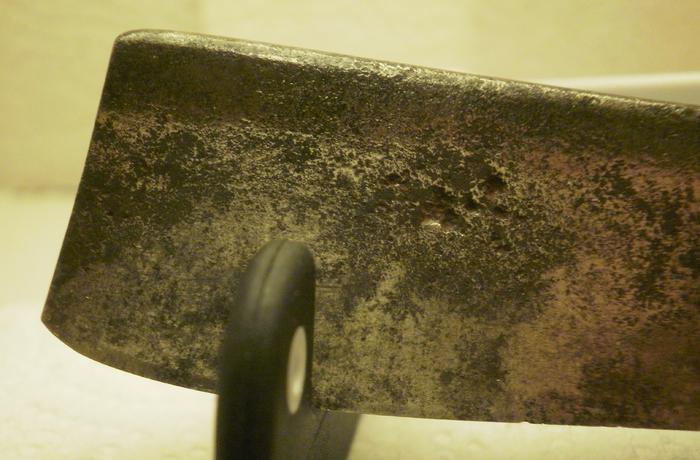
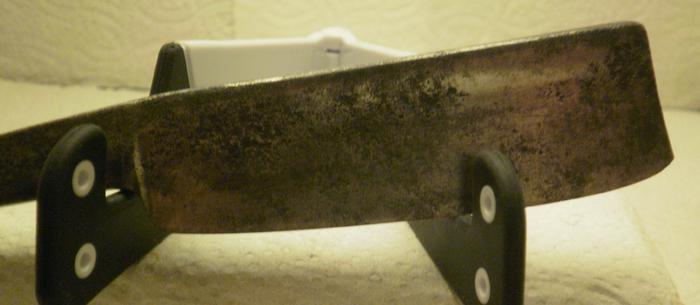
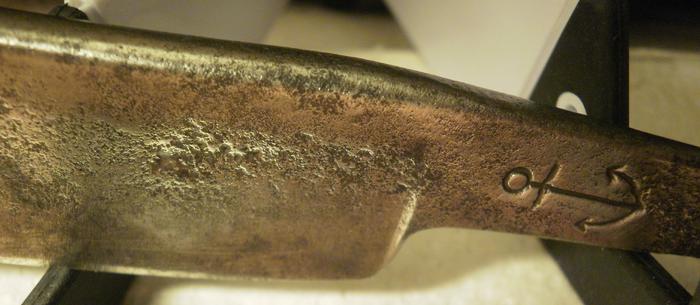
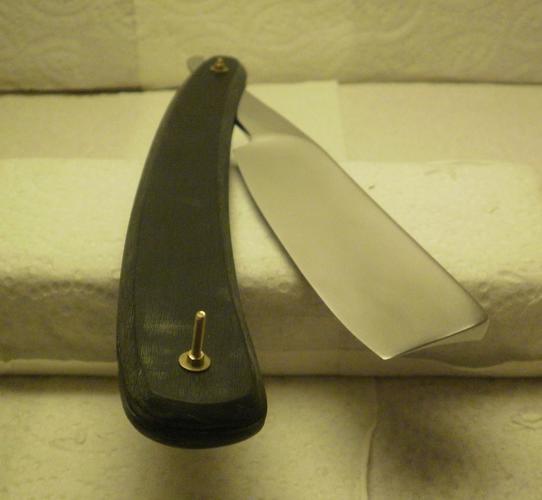
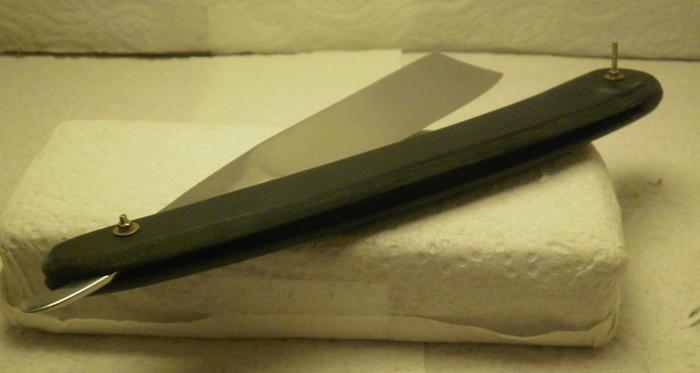
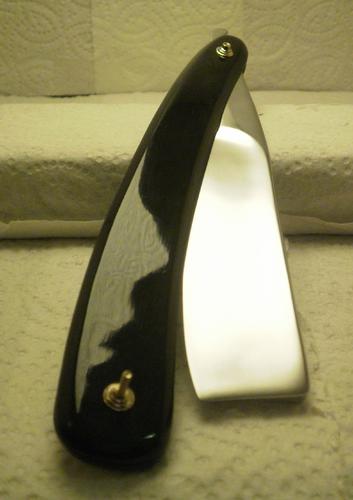
I can't find any makers mark, just the anchor. This thing is a massive wedge.
Printable View
I can't find any makers mark, just the anchor. This thing is a massive wedge.
Just sold one on the bay. That anchor was used by George Brittain. Only thing missing is the "G.B".
It may or not be his.
Hey Dave...nice blade! I just restored one just like it for Phrank...same Anchor with no makers mark. You gotta a lot of 'meat' there so it should restor nicely...Good Find!
Attachment 214879Attachment 214880
Here is a link to show you what can be done...
http://straightrazorpalace.com/custo...hor-razor.html
+1 Wolfpack
Beat me to it! :rofl2:
Yes, the one you restored was in supremely f'ed up condition, thanks to you, a real antique beauty was brought back to life.
ChopperD - if you're looking to get that blade into the rotation, Wolfpack is worth sending out a howl to - you won't be disappointed.
Wolfpack, if I added to your workload - apologies!
:rofl2::rofl2::rofl2: ....No worries Andrew. I appreciate the 'Thumbs Up' from you my friend!Quote:
Originally Posted by Phrank
As Wolfpack noted, a lot of meat there, but a lot of corrosion at the bevel. I had a George Brittain in like condition and it took a lot of honing to get past where the edge was falling apart into Swiss cheese. Like a 1/16" of blade gone by the time I was done. So hone it to get past the corrosion before you begin working on the rest of the blade. :gl:
I'd clean her up & KEEP those scales,,, same pins if possible,,, clean the wood scales a little & re-oil them,,,, that's a great find.
Gooser and I have razors with very similar marks. http://straightrazorpalace.com/razor...mark-game.html It seems nobody has any concrete information on the mark. Mine is obviously a regrind, a good one but a regrind all the same. I was just tinkering with mine yesterday. I need to make a set of scales as the ones that are on it are of no value to me on that blade. They look like a wart on a witches nose. I think you will get that old girl up and shaving all in good order. That's some good hunting. A very nice very old mystery razor.
This one wasn't even made in Sheffield, though whoever made it went out of their way to make it look like a Sheffield razor:
http://theshiveringbeggar.com/wp-con.../IMG_26591.jpg
http://theshiveringbeggar.com/wp-con.../IMG_26601.jpg
(Sorry about the picture quality, I haven't had a chance to build a new lightbox since moving).
The front of the blade is etched FINE SILVER STEEL and the pile side (unusually) is also etched, "Probe gut". German, something like 'Proven good'.
I say it's not Sheffield made for a collection of reasons:
- The flower-shaped pin collars are different from any Sheffield made ones.
- The lettering pressed into the scales is even more non-uniform and poorly kerned than the worst Sheffield ones I've seen.
- The inside of the scales have the maker's stamp -- G. Linder. A German name (and no one of that name worked in Sheffield until the early 1900's.
Yes, the scales are dyed horn, they're just died a vivid candy-red.
In short, the anchor mark was used all over the place. It seems to have been a standard symbol included in many letterpress kits (which is almost certainly what most razor stamps were derived from).
Nice, 'vivid red candy horn' with rosette collars...must have been a real looker coming out of the gate. Fascinating history
Hey Zak - hope things are well with you.Quote:
Originally Posted by Voidmonster
Regarding the collars - here's a pic of a matched pair of WB's I have, do you think the collars are similar?
Attachment 215072Attachment 215075
Those look like regular old Sheffield ones. They've got more definition to them, and even though it looks like a few of yours are held on with microfasteners, you can tell that the way it was pinned together is different.Quote:
Originally Posted by Phrank
Here's a closeup of three Sheffield ones and my mystery (probably German) razor:
http://theshiveringbeggar.com/wp-con...orettePins.jpg
It should be relatively clear.
Good to see you posting Zakster! :chapeau
Zak - the pic of the W&B's on the left is before Wolfpack restored them - perhaps he can illuminate regarding the pins...interesting, yes, you can clearly see the added detail.
I haven't taken this one apart, but I'd guess there aren't any support washers beneath the decorative one, so when they hammered the pins, it flattened. Also, looks like they're steel (as well as the pins), which is really rare on Sheffield stuff.Quote:
Originally Posted by Phrank
Quote:
Originally Posted by Phrank
Zak...the ones that Andrew pictured above (rosette collars) did have your standard SS support washers underneath. When I re-pinned them I also used support washers that I made for them. BTW...the collars for Andrew's pair of W&B's look just like a few old Geo. Johnson razors with rosette's that I have. So perhaps there was some 'sub-contractor' back in the day that made collars for many different manufacturers of razors????Quote:
Originally Posted by Voidmonster
No need to apologize for the rosette photograph Voidmonster....you can see a hellish amount of lint as well as the difference in collars.
My guess is everybody got their tools struck off the same mold, or even from the same original manufacturer (even the guys that made tools had to buy tools to make tools).Quote:
Originally Posted by Wolfpack34
170 year old velvet lined boxes really do ONE particular thing VERY well... Can you guess what it is? :chapeauQuote:
Originally Posted by WW243
Here you go Dave!
Getting this one done has been a real project to be sure and for certain! Dave's been as patient as Job with me, BUT in my defense taking on a project like this one is a challenge and you really have to go slow as you go.
Anyway...here is a picture tutorial of this project. All that's left to be done is for Dave to pick out the collars (either brass bulls-eye, or Domed SS) that he thinks will look the best for him and get it pinned up and honed up.
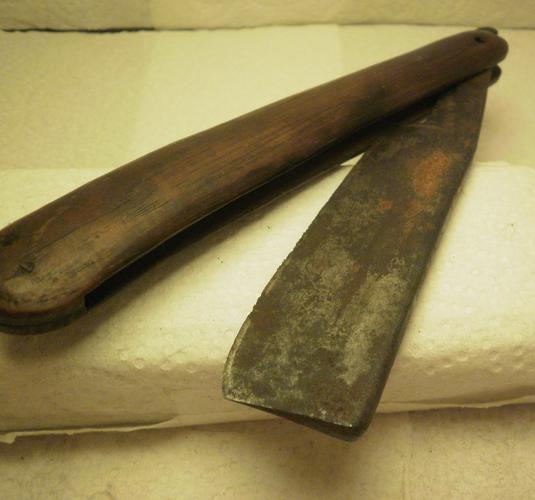
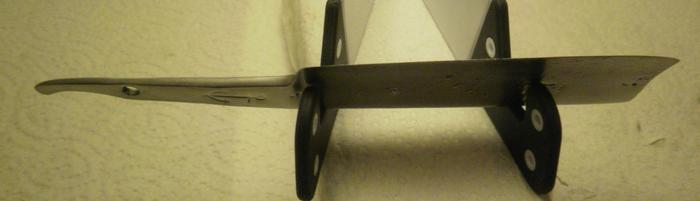
Here's the way the razor looked when it arrived:
Attachment 220102Attachment 220103Attachment 220104Attachment 220105Attachment 220106Attachment 220107Attachment 220108
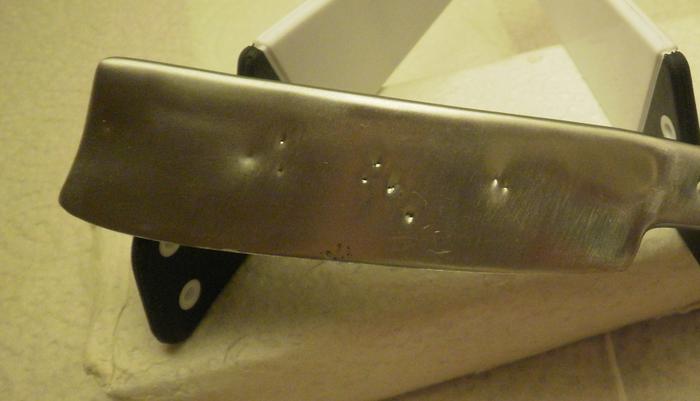
And heres is what the razor looked like after all the red surface rust and the black discoloration (what some would call PATINA ! ) had been removed to show what and how bad the pitting damage was before beginning the restoration project
Attachment 220112Attachment 220113Attachment 220114Attachment 220115Attachment 220116Attachment 220117Attachment 220118Attachment 220119Attachment 220120Attachment 220121MORE PICTURES:
MORE PICTURES:
After a lot of the initial sanding was done…the tang top bottom and sides as well as the spine and toe have been cleaned up a good bit, but major pits still remain on the blade faces. BUT… I am starting to see a way forward…
Attachment 220122Attachment 220123Attachment 220124Attachment 220125Attachment 220126Attachment 220127Attachment 220128Attachment 220129Attachment 220130Attachment 220131
MORE PICTURES:
Continuing the sanding progress…still working with coarser grits to remove the pits…
Attachment 220132Attachment 220133Attachment 220135Attachment 220136Attachment 220137
MORE PICTURES:
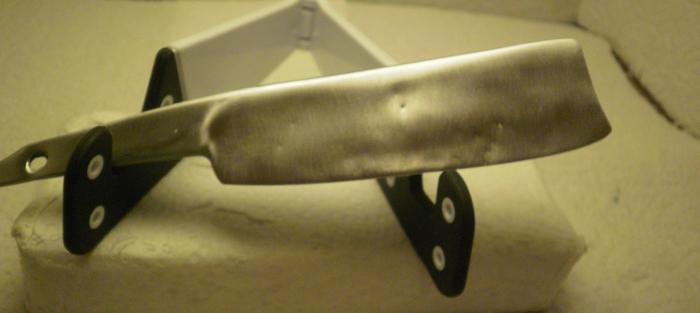
The pits are almost completely gone except for a few near the edge. The blade is really starting to take shape now…Careful sanding and continuously bread-knifing the edge to keep it from getting to thin and losing too much of the blade width…
Attachment 220138Attachment 220139Attachment 220140Attachment 220141Attachment 220142Attachment 220143Attachment 220144Attachment 220145
MORE PICTURES:
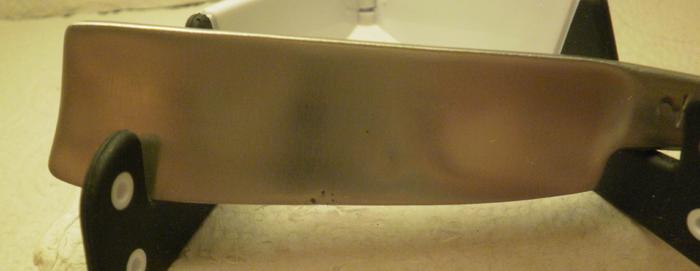
The blade is basically finished at this stage except for one tiny pit remaining near the edge…time to put the finishing touches on the blade and work on the scales….
Attachment 220146Attachment 220147Attachment 220148Attachment 220149Attachment 220150Attachment 220151Attachment 220152Attachment 220153Attachment 220154
MORE PICTURES:
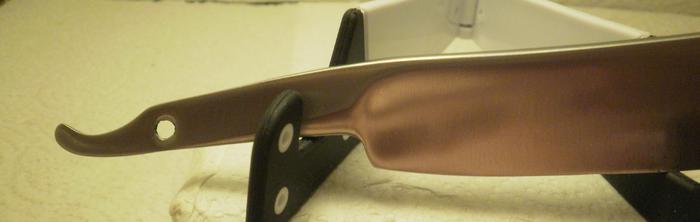
Mock-up of the finished blade and the rough shape of the scales…
Attachment 220155Attachment 220156Attachment 220157Attachment 220158Attachment 220159Attachment 220160Attachment 220161
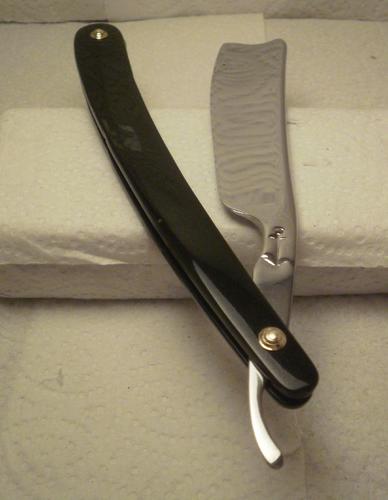
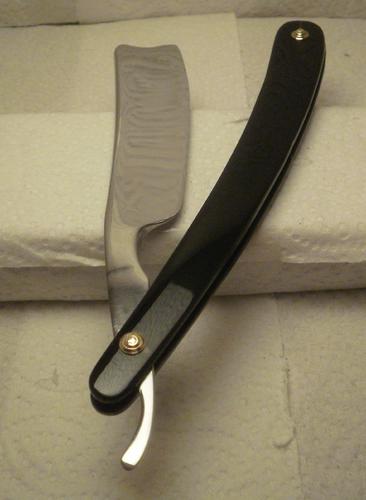
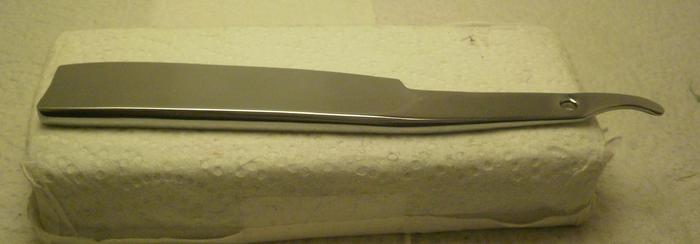
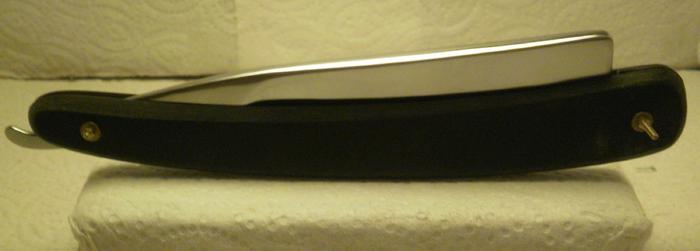
FINISHED RAZOR:
And here’s the finished razor! Just need to choose the collars and pin it up and then it goes to the hones…
Attachment 220162Attachment 220163Attachment 220164Attachment 220165Attachment 220166Attachment 220167Attachment 220168Attachment 220169Attachment 220170Attachment 220171
Here is the latest razor I have been working on, a massive 12/8ths.
Here's how it turned out.
Pretty good, I'd say....if you don't like it, move on to another thread.
Oh, I get it, I got here before the pics were uploaded. The text was here without the pics. Neat trick Mike!
Here's WW243:Quote:
Originally Posted by WW243
Attachment 220173
DING DANG that is AWESOME! :tu :tu
'removing the pits' you say in a cavalier tone...but you must be removing a lot of metal to get to the bottom of those pits. Amazing save! That one definitely rose from the dead.
Lots of metal indeed Bill! It's a slow...never think you'll ever be finished... process. But sometimes it's worth the effort!
I'm thinking stainless steel will look better on this razor. What do you guys think?
My opinion Dave is that the domed stainless steel collars would be the way to go. They are very clean looking. The bulls-eye collars would always work well BUT I'm with the SS for this razor.Quote:
Originally Posted by ChopperDave
I agree, go with the SS collars.Quote:
Originally Posted by Wolfpack34
What a superb restoration job WP34. :dropjaw:
Patience, perseverance and lots of elbow grease brought that blade back from the dead!
Thank you Thug!Quote:
Originally Posted by Thug
Definitely back from the dead but not a zombie that's for sure. Although it could still come out haunted :<0)
I got to watch this progress and still don't believe what I see.
I do remember Mike saying ..........
Attachment 220274
:rofl2::rofl2::rofl2: ... Now there's the 10Pups humor that we all know and miss!!! Good to see you post Jerry! Thanks for all your help!
Trying not to get too exicted about getting the Rasty Anchor back...
:rock:
And the Razor Houdini performs another, razor death defying escape, unscathed…
Pure magic, Mike amazing.
Give it to Mikey, he’ll fix anything…